Airthings Wave Mini Manual
- User manual (27 pages) ,
- Operating manual (14 pages) ,
- User manual (15 pages)
Advertisement
- 1 Wave Mini
- 2 TROUBLESHOOTING YOUR WAVE MINI
- 3 View series
- 4 VIEW SERIES COMMON QUESTIONS
- 5 TROUBLESHOOTING YOUR VIEW SERIES
- 6 Documents / Resources
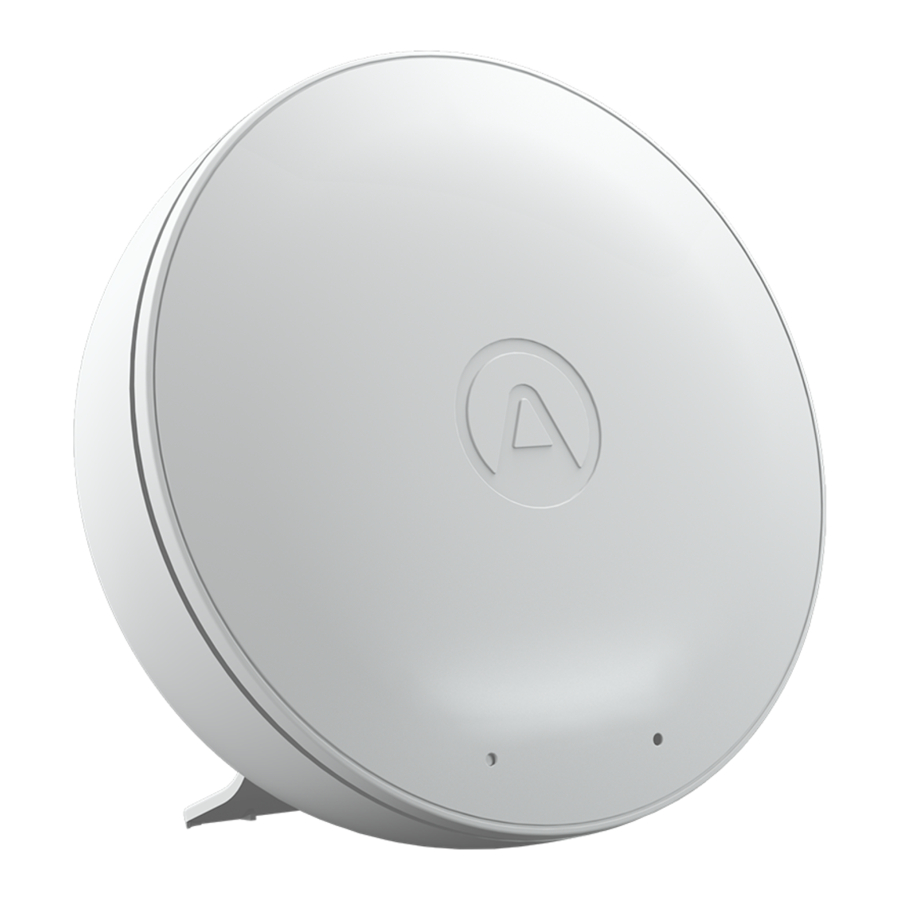
Wave Mini
Congratulations on your purchase of Wave Mini - a compact, discreet, and versatile indoor air quality monitor.
The integrated temperature and relative humidity sensors let you keep tabs on these key aspects of a space's ambient comfort.
Wave Mini also provides an indication of total airborne chemicals (Volatile Organic Compounds, or VOCs) present in the air. This means that the measurement indicates the total concentration of all VOCs in the air, not individual VOCs, expressed in parts per billion (ppb). There are countless sources of VOCs, many of which are generally harmless. However, depending on a person's sensitivity, the level and duration of exposure, some VOCs can cause symptoms that vary from eye, nose, and throat irritation to headaches, dizziness, and even nausea. Some of the common VOCs that Wave Mini will detect include those emitted by paints, paint strippers and solvents, aerosol sprays, household cleaning products and disinfectants, air fresheners, dry-cleaned clothing, and even new carpets or upholstered furniture. Indeed, even ordinary and natural activities can cause VOCs levels to rise, like cooking or opening a bottle of wine, even body odor can increase VOC levels! Wave Mini helps you to investigate and identify what is affecting the air quality in your home so that you can take steps to make it as healthy as possible.
Wave Mini also integrates a fourth, virtual sensor that can estimate the risk for mold growth. Mold spores are always present to some degree in the air we breathe - what the Wave Mini aims to do is alert you when conditions are ideal for the mold to begin growing on surfaces in a space. It estimates the mold growth risk based on the measurements of temperature and humidity. While it does not detect if there is mold present, it does indicate to what degree the conditions are favorable to mold growth. When the temperature and humidity values coincide to indicate ideal conditions for mold growth, Wave Mini reports a higher risk so that you can take steps to minimize the risk. If you want to use Wave Mini specifically for the purpose of indicating mold risk, there are special instructions regarding the placement of the monitor that you need to follow. These are described later in this manual.
WHAT'S IN THE BOX
The box contains:
- Wave Mini (fully assembled)
- Attachable stand (for placement on a surface)
- 3 AA alkaline batteries (already installed)
- Quick Start guide
- Regulatory information guide
Your Wave Mini comes fully assembled. You only need to take off the backplate, then remove the pull-tab so that the batteries begin to power the monitor. Finally, reattach the backplate and you're ready to place your Wave Mini where you want it to work for you. If you want to place it on a nightstand, table or other at surface, connect the stand to the backplate. See Step 4 below for tips on where best to place the monitor.
ABOUT YOUR PRODUCT

If you plan to mount your device on a wall or ceiling, the backplate serves as a mounting plate. Be sure that you use a screw best suited for the wall's material. Once the plate is attached to the wall, the magnets on the plate and the device make it a snap to mount the monitor.
ABOUT THE SENSORS AND THRESHOLDS
Wave Mini contains three sensors - one that measures levels of VOCs in the air and two others that track temperature and humidity. Wave Mini also offers a virtual sensor that indicates the conditions are favorable to mold growth. To obtain the most accurate readings, some sensors require a period of calibration.

1 During the 7-day calibration period, values may fluctuate erratically as the sensor adjusts. This is expected behavior so don't be alarmed
SETTING UP YOUR PRODUCT
- Download the Airthings app and create your account
Download the Airthings app from the Apple App Store or Google Play Store and create an account. If you already have an Airthings account, that's great! You'll only need to add your new Wave monitor to it.
For Android users: Why do you need to enable location permission for the Airthings app? Wave Mini connects with your smartphone using Bluetooth LE. Google Android requires location permission to be enabled in order to use Bluetooth LE. This is not an Airthings requirement, nor do we collect or save your location data without your explicit permission.


- Activate the monitor and add it to your Airthings account
Unbox the monitor and remove the pull-tab from the battery inside. It's now activated and ready to begin monitoring! Open the Airthings app and log into your account. Follow the in-app instructions to locate and connect to the device.
Note: Make sure that Bluetooth is enabled on your smartphone or it won't find the monitor!
Once you add your new Wave Mini to your account, you may be prompted to update the firmware. If so, we recommend that you take a few minutes to do it. - Connect Wave monitor to an existing Airthings hub
If you do not have an Airthings Hub or View series monitor already set up as a hub, you should skip this step and proceed to Step 4.
Once your Wave has been successfully added to your Airthings account, you can connect it to your Airthings hub device.
Note: If you want to use your View series monitor as the hub, ensure that it is plugged into a power supply. It will not work as a hub unless it is plugged in.
To link your new Wave monitor to the hub device, simply click the link icon in the upper right of the Wave monitor device screen and follow the steps. You must be within Bluetooth range of the monitor during this process and it can take from 15 minutes or up to one hour for the connection to be established. Once connected successfully, you will see a signal strength indicator associated with the Wave monitor. - Place the monitor where you need it
Where you place the monitor depends upon how you want to use it; as a mold risk indicator or to monitor a space's overall air quality.
Using Wave mini as a mold risk indicator
Mold spores are always present to some degree in the air we breathe. Wave Mini monitors the temperature and humidity levels over time so it can alert you when conditions are ideal for mold to begin growing on surfaces in a space. There are many types of mold and most of them can grow in a wide range of temperatures and moisture levels. That said, to minimize the potential for mold growth, the EPA recommends maintaining relative humidity levels to under 60%. For best results, place your Wave Mini as close to the area where you suspect mold could begin to grow.
There are some common locations in a home where mold is likely to grow under the right conditions:
- Rooms with cold external walls and/or poor insulation
- Rooms with poor ventilation
- Basements and attics
- Bathrooms
- Garages and sheds
- Crawl spaces
Within a space, the monitor should be placed as close to the area where mold is most likely to grow. These may include:
- Next to a wall or on a windowsill
- Underneath or behind furniture
- Towards the floor on external walls
- Next to underground external walls
- Behind an access door (such as an inspection hatch under a bathtub, for example)
As a final word on mold risk indication, we want to be explicit about what the Mini does not do:
- It does not detect mold spores in the air.
- It does not detect mold risk due to high humidity inside constructions (leaks in roof, flooding, within walls, or incorrect construction).
- It does not estimate mold risk in areas more than approximately 15in (or 40cm) from the device (therefore the middle of the room is not a proper placement).
Using Wave Mini to indicate indoor air quality
As an indoor air quality monitor, Wave Mini informs you of the changing concentrations of airborne chemicals in a room's air. When levels of VOCs increase, you should reflect on any activity that might have triggered the change. For example, the use of candles, sprays, cleaning products, cooking, and so on. In this way you can begin to better understand what is affecting your indoor air quality and take steps to minimize irritating chemical contaminants and keep your air healthy.
Here are a few tips for placing your Wave Mini for air quality monitoring:
- Never place the device outdoors - Wave is designed only for indoor use and the components can su er irreversible damage.
- Keep the device at least 1 meter (3 feet) from windows, doors, and vents that might interfere with accuracy of readings for the room's air.
- Try to place the device at the average "breathing height" in the room to take the most relevant measurements. For a bedroom, this would be at pillow height.
- If on a tabletop or other surface, make sure the surface is stable and that the monitor is placed where it's not likely to be tampered with, moved or knocked to the ground.
- To use the wave feature for quick-checks, make sure you can wave within 25 cm (10 inches) of the monitor's face.
For best results, leave your monitor in the same place over the long term. If you want to use your Mini in a completely new room or space, refer to the instructions in Move your monitor to a new location (changing a monitor's name).
- Calibrate and maintain your monitor
The temperature and humidity sensors inside your Wave Mini will provide accurate readings almost immediately and don't really require a calibration time.
However, the VOC sensor requires about seven days, so that it can acclimate to the local environment and create a baseline for future measurements.
To maintain your device, simply wipe it gently with a dry cloth to keep it from collecting dust and impeding its ability to monitor the air properly. The monitor should be exposed to fresh air about every week so that it can maintain a proper baseline. This should happen naturally in a well-ventilated space.
The Airthings app indicates the remaining battery power for each monitor in your account so that you are aware when it's time to change them. For longer-life and optimal performance, we recommend non-rechargeable, alkaline batteries.
Note: When you change the monitor's batteries, it can take up to 1 hour for the remaining battery power to be accurately reflected in your Airthings app.
USING YOUR PRODUCT
The Airthings app is where you will interact the most with your Wave Mini. Unless your Wave monitor is connected to an Airthings hub, you must have Bluetooth enabled on your smartphone and be within Bluetooth range whenever you are checking your air quality data.
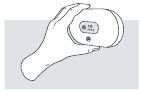
Quick-checking the current readings
Wave Mini Is equipped with a motion sensor behind its faceplate so that when you wave your hand in front of it, a color-coded signal illuminates to give you an indication of the overall air quality. The color is determined by the current readings for each sensor, excluding temperature:
![]() Air quality is good
Air quality is good
The current reading for each of the sensors are within the normal, healthy ranges.
![]() Air quality is fair
Air quality is fair
At least one of the sensors is recording a reading that is in the fair range of values.
![]() Air quality is poor
Air quality is poor
At least one of the sensors is recording a reading that is in the poor range of values.
In the case of mold risk, you should inspect the area surrounding the monitor closely to make sure there is no mold. You might want to consider improving ventilation or taking steps to reduce humidity levels in the area.
To access detailed readings, open the Airthings app.
Understanding the VOC readings and what to do about them
There are many different sources of VOCs including ourselves! Even breathing and other bodily scents can affect the VOC level. The VOCs present in the air are constantly fluctuating so, apart from the handy green, yellow, and red scale, how should we understand them? And when should we do something about them?
Think of your Wave Mini as the most powerful tool available to a VOC detective. As you see the VOCs rise and fall, and use the dashboard to spot trends, you can find the culprit by connecting the periods of high VOCs with activities that might have triggered them. For example, cooking, using a scented room spray or burning a candle, coming home with freshly dry-cleaned clothes, sleeping, cleaning, and so on. In the case of ordinary activities like sleeping and cooking, you can take steps to improve the ventilation during those activities to lower the VOCs that accumulate in your space. Use the vent hood or keep a window open. More harmful VOCs can come from chemicals emitted by many cleaning products, dry cleaned textiles, cigarette smoking, e-cigarettes, new furnishings, and more. If you identify any of these as the culprit, you can take specific action to reduce the VOCs in the air you breathe.
Recalibrating the VOC sensor
The VOC sensor in your Wave monitor recalibrates itself all the time. It does this by using the lowest VOC level measured over the last 7 days and using it as a baseline for "clean" air. If you keep your Mini in a well-ventilated room or space where the monitor is exposed to fresh air at least once every week, the VOC sensor will keep itself well-calibrated for your space. However, if there is a persistent source of VOCs present in the space over several days, the sensor will create a new baseline which may be deceptive; using a higher level of VOCs as "clean" air than is normal for the space.
If you are ever in doubt, or if you know that the room has had persistent and unusually high levels of VOCs for days, you can recalibrate it. Simply move the monitor to another indoor place where it is exposed to fresh air for about 10 minutes. Then, you can return it to its usual location. By doing this, you force the sensor to reset the baseline to a more accurate value.
Looking into trends over time
Open the Airthings app. The main page lists the devices that are paired with your account. Select the device whose readings you would like to analyze. The device page provides a snapshot of the current air quality values. Click on any sensor value to consult the trends over time in a line graph. You can view the trends in a graph over preset time periods and show the average value for the selected period.
Managing notifications
You can receive notifications on your phone when a threshold is crossed and a reading is detected inside a "red" zone. To turn notifications on and off, use the Settings for the monitor in the Airthings app.
You will only receive notifications when you are within Bluetooth range of the Wave monitor. However, if your Wave is enabled for remote access via an Airthings hub device, you will receive notifications whenever a threshold is reached, no matter where you are.
Moving your device to a new location
After monitoring the air in one space for a while, you may want to move the monitor to understand what's in the air in a different space in your home. There are a few ways to do this and you can get more information in our Help Center.
Changing the batteries
The three AA batteries should keep your Wave Mini running for 24+ months but the time will come when you need to replace them. The Airthings app indicates the remaining battery power so that you are aware when it's time to change them. We recommend using non-rechargeable alkaline batteries. When you change the batteries, it can take up to one hour for the battery charge level to update in the app. But don't worry, the monitor will start taking its readings as soon as the new batteries are inserted.
When you remove the old batteries, all of the sensors automatically reboot. This means that the VOC sensor will need to recalibrate during the first 7 days so might see some erratic readings. But after 7 days, the sensor will be reporting reliable information about the VOC levels.
GENERAL SPECS & SENSOR ACCURACY
Operating environment
Wave Mini is designed to operate indoors, away from heavy dust and direct sunlight and in the following ambient conditions:
- Temperature: 39°F to 104°F (4°C to 40°C)
- Humidity: Below 85%
Product details
- Weight: 4.8oz (135 gr.) including batteries
- Dimensions: 3.14in (80mm) diameter x 1in (25mm) height
- Power: 3 AA batteries
- Connectivity: Bluetooth Low Energy & Airthings SmartLink
Sensor accuracy
VOCs
Metal oxide semiconductor sensor (MOS)
Measurement range: 0-10 000 ppb
Relative Humidity
Accuracy: ±3 %RH at 77°F (25°C) within 20-80 %RH
Temperature
Accuracy: ±0.9°F at 77°F & ±1.8°F from 32-140°F
Accuracy: ±0.5°C at 25°C & ±1°C from 0-60°C
TROUBLESHOOTING YOUR WAVE MINI
The most common issues customers experience are related to connectivity and syncing. Before getting to our troubleshooting guidance, let's explain how connectivity works with the Wave monitor.
About Wave monitor connectivity & syncing
Your Wave monitor is not enabled for direct WiFi connectivity. So, how does it send its readings to your account in the cloud? It does this using Bluetooth Low Energy (BLE) to sync the data it collects with the Airthings app on your smartphone. Since it can only sync with the app when your smartphone is within Bluetooth range, you will only be able to read current measurements in the app when you are within range of the monitor. The monitor itself collects all of its readings and saves them in its local memory for up to 80 days. Each time it syncs with the app, it uploads all of the readings taken since the last time it synced. Those readings are sent through your phone to your account in the cloud. This allows you to maintain and consult the full history of the sensor readings over time.
About connectivity & syncing with an Airthings hub device
Your Wave monitor can be enabled for remote access so that, wherever you are, your app shows you the latest readings from the monitor. How? By using an Airthings hub device. A hub device is one that connects directly to your home's internet network and uses SmartLink*, to connect to Airthings Wave monitors in your home. The Wave monitors send their readings continuously to the hub device over SmartLink, and the hub device sends the data to your account in the cloud. Then, wherever you are, you can open your Airthings app and check the current readings taken by your home's monitors.
Other bene ts of being hub-connected are to use voice commands more easily with your home's Amazon Alexa or Google Assistant devices, or to use IFTTT applets that integrate your Airthings air quality readings with your home's smart plugs, air purifiers, humidifiers, and so on. In addition, when a hub enables your Wave monitor for remote access, you will receive any configured notifications whenever and wherever, and not just when you are within Bluetooth range of your monitor.
But what are Airthings hub devices? One is the appropriately named Airthings Hub which simply serves as a link between your Wave monitors and your home's internet network. The other type of hub is any of our three View series monitors. These monitors contain different sets of sensors to take their own readings in a space in your home and can simultaneously be used as Airthings hubs to link your Wave monitors with your account in the cloud.
*Airthings SmartLink is a form of long-range wireless communication, developed by Airthings. It is based on the Sub-1 Ghz communication protocol and it is designed for low power consumption and long-range robust connectivity of up to approx 100m/ 330ft.
General troubleshooting tips
Whenever you are experiencing problems with the Airthings app or a monitor, there are some basic things you should always check first:
- Has the monitor been dropped recently? Unfortunately, the monitors are not designed to be rugged and the sensors inside are quite delicate. If you drop your monitor or it su ers an impact, this could cause a malfunction in readings or the monitor's general operation.
- Are you running the latest version of the Airthings app and do you have the latest firmware installed?
- Are the batteries dead or about to run out? You can consult the monitor's battery level in the app from the last time it synced.
When using a Wave monitor without an Airthings hub
After following the general troubleshooting tips above, you might still be seeing a problem. Here are a few common problems and what you should do if you are not using an Airthings hub device with your Wave monitor.
My app is not connecting to my device |
|
| My app is not syncing with my Wave monitor while running in the background |
|
| The color indicator doesn't light up when I wave my hand over it |
|
When using a Wave monitor with an Airthings hub
After following the general troubleshooting tips above, you might still be seeing a problem. Here are a few common problems and what you should do if you are using an Airthings hub device with your Wave monitor.
- If using an Airthings Hub, you can find complete information in the Hub setup guide.
- If using a View series monitor as the hub, ensure that it is plugged into a power outlet. View series monitors are only activated as hubs when they are plugged in.
| I've set up my Airthings hub device but I cannot see the Wave monitor to link it to the hub | Bluetooth is required to link the Wave monitor to the hub device.
Once the Wave is linked to the hub, Bluetooth will be deactivated on the Wave monitor (to reduce its power consumption). |
| I've linked my Wave monitor with the hub but I am not seeing up-to-date readings from that monitor in the app |
|
View series
Airthings View Pollution 2980 - Air Pollution Monitor (Fine Dust, Humidity, Temperature) with WiFi Connection, Hub Functionality andamp; Calm Tech Display
By keeping track of your indoor air quality and/or radon levels, you can make healthier decisions in the spaces where you spend most of your time. Increased productivity and energy levels, better quality sleep, and resistance to illness are just a few of the bene ts. Lessening your exposure to radon will reduce your risk of lung cancer.
Your Airthings View device provides you with the information you need on the display, your phone and the Airthings Dashboard. Or you can simply wave in front of the device for a visual indication of your levels.
GET IN TOUCH
For technical support or if you have any questions or comments that we did not answer here, you can reach us the following ways:
- Chat bubble on the airthings.com website.
- Visit our support forum help.airthings.com
WHAT'S IN THE BOX
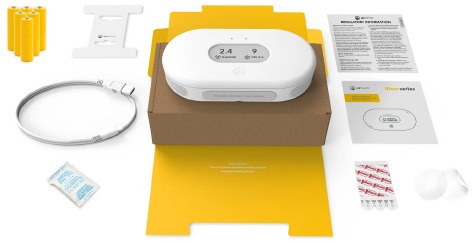
- Sleeve & hangtab x 1
- External box x 1
- Cable x 1
- Regulatory booklet x 1
- Batteries x 6
- Silica bag x 1
- 3M sticker x 3
- User manual x 1
- Translucent sticker x 2
FEATURES AND CONTENT

- Customizable display
- Glow signal
- Motion sensor
- Air inlets
- Battery compartment with 6 AA batteries (included)
- USB cable port
- Reset button
- Individual serial number
- Mounting bracket
- One-time battery tab
DEVICE SETUP
- Download the Airthings App
Download or update the Airthings App from the Apple App Store or Google Play Store and create an account.
![]()

- Setup
Pull the battery tab on the device and follow the in-app instructions to connect the device to your smartphone and your WiFi. You can also power your device using the supplied USB cable. There may be a firmware update when you start the device.
Note: You can leave the batteries in when powering over USB, but the batteries will not be recharged. Your device will automatically swap between battery power and USB power. - Placement
Your View device can be placed wherever you want to measure your air quality, such as your night stand, on the wall in the baby room, or on a shelf in the living room. It should be kept away from very dusty environments, and performs best if cleaned with a dry or damp cloth once in a while. View Plus and View Radon should be kept out of damp environments above 85% humidity to avoid damage to the radon sensor.
To mount your View on a wall: Fix the mounting bracket to the wall. Make sure you use appropriate screws for your wall type. Do not place it close to vents or windows. Minimum 1 meter / 3 feet distance.
![]()
- Calibration
Some sensors will need time, usually around a week, to calibrate after power-up. See more details in the product sheet for your device.
The various sensors have different sample rates (how often it records a data point) and accuracy. The radon sensor in particular is built for long-term monitoring. Although you can read the early data samples, they are likely to be inaccurate. Radon will often vary significantly from day to day, and even month to month. Buildings can be diagnosed for radon by measuring all living areas - e.g., living rooms and bedrooms - for at least one week. For a more accurate value, this should be followed by a long-term measurement (for at least 2 months) in the room with the highest radon value.
![]()

DAILY USE

Configurable Display
The display can be configured to show the sensor values you care most about. Configuration is done in the Airthings Dashboard or App. The display will update up to every 2.5 minutes, depending on the sensor sample interval and the sensors shown on the display. It will sometimes flicker completely to refresh itself. This is normal and does not mean your device is operating incorrectly.
Note: The calm tech, e-paper display does not require power to show an image. If your View device suddenly loses power, for example if the USB connector is removed and there are no batteries in the compartment, then the display will simply keep displaying whatever image it had when loss of power occurred. The display will update as normal when power is restored to the product.
Using your View as a hub for other Airthings devices
When powered over USB, and connected to WiFi, your View device will act as a SmartLink hub for other supported Airthings devices (Wave Mini, Wave Plus, Wave Radon 2nd gen). This is a great way to keep all your Airthings devices continuously connected and accessible. Use the Airthings App to select which Airthings devices to link to your View.
Reset button
A short press of the reset button (for about half a second) will toggle through various useful information on the display. Note that a short press will not reset the device.
A long press of the reset button will reset your device completely, reverting it back to its factory state. This removes any locally stored personal data, such as your WiFi password. It will not remove the device from your online account. When you hold the reset button, a countdown will show up on the display letting you know when the reset will take place. If you release the button before the countdown has finished, the reset will be canceled.
Wave function
Wave in front of your device for a quick visual indication of your indoor air quality levels. The glow signal will light up according to the overall air quality (green means good, yellow means fair, and red means poor), and the display will change to show any levels that are fair or poor. For details on sensor thresholds go to help.airthings.com
Airthings App
Your app will update automatically as long as your device is connected to a WiFi network. The Airthings App includes sensor values, historical graphs, and long and short-term averages. Use the app to configure your View, set up notifications based on sensor values, and more.
Airthings Dashboard
The Airthings web dashboard lets you view, customize and analyze the sensor data from all of your devices at a glance. You'll also have access to trends and advanced analytics. Find out more at airthings.com/dashboard
Sensors
Read more about how to use and interpret the values reported by the sensors in your View device.
INTEGRATIONS
All Airthings View devices share data to your mobile device as well as the Airthings Dashboard — a free online platform that provides quick access to view, customize and analyze sensor data from multiple Airthings devices. Go to airthings.com/dashboard for more info.
The Airthings View offers the possibility to use Amazon Alexa and Google Assistant to read out your latest sensor measurements from any Airthings device that is connected via a Hub or View product. Limitations to languages and regions apply. Please visit airthings.com for the latest requirements and limitations.
The Airthings View also supports IFTTT, allowing users to create or access useful recipes for their device to follow, and integrate with third-party products.
Sign up for our newsletter for the latest updates.

VIEW SERIES COMMON QUESTIONS
You can find answers to many common questions here: help.airthings.com
If you have other questions, you can contact the Airthings support team using the chat bubble on our web page, in the app, or by sending an email to support@airthings.com
What is the range of the View when used as a hub?
The View will typically be able to reach linked Airthings devices anywhere in most homes. Tests show that in most cases the range should be more than enough for a large family home. Range may vary depending on wall and floor materials, wireless interference, placement, and other factors.
How many devices can be connected to a View used as a hub?
The View can support up to 10 devices being connected to it.
What devices can be linked to the View when used as a hub?
The Wave Plus, Wave Mini and Wave Radon devices can be linked to your View.
Wave 1st gen (serial number 2900x) and other View devices cannot be linked to the View. If you own multiple View devices, these will send data to your account in the Airthings cloud over WiFi independently.
Can I retrieve data locally from the unit?
This is unfortunately not possible. The data is encrypted in transit to the Airthings cloud and is retrieved again through the Airthings Wave app or web dashboard at https://dashboard.airthings.com.
Can I retrieve data over Bluetooth from the View, like I can with Wave devices?
No, View devices only support data transfer over WiFi. Bluetooth is only used for initial setup and configuration.
How often will Wave devices send data through the View when used as a hub?
The Wave devices send in data every 5 minutes. Radon data (24 hour rolling average) is sent every hour.
TROUBLESHOOTING YOUR VIEW SERIES
| CATEGORY | PROBLEM / RESOLUTION |
| Adding to your account | I can't find my View device when trying to add it to my app.
|
I am unable to connect my device to WiFi
| |
| Using your View as a hub for other Airthings devices | I don't see my Wave device when linking it to the View
|
I don't see my other View device when linking it to the View.
| |
I don't see data coming from the Wave devices when linked to my View.
| |
I set my unit to the wrong regionWhat should I do?
| |
| Display | My display is flickering at times
|
My View is without power and batteries, but the display is still showing.
| |
My display is showing different values than those shown in the App.
| |
| Noise from the device | My View will sometimes make a slight fan noise, is this normal?
|
NEED MORE HELP?
If you're still having trouble and you've followed the troubleshooting guidance, it's always a good idea to search our Help Center where we answer common questions about how Airthings monitors work and what to do when something goes wrong. If you cannot find the help you need there, you can contact our Customer Success team in the following ways:
Live web chat:
Our representatives are available on the airthings.com chatbot 18 hours a day, Monday through Friday.
Email:
Email our team at support@airthings.com and we will reply to you within 24 business hours. Please attach any photos or screen captures that may help to describe the problem. You should also include your monitor's serial number which you can find inside the unit by removing the back plate. Finally, also confirm the email address associated with your Airthings account in case you send the email from a different address.
Documents / Resources
References
![dashboard.airthings.com]() Airthings
Airthings![www.apple.com]() App Store - Apple
App Store - Apple![play.google.com]() Google Play
Google Play![airthings.com]() Airthings | Smart indoor Radon & Air Quality Monitors
Airthings | Smart indoor Radon & Air Quality Monitors![help.airthings.com]() https://help.airthings.com/en/
https://help.airthings.com/en/![www.airthings.com]() Airthings Dashboard | Track and Analyze data from devices
Airthings Dashboard | Track and Analyze data from devices
Download manual
Here you can download full pdf version of manual, it may contain additional safety instructions, warranty information, FCC rules, etc.
Advertisement


Need help?
Do you have a question about the Wave Mini and is the answer not in the manual?
Questions and answers