Advertisement
Product List
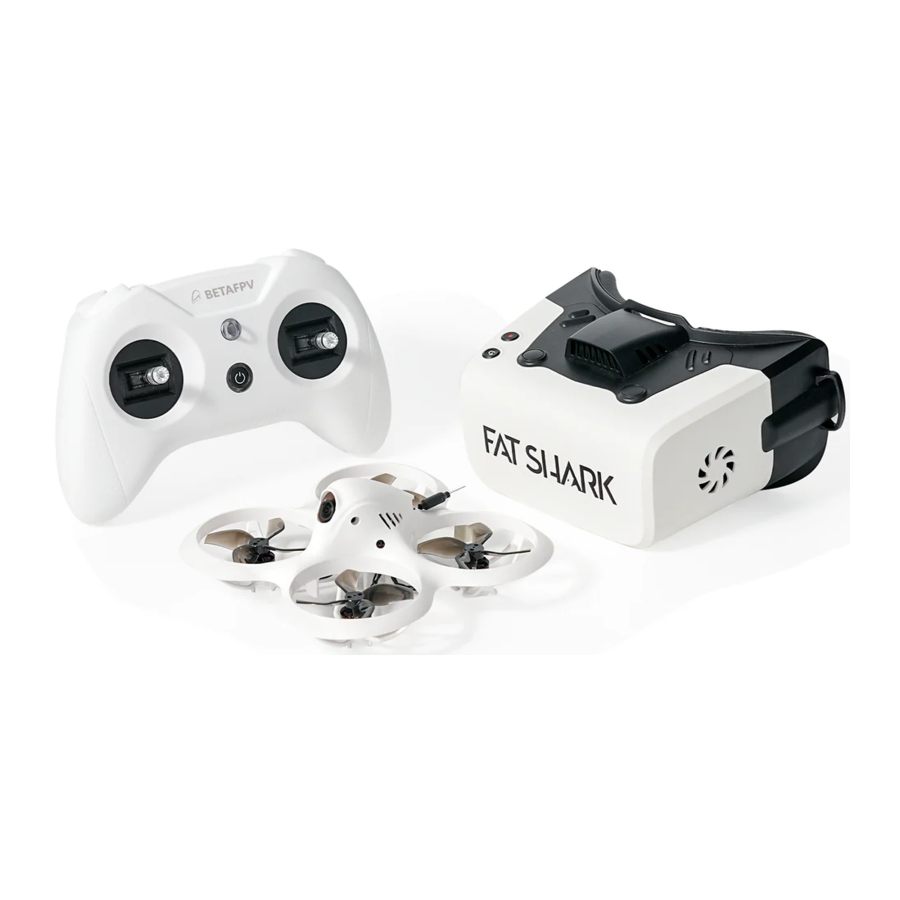
1 x Cetus X Brushless Quadcopter (Betaflight Firmware, ELRS 2 4G Receiver)
1 x LiteRadio 3 Transmitter (ELRS 2.4G)
1 x BEATFPV VR03 FPV Goggles
Box Contents:
4 x BT2.0 450 mAh IS Lipo Battery
1 x BT2 0 Battery Charger and Voltage Tester
1 x USB Charging Cable (Type-C)
1 x Type-C to FC Adapter
1 x Prop Removal Tool
4 x Gemfan 2020 4-BIades Prop (Spare set)
1 x Portable Storage Bag
Preflight Checks
- Check all parts are included according to product list Ensure all parts are intact and the frame undamaged
- Ensure that propellers and motors are installed correctly and stably.
- Ensure that propellers do not scratch against frame ducts and motors spin smooth y
- Ensure batteries (of quadcopter, remote control radio transmitter, and FPV goggles) are fully charged
- Be sure pilot is familiar with all flight controls (Refer "Remote Control Radio Transmitter")
- Always keep a safe distance in all directions around the quadcopter (1 meter or more) when having a test-flight. Operate the quadcopter carefully in open space
Quick Start Guide
Quick Start
Before flying, verify that the remote control radio transmitter is successfully connected with the quadcopter, all basic controls are functional, and the quadcopter can be taken off normally.
- Take out the remote control radio transmitter and set the throttle joystick and two switches SB and SC on the top to the lowest position while ensuring that switches SA and SD are pop-up. Hold the power button on the remote control radio transmitter for 5 seconds until it beeps three times, and then release. When the remote control radio transmitter power indicator turns from flash red to solid blue, it means the transmitter has been successfully powered on.

- Install two batteries into the battery mounting slot under the quadcopter. Connect the quadcopter with the battery, and then place the quadcopter on a horizontal surface. Wait 3-5 seconds until the green LED on the FC board is on solid, which represents a complete initialization of the quadcopter and its successful connection with the remote control radio transmitter.

- Press switch SA to arm the quadcopter. The throttle joystick must be at the lowest position or the quadcopter will not be armed. After being armed, the motors will spin slowly. Pressing SA again and making it push up will help disarm the quadcopter and motors


Complete above three steps to ensure that the quadcopter and the remote control radio transmitter can work normally. Then, the following flight operations can be continued
Flight Operations
- Re-arm quadcopter (step 3). Motors will spin at a low speed
Throttle (left) Joystick:
Up/down controls the rate of ascent/ descent.
Left/Right controls counterclockwise/ clockwise rotation.

Direction (right) Joystick:
Up/down controls forward/ backward tilt (pitch)
Left/right controls left/ right tilt (roll)


Before flying with goggles, it is recommended to practice and get familiar with the sensitivity of joysticks by following the above-mentioned operation steps.
 :
:
- Find a suitable open place for the first flight.
- Give a slow push to the joysticks, especially the throttle joystick.
- If the quadcopter becomes out of control or collides with objects, press switch SA immediately to disarm, and motors will stop spinning.
- Land quadcopter steadily and press switch SA to make it push up, which is shown as below:

- Disconnect the batteries with the quadcopter through removing it from the mounting slot. Holding the power button on the remote control radio transmitter and the remote control radio transmitter will stop work after three beeps

First Person View (FPV)
First-person view (FPV) is to operate the quadcopter through the real-time image transmitted by FPV googles' camera. Operations for starting googles are shown as below:
")
- Take out the goggles and install the headband; Rorate the antenna to be vertical;
- Slide the power switch to the right. The screen lights up and the VR03 goggles are turned on;
- Long press the "S" button for 2-3 seconds to turn on the fast frequency search function. After 3 seconds, a beep will sound and the corresponding FPV cross machine screen is displayed in the goggles, indicating that the frequency search is complete
On Screen Display (OSD)
After the frequency search, flight information and FPV camera images will be shown on the display This information is called On Screen Display (OSD), which is shown as below:
")
About OSD information:
- The flight status of the quadcopter is displayed in the center. ARMED indicates unlocked status; CRASH FLIP SWITCH indicates activated Turtle Mode; BATT > FULL indicates that the battery voltage of the quadcopter is full;
- Status of the quadcopter is displayed in the bottom of the screen, including the quad battery voltage, flight time, flight mode, and model of the drone.
Flight Modes
The flight mode is displayed in the lower left corner of the flight screen, corresponding to the different quadcopter flight modes. Operators can choose different flight modes according to different flight environments and their different preference for operating the quad
- Angle Mode: when the quadcopter ascends, pilots need to control and adjust the altitude of the quad through the throttle joystick. The position of the direction joystick controls the tilt direction and tilt angle of the quadcopter After moving the throttle
joysticks back to the center, the quadcopter will return to a horizontal position. The
operation is relatively simple. Novice pilot can achieve simple flight with a little practice
because the drone keeps its levelled position once the pilot lets go of the stick. ANGL
is displayed in the OSD
- Horizon Mode: Pilot needs to control the flight altitude by operating the throttle joystick. The quadcopter will maintain a horizontal attitude when the direction joystick is moved to the center. Unlike Angle mode, you can do flips and rolls when the stick is at full deflection in Horizon mode. This mode features difficult operations and is suitable for skillful pilot. HOR is displayed in the OSD
- Air Mode: The altitude and attitude of the quadcopter are manually control ed by pilot. The quadcopter will maintain its current attitude when the direction joystick is moved to the center. Acrobatic flight is possible. The operation is difficult and pilot needs a lot of practice. AIR is displayed in the OSD.
- Turtle Mode: If the quadcopter is crashed into the ground and the fuselage is flip, the turtle mode can be activated to reverse the motor and turn the quadcopter back to the front When the mode is in use, the direction joystick is used to control the rotation of motors to drive the blades to rotate in the reverse direction, realizing a reverse rotation of the fuselage. CRASH FLIP SWITCH is displayed in the center of the OSD. For more details, please refer to the chapter "Advanced Settings-Turtle Mode" The flight mode is selected by a switch on the remote control radio transmitter. For more details, please refer to the chapter "Remote Control Radio Transmitter-Switch Functions"
Battery Charging
Each battery provides 4-5 minutes of smooth flight. When LOW VOL is displayed in the OSD flight interface, which indicates that the battery is too low and needs to be charged
Charging steps are shown as below:
- Plug the charger into the Type-C port through USB cable;
- Connect one or two batteries to the port on the right of the charger and the charger's LED will turn solid red while charging;
- When the charger's LED turns solid green, charging is complete

Two batteries can be charged at the same time. Charging a fully discharged battery takes approximately 20 minutes. When the battery is inserted into the TEST port and the charger is not plugged in via USB cable, the current battery level will be displayed. The number of 4.25-4.35 represents a fully charged battery while 3.30 or lower indicates a low battery.


Note: The electric display charger in this kit cannot be charged with a double-head Type-C data cable.
Remote Control Radio Transmitter
The remote control radio transmitter included in this kit is the LiteRadio 3 (ELRS 2.4G) Indication of functions of button and switches is shown as below.


Switch Functions
Four switches are provided on the front of the remote control radio transmitter: switch SA, switch SB, switch SC, and switch SD, as shown below. Pilot can change different modes and parameters of the quadcopter with these switches. Please take notice that these switch can only work after the remote control radio transmitter is successfully connected to the quadcopter.

Switch SA: Arm/Disarm Quadcopter
- Quadcopter will be disarmed if switch SA is up.
- Quadcopter will be armed if switch SA is pressed
Switch SB: Flight Mode of Quadcopter
- The flight mode is "Angle Mode" if switch SB is down (ANGL)
- The flight mode is "Horizon mode" if switch SB is in the middle (HOR).
- The flight mode is "Air mode" if switch SB is up (AIR).
Switch SC (If the Quadcopter is facing down): Control for Turtle Mode
- Switch SC up will enter Turtle Mode
- (Once the Quadcopter is facing up) Pressing the switch to down or middle will turn off Turtle Mode
Switch SD: Unused
Joystick Functions
Two joysticks (throttle&direction joysticks) on the front of the remote control radio transmitter control the quadcopter as following: Ascent/descent (throttle), forward/backward tilt (pitch), left/right tilt (roll), and rotation of flight direction(yaw) Throttle (left) Joystick - Ascent/descent (throttle) and rotation of flight direction (yaw).

Direction (right) Joystick - forward/backward tilt (pitch) and left/right tilt (roll)

Button Functions
There are three buttons on the remote control radio transmitter.
- Power button: Turns the remote control radio transmitter on/off with a long press
- BIND button: Enter binding mode with a short press when the remote control radio transmitter is powered on.
- SETUP button: Enter joystick calibration mode with a short press after the remote control radio transmitter is powered on. Refer to "Advanced Settings" for more information on binding or joystick calibration
Charging the Remote Control Radio Transmitter
The remote control radio transmitter has a built-in 2000mAh battery. External battery is not required If LED ring breathes in red and beeps twice, it indicates that the battery is low and needs to be recharged. Steps to charge the remote control radio transmitter battery:

- Turn off the remote control radio transmitter;
- Connect remote control radio transmitter and adapter with the Type-C cable. (5V output adapter is allowed, such as mobile phone charger);
- The LED ring breathes in red means charging, while in green means fully charged
Note: Fast charging protocol is not supported So radio transmitter can not be quickly charged.
FPV Goggles
The FPV goggles used in the kit is named model VR()3. VR03 FPV goggles uses the external antenna and supports DVR recording
Quadcopter LED Light

- Power switch
Turn the power switch left and right to turn the goggles off or on. When facing the switch, the left position is powered off, right position is powered on
- Search button (S)
Quick frequency search: Press and hold the frequency search button for 2-3 seconds to activate frequency search. There will be a beep after 3 seconds, and the best available frequency will be selected. Quick frequency search is completed Frequency scan: Short press the frequency search key once to enter frequency scan interface

Press and hold for 2-3 seconds to activate frequency scan, result will be displayed after 3 seconds. The different colors in the screen indicate the current status of each frequency as follows:


- Band Key and Channel Key
In the frequency scan interface, the Band Key can be cycled down to select different bands, and the Channel Key can be cycled to the right to select different channels. Pilot can select the goggles frequency by pressing the Band Key and Channel Key. For example, select a band and channel with green status since these frequencies are not occupied and signal interference is relatively weak. Then, set the quadcopter to the corresponding frequency and adjust the goggles to match.
Frequency Selection
The FPV goggles can receive 48 frequency points in the 5.8GHz spectrum, distributed across 6 bands (A, B, E, F, R, and L) of 8 channels (CH-I, , CH-8), as shown below:

Press and hold the Search Key for 2-3 seconds to automatically search for the frequency point with the strongest signal strength in the space to obtain the FPV picture of the quadcopter.
User can also shortly press the Band Key to switch to the designated band and use the Chanel Key to switch to the designated channel so that the FPV goggles can work on the designated frequency point
DVR Function
VR03 FPV goggles support video recording function, short press the record button to start or stop video recording

- Insert the micro SD card into the micro SD card slot, FAT32 format only and maximum 64G;
- After short pressing the record button, a red dot will appear in the upper left corner, and there will be a "beep beep" sound from FPV goggles;
- Wait for 8 seconds and the red dot will start flashing. At the same time, a line of red numbers appears and the timer starts running, the recording indicator LED stars flashing, indicating the start of recording;
- Short press the record button. After 2-3 seconds the red dot on the upper left corner stop flashing together with the timer being vanished, and the red record LED indicator also turns off This indicates the goggles has stopped recording
Note: After pressing the record button, the DVR recording function will take about 8-10 seconds to be activated, please wait in patience.
Note: The maximum duration of each recording is 10 minutes. When a recording exceeds 10 minutes, a new recording file will be created automatically
FPV goggles supports DVR replay function, operating steps are listed as follows:

- Ensure Micro SD card has been inserted into the slot, with recording files in the card;
- Long press the record button for 2-3 seconds and there user will hear three beeping sounds. "LOADING DVR..." will appear on the screen;
- Wait about 8-10 seconds depending on the file size to finish loading and enter the DVR interface;
- After entering the DVR interface, button functions are redefined and explained by image shown below;
- Long press the record button for 2-3 seconds in the DVR interface again to exit.
Use the above buttons on the goggles to perform switching videos, Play or Pause, Fast Forward or Fast Backward, etc
 Note: After pressing the record button, the DVR recording function will take about 8-10 seconds to be activated, please wait in patience.
Charging the FPV Goggles
The FPV goggles have a built-in 2000mAh battery and no external battery is required When voltage is below 3.4V, there will be a beep every IOS and this indicates the battery needs to be recharged User can also press the S button to check the voltage Steps to charge the goggles battery is as follows:

- Switch off the FPV goggles;
- Connect FPV goggles and adapter with the Type-C cable (5V output adapter is allowed, such as mobile phone charger);
- The power light will be blue when charging and ights out when fully charged
Note: Fast charging protocol is not suppoHed. So FPV goggles can not be quickly charged.
Quadcopter OSD Menu Operation
The OSD menu is a set of operation interfaces designed to modify the configuration of the quadcopter. It's most used functions are switching the VT X frequency and output power
How to Access/Operate OSD Setting Menu
The position of joysticks to access the OSD setting menu is as shown below. The throttle joystick is moved to the left-center and the direction joystick towards the upward center.
Make sure the quadcopter is disarmed before accessing the OSD menu.

After accessing the OSD menu, pilot will see the following menu interface on the FPV screen.

The OSD menu cursor can be controlled by the right joystick to operate in OSD interface:

- Up: move the cursor up
- Down: move the cursor down
- Right: confirm/modify selection
VTX Frequency and Power Switching
Cetux X Whoop Quadcopter (Betaflight version) uses M04 VT X with a maximum power of 400mW. Changing frequency and output power value through buttons is not supported by this VTX. To configurate these values, please access OSD Menu in the Betaflight firmware.
Path for configurating VTX BAND: FEATURES>VTX>BAND>FEATURES>VTX>CHAN
Path for configurating VTX power value: FEATURES>VTX>POWER
Interface for Configurating VTX setup is shown as below:

NOTE: After changing the VTX band or power, please press (SAVE) on the interface for changes to be activated
NOTE: Please do not leave a powered-on quad to sit still (above 1 minute) when the VTX power is set to be above 100mW. This can cause overheating of VTX and malfunctioning of the hardware.
LED Light I Beep Status Codes
Quadcopter LED Light
There is a blue LED light and a green LED light on the flight controller. It is used to indicate whether the quadcopter is powered on normally and various status of the quadcopter

The green LED light is the receiver status light. Its codes are as follows:
| Status | State description | Solution |
| Flashing slowly | Remote control radio transmitter's receiver not connected | Open remote control radio transmitter connection |
| Flashing fast | Quadcopter is in binding mode | Press the BIND button on the remote control radio |
| Solid | The quadcopter is connected with the remote control radio transmitter |
The green LED light is the receiver status light. ts codes are as follows:
| Status | State description | Solution |
| Off | Normal, able to arm | |
| Flashing | Error, unable to arm | Throttle stick at lowest |
| Solid On | Armed |
Remote Control Radio Transmitter LED Light & Beep Status Codes
There is a blue & red LED indicator light around the power button which indicates the status of the remote control radio transmitter.

| Indicator LED color | Status | State description | Solution |
| Red | Solid | Throttle joystick is not at the lowest position when starting | Move throttle joystick to the lowest position |
| Red | Flashing fast | Remote control radio transmitter is in binding mode | Wait for binding |
| Red | Flashing slowly | Battery voltage is too low | Charge remote control radio transmitter |
There is a built-in beeper, pilot can recognize the working status of the remote control radio transmitter by its sound
| Beep | State description |
| The buzzer alarms twice: di-di | Low battery |
FPV Goggles LED Light Status Codes
The FPV Gogg es have a blue LED which indicates battery charging status, and a red LED which indicates DVR recording status.

The status codes of the blue charging indicator LED are as follows:
| Status | State description |
| Solid On | Charging |
| Off | Not charging or charging is complete |
The status codes of the red recording indicator LED are as follows:
| Status | State description |
| Flashing | Recording |
| Solid | DVR recording does not start |
Advanced Settings
Additional advanced settings are available in case of special operations
Turtle Mode
When the quadcopter falls to the ground and is facing down, we can activate turtle mode with the remote control radio transmitter to tum it over. To activate turtle mode:

- Press the switch SA to pop-up status, make the drone in disarmed status;
- Toggle switch SC from down to up to activate turtle mode. CRASH FLIP SWITCH is displayed in the OSD;
- Press the switch SA to arm the drone next;
- Move the direction joystick towards either direction. The motor will spin, and the quadcopter will reverse;
- When the OSD display CRASH FLIP <", which means the drone reversed and is normal now. Press the switch SA to disarm the drone now.
- Toggle switch SC from up to down to off turtle mode;
- Arm the quadcopter and operate normally.
Note: Turtle mode is suitable for flat ground and it's not recommended to activate this mode on grass
Re-Bind for Quadcopter
If quadcopter and remote control radio transmitter cannot be connected successfully, the pilot may need to re-bind. This can happen when replacing new electronic parts of the quadcopter during maintenance or upgrading the remote control radio transmitter.
The re-bind steps for SPI ELRS 2 4G receiver version are as follows:

- First, please make sure that the current protocol of the remote control radio transmitter is ExpressLRS 2.4G protocol version2;
- Power on the quadcopter and wait for the its system to load completely;
- Use a screwdriver to lightly press the button on the quadcopter and the green LED light on the quadcopter changes from slow flashing to fast flashing;
- Power on the remote control radio transmitter and wait for its system to oad complete-
- Lightly press the BIND button on the back of the remote control radio transmitter with a screwdriver, the red LED light of the remote control radio transmitter start flashing fastly;
- If re-bind is successful, quadcopter green LED light will change from fast flashing to solid
Note: The SPI ELRS 2.4G receiver integrated by Cetus X supports the ExpressLRS 2 protocol by default; it cannot be binded using the ExpressLRS 1 or ExpressLRS 3 protocol
Note: After the re-bind is successful, the connection will be completed automatically when restarting the quadcopter or the remote control radio transmitter Do not need to re-bind it every time powered on
Note: The re-binding of the remote control radio transmitter and the quadcopter may not be successful after pressing the BIND button of the remote control radio transmitter once. In this situation, pilot needs to press the BIND button a second time to complete the binding.
Remote Control Radio Transmitter Calibration
After repeated use or if the remote control radio transmitter is subjected to physical impact, the joysticks may no onger read correctly and require recalibration. Calibrate the joystick value can ensure that its joystick value is in the neutral position.
- After powering on, press the SETUP button on the back of the remote control radio transmitter which will beep twice, and red LED flashing fastly(twice at a time). The remote control radio transmitter has entered calibration mode
- Move throttle joystick and direction joystick to middle position Press SETUP button again and wait until the remote control radio transmitter beeps three times. The red LED flashing fastly(twice at a time). This indicates joysticks center data has been acquired and enter boundary data calibration.
- Toggle the joystick to move to the top, bottom, left, and right joystick boundaries respectively (do not press too hard, the joystick just needs to touch the boundary) and keep the position for I-2S, then press the SETUP button one more time, we can hear a long beeping sound (about 3 seconds) from the buzzer again, and the red LED light stops flashing, indicating that the calibration of the joystick is completed
Betaflight Configuration
Cetus X (Betaflight version) is configured with all the parameters out of factory and no need to configurate anymore.
It is recommended to master the basics of Betaflight Configurator and Betaflight firmware before configuring the quadcopter.
- Betaflight website: https://betaflight.com/
- Watch a tutorial video on how to get started: https://www.youtube
Cetus X RTF FPV Kit (Betaflight version) uses BETAFPV F4 IS 12AAlO flight controller, with SPI ELRS 2.4G receiver.
The flight controller integrates SPI ELRS 2.4G receiver, the configuration is as follows:

Set receiver's channel as AETR1234. The throttle stick minimum threshold is 1050( f the lowest value of radio controller is being set above 1050, arming will be invalid.) Exact setting is shown below:

The default setting for flight mode is shown below
AUX1: Arm/Disarm Quadcopter;
AUX2: Flight Modes of Quadcopter configured with Horizon Mode, Angle Mode and Air Mode;
AUX3: Turtle mode

The default firmware and configuration of Cetus X (Betaflight version) are shown as below if customers need reset:
Betaflight flight controller firmware, Betaflight CLI configuration, BB51 BLHeli S ESC firmware download address:
- Betaflight Flight Controller Firmware and BB51 BLHeli_S ESC Firmware:
https://support.betafpv.com/hc/en-us/articles/9436686257945-Firmware-for-F4-1S-12A-FC-ELRS-V2-2 - Betaflight CLI Configuration:
https://support.betafpv.com/hc/en-us/articles/9436959532825-CLl-for-Cetus-X
Supplement
Warning & Security
- Move the throttle joystick as gently as possible to avoid the quadcopter ascending and descending too suddenly
- Press switch SA on the remote control radio transmitter immediately if the quadcopter collides with any object.
- Please try to keep motors perpendicular to the body Otherwise, flight performance will be degraded
- Learn to control the quadcopter proficiently before flying in a large outdoor area or with the wind
- Battery life can be significantly reduced if pilot continues to fly after the low voltage warning is shown.
- Do not fly in rain. Humidity may cause unstable flight or loss of control
- Keep the battery away from water. If the flight controller touches water, a short circuit may occur and the flight controller may burn out.
- Do not fly in inclement weather with thunderstorms or lightning
- Do not fly in areas that are not permitted by ocal law.
Precautions for Battery Use and Charging
- Do not immerse the battery in water. Store in a dry area if not used for a long time
- Keep away from children. If swallowed, seek medical attention immediately.
- Do not use or store the battery near heat sources, microwave ovens, or open flames
- Only use a battery charger that meets the specifications when charging
- Do not throw the battery into fire or heat the battery.
- Do not use or store the battery in an extremely hot environment, such as in a car under direct sunlight or hot weather. Overheating affects the performance of the battery and shortens the service life of the battery. Overheated batteries can catch fire
- If the battery has a peculiar smell, temperature, deformation, discoloration, or any other abnormal phenomenon, stop using the battery. Recycle and replace the battery.
- If the battery connector gets dirty, please wipe it with a dry cloth before use. Avoid getting battery contacts dirty, which can cause energy loss or failure to charge
- Disposing of the battery randomly may cause a fire. Please fully discharge the battery and use insulating tape to dispose of the battery output connector before disposing of the battery. Refer to local regulations before disposing or recycling a battery
After-Sale Service
- Warranty: All defective merchandise, unless otherwise indicated, may be returned for a replacement within 30 days from the date of goods received. We cannot provide refunds or replacements beyond 30 days
- If the product is confirmed to have a quality problem (product design or quality issues), we will cover it with replacing or refund
- All warranty replacements are required to have photos or videos and a detailed description. The warranty does not cover physically damaged merchandise. We are willing to figure out the best solutions, as always.
- For after-sale service, please reach out via e-mail: support@betafpv.com
This clause only applies to the products manufactured by BETAFPV and sold by BETAFPV authorized dealers.
The specific interpretation rights of this clause belong to BETAFPV.
FAQ
How to Replace Propellers
Propellers can be deformed or fall off when a quadcopter collides with an object Bent or missing propellers need to be replaced Use the included propel er removal too to remove propel ers from the motor. Please hold the motor instead of the frame duct with your hand when removing propellers to protect the frame from being deformed by overexertion. 4pcs spare propel ers are included; 2pcs clockwise (CW) and 2pcs counterclockwise (CCW) Install as in the diagram below.

How to Use FPV Simulator
The safest and quickest method to get started is to use an FPV simulator. The LiteRadio 3 remote control radio transmitter supports most FPV simulators on the market with a comprehensive configuration

Operation steps below:
- Turn off the radio transmitter.
- Connect the transmitter to computer via a USB cable. Wait for the LED ring breathes in red or green.
- Install driver from PC automatically, prompt box pops up after successful installation.
Then, radio transmitter works as a joystick human interface device (AKA HID device) normally.

User needs to manually install driver if PC doesn't install automatically or is installed incorrectly.
Do not power on the transmitter and connect it to the PC The USB port is invalid in this situation.
How to Stop After A Collision

- Press switch SA on the remote control radio transmitter immediately once the quadcopter collides with an object When the switch SA pop up, all motors will immediately stop.
- If the flying altitude is too high and it is difficult to control, please press switch SA immediately to stop the motor.
Press switch SA immediately when the quadcopter is hit or the propellers scratch against the frame duct.

Documents / Resources
References
![betaflight.com]() https://betaflight.com
https://betaflight.com![betafpv.com]() Micro Whoop Drone Racing Shop - FPV Drone Racing Quads & Gears – BETAFPV Hobby
Micro Whoop Drone Racing Shop - FPV Drone Racing Quads & Gears – BETAFPV Hobby

Download manual
Here you can download full pdf version of manual, it may contain additional safety instructions, warranty information, FCC rules, etc.
Advertisement


Need help?
Do you have a question about the Cetus X and is the answer not in the manual?
Questions and answers