
Related Manuals for Energizer EZ40VTREN


Summary of Contents for Energizer EZ40VTREN
- Page 1 ORIGINAL INSTRUCTIONS >EN 40V CORDLESS CHAINSAW EZ40VTREN USER GUIDE CAUTION Read the instructions before using this machine.
- Page 2 ©2022 Energizer. Energizer and certain graphic designs are trademarks of Energizer Brands, LLC and related subsidiaries and are used under license by Builder SAS. All other brand names are trademarks of their respective owners. Neither Builder SAS nor Energizer Brands, LLC is affiliated with the respective owners of their trademarks.
- Page 3 Let’s get started. You’re excited to power up, so we’ll keep this brief!
-
Page 4: Table Of Contents
CONTENT S 1. INTENDED USE 2. GENERAL SAFETY WARNINGS 3. THE PRODUCT 4. ASSEMBLY 5. OPERATION 6. TRANSPORTATION AND STORAGE 7. MAINTENANCE 8. DISPOSAL 9. DECLARATION OF CONFORMITY 10. WARRANTY 11. PRODUCT FAILURE 12. WARRANTY EXCLUSIONS... -
Page 5: Intended Use
1. INTENDED USE The product is only intended for use outdoors. For safety reasons the product must be adequately controlled by using two handed operation at all times. The product is designed for cutting branches, trunks, logs and beams of a diameter determined by the cutting length of the guide bar. - Page 6 PERSONAL SAFETY ◆ Stay alert, watch what you are doing and use common sense when operating a power tool. Do not use a power tool while you are tired or under the influence of drugs, alcohol or medication. A moment of inattention while operating power tools may result in serious personal injury. ◆...
-
Page 7: Chainsaw Safety Warnings
2.2 ADDITIONAL GENERAL SAFETY WARNINGS ◆ Some regions have regulations that restrict the use of the product. Check with your local authority for advice. ◆ Never allow children or people unfamiliar with the instructions to use the product. Local regulations may restrict the age of the operator. - Page 8 chain and be whipped toward you or pull you off balance. ◆ Carry the chainsaw by the front handle with the chainsaw switched off and away from your body. When transporting or storing the chainsaw always fit the guide bar cover. Proper handling of the chainsaw will reduce the likelihood of accidental contact with the moving saw chain.
- Page 9 area, but remember the helmet, particularly with the mesh visor, can help reduce the potential for injury to the face and head if kickback occurs. ◆ An incorrectly tensioned chain can jump off the guide bar and could result in serious injury or fatality. The length of chain depends on the temperature.
- Page 10 Chainsaw jackets for upper body protection Should comply with EN 381-11 and be CE marked. 2.5 INSTRUCTIONS CONCERNING THE PROPER TECHNIQUES FOR BASIC FELLING, LIMBING, AND CROSS - CUTTING Understanding the forces within the wood When you understand the directional pressures and stresses inside the wood you can reduce the “pinches”...
- Page 13 5 cm / 2 5 cm / 2...
- Page 14 Removing buttress roots A buttress root is a large root extending from the trunk of the tree above the ground. Remove large buttress roots prior to felling. Make the horizontal cut into the buttress first, followed by the vertical cut. Remove the resulting loose section from the work area.
- Page 15 Limbing a tree Limbing is removing the branches from a fallen tree. When limbing leave larger lower limbs to support the log off the ground. Remove the small limbs in one cut. Branches under tension should be cut from the bottom up to avoid binding the chainsaw.
-
Page 16: Residual Risks
Cutting spring poles A spring pole is any log, branch, rooted stump, or sapling which is bent under tension by other wood so that it springs back if the wood holding it is cut or removed. On a fallen tree, a rooted stump has a high potential of springing back to the upright position during the bucking cut to separate the log from the stump. - Page 17 If you experience any of the symptoms of this condition, immediately discontinue use and see your doctor about these symptoms. Warning:: Injuries may be caused, or aggravated, by prolonged use of a tool. When using any tool for prolonged periods, ensure you take regular breaks. 1.8 SYMBOLS Safety alert.
-
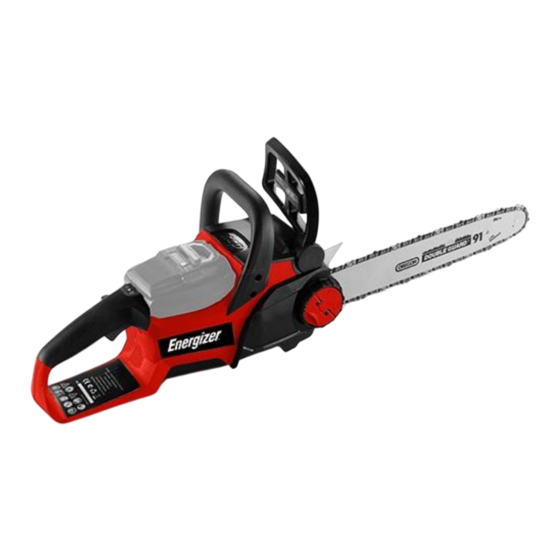
Page 18: The Product
3. THE PRODUCT 3.1 DESCRIPTION... - Page 19 1. Front hand guard/Chain brake 9. Throttle trigger 2. Front handle 10. Sprocket cover 3. Rear handle 11. Chain tension adjustment ring 4. Chain 12. Chain tension knob 5. Guide bar 13. Guide bar cover 6. Spiked bumper 14. Chain catcher 7.
-
Page 20: Technical Data
3.2 TECHNICAL DATA Model EZ40VTREN Rated voltage 36 Vd.c. (40Vd.c. max) No-load speed 12 m/s Guide bar length 356 mm(14’’) 9.525 mm (0.375”) Chain pitch Chain gauge 1,27 mm Drive links 6 teeth x 0.375” Drive sprocket <0.15S Chain stop... -
Page 21: Assembly
chainsaw steady while cutting. When cutting, push the machine forward until the spikes dig into the edge of the wood, then by moving the rear handle up or down in the direction of the cutting line it can help ease the physical strain of cutting Guide bars Generally, guide bars with small radius tips have somewhat lower potential for kick-back. -
Page 22: Charging Battery Pack
3-4 mm 4.3 CHARGING BATTERY PACK Align the raised rib on the battery pack with the groove on the battery charger. Plug the charger to the electrical alimentation. You can see the charge status by pressing the charge level indicator which is on the battery. The battery is fully charged when all light s are switched on. -
Page 23: Installing Battery Pack
5.2 INSTALLING BATTERY PACK 1. Place the battery pack in the chainsaw. Align raised ribs on battery pack with grooves in the chainsaw’s battery port. 2. Make sure the latch on bottom of the battery pack snaps in place and that battery pack is fully seated and secure in the chainsaw before beginning operation. -
Page 25: Transportation And Storage
6. TRANSPORTATION AND STORAGE ◆ Stop the machine, remove the battery pack and allow the tool to cool before storing or transporting. ◆ Clean all foreign material from the product. Store it in a cool dry and well-ventilated place that is inaccessible to children. -
Page 26: Maintenance
7. MAINTENANCE Warning: Use only original manufacturer’s replacement parts, accessories and attachments. Failure to do so can cause possible injury, poor performance and may void your warranty. Warning : Servicing requires extreme care and knowledge and should be performed only b y a qualified service technician. -
Page 27: Replacing Guide Bar And Saw Chain
◆ Consequences of improper maintenance may cause the chain brake and other safety features to not function correctly, thus increasing the potential for serious injury. Keep your chainsaw professionally maintained and safe. ◆ Sharpening the chain safely is a skilled task. Therefore the manufacturer strongly recommends that a worn or dull chain is replaced with a new one, available from your authorized service center. - Page 28 3-4 mm...
-
Page 29: Maintenance Schedule
7.2 INSPECTING AND CLEANING THE CHAIN BRAKE ◆ Always keep the chain brake mechanism clean by lightly brushing the linkage free from dirt. ◆ Always test the chain brake performance after cleaning. Refer to “Operation - Checking and Operating Chain Brake” earlier in this manual for additional information. 7.3 MAINTENANCE SCHEDULE Daily check Bar lubrication... -
Page 30: Declaration Of Conformity
ZI du Casque – 32 rue Aristide Berges – 31270 CUGNAUX - FRANCE Tel: +33 (0)5.34.502.502 Fax: +33 (0)5.34.502.503 Declares that the machine: CORDLESS CHAINSAW EZ40VTREN Serial No: 20220126819-20220127118 The people name holding the technical file:Mr Olivier Patriarca Is in conformity with the relevant provisions of the Machinery Directive 2006/42/EC... -
Page 31: Warranty
10. WARRANTY WARRANTY The manufacturer guarantees the product against defects in material and workmanship for a period of 2 years from the date of the original purchase. The warranty only applies if the product is for household use. The warranty does not cover breakdowns due to normal wear and tear. The manufacturer agrees to replace parts identified as defective by the designated distributor. -
Page 32: Product Failure
11. PRODUCT FAILURE WHAT TO DO IF MY MACHINE BREAKS DOWN? If you bought your product in a store: a) Empty the fuel tank if your product has one. b) Make sure that your machine is complete with all accessories supplied, and clean! If this is not the case, the repairer will refuse the machine. -
Page 33: Warranty Exclusions
12. WARRANTY EXCLUSIONS THE WARRANTY DOES NOT COVER: • Start-up and setting up of the product. • Damage resulting from normal wear and tear of the product. • Damage resulting from improper use of the product. • Damage resulting from assembly or start-up not in accordance with the user manual. •... - Page 34 NOTES...
- Page 35 NOTES...
Need help?
Do you have a question about the EZ40VTREN and is the answer not in the manual?
Questions and answers