Advertisement
INTRODUCTION
With proper operation and maintenance, AXITEC ENERGY GMBH & CO. KG modules will provide you with clean and renewable solar electricity for years to come. This manual contains necessary installation, maintenance, and safety information. Keep this guide in a safe place for future reference.
Non-compliance with this installation instruction may result in property damage and/or physical injury. AXITEC ENERGY GMBH & CO. KG will not be liable for compensation of any loss or injury caused by this type of non-compliance.
AXITEC ENERGY GMBH & CO. KG reserves the right to make unannounced alterations to the design and/or technical specifications of its solar modules at any time. Therefore, only the datasheet current at the time of manufacture is definitive. It is therefore expressly recommended to ensure that the datasheets on hand represent the current status before placing an order. When performing assembly or other work on the solar modules, the datasheets and user information current at the time of manufacture of the relevant module are to be used for reference. The contents of older or newer documents may be incorrect due to interim product changes.
This version of "Installation & Operating Instructions" replaced all other before.
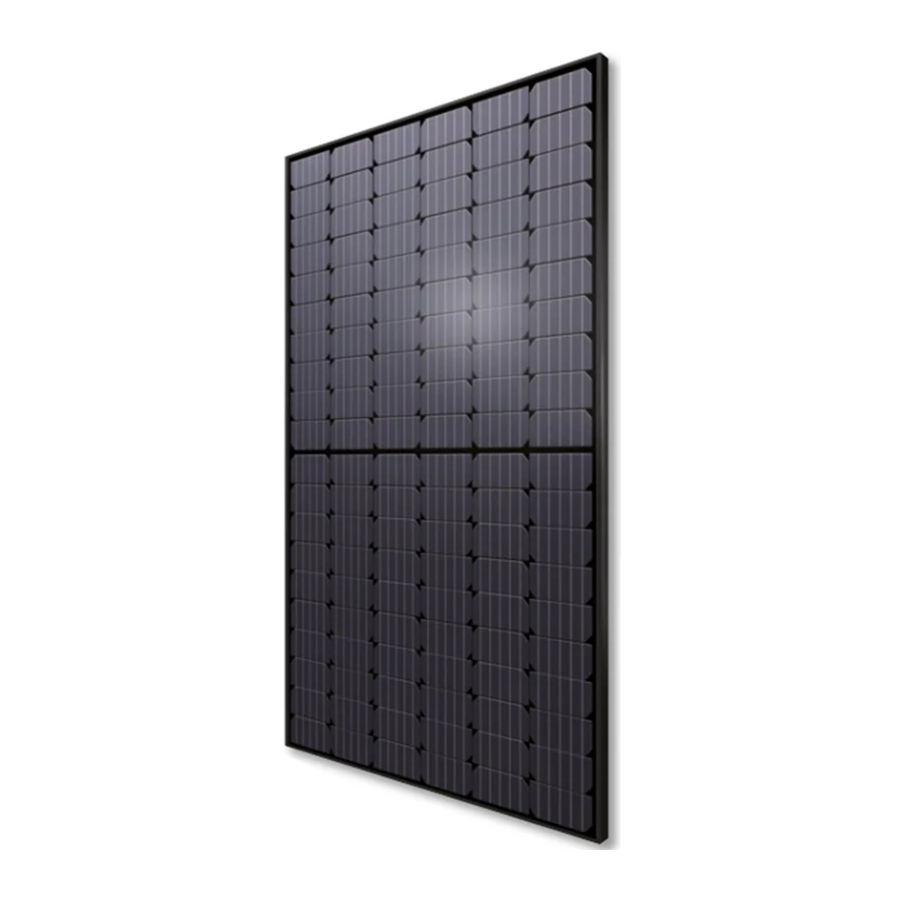
Module type
This manual is valid for following module types:
| AC-xxxM/60S: xxx = 310 – 325; | AC-xxxMH/120S: xxx = 310 – 335 |
| AC-xxxM/72S: xxx = 370 – 390; | AC-xxxMH/144S: xxx = 370 – 405 |
| AC-xxxMH/120VAU: xxx = 360 – 385; | AC-xxxMH/144VAU: xxx = 440 – 465 |
| AC-xxxMH/108VAU: xxx = 400 – 415; | AC-xxxMH/144VAU: xxx = 530 – 555 |
| AC-xxxMH/108KAU: xxx = 400 – 415; | AC-xxxTGB/108BBA: xxx = 430; 440 |
| AC-xxxTGB/108WBA: xxx = 430 – 440; | AC-xxxTGB/120BBA: xxx = 470 |
| AC-xxxTGB/120WBA: xxx = 470; | AC-xxxTGB/144TSA: xxx = 565 – 580 |
| AC-xxxTGBL/108WBA: xxx = 440-450; | AC-xxxTGBL/108BBA: xxx = 440-450 |
| AC-550TGB/120TSA: xxx = 550 |
Codes and regulations
The mechanical and electrical installation of PV systems should be performed in accordance with all applicable codes, including electrical codes, building codes and electric utility interconnection requirements. Such requirement may vary for mounting location. Requirements may also vary with system voltage, and for DC or AC application. Contact local authorities for governing regulations.
General information
Product Identification
Each module has four labels
1x name plate:
Describes product type, nominal power, nominal current, nominal voltage, no-load voltage, shortcircuit current (measured under standard test conditions (STC), the measurement tolerance is +/3%), weight, dimensions, etc. The maximum system voltage is 1000 or 1500 V DC, depending on the Module type.
3x serial number/barcode:
Each module has a unique serial number encoding, among other details, the year and month of manufacture. One serial number label is permanently fitted on the front below the glass, one Label with serial number and barcode is on the rear below / next to the type label and one with serial number and barcode is on the frame.

General Rules and Safety Precautions
Before the start of the installation of the PV system, the advice of the relevant authorities as well as the energy provider regarding regulations, guidelines and approval requirements must be obtained. These are to be followed during installation. All applicable local, regional, and national statutory orders and regulations are to be observed.
An improper execution during installation or commissioning can result in personal injuries or damage to the modules.
It is advisable to provide for service access during project planning.
Protective goggles and safety shoes are to be worn at all times when performing the work. If applicable, observe the regulations and recommendations of the relevant trade associations or corresponding bodies. Work on the photovoltaic system must not be performed in rain, snow or wind. The glass surface and module frame can become hot when exposed to sunlight and there is a risk of burns. Use gloves, if applicable.
Work only under dry conditions and use only dry tools. Do not handle modules when they are wet unless wearing appropriate protective equipment.
For safety reasons, defective modules must be replaced immediately.
The photovoltaic modules from AXITEC described herein meet the requirements of application class A, that is, dangerous voltage (IEC 61730: greater than 50 V DC or greater than 240 W; EN 61730: greater than 120 V DC) and systems with dangerous power output, where unrestricted accessibility is to be expected.
Solar modules generate DC voltage when exposed to sunlight. Any contact with 30 V or more DC voltage can be fatal.
Modules have no on/off switch. Modules can be rendered inoperative only by removing them from sunlight, or fully covering their surface with completely opaque material, or by working with modules faced down a smooth, flat surface.
Only connect solar modules with the same rated output current in series. When solar modules are connected in series, the total voltage is equal to the sum of the voltages of the individual solar modules. For the maximum system voltage for solar modules, please refer to the respective data sheet.
The modules must not be immersed in water.
Do not artificially bundle sunlight by means of mirrors, lenses or other devices onto the module.
Reflection from snow or water can increase sunlight and therefor boost current and power. In addition colder temperatures can substantially increase voltage and power.
If the modules are installed according to the instructions above, the system components must result in a proper operation of the modules. If the modules are not operated properly, the warranty can become void or at least significantly limited.
Further information about modules from AXITEC can be found in the datasheets for the modules. The datasheets are available via the Internet at www.axitecsolar.com.
Fire Protection
For questions regarding building safety and prevention of fires on buildings please contact the relevant local authority.
If applicable, use earth fault switches or fuses in accordance with the specifications of the local authorities.
Do not use modules near devices or places where flammable gases may be formed.
In a roof installation, the module must only be mounted above a fireproof roof cover approved for this application.
Our modules comply with fire protection class C in accordance with IEC 61730-2. As a rule, it can be assumed that a fire risk can be assessed as low-risk if our modules are properly installed on roofs made of class A building materials, i.e. non-combustible, in accordance with DIN EN 13501. When installed on a roof, the module may only be mounted over a fire-resistant roof covering approved for this application. In addition, it must be ensured that the rear wall and the mounting surface are fully ventilated. Improper installation can lead to a fire hazard. To ensure the fire resistance of the roof, a distance of ≥ 10 cm between the module frame and the roof surface is recommended. However, it must be checked separately on site in each individual case to what extent it is possible to install the modules in accordance with the relevant fire protection regulations and whether additional measures may need to be taken. The installing company is always responsible for ensuring that the installation is carried out correctly and in accordance with regulations.
Installation Assembly Rules
Assembly Notes
It is recommended to remove the solar modules from the packaging only at the time of installation.
When stacking the solar modules, do not exceed the upper limit indicated on the packaging box.
Store the packaging box in a ventilated, rainproof and dry place before unpacking the solar modules.
The glass surfaces must not be damaged or scratched. In particular, the rear of the module must not be exposed to mechanical impacts (e.g. by sharp, hard objects).
Do not stand on the modules or module frames.
Do not lift the module by holding the module's junction box or electrical leads.
The solar modules must not be installed under bending tension and the frame parts must not be twisted in themselves during assembly.
The solar module must not be compressed along its sides.
Modules must be handled with care during installation. Impacts to the front and rear or the edges can damage the modules.
For a roof assembly, ensure that the structural dimensions (consult a structural engineer, if applicable) of the roof are adequate for bearing the loads imposed by the photovoltaic system.
It is forbidden to make changes or repairs to the solar module ( e.g. additional drilling in the module frame, removal of the type plate)!
To ensure sufficient ventilation, a distance of at least 10 cm must be maintained between the underside of the frame and the roof. Smaller distance only after consultation with AXITEC.
Water drainage openings in the module frame must not be closed in any way. The mounting frame, too, must not obstruct them. The earthing holes provided only serve for the purpose of earthing the frame.
Site selection
Marine and mobile applications are generally excluded. Floating installations only after consultation with AXITEC.
If the modules are assembled near the sea, a minimum distance of 500 m to the coastline must be ensured.
Solar modules may not be installed above 2,000 m above sea level.
Glare caused by modules cannot be ruled out. Modules must therefore not be installed in locations where glare could pose a potential risk.
Operation of the solar modules in regions with snow loads of up to 3600 Pa is dependent on the assembly and module type (see Mechanical installation).
The modules must be installed in an environment in which it is ensured that the operating temperature range will not exceed or fall below -40°C to +85°C. Sufficient air circulation behind the modules should particularly be ensured in hot environments.
All shading of the module array is to be avoided. The modules must not be permanently shaded (including partial shading, spot shading, uniform shading or uneven shading). Permanent shading means that the cells are continuously shaded over a longer period of time, e.g. when modules are installed behind a pipe, a chimney, a tree, etc. If a defect (e.g. a hot spot) is caused by improper installation of a module in the shade or by poor maintenance, the warranty is void. The power loss in fully or partially shaded cells leads to power loss, reduced yield and can lead to localized overheating, which in turn can have a negative effect on the service life of the modules. Permanent shading can lead to accelerated ageing of the encapsulation material and cause thermal stress on the bypass diodes. If modules are nevertheless installed in such shaded areas, optimizers are required at module level (MLPE).
Alignment
If possible, all modules should be aligned in the same way.
The solar modules are suitable for installation both with their long side up and their short side up. (see Mechanical installation).
The modules are to be mounted in such a way that melt- and rainwater can run off freely and that the module will not be constantly wet.
To increase the yield of the rear side of bifacial modules, shading by the substructure should be avoided as far as possible. A substrate with a high albedo and an increased distance between the module and the substrate also have a positive effect on the energy yield of bifacial modules.
Tilt angle

The solar modules must be installed at an angle of at least 10° to the ground. Building regulations must be observed (in Germany maximum 75°).
Depending on the angle of inclination, the solar modules provide a different yield. The optimal tilt angle depends on the location and the azimuth of the solar modules.
For optimal output the PV-Module should be facing North in the southern hemisphere.
All solar modules connected in series should be oriented the same way for optimal energy yield.
Mechanical installation
The modules must be mounted with a minimum distance of 5 mm to the next module.
Struts, mounting clamps, screws and other fixing elements must be commercially available and corrosion-free. In particular, the fixing elements must be designed in accordance with the local wind and snow loads.
Ensure modules are not subject to wind and now loads exceeding the maximum permissible loads.
Installation with clamps
When using mounting clamps, the solar modules are to be mounted on the struts in at least four locations on opposite sides. The clamps must be positioned inside the mounting zone. The module must be securely fixed. The clamps must not be in contact with the front glass or deform the frame in any way. Avoid shading effects from the clamps and mounting system.
It is recommended to use a clamp with a length of at least 40 mm. Avoid shading by the clamp. The maximum tightening torque for the mounting clamps can be obtained from the manufacturer of the clamps.


 clamping range
 substructure

D = L/4  mm
mm
S = 100 to 300 mm
P = L/4  mm
mm
R = 0 mm to L/ 4 -100 mm
M =L/2 mm or M = L/2
  mm
mm
Ensure that the junction boxes do not touch the third mounting rail in case of deflection.
* All drawings are schematic diagrams and do not match reality.
Design loads* (pressure / suction) for the permissible installation variants

*tested with 1.5 times higher test load perpendicular to the module plane
example:
| Module type | Module | Distance Module mounting long side | Distance module mounting short side | ||||
| length [mm] | width [mm] | high [mm] | min [mm] | max [mm] | min [mm] | max [mm] | |
| 108 cells | 1722 | 1134 | 30 | 330,5 | 530,5 | 100 | 300 |
Mounting using the mounting holes
Instead of mounting clamps, the modules can also be attached to the substructure using the mounting holes located in the frame (long module side). The mounting screws must be alternately fastened to the struts at at least four points.

| Mounting hole | Screw | Recommended Tightening torque |
| 14*9 mm | M8 | 12,5 Nm - 18 Nm |
| 10*6,5 mm | M6 | 8 Nm – 12Nm |
Design loads* (pressure / suction) for mounting with mounting holes
| Module type | Mounting variant | ||
| Inner 4 holes (I) | outer 4 holes (A) | 400 mm holes | |
| 108-cells 120-cells 60-cells | 3600 Pa / 1600 Pa | 1600 Pa / 1600 Pa | - |
| 144-cells 72-cells | 1600 Pa / 1600 Pa | 1600 Pa / 1600 Pa | 1200 Pa / 1200 Pa |
| 132-cells | 1600 Pa / 1600 Pa | 1600 Pa / 1600 Pa | 1200 Pa / 1200 Pa |
*tested with 1.5 times higher test load perpendicular to the module plane
144 cell XXL and 132 cell XQ modules have additional 4 mounting holes with 400mm spacing, which are suitable for tracking bracket system products.
Mounting with insertion systems
Individual approvals can be requested for insertion systems if no approval is available from the insertion system manufacturer.
Electrical installation
The electrical connection of the individual solar modules to each other and the connection to the inverter must be made using the connectors of the same type pre-mounted on the solar modules. The cables must not be used as carrying aids or bent and must not be installed under tensile stress. Only use special solar cables and suitable connectors that comply with the local specifications at the installation site.
| Connector model name | Allowable mating connector model name |
| PV-KST4 / PV-KST4-EV02 / PV-KST4-EV02A (Stäubli Multi- Contact) | PV-KST4 / PV-KST4-EV02 / PV-KST4-EV02A (Stäubli Multi- Contact) |
Only certified solar cables may be used for earthing and connecting the modules (e.g. IEC 62930 approved). The recommended minimum cross-section of the cable is 4 mm² (#12 AWG). Only certified solar cables may be used for grounding and connecting the modules. The minimum bending radius is 5x the cable diameter.
Keep the connectors dry and clean during installation. Note that pollution from sand, dust and water will result in arca and electrical shock of connector.
Secure the cable to the mounting system with UV-resistant cable ties and avoid direct sunlight on the cables.
Cables and connectors must not rest on the roof cladding and must not lie in the water-bearing plane.
The electrical installation and commissioning must only be carried out by a qualified electrician who knows the relevant standards and regulations for the use and assembly of solar modules. Our operating instructions do not enable persons lacking the mentioned knowledge to assemble the solar module.
Modules must not be operated under short-circuit conditions.
Disconnecting the module connections during operation can result in light arcs (break sparks) and therefore in a hazard for people and equipment. Do not insert any objects into the plugs and sockets!
Electrical design
Connect the max. number of modules that corresponds to the voltage specifications of the devices used in the system. The modules (in accordance with protection class II) must not be operated with a higher voltage than the permitted system voltage. The specifications can be found in the datasheet of the modules or in the datasheet of the relevant inverters. Please ensure that the cables are installed and fixed in such a way that, in particular, the plug-in connections do not lie in a water-carrying plane.
All connected electrical components must be designed for the maximum operating voltage of the system.
Due to special environmental conditions, a module may supply a higher current and/or voltage than specified under the standardized test conditions. When designing PV systems, the values for Isc and Uoc should be multiplied by a factor of 1.25 to determine the nominal values for components such as, e.g., cabling, fuses and inverters which will be connected to the output of the modules.
To determine the maximum possible number of modules per string, the open-circuit voltage at the lowest temperature must be considered:
𝑈 𝑠𝑦𝑠𝑡𝑒𝑚,𝑚𝑎𝑥 ≥ 𝑁 × 𝑈𝑂𝐶,𝑆𝑇𝐶 [1 + 𝛽𝑈𝑜𝑐 × (𝜗𝑚𝑖𝑛 − 25)]
𝑁 = 𝑛𝑢𝑚𝑏𝑒𝑟 𝑜𝑓 𝑠𝑒𝑟𝑖𝑒𝑙𝑙 𝑚𝑜𝑑𝑢𝑙𝑒𝑠;
𝛽𝑈𝑜𝑐 = 𝑡𝑒𝑚𝑝𝑒𝑟𝑎𝑡𝑢𝑟𝑒 𝑐𝑜𝑒𝑓𝑓𝑖𝑐𝑖𝑒𝑛𝑡 𝑜𝑓 𝑈oc;
𝜗𝑚𝑖𝑛 = 𝑚𝑖𝑛𝑖𝑚𝑢𝑚 𝑡𝑒𝑚𝑝𝑒𝑟𝑎𝑡𝑢𝑟𝑒 𝑎𝑡 𝑙𝑜𝑐𝑎𝑡𝑖𝑜𝑛
The specified protection classes are to observed, however, the minimum compliance required is IP65. Ensure a gapless connection when connecting the plug-in connectors.
For a series connection, only modules with the same current rating should be used, and for a parallel connection, only modules with the same voltage rating should be used. Modules can be connected in series by connecting the positive connection of one module to the negative connection of the next module.

Suitable overcurrent protection measures (e.g. string cut-out) are required for the parallel connection of the modules. It must be ensured that the specified capacity regarding the return current IR of the datasheet will not be exceeded. If there are more than two parallel strings, string fuses and string diodes must be used.
Only use special solar cables and suitable plugs. Attach the cables to the mounting system using UV-resistant cable ties and avoid exposing the cables to direct sunlight.
In order to reduce voltages caused by lightning strikes, the surface area of all conductor loops must be as small as possible. Modules shall be installed in such a way that sufficient air circulation will be possible to prevent an overheating of the modules and components.
IR, of 16 A for:
AC-xxxM/60S: xxx = 310 – 325;
AC-xxxMH/120S: xxx = 310 – 335
AC-xxxM/72S: xxx = 370 – 390;
AC-xxxMH/144S: xxx = 370 – 405
IR, of 20 A for:
AC-xxxMH/120VAU: xxx 360 – 385;
AC-xxxMH/144VAU: xxx = 440 – 465
IR, of 25 A for:
AC-xxxMH/108VAU: xxx 400 – 415;
AC-xxxMH/144VAU: xxx = 530 – 555;
AC-xxxMH/108VAU: xxx 400 – 415
IR, of 30 A for:
AC-xxxTGB/108BBA: xxx = 430; 440;
AC-xxxTGB/108WBA: xxx = 430 – 440;
AC-xxxTGB/120BBA: xxx = 470;
AC-xxxTGB/120WBA: xxx = 470;
AC-xxxTGB/144TSA: xxx = 565 – 580;
AC-xxxTGBL/108WBA: xxx = 440 - 450;
AC-xxxTGBL/108BBA: xxx = 440 – 450;
AC-xxxTGB/120TSA: xxx = 550;
Bypass diode
The junction boxes of the half-cell modules each contain a bypass diode connected in parallel to the cell string. In case of shading, the diode can bypass the affected part of the module and thus protect it from excessive heating and reduce power losses of the entire system. Partial shading should nevertheless be avoided. Note that the bypass diode is not the overcurrent protection device.
If the diode is defective, the installer or system maintenance supplier must contact Axitec. Please do not attempt to open the module junction box yourself.
Each module contains 3 bypass diodes.
Grounding
The modules are to be grounded according to the country-specific requirements and laws. If a lightning protection system is already present or intended to be installed on the building, the PV system is to be integrated into the protection concept against direct lightning strike. If a transformerless inverter is used, equipotential bonding may be prescribed in accordance with the inverter manufacturer's specifications. Country-specific laws must be observed.

Earthing of the modules shall only be carried out at the locations on the frame profile specified for this purpose via an earth cable that is connected electrically conductive with the frame.
Country-specific standards are to be adhered to.
Maintenance and Cleaning
Maintenance
We recommend regular inspections:
- Regularly check the module for signs of damages and glass breakage
- Check that all electrical connections are secure and free of corrosion
- Check that the cables are undamaged
- Check that the mounting system is securely attached and firm
The most common causes for a low energy yield are:
- Improper or faulty wiring
- Burned-out fuses or triggered power switches
- Shading of the modules by trees, masts or buildings
- Failure of the inverter
- Improper maintenance and cleaning
- Build-up of dirt on the modules
- Unsuitable angle of inclination or alignment of the modules
Cleaning
If the solar modules are sufficiently inclined (≥ 15°), cleaning them is generally not necessary (self-cleaning by rain). If they are installed at a shallow angle and/or there is a lot of dirt/dust, cleaning from time to time can be helpful to maintain a high energy yield.
Cleaning a photovoltaic system carries the risk of electric shock and damage to modules and other components. Therefore, we recommend cleaning only to trained personnel who are familiar with the risks of applying water to electrical components and have personal protective equipment. There is an increased risk of electric shock if modules are damaged. Inspect the modules before cleaning.
To reduce the risk of electric shock, the system should be shut down and cleaning should be performed in low sunlight.
Requirement for cleaning process:
- Do not dry clean the modules.
- Rainwater or tap water with a total hardness of less than 75 mg/L can be used for cleaning.
- If running water is not sufficient to remove heavy soiling, use a soft, non-conductive sponge or similar tool. If necessary, a non-abrasive, non-caustic, mild glass cleaner may be used to aid in the cleaning process. Residues of the cleaner must be rinsed off with sufficient running water.
- Do not use a high-pressure cleaner or brush the back of the modules.
- It is forbidden to stand or walk on the modules.
- The difference between the module temperature and the water temperature must not exceed 20 K.
Documents / Resources
References
Download manual
Here you can download full pdf version of manual, it may contain additional safety instructions, warranty information, FCC rules, etc.
Advertisement


Need help?
Do you have a question about the AC Series and is the answer not in the manual?
Questions and answers