Advertisement
TIPS & TRICKS
WATCH OUT FOR USEFUL TIPS & TRICKS REGARDING OUR PRODUCTS UNDER WWW.DUOTONESPORTS.COM.

RIGGING THE PRODUCT
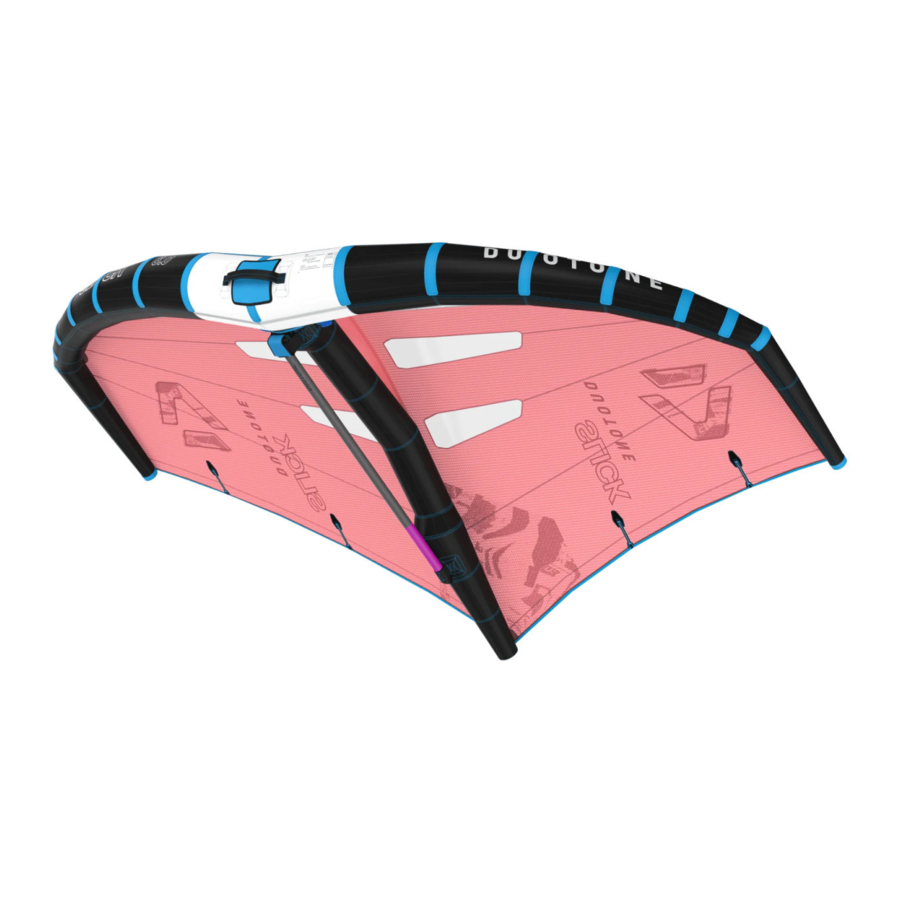
OVERVIEW OF THE PRODUCT

- Leading Edge
- Sail Battens
- Airport Valve
- Canopy
- Trailing Edge
- Front Boom Conntection
- Back Boom Conntection (2x)
- Boom
- Leading Edge Handle
- Leash Attachment Loop
- Tip
- Windows
INFLATING THE PRODUCT
- Lay the foil wing down on sand, grass or a surface free of hard or sharp objects as they could damage it.
- Turn the Foil Wing with the leading edge into the wind. The bottom side of the foil wing is facing upwards
- Connect the hook on your pump to the safety leash loop on your Foil Wing.
- Slide the end of the foil boom into the rear loop on the strut of the foil wing. For wings sized 2.5 / 3.0 / 3.5 there are two loops on the strut. If you are using the boom in the original length, you must put the end of the boom through the first loop and secure it in the rear loop. The front loop is for shorter booms. These are not offered by DUOTONE. Make sure the end of the boom has been pushed in up to the rear strap.
- Now slide the front end of the boom into the strap device provided. Make sure the rounded side of the front tube is mounted, and the side with the central notch is facing up, and the raised sections on the left and right are sticking out behind the strap.
- Secure the front end of the boom first by taking both hook and loop fastenings from back to front and then passing the upper fastening strips from the upper neoprene cap with integrated velcros from front to back over the top.

- Close the outlet valve on the strut and tip and pump the foil wing according to the label next to the valve (see Section 4 on using the Air Port valve). When doing this, check regularly to ensure the boom is in the right position. Do not exceed the maximum pressure specified for your foil wing as this can result in damage to the wing. Reduce the pressure by 0.5 - 1 PSI for more comfort.
![]()
- Close the valve
![]()
- Connect the leash with the Foil Wing using the loop provided at the front tube.


SECURING THE PRODUCT ON THE BEACH
When the foil wing is not in use it has to be secured so it won't fly away.
- Lay the foil wing down in areas without any sharp objects.
- Turn the foil wing around so that the leading edge lies on the ground and points into the wind.
- Attach the leash to a fixed object, like a pole, tree or alternatively weigh the foil wing down with sand or any other soft and heavy object.
HOW TO USE THE AIR PORT VALVE II

- Unscrew and remove the valve cap.
- Insert the end of the pump hose fully into the blue ring of the valve.
- Turn the end of the pump hose, including the blue ring clockwise by approximately 90˚. Excessive overturning of the valve may cause internal damage to the valve system. The arrow markers on the disc and the adapter of the pump indicate how far you should turn.
- Pump up the foil wing
NOTE: Due to the manufacturing tolerances of the pump hose (in particular third-party pumps), some air might escape from the valve while pumping. This however does not effect the inflation of the foil wing. - After inflation, turn the end of the hose (and the blue ring) approximately 90° counterclockwise.
This will activate the non-return function of the valve. - Remove the end of the hose from the blue ring.
- To achieve an airtight seal, screw the valve cap onto the thread. Take note to place the valve cap correctly onto the thread for accurate fastening and sealing.
Deflation:
- Remove the air from the Foil Wing via the Dump valve or the Air Port valve II.
![]()
- Turn the blue ring as far as possible in a clockwise direction. The foil will now be deflated.
![]()
- Close the valve with the cap to avoid dirt from entering the valve.
![]()


PACKING UP THE PRODUCT
- Remove the air from the Foil Wing via Air Port Valve II.
- Remove the foil boom from the Foil Wing.
- Spread the wing on the ground, handles facing down.

- Fold the trailing edge towards the front.

- Fold the back of the wing a second time towards the front.

- Fold the tips towards the middle.

- Roll the wing up from both sides into the middle.

- Store the Foil Wing in the bag.


REMEMBER: Always remove the foil boom when packing away the Foil Wing. Do not roll the Foil Wing around the foil boom or pack both of them into the bag. This can result in damage to the bladder.
ATTENTION: DO NOT FOLD THE WINDOW. FOLDING WILL LEAD TO CRACKS/TEARS OF THE MATERAL.
NO WARRANTY IF DAMAGE IS CAUSED BY WRINKLES AND TEARS.
PRODUCT CARE
- Avoid bringing the foil wing into contact with sharp-edged rocks, thorns, wood and other objects that may damage, puncture or tear the cloth.
- Do not expose the foil wing to excessive sun as it ages the material unnecessarily.
- Deflate the bladders if the foil wing is to be left unattended for any length of time.
- Avoid leaving your foil wing on the beach for extended lengths of time as small wind movements may quickly cause wear and tear to the cloth.
- Try to pack up the foil wing without cuttlings into the bag to avoid tearing the canopy.
- To carry a foil wing, turn it so that the leading edge is upwind and the underside faces upwards. Grab the centre of the leading edge tube. If the wind is blowing, it will hold the foil wing clear of the ground. Be sure not to drag the tips of the foil wing across the ground.
- A coating that results from using the foil wing in salt water will not damage the foil wing. However, rinsing in fresh water and drying doesn't hurt.
- When cleaning the foil wing be sure that no water, dirt, or sand gets inside the bladders.
- Be sure that the foil wing has dried completely before packing it up. Otherwise changes of color or mildew could occur. Such bleeding is not covered under the DUOTONE warranty.
- Do not dry the foil wing in direct sun!
- Keep sand and water out of the air pump.
HANDLING OF THE LAZY PUMP CLIP
REMOVAL OF LAZY PUMP CLIP
- Use a small screwdriver to remove the Lazy Pump Clip. Slide the tip of the screwdriver carefully under one of the snap arms of the Lazy Pump Clip.

- Rotate the tip of the screwdriver 90 degrees. The snap arm will spring open.

- Repeat steps 1 and 2 on the opposite side of the clip.


ATTACHING THE LAZY PUMP CLIP
- Place one half of the Lazy Pump Clip on the valve so that the lower edge of the Lazy Pump Clip fits into the groove of the valve.

- Place the second half of the Lazy Pump Clip on the valve so that the snap arms face the corresponding groove.

- Press the two halves carefully together with the help of a pair of pliers. Both snap arms must be fully engaged so that the Lazy Pump clip is securely closed.


BLADDER REPAIR
REMOVING THE LEADING EDGE BLADDER
- Lay the foil wing down flat on the ground with the struts facing upwards and deflate all the struts.
- Remove all rubber hose from the leading edge valves.

- Open the end of the leading edge at the wing tips and pull out the bladder a few centimetres.
- Attach a kite line to it using a larks head.
![]()
- Open the zipper at the centre of the leading edge.

- Push the bladder valve in the leading edge cavity.
- Unscrew the secure ring from the Air Port Valve II using the provided tool.

- Push the Air Port Valve II in the leading edge cavity.
![]()
- Remove each side of the bladder through the zipper from the leading edge, leaving the kite line inside the leading edge for re-insertion.


REMOVING THE STRUT BLADDERS
- Remove the rubber hose form the strut valve.

- Push the bladder valve in the strut cavity.

- Turn it sideways and have a close look at the front part of the strut.

- Disconnect the small white rope from the loop webbing.
- Pull out the white rope carefully.

- Take one of the flying lines and halve it. Connect the white rope to this line and secure it with two knots.

- Turn the strut over to the other side and push the valve into the strut.
- Ensure that the valve can move inside the strut freely.

- Now have a look at the strut end.
- Remove the strut flap and pull carefully on the bladder.

- Ensure that the flying line you attached at the front of the strut can slide through the strut hole easily.
- Pull out the entire bladder through the strut end.

- Remove the flying line from the bladder, ensuring that you keep the flying line inside the strut inorder to be able to replace the bladder again.
- To reinstall please follow the above steps backwards.


BLADDER REPAIR
For repairing small holes we recommend using the repair kit from DUOTONE.
- Inflate the bladder and wipe it with a sponge soaked in soapy water or submerge portions of the bladder in a tub of water. Air bubbles indicate holes.
- Mark the hole and deflate the bladder.
- Dry the bladder around the hole.
![]()
- For small holes use the self-adhesive repair patches.
- For bigger holes: cut a round patch out of the enclosed tube material.
- Spread the patch and the damaged area with a thin layer of contact glue and let both sides begin to dry.
- Now press both sides together.

RE-INSERTING LEADING EDGE BLADDER
- Before you begin to reinsert the bladder make sure the air valves are aiming in the direction of the valve opening.
![]()
- Fold the bladder according the picture and lay the folded bladder in front of the zipper of the leading edge.

- Pull carefully on the line coming out of the middle of the leading edge and feed the bladder back into the cavity.
- Be sure that it is inserted correctly without twisting.
- When the bladder is completely inserted, make sure that the air valves are positioned correctly in the valve opening
- Screw the secure ring back onto the valve.
![]()
- Re-attach the rubber hoses to the leading edge valves.

- Close all lazy-pump-cleats.
- Fill the leading edge with air carefully.
- Check that the bladder has been correctly inserted and look for wrinkles in the material. If you detect any irregularities in the air tube or if the valve is not positioned correctly, deflate and start over again.
- Roll up the excess bladder and close the flaps at the wing tips.


WINDSPEED AND PRODUCT SIZE
This foil wing is superbly easy to water re-launch and offers easy, predictable performance. Only a few knots of wind speed is required to fly this foil wing. Foil wing foiling however, generally requires more wind, depending not only on rider ability but also the size of foil wing, rider, board and foil.
The following table demonstrates the approximate average wind speeds in which foil wing of different sizes can be used by riders of various skill levels and weights. Riders who are significantly heavier or lighter should use, for a given wind speed range, foil wing that are one size bigger or smaller respectively. These represent a rough guide only.
| SLICK 23 | SIZE | WIND RANGE [KN] |
| 3.0 | 19 - 37 | |
| 3.5 | 16 - 33 | |
| 4.0 | 14 - 30 | |
| 4.5 | 12 - 28 | |
| 5.0 | 10 - 25 | |
| 5.5 | 9 - 22 | |
| 6.0 | 8 - 20 | |
| 6.5 | 7 - 18 | |
| SLICK DLAB 23 | SIZE | WIND RANGE [KN] |
| 4.0 | 12 - 30 | |
| 4.5 | 10 - 28 | |
| 5.0 | 8 - 25 | |
| 5.5 | 7 - 22 | |
| 6.0 | 6 - 20 | |
| 6.5 | 5 - 18 |
SAFETY AND PRECAUTIONS
DUOTONE STRONGLY RECOMMENDS:
If you are not yet able to wing foiling or if you feel insecure, you must attend a licensed school to learn the basics of this fantastic sport. Get familiar with the safety precautions, which are indispensable for safe wing foiling.
Foil wing foiling creates a heavy strain on your body. You should only go foil wing foiling if you are in good physical condition and suffer from no medical conditions that may prevent you from wing foiling. Always act carefully to not endanger yourself or anyone else. Do not endanger the safety of uninvolved third parties! Be aware of the risks you take and limit them to a minimum level!
Before going on the water make sure you are familiar with your DUOTONE equipment. For your own safety, read the following instructions as well as product descriptions very carefully.
PRODUCT SAFETY
- Only use on unobstructed stretches of water.
- Only fly the Foil Wing if you are a good swimmer and you are wearing a life jacket.
- Only use with the corresponding boom and leash.
- Use a leash equipped with a quick-release system so that you can completely detach yourself from the Foil Wing in an emergency.
- Avoid power lines, telephone lines, airports, roads, buildings and trees.
- Use a leash on your board and wear a helmet and protective clothing when learning new or risky manoeuvres! Be aware of the general risks associated with water sports, such as stones and rocks, waves, sunburn, hypothermia, jellyfish, etc.
DANGERS FROM THE PRODUCT
WHEN WING FOILING YOU MIGHT FACE THE EXTREME FORCES OF THE ELEMENTS.
In rare cases the Foil Wing or its boom can cause dangerous situations:
- You can hurt yourself through uncontrolled water take-offs caused by gusty conditions, and the danger of collision with obstacles.
- Risk of injury due to an inability to control the Foil Wing in gusty conditions.
- Use a leash that allows you to keep the Foil Wing under control.
- When not in use, inflated wing must be secured with sand or heavy objects. A wing filled with air can fly away at any time, injuring people and in extreme cases even kill them.
DANGERS FROM THE BOARD OR FOILBOARD
The use of a hydrofoil board is a high-risk activity and can be extremely dangerous if implemented incorrectly. This can result in serious injury or even death for the user or other individuals in the vicinity. All users of the DUOTONE Foil Wing must be aware of the associated risks. These include loss of control, collision with the board and even drowning. Some of the foil components are extremely sharp and thus pose a potential risk. To protect the rider and others against injury, the foil must be handled with special care from the point at which it is constructed until it is used. We recommend using a certified helmet at all times and an appropriate collision-proof or protective vest as well as a wetsuit and neoprene shoes. Do not exceed your capabilities and maintain control over the Foil Board and the Foil Wing at all times. Do not push beyond your limits when using the Foil Wing, and ride at a speed that is commensurate with your ability level. Be aware of your surroundings, and familiarise yourself with them. Do not endanger others by coming too close to swimmers, boats, jetties and other objects that could be damaged by you or the foil. Do not use the foil in shallow waters. This could also result in injury to you and damage to your foil. You should also be aware that individual components on this product are exposed to natural forces and may be subject to wear.
DANGERS TO UNINVOLVED THIRD PARTIES
- It is within your responsibility to check whether uninvolved people or other athletes may be endangered or injured by your actions or your gear.
- Do not foil wing foiling at places where uninvolved third parties might get injured.
- Avoid flying the foil wing in the vicinity of other water users such as swimmers, kayakers, windsurfers, water-skiers and boaters.
WEATHER RELATED DANGERS
- Avoid offshore wind.
- Be careful with onshore wind.
- Get information on tidal and sea current conditions at your spot!
- Get information from both the weather report and the locals on prevailing weather conditions.
- Never use the foil wing with wind forces so strong that you are unable to maintain precise control.
- Do not use the foil wing when wind conditions are likely to change dramatically.
- Never use this foil wing when thunderstorms are nearby or when such storms have a good chance of developing (check the weather report!).
- Leave the water immediately when a storm is approaching. You are in a life threatening situation since you may be struck by lightning!
| BFT | M/S | KM/H | MPH | KNOTS | DESIGNATION |
| 0 | 0 – 0.2 | 0 – 0.8 | 0 – 0.6 | 0 – 0.5 | Calm |
| 1 | 0.3 – 1.5 | 0.9 – 5.5 | 0,7 – 3.5 | 0.6 – 3.0 | Light Air |
| 2 | 1.6 – 3.3 | 5.6 – 12.1 | 3.6 – 7.5 | 3.1 – 6.5 | Light Breeze |
| 3 | 3.4 – 5.4 | 12.2 – 19.6 | 7.6 – 12.2 | 6.6 – 10.5 | Gentle Breeze |
| 4 | 5.5 – 7.9 | 19.7 – 28.5 | 12.3 - 17.8 | 10.6 – 15.5 | Moderate Breeze |
| 5 | 8.0 – 10.7 | 28.6 – 38.8 | 17.9 – 24.0 | 15.6 – 20.9 | Fresh Breeze |
| 6 | 10.8 – 13.8 | 38.9 – 49.8 | 24.1 – 31.0 | 21.0 – 26.9 | Strong Breeze |
| 7 | 13.9 – 17.1 | 49,9 – 61.7 | 31.1 – 38.3 | 27.0 – 33.3 | Near Gale |
| 8 | 17.2 – 20.7 | 61.8 – 74.6 | 38.4 – 46.4 | 33.4 – 40.3 | Gale |
| 9 | 20.8 – 24.4 | 74.7 – 88.0 | 46.5 – 54.7 | 40.4 – 47.5 | Strong Gale |
| 10 | 24.5 – 28.4 | 88.1 – 102.0 | 54.8 – 63.6 | 47.6 – 55.3 | Storm |
| 11 | 28.5 – 32.6 | 102.1 – 117.0 | 63.7 – 73.0 | 55.4 – 63.4 | Violent Storm |
| 12 | 32.7+ | 117.1+ | 73.1+ | 63.5+ | Hurricane |
THE LISTED RISKS CANNOT BE COMPLETE.
The basic rules for wing foiling comply with those of common sense and are valid for all outdoor sports.
For further information please visit:
www.duotonesports.com
Documents / Resources
References
Download manual
Here you can download full pdf version of manual, it may contain additional safety instructions, warranty information, FCC rules, etc.
Advertisement


Need help?
Do you have a question about the Slick and is the answer not in the manual?
Questions and answers