Advertisement
WHAT'S INCLUDED

 Sample Aromatic Botanicals not included in Australian package
1 x XQ2 Multi Purpose Heater
1 x XQ2 Power Adapter and Cord
1 x XQ2 Remote Control
2 x XQ2 Glass Connoisseur Bowls
2 x XQ2 Tuff BowlGrips
1x XQ2 Glass Aromatherapy Dish
1x XQ2 3' Whip (Silicone)
1 x XQ2 Glass Mini Whip W.I Dome Screen
1 x XQ2 Frosted Glass Balloon Mouthpiece
1 x Balloon Connector
2 x XQ2 Balloon Bags
1 x XQ2 Balloon Cap
1 x XQ2 Air Filter Cartridge w.' Filter
1x XQ2 Stainless Steel Stirring Tool
1 x XQ2 Flat Screen
1 x XQ2 Dome Screen
1 x XQ2 Sample Aromatic Botanicals
1 x XQ2 Owner's Manual
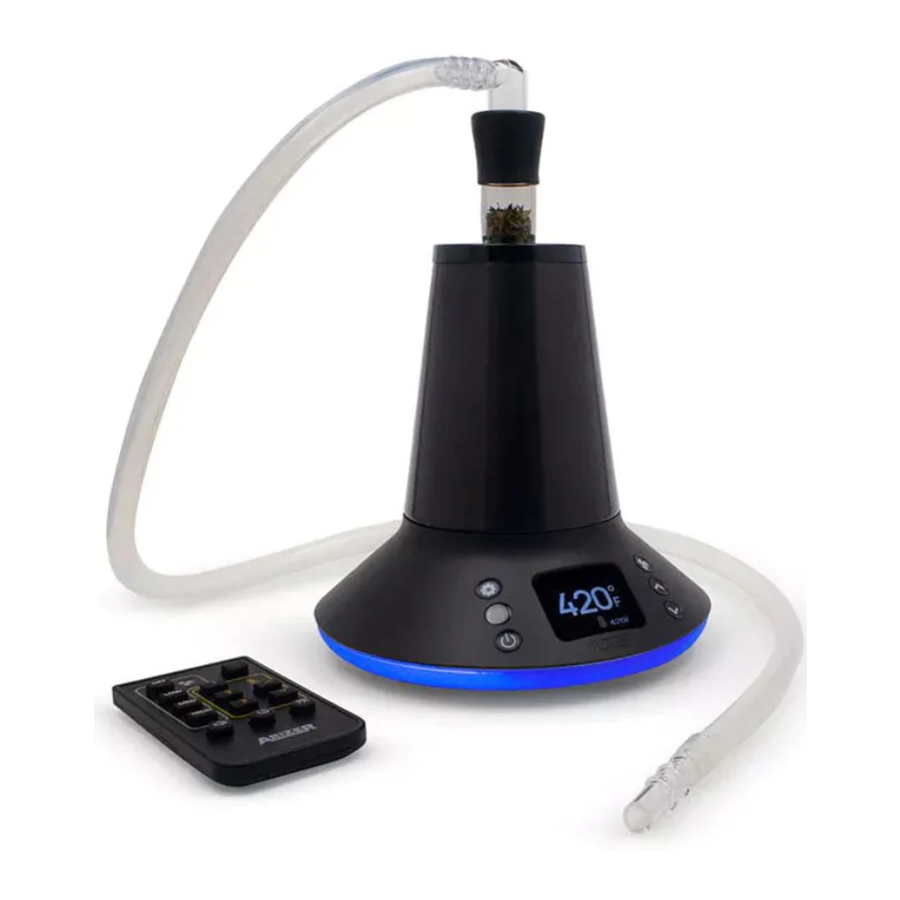
USER FRIENDLY OS
Control Panel

- Power Button
- Settings Button
- Fan Button
- Navigation Buttons
- Current Temperature
- Set Temperature
Power 
Press the Power Button to instantly turn the unit on and off. Hold for 2 seconds to start the unit if the Delay Start setting is activated. The unit will beep once when turned On or Off when audio is activated,
Settings 
Press the Settings Button to access the menu and press the Up or Down buttons to navigate, When the desired Custom Session Setting is displayed. press the Settings button to select it. then press the Up or Down buttons to scroll through the options, When the desired option is displayed, press the Settings button to return to the menu, or wait 5 seconds to return to the temperature display.
LED Lights
LED lights in the unit base and heater can be set to Off, Dynamic Mode, Spectrum Mode, or one of 8 individual color options. Spectrum Mode changes the color every 2 seconds in a continuous loop. Dynamic mode allows you to tell the state of the unit at a glance:
- Heating: Pulses from Yellow to Orange during heat up
- Reach Set Temperature: Blinks Green twice when set temperature is reached
- Stable Temperature: Pulses orange continuously while set temperature is maintained
- Fan Operation: Pulses purple when fan is active
- Cooling: Pulses cyan while the temperature is cooling down
- Cooling with Fan: Pulses blue while cooling with the fan activated.
Screen Brightness
The color display has two brightness options: High and Low.
Audio / Beep
This setting has three volume options: Low, High and Off.
Temp. Alert
When this setting is activated, two beeps will be heard when the set temperature is reached. This option can also be turned Off.
Auto-Off Timer
A programmable shut-off timer can be set at 30 minute intervals. up to 2 hours, and can be deactivated for longer use.
Temp. Settings
The default display setting is Celsius, which can easily be changed to Fahrenheit.
Delay Start
When this Setting is activated, the Power Button must be held for 2 seconds to turn on the unit. If the power button is not held, a double beep error warning will sound.
Fan 
Press the Fan button to switch between Low, Medium, High and Off. The Remote Control also has four dedicated buttons to change fan speeds directly.
Navigation 
The Up and Down buttons are used to navigate the menu settings and options, and to change the temperature settings directly. Press the Up or Down button once to change the temperature in 1-degree increments. Press and hold the Up or Down button to change the temperature in 10-degree increments.
REMOTE CONTROL
Using the Remote The Remote Control gives direct access to frequently used Custom Session Settings and will quickly become your go to accessory. Before first use, ensure the plastic insert covering the battery has been removed.

Power 
Press to instantly turn the unit on and off. Hold for 2 seconds to start the unit if the Delay Start setting is activated.
Fan 
There are 4 dedicated fan buttons for Off. Low, Med, and High. Press the buttons to activate or change the fan speed.
Temperature Adjustment 
The Up and Down arrows are dedicated to adjusting temperature settings. There are three programmable temperature preset buttons. The preset button default temperatures are: (1)170C/338F, (2) 18SC/365F, and (3) 200C/392F. To reprogram the presets, set the temperature you would like to save, then press and hold the chosen button (1, 2 or 3) until you hear a beep.
Audio 
Press the Audio button to switch between the setting options.
Auto-Off Timer 
Press the Auto-Off Timer button to switch between the setting options.
LED Lights 
Press the LED button to switch between the Light setting options.
OPERATION
Aromatherapy
Botanicals such as Lavender, Chamomile, Orange Peels, and many more, can be vaporized for aromatherapy. By heating your favorite herbs and flowers to precise temperatures, the pleasing aromas, terpenes. and botanical compounds are released to promote/enhance energetic or relaxing environments,

- Set the unit to a low temperature 100C— 150C (212F — 302F).
- Place some dried botanicals into the Aromatherapy Dish.
- Attach the Aromatherapy Dish to the unit
- Turn on the fan to diffuse the aromas. Use fan speed I so the materials do not blow out of the bowl.
- Discard the contents of the bowl and refill as desired.
![caution]() Do not pour liquids of any kind into the Aromatherapy Dish. Liquid damage is not repairable and is not covered under warranty.
Do not pour liquids of any kind into the Aromatherapy Dish. Liquid damage is not repairable and is not covered under warranty.
 Do not pour liquids of any kind into the Aromatherapy Dish. Liquid damage is not repairable and is not covered under warranty.
Glass Connoisseur Bowl
The Glass Connoisseur Bowl has an optimized full-coverage air flow that evenly distributes heat for the most efficient use of flowers. herbs and botanicals. with two chamber sizes:
Cloud Chamber
Large capacity chamber with the glass screen closer to the heater. Produces a stronger/thicker vapor. Ideal for multi bag sessions.

Flavor Chamber
Small capacity chamber with the glass screen further from the heater. Produce a smoother/lighter vapor. Ideal for personal use and micro-dosing.
We recommend using the all-glass screen alone, but the fiat metal screen can be added for finely ground materials.

Tuff BowlGrips
Heat-safe silicone Tuff BowlGrips can be used on both ends of the Connoisseur Bowl for easy handling.
Whip System

- Set the Unit to a higher temperature to suit your preference for light or thick vapor 170c-220C(338F-428F).
- Coarsely grind the desired amount of material and load it into the top of the Connoisseur Bowl.
![caution]() Do not load or pack the bowl too tightly or airflow could be restricted.
Do not load or pack the bowl too tightly or airflow could be restricted. - Attach the Class Connoisseur Bowl to the unit, then attach the 3' Whip to the bowl. Wait for approximately 3-5 minutes to prime the materials for use.
- Inhale through the glass mouthpiece in a slow. steady draw.
- Alternately, turn on the Fan while inhaling for an assisted draw.
- Periodically stirring the bowl contents will help get the most out of your material. Use the provided Stirring Tool to stir the material in the chamber. Remove the bowl from the unit before stirring.
- Discard used bowl contents and refill as desired.
![information]() The Dome Screen in the 3' Whip can clog and needs to be cleaned or replaced periodically for optimal performance.
The Dome Screen in the 3' Whip can clog and needs to be cleaned or replaced periodically for optimal performance.
Balloon System

- Set the Unit to a higher temperature to suit your preference for light or thick vapor 170c-220C(338F-Q8F).
- Coarsely grind the desired amount Of material and load it into the top Of the Connoisseur Bowl.
![caution]() Do not load/pack the bowl too tightly or airflow could be restricted. Always load from the top of the Bowl and never load both bowl chambers at the same time.
Do not load/pack the bowl too tightly or airflow could be restricted. Always load from the top of the Bowl and never load both bowl chambers at the same time. - Attach the loaded Glass Connoisseur Bowl to the unit, then attach the mini-whip to the bowl. Wait for approximately 3-5 minutes to prime the materials for use.
- Attach the balloon mouthpiece to the mini-whip.
- Activate the Fan to your preferred speed and allow the balloon to fill with vapor.
- Detach the balloon from the mini-whip. then inhale through the Frosted Glass Balloon Mouthpiece. Seal the balloon between draws using the silicone Balloon Cap to prevent leakage.
- Periodically stirring the bowl contents will help get the most out of your material. Remove the bowl from the unit before stirring. and use the Stirring
Tool to stir the material in the chamber
- Discard used bowl contents and refill as desired.
![information]() If the balloon is filling slowly or not filling. the bag may need to be replaced.
If the balloon is filling slowly or not filling. the bag may need to be replaced.
![information]() The Dome Screen in the Mini Whip can clog and needs to be cleaned or replaced periodically for optimal performance.
The Dome Screen in the Mini Whip can clog and needs to be cleaned or replaced periodically for optimal performance.
Balloon Assembly
The Balloon consists of the Bag, Balloon Connector, Balloon Cap and Frosted Class Balloon Mouthpiece.
- Slip the silicone balloon cap over the glass mouthpiece so it rests between the glass bulbs.
![]()
- Insert the bottom (unfrosted end) of the glass mouthpiece through the top Of the hole Of the silicone balloon connector. Push until the bulbs Of the mouthpiece are on each side of the cap.
![]()
- Gather the open end of the balloon and insert it through the large opening in the threaded base until there is enough material to fold evenly back past the base threads.
![information]() The size of the bag can be adjusted by changing how much material is pulled through the opening. Trim excess material away with scissors.
The size of the bag can be adjusted by changing how much material is pulled through the opening. Trim excess material away with scissors.
![]()
- Push the two pieces of the balloon connector together until they lock. Slide the connector up the glass until it rests against the bulb closest to the frosted mouthpiece.
![]()


CLEANING AND MAINTENANCE
Unplug unit from outlet before cleaning. Let the unit and all parts cool down before handling and/or cleaning. When cleaning any glass DO NOT expose hot glass parts to cold water or extreme temperature change, as this will cause cracking and breaking of the glass. All parts/screens are removable for ease of cleaning. Regular Isopropyl Rubbing Alcohol, cotton swap, Pipe Cleaners, etc. can be used to clean/sterilize. Do not soak the tubing in alcohol as it may absorb the smell/taste. All glass and metal screens are safe to soak. When parts are clean, rinse thoroughly under hot water. Repeat as necessary. Make sure all the glass parts and accessories are fully dry before the next use.
If you experience difficulty removing the tubing from the glass parts, soak the tubing in hot water for a few minutes and the tubing will become softer and more pliable to work with. To clean the warming unit and remote do not use any abrasive or hard cleaners, a simple soft cloth dampened (not wet) with warm water will do the job. Contact cleaner for keyboards and electronics can also be used. If materials are spilled down inside the unit, turn the unit OFF and unplug. Turn the unit upside down and gently shake it back and forth until the debris falls out
Replacing the Air Intake Filter
To maintain optimal performance, periodically change the filter in the reusable Air Filter Cartridge.

- Unplug the XQ2 and ensure that all parts have fully cooled.
- Turn it upside down and pull the tab on the bottom Of the unit to open the air filter compartment.
- Remove the plastic Air Filter Cartridge by grasping the two finger holes.
- Insert your finger in the large opening and pull off the perforated cover (exposing the white filter) and remove the old filters.
- Insert the new black filter into the Cartridge, then place the second filter with white side facing out.
- Replace the top of the Cartridge, ensuring the two tabs snap into place inside.
- Place the Cartridge back into the bottom of the XQ2 with the two finger holes facing outward.
- Close the air filter compartment cover by pressing the cover down until both tabs lock with an audible click.
Troubleshooting
If you experience an issue with your Arizer send an email to service@arizer.com and an expert Arizer customer service representative will reply as soon as possible to help troubleshoot and resolve any issues. To expedite your service request please include a description of the problem. your full name, your shipping address, the serial number on the bottom of your device, and a copy of your sales receipt.
Available Accessories
All Spare parts and accessories are available on our website: www.arizer.com
CAUTIONS, DISCLAIMERS AND WARNINGS (READ BEFORE USE)
Examine box contents to ensure all included parts are in good condition and not damaged from shipping. If new items are received damaged, do not use, and email service@arizer.com for assistance. Packaging materials, bags and small parts may pose a choking hazard. Keep out of reach from children, minors and pets. Prior to first use, let the unit heat for 5-10 minutes at 2200C to burn off any residue from packaging and manufacturing. Not for use with e-liquids, tobacco, or tobacco products. Misuse can result in damage and voids all warranties. Unauthorized service performed voids all warranties. For assistance email service@arizer.com
 Hot device and hot parts are a burn hazard - handle with care and caution
- Never leave the unit turned on and unattended.
- Keep the unit upright at all times.
- Allow the unit and hot parts to cool before handling, storing. or placing on a surface where heat damage can occur.
 Borosilicate glass is breakable - handle with care and caution
- Avoid hitting or tapping glass parts on hard surfaces to prevent cracking.
- Do not expose hot glass to cold water or extreme temperature changes.
- Examine parts periodically for cracks. chipping and weakness from handling and drops.
- Do Not use cracked or broken glass.
- Safely dispose of damaged glass according to local regulations.
 Product contains electrical components - handle with care and caution.
- Do not immerse or operate the product in or around any liquids.
- Do not insert or pour anything into the unit.
- Do not operate if damaged or exposed to any liquids.
- Do not store or operate the unit or contents near flammable material or in extreme temperatures
- Do not open the unit: doing so may result in electric shock.
- Unplug the unit by gripping the plug body and pulling it from the outlet. Do not yank or twist the cord to unplug it.
- Do not let the cord touch hot surfaces,
- Position the unit so the cord cannot be pulled or tripped over.
- If an extension cord is required, use a grounded, three-prong power cord.
The information contained in this manual is provided for instructional and cautionary purposes only. as an aid in understanding the various theories and practices, preparation and uses, and does not represent an endorsement or guarantee the efficacy or use of its preparation. This information is not intended in any way to replace or supersede professional consultations. In no way is the information contained herein intended to be a medical or prescriptive guide or to be used for diagnosing or treating a health problem, condition or disease. It is the users responsibility to consult a Physician or Medical Professional. This product is not licensed as a medical device; use only as intended.
Documents / Resources
References
Download manual
Here you can download full pdf version of manual, it may contain additional safety instructions, warranty information, FCC rules, etc.
Advertisement


Need help?
Do you have a question about the XQ2 and is the answer not in the manual?
Questions and answers