Synology Disk Station Series, DS-106j Manual
- Installation manual (80 pages)
Advertisement
PACKAGE CONTENTS
Before you begin, please check the package contents to verify that you have received the items below.

INSTALL HARD DISK
DS-106j requires one 3.5" IDE hard disk for installation. Refer to the following steps for details:

If you use a hard disk with data on it to install, system will format the hard disk and erase all data in some cases. Please back up the data if you need it in the future.
- Assemble the prepared IDE HDD to the Bracket and use the 5mm screws on both side of the Bracket to fix the HDD.

- Place DS-106j sideway with "USB COPY" button upward and slide open the side cover at the direction indicated.

- When opening the side cover, please be careful to keep the USB cable connected to the mainboard.

- Place USB Cable under IDE Cable. This will help eliminate the Electromagnetic Interference.

- Place the assembled IDE HDD with Bracket into DS-106j and connect it with IDE and Power cable.

- Use the 10mm screws to assemble the Bracket to the mainboard.

- Stick one aluminum foil sticker on the hard disk and the LAN port. Then use the other one to stick on the hard disk and the USB port. This helps eliminate the Electromagnetic Interference.

- Arrange the cables while closing the side cover and slide back as indicated.

- Use Black screws at the back of DS-106j to assemble the side cover to complete the installation process.


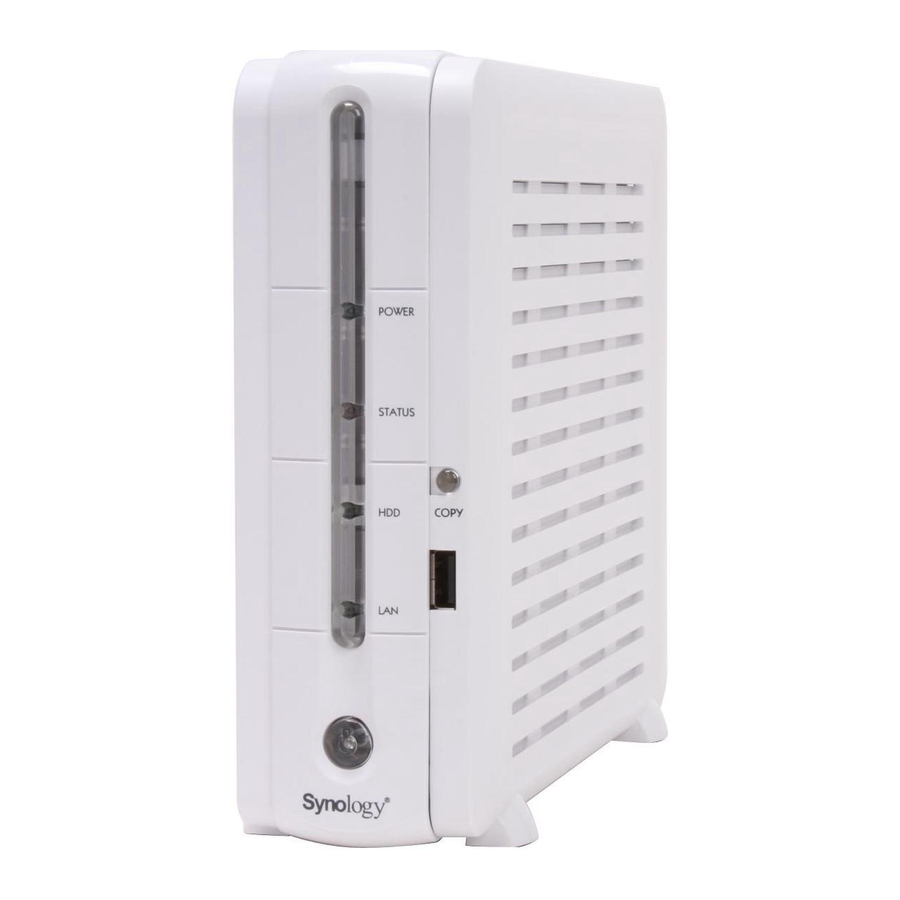
TURN ON SERVER
- Connect the AC power adapter to the server and plug in the AC power cord to the power outlet.

- Use the LAN cable to connect the server to your switch/router/hub.

- Press the power button on the front panel to power up the server. Wait for the POWER LED to be constant blue.


Windows User
- Insert the installation CD to your computer.
![]()
- Choose Set up the Synology Server on the autorun menu.
![]()
- Click Browse to select the ".pat" installation file in the installation CD.
- Follow the on-screen instructions to complete the setup process.


Note: If you choose One-Click Setup, the admin password will be blank.
Mac User
- Insert the installation CD to your computer.
![]()
- Double click on the CD-Rom Drive thumbnail.
![]()
- Double click MacOSX.
![]()
- Double click Synology Assistant-SYNOLOGY.dmg.
![]()
- Double click on the automatically generated thumbnail Synology Assistant-SYNOLOGY.dmg on the desktop.
![]()
- Double click Synology Assistant to run the Setup Wizard.
![]()
- Click Browse to select the ".pat" installation file in the installation CD.
- Follow the on-screen instructions to complete the setup process.


Note: If you choose One-Click Setup, the admin password will be blank.
CONGRATULATIONS!
Server has been set up. Refer to the User's Guide in the installation CD for advanced settings and management. For more information or online resources, please visit http://www.synology.com.
SAFETY INSTRUCTIONS
Please read these safety instructions carefully before use, and keep this manual in a safe place for your future reference.
Keep away from direct sunlight and away from chemicals. Make sure the environment does not experience abrupt changes in temperature or humidity.

Do keep Synology product upright. Do not lay it down horizontally.

Do not place the Synology product close to any liquid.

Before cleaning, unplug the power cord first.
Wipe Synology product with damp paper towels. Do not use chemical or aerosol cleaners to clean it.

Do not place the Synology product on a cart, table, or desk, which is not stable to avoid the product from falling over.


The power cord must plug in to the right supply voltage. Make sure that the supplied AC voltage is correct and stable.

There are slots on the button of Synology product for ventilation. To make sure Synology product is operating under normal condition, please do not block or cover those slots to avoid the product from overheating.

Documents / Resources
References
Download manual
Here you can download full pdf version of manual, it may contain additional safety instructions, warranty information, FCC rules, etc.
Advertisement


Need help?
Do you have a question about the Disk Station Series and is the answer not in the manual?
Questions and answers