Roland JAZZ CHORUS JC-120 Manual
- Owner's manual (8 pages) ,
- Wiring diagram (7 pages) ,
- Instructions manual (6 pages)
Advertisement
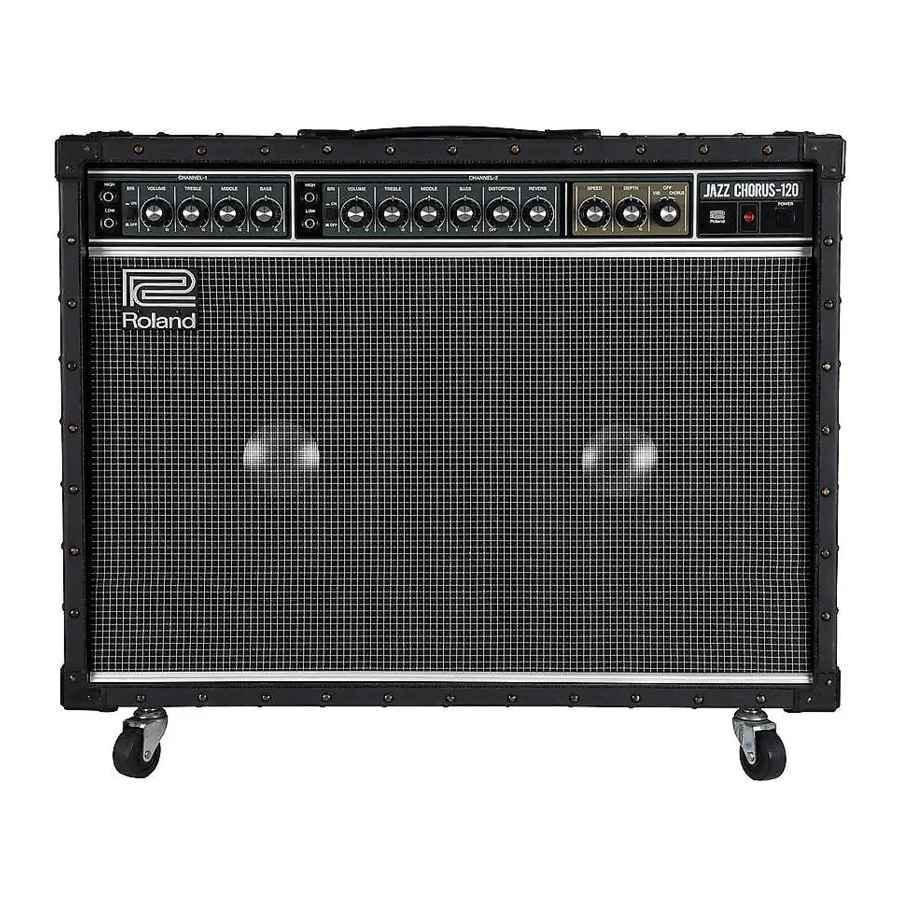
FEATURES
- 120 watts (rms) of output power; 2 channels of 60 watts each. Channel 2 is equipped with Roland's renowned chorus effect.
- Two input jacks (high-gain and low-gain) accommodate virtually any guitar.
- Both channels contain a Bright switch for greater tonal control.
- A three-spring reverb unit produces a warm, distinctive sound.
- The reinforced cabinet is designed to withstand the rigors of the road while providing characteristic styling.
- Chorus/Vibrato, Reverb and Distortion can all be controlled by footswitches leaving your hands free for playing.
- Channel 2 contains an effects loop circuit that allows you to select either a series or parallel connection. Further, it provides selection of a +4dBm or -20dBm input level to match the level of your effects device.
PANEL DESCRIPTION
FRONT PANEL

REAR PANEL

- Input Jacks
Two input jacks are provided. For a guitar with a standard output, use the "HIGH" input. For very high output instruments, use the "LOW" input. - BRI (Bright) Switch
When this switch is set to ON, a bright, clear sound can be obtained. - VOLUME Knob
Clockwise rotation will increase the amplifier's overall volume. - TREBLE Control Knob
Clockwise rotation will boost the higher frequencies. - MIDDLE Control Knob
Clockwise rotation will boost the allimportant middle frequencies. - BASS Control Knob
Clockwise rotation will boost the lower frequencies. - DISTORTION Knob
Clockwise rotation will intensify the distortion effect. "OFF" turns the effect off. - REVERB Knob
Clockwise rotation will intensify the reverb effect.
- Vibrato SPEED Knob
This knob adjusts the rate (frequency of the sound vibrations) of the vibrato effect. Clockwise rotation increases the vibrato speed. - Vibrato DEPTH Knob
This knob adjusts the depth of the vibrato effect. Clockwise rotation deepens the vibrato effect. - VIB/OFF/CHORUS Switch
This knob selects the Chorus or Vibrato effect. When it is set to the "OFF" position neither effect will be obtained.
* Neither the speed nor depth of the Chorus effect can be changed. - Pilot Lamp
This will light when the amplifier is switched on. - POWER Switch
This switch turns the amplifier on and off.
* Be sure to set the VOLUME Knob to "0" before switching the amplifier on or off. You may hear a "DC thump" when switching the amplifier on or off but this is normal.
- FOOTSWITCH Jacks
With the proper footswitch connected to the appropriate jack, you can obtain on/off control of Chorus/Vibrato, Reverb and/or Distortion. * Even when a footswitch is turned on, no effect will be obtained if knobs 7 and 17 are in the "OFF" positions.
- CH-2 EFFECT LOOP SEND Jack
This is the jack from which the dry (unprocessed) signal is sent to the effects device.
- CH-2 EFFECT LOOP LEVEL Switch
This switch selects the input/output level for the Channel 2 effects loop. Change the switch position to accommodate the effects device you are using. When the connected unit's input/output level is high, set the switch to "+4dBm," and when that level is low, set the switch to "-20dBm."
- CH-2 EFFECT LOOP RETURN Jacks
These are input jacks for the return signal from your effects device. Stereo connections (L/R) are possible. To use the unit in mono, use the L(MONO) jack.
* When using this unit in mono, the return sound will not be output through the speakers even if you input the return sound to the RETURN R jack. That is, when the L(MONO) jack is not used, only direct sounds will be output (regardless of the LOOP switch setting).
* Before you make connections to the RETURN jack(s), be sure to switch the units off. - CH-2 EFFECT LOOP Switch
This switch selects either the series or parallel connection for the Effects Loop circuit.
When PARALLEL is selected, external effects sounds and direct sounds (unprocessed sounds) will be mixed.
When SERIES is selected, external effects sounds will not be mixed with direct sounds. - LINE OUT Jacks
Use these jacks to connect the JC-1 20 to another guitar amplifier or mixer, or to a tape deck for recording. A stereo pair (L/R) is provided, but mono connections are also possible (use the L (MONO) jack).

SPECIFICATIONS
Rated Power output
120W (60W+60W) / 8Q+8Q
Speakers
30cm (1 2inches) + 30cm (12inches)
Power Supply
AC 117V, AC 230V or AC240V
Power Consumption
132W (117, 230, 240V)
Nominal Input Level
-30dBm / 680kQ OdBm=0.775V
Connectors
CH-1: Input Jacks (HIGH, LOW), CH-2 Input Jacks (HIGH, LOW), FOOTSWITCH Jacks (CHORUS/VIBRATO, REVERB, and DISTORTION), CH-2 EFFECT LOOP SEND Jack, CH-2 EFFECT LOOP RETURN Jacks (L/(MONO), R), LINE OUT Jacks (LAMONO), R)
Controls
CH-1: BRI (Bright) Switch, VOLUME Knob, TREBLE Control Knob, MIDDLE Control Knob, BASS Control Knob CH-2: BRI (Bright) Switch, VOLUME Knob, TREBLE Control Knob, MIDDLE Control Knob, BASS Control Knob, DISTOR- TION Knob, REVERB Knob, Vibrato SPEED Knob, Vibrato DEPTH Knob, VIB/OFF/CHORUS Switch
POWER Switch, CH-2 EFFECT LOOP Switch, CH-2 EFFECT LOOP LEVEL Switch
Dimensions
760(W) x 280(D) x 622(H) mm (includes casters) 29-15/16 (W) x 11-1/16( D). x 24-1/2 (H) inches
Weight
28kg / 61.7 Ibs
Accessories
Vinyl Cover, Owner's Manual
Options
Footswitch: FS-1, FS-5L (BOSS)
- In the interest of product development, the specifications and/or appearance of this unit are subject to change without prior notice.
IMPORTANT NOTES
Power Supply
- Before connecting this unit to other devices, turn off the power to all units; this will help prevent damage or malfunction.
- Do not use this unit on the same power circuit with any device that will generate line noise; an electric motor or variable lighting system for example.
Placement
- Using the unit near power amplifiers (or other equipment containing large power transformers) may induce hum.
- This device may interfere with radio and television reception. Do not use this device in the vicinity of such receivers.
Maintenance
- For everyday cleaning wipe the unit with a soft, dry cloth or one that has been slightly dampened with water. To remove stubborn dirt, use a mild, non-abrasive detergent. Afterwards, be sure to wipe the unit thoroughly with a soft, dry cloth.
- Never use benzene, thinners, alcohol or solvents of any kind, to avoid the possibility of discoloration and/or deformation.
Additional Precautions
- Protect the unit from strong impact.
- A small amount of heat will radiate from the unit during normal operation.
- Before using the unit in a foreign country, consult with qualified service personnel.
Information
When you need repair service, call your local Roland Service Station or the authorized Roland distributor in your country as shown below.

IMPORTANT SAFETY INSTRUCTIONS

RISK OF ELECTRIC SHOCK DO NOT OPEN
TO REDUCE THE RISK OF ELECTRIC SHOCK, DO NOT REMOVE COVER (OR BACK). NO USER-SERVICEABLE PARTS INSIDE. REFER SERVICING TO QUALIFIED SERVICE PERSONNEL.
 The lightning flash with arrowhead symbol, within an equilateral triangle, is intended to alert the user to the presence of uninsulated "dangerous voltage" within the product's enclosure that may be of sufficient magnitude to constitute a risk of electric shock to persons.
 The exclamation point within an equilateral triangle is intended to alert the user to the presence of important operating and maintenance (servicing) instructions in the literature accompanying the product.
INSTRUCTIONS PERTAINING TO A RISK OF FIRE, ELECTRIC SHOCK, OR INJURY TO PERSONS.
SAVE THESE INSTRUCTIONS

When using electric products, basic precautions should always be followed, including the following:
- Read all the instructions before using the product.
- Do not use this product near water — for example, near a bathtub, washbowl, kitchen sink, in a wet basement, or near a swimming pool, or the like.
- This product should be used only with a cart or stand that is recommended by the manufacturer.
- This product, either alone or in combination with an amplifier and headphones or speakers, may be capable of producing sound levels that could cause permanent hearing loss. Do not operate for a long period of time at a high volume level or at a level that is uncomfortable. If you experience any hearing loss or ringing in the ears, you should consult an audiologist.
- The product should be located so that its location or position does not interfere with its proper ventilation.
- The product should be located away from heat sources such as radiators, heat registers, or other products that produce heat.
- The product should be connected to a power supply only of the type described in the operating instructions or as marked on the product.
- The power-supply cord of the product should be unplugged from the outlet when left Mouse for a long period of time.
- Care should be taken so that objects do not fall and liquids are not spilled into the enclosure through openings.
- The product should be serviced by qualified service personnel when:
- The power-supply cord or the plug has been damaged; or
- Objects have fallen, or liquid has been spilled onto the product; or
- The product has been exposed to rain; or
- The product does not appear to operate normally or exhibits a marked change in performance; or
- The product has been dropped, or the enclosure damaged.
- Do not attempt to service the product beyond that described in the user-maintenance instructions. All other servicing should be referred to qualified service personnel.
GROUNDING INSTRUCTIONS
For the USA
This product must be grounded. If it should malfunction or breakdown, grounding provides a path of least resistance for electric current to reduce the risk of electric shock.
This product is equipped with a cord having an equipment-grounding conductor and a grounding plug. The plug must be plugged into an appropriate outlet that is properly installed and grounded in accordance with all local codes and ordinances.

Improper connection of the equipment-grounding conductor can result in a risk of electric shock. Check with a qualified electrician or serviceman if you are in doubt as to whether the product is properly grounded.
Do not modify the plug provided with the product— if it will not fit the outlet, have a proper outlet installed by a qualified electrician.
For Polarized Line Plug
For Canada
TO PREVENT ELECTRIC SHOCK, MATCH WIDE BLADE OF PLUG TO WIDE SLOT, FULLY INSERT
For the U.K.
THE APPARATUS MUST BE EARTHED IMPORTANT: THE WIRES IN THIS MAINS LEAD ARE COLOURED IN ACCORDANCE WITH THE FOLLOWING CODE.
GREEN-AND-YELLOW: EARTH, BLUE: NEUTRAL, BROWN: LIVE
As the colours of the wires in the mains lead of this apparatus may not correspond with the coloured markings identifying the terminals in your plug, proceed as follows:
The wire which is coloured GREEN-AND-YELLOW must be connected to the terminal in the plug which is marked by the letter E or by the safety earth symbol @ or coloured GREEN or GREEN-AND YELLOW.
The wire which is coloured BLUE must be connected to the terminal which is marked with the letter N or coloured BLACK. The wire which is coloured BROWN must be connected to the terminal which is marked with the letter L or coloured RED.
The product which is equipped with a THREE WIRE GROUNDING TYPE LINE PLUG must be grounded.
Documents / ResourcesDownload manual
Here you can download full pdf version of manual, it may contain additional safety instructions, warranty information, FCC rules, etc.
Advertisement


Need help?
Do you have a question about the JAZZ CHORUS JC-120 and is the answer not in the manual?
Questions and answers