Advertisement
- 1 Statement
- 2 List of Items
- 3 Meet Your Laserbox
- 4 Quick Operation Guide
- 5 Start cutting / engraving
- 6 More Operations
- 7 More Features
- 8 Cutting/Engraving Material Requirements
- 9 Annular Indicator Status Description
- 10 Safety First (Important)
- 11 Laser safety
- 12 Fire safety
- 13 Electrical equipment safety
- 14 Warnings and instruction signs
- 15 Documents / Resources
Statement
Welcome to use Makeblock products!
Before installing and using the product for the first time, please carefully read all the accompanying materials of the product to improve your experience with it. If you fail to use the product according to the instructions and requirements of the Manual, or mis-operate the product due to misunderstanding, etc., Makeblock Co., Ltd. (Shenzhen) will bear no responsibility for any loss resulting therefrom, except for losses due to improper installation or operation by Makeblock professional maintenance personnel.
This product should be operated by an adult who is already familiar with the contents of this manual or under the supervision of an adult who is already familiar with the contents of this manual. In the scene where children appear, please pay special attention when operating.
Makeblock Co., Ltd. (Shenzhen) has collated the Manual rigorously and carefully, but we cannot guarantee that the Manual is completely free of error or omission.
Makeblock Co., Ltd. (Shenzhen) is committed to continuously improving product functionality and service quality, and therefore reserves the right to change any product or software program described in the Manual and the contents of the Manual at any time without prior notice.
The Manual is intended to help you use the product correctly and does not include any description of the product hardware and software configuration. For product configuration, please refer to the relevant contract (if any) and packing list, or consult your distributor. Pictures in the Manual are for reference only and the actual product may vary.
Protected by copyright laws and regulations, the Manual shall not be reproduced or transcribed in any way, or be transmitted on any wired or wireless network in any manner, or be translated into any language without the prior written authorization of Makeblock Co., Ltd. (Shenzhen).

This area represents a special danger for the user or the person responsible for maintenance if the operating instructions are not observed.

In these areas, pay particular attention to the possible dangers of laser light.
List of Items

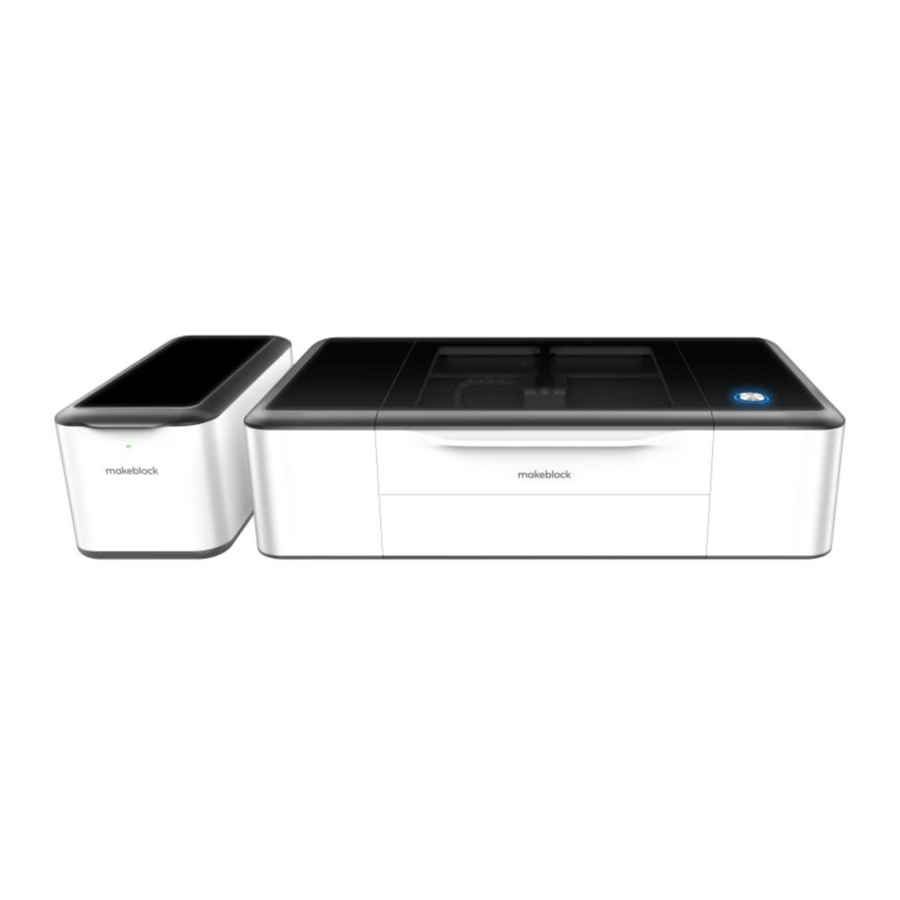
Meet Your Laserbox
Laserbox

- Button
- Annular Indicator
- Power Button
- Power Interface
- USB Interface
- Ethernet Cable Interface
- Smoke Outlet
- Aviation Interface

- Camera
- Laser Head
- Tray
- Honeycomb Panel
- Laser Tube
Smart Smoke Purifier

- HEPA Composite Filter
- Indicator
- Aviation Interface
- Smoke Inlet
- Smoke Outlet
Quick Operation Guide
Tips: You can also visit the website below to get the video tutorials.
https://www.makeblock.com/maker-tools/laserbox-video
Connect the smart smoke purifier

- Connect the purifier with the 2m-exhaust pipe and lay the pipe to the window.
- Connect the Laserbox and purifier with the 1.5m-exhaust pipe.
- Connect the Laserbox and purifier with the aviation connector.
- Connect the power supply.
Start the Laserbox
After pressing the power button, the laser head will automatically reset and calibrate. After the first startup, the annular indicator will turn solid white. The startup process takes a while, and please be patient.

Connect a computer to the Laserbox
Laserbox so ware is required for the connection of a computer to the Laserbox. Please download and install the so ware at the following website.
https://www.makeblock.com/maker-tools/laserbox
There are three ways to connect a computer to the Laserbox. Choose the best according to your situation.

Connect with the USB cable
-
Connect a computer to the Laserbox with the USB cable.


- Open the so ware, select "Connect to a new Laserbox" and click "Next".
![]()

- Select "USB" and click "Next" to start the connection.
![]()

- Successful connection.
![]()

Connect with an Ethernet cable (not included in the package)
- Connect your computer to the Laserbox with an Ethernet cable.


- Open the so ware, select "Connect to a new Laserbox" and click "Next".
![]()

- Select "Ethernet" and click "Next" to start the connection.
![]()

- Successful connection.
![]()

Wi-Fi wireless connection
- Connect a computer to the Laserbox with the USB cable.


- Open the so ware, select "Connect to a new Laserbox" and click "Next".
![]()

- Select "Wi-Fi" and click "Next".
![]()

- Connect to the existing Wi-Fi network.
![]()

- After successful connection, you can disconnect the USB cable and wirelessly control the Laserbox.
Start cutting / engraving
- Place the official materials in the Laserbox working area.
Note: Cutting/Engraving Material Requirements can be found in the appendix.

- Open the Laserbox so ware and select the sample image. You can also import or draw images yourself.

- Click the "Start" button. The Laserbox can automatically identify official materials and set cutting/engraving parameters.

- Click "Send" to send the image to the Laserbox. After the transmission is completed, the Laserbox would be ready, and the annular indicator would turn flashing blue.

- Press the button on the Laserbox to start cutting/engraving.


More Operations
Pause the task
Method 1: Click "Pause" in the so ware interface to pause the task.

Method 2: Press the button on the Laserbox to pause the task. Press again to continue with the task.

Method 3: Open the lid to pause the task. Close the lid and press the button on the Laserbox to continue with the task.

Cancel the task
- Open the lid.
![]()
- Press and hold the button for 5 seconds. After the task is cancelled successfully, you will hear a beep sound and the annular indicator turns from red to blue.
Note: After starting cutting/engraving, you can also cancel the task by clicking "Pause -> Cancel" in the Laserbox so ware interface.


Clean chippings
Residues and chippings accumulated during operation of the Laserbox should be cleaned regularly, otherwise it may cause a fire. Pull out the tray as shown to clean up residues and chippings.

More Features
Bring sketch to life
Draw on copy paper or official materials with a black/red oil-based pen. For images drawn with a black oil-based pen, the Laserbox will cut along the contour and the black area will be engraved. Images drawn with a red oil-based pen will be cut directly along the handwriting.
- Draw an image, preferably with a Deli S550 oil-based marker.
![]()
- Place the material and close the lid.
![]()
- Press the button on the Laserbox to start the task.
![]()


Note: For optimal cutting / engraving effect, it is recommended to use the Deli S550 oil-based marker, draw the image as far as possible from the ring code and the edge of the material, and place the material in the center of the honeycomb panel. Only with copy paper and official materials, you can bring sketch to life. Damages caused by the use of other materials are not covered by Makeblock's warranty service.
Image extraction
The Laserbox has a built-in camera that extracts the surface image for further creation.
- Place the object for image extraction.


- Start the Laserbox and select "Marquee" to put the image you want to extract in a selection box.

- Successful image extraction.


Cutting/Engraving Material Requirements
Maximum dimensions for cutting: 500 (length) * 300 (width) * 22 (thickness) mm
Materials for cutting/engraving:
| Paper | Cardboard |
| Wood board | Acrylic |
| Cloth | Base plate |
| Leather | ABS-based color board |
| PET | Rubber |
| Wood veneer | Glass fiber |
| Plastic | Corian |
Unauthorized materials:
| Uneven material | |
| Humid material | |
| Dirty material | |
| Out-of-gauge material |
and all materials not included in the list of processable materials.
Note: The use of poor quality materials may result in poor cutting/engraving. It is recommended to use Makeblock official materials. The use of the materials not recommended above may damage the device, and the resulting damages are not covered by Makeblock's warranty service.
Annular Indicator Status Description

| Indicator status | Description | |
 | Flashing white | The system gets started. |
 | Solid white | Waiting to connect. |
 | Flashing blue | It is ready and the image has been sent successfully. |
 | Solid blue | It is in the standby mode and the Laserbox has been connected to the computer. |
 | Six indicators light up gradually | It is in the working status, and the number of indicators that are ON indicates the current progress. |
 | Solid green | Completion. |
 | Green breathing indicator | Sleep mode. It goes into the sleep mode from the standby mode after 10 minutes idle. |
 | Solid red | Abnormal. |
 | Solid purple | The Laserbox firmware is being upgraded. |
Safety First (Important)
General safety
Read and get familiar with all safety protocols and procedures before operating the Laserbox. Users shall strictly follow all safety precautions and ensure that the Laserbox is properly assembled and in working order.
 Please observe the following operating principles:
- Be sure to check the Laserbox for damage every time before use. Do not operate any damaged or defective Laserbox in any way.
- Please keep the workspace clean and flat. Note that the laser tube is made of glass and is very fragile. If it is broken, the Laserbox will fail to work.
- Without authorization, please do not disassemble or change the Laserbox structure in any other way; and please do not modify or decompile the operating system of the Laserbox.
- Please keep the inside of the Laserbox clean. Residues and chippings accumulated during cutting and engraving are dangerous and may cause fire. Clean the chippings and residues in the honeycomb panel and tray regularly.
- The working temperature of laser is between 5°C and 25°C. It is strictly prohibited to operate below 0°C.
Laser safety
Under normal circumstances, the CO2 laser tube is completely enclosed in a casing during operation. The Laserbox has a safety interlock switch. If the lid is lifted during operation, the Laserbox will stop working to prevent harming people. No special precautions are required to ensure laser safety.
Please observe the following safety guidelines:
- Never operate the Laserbox with any parts removed, such as tray. Please note that the absence of any part of the Laserbox may expose the laser system and increase the risk of equipment damage. Remember that the CO2 laser beam is invisible.
- Do not engrave or cut any material that contains PVC or vinyl (processed plastics are not recommended). These materials (and other materials containing chlorine/chloride) can generate corrosive vapor that is extremely harmful to the human body and can cause damage to the Laserbox.
- Any damage caused by engraving or cutting any material containing PVC or vinyl is not covered by Makeblock's warranty.
- Do not engrave or cut any unknown material. Vaporization/melting of many materials, include, but not limited to, PVC and polycarbonate, will release harmful smoke.
- Laser operation is prohibited when the lid/tray is lifted. Make sure that the Laserbox is closed by the lid/tray during operation and do not tamper with the safety mechanism of the lid. Open the tray ONLY when it needs maintenance or cleaning. After maintenance and cleaning, please install the tray as required immediately. If you start the laser without the tray installed as required, and perform improper operation through the gap of the tray, it may cause injury to your body.
- Do not operate the Laserbox before properly connecting smoke purifier. Most materials produce irritating smoke when being processed.
- These include, but are not limited to, paints, varnishes, composite boards, and plastics that can produce hazardous compounds during processing.
The reference standard for laser safety is American National Standard for Safe Use of Lasers (Z136.1-2000), which is provided by the American National Standards Institute (ANSI). This reference is the basis for federal regulations and laser system manufacturers, as well as the laser safety guidelines of Occupational Safety and Health Administration (OSHA). It contains details on the proper installation and use of laser systems.
Fire safety
A high-density laser beam is used by the Laserbox to irradiate the material to be cut or engraved, so as to heat up the material surface and vaporize the material without burning. But most materials are inherently flammable and may be ignited to form an open flame that can burn down the Laserbox (even if it is made of flame-retardant materials) and its surroundings. Experience shows that vector cutting with a laser is most likely to produce an open flame. In particular, acrylic has proven to be extremely flammable in vector cutting.
 Please read the following warnings and suggestions carefully:
- Please note that stacked materials (especially organic materials such as paper) may cause flame propagation or increase the risk of material ignition.
- Never leave the Laserbox unattended during operation. There is a risk of fire if the Laserbox is started due to incorrect settings and le unattended for long periods of time, or if the Laserbox is mechanically or electrically malfunctioning during operation.
- Clean the Laserbox regularly. Excessive accumulation of residues and chippings from cutting and engraving would increase the risk of fire. Honeycomb panel and tray should be removed and cleaned periodically to ensure that there is no residue or chipping in the Laserbox.
- Keep the area around the Laserbox clean and free of cluttered flammable materials, explosives or volatile solvents such as acetone, alcohol or gasoline. Provide fire extinguishers, and perform regular maintenance and inspection.
Electrical equipment safety
Laser tube of the Laserbox has a silicone rubber casing, which can effectively shield the internal power cord. If you find the cover is loose and the power cord is exposed, stop operating and contact customer service personnel.
Please carefully read and strictly observe the following warnings and suggestions:
- When the Laserbox is connected to the power supply, do not open any access panel on the Laserbox to avoid harm from accidental contact with the power supply.
- When the Laserbox is connected to the power supply, do not touch the electronic-related area with your hands or other tools.
- Power button of the Laserbox is at the rear of it. Pressing (-) to power it on and pressing "off" to power it off.
Warnings and instruction signs
All warning and information signs attached to your laserbox are located in places that may be a source of danger before and/or during operation.
Damaged or lost warning and information signs must be replaced immediately. The missing warning and information signs can be replicated using the templates on the following page.

Documents / Resources
References
Download manual
Here you can download full pdf version of manual, it may contain additional safety instructions, warranty information, FCC rules, etc.
Advertisement


Need help?
Do you have a question about the Laserbox and is the answer not in the manual?
Questions and answers