GFB DV+ (T9358) Manual
- Installation instructions (4 pages) ,
- Installation instructions (4 pages) ,
- Installation instructions (4 pages)
Advertisement
INSTALLATION

All GFB pistons are checked for fitment and tolerance before shipment. Please do not drop the GFB piston onto a hard surface as this may cause (invisible) damage that could result in boost leaks or sticking.
These instructions show installation on an A250 with transverse engine layout. For installation on other models with longitudinal engine layout, the procedure is the same, but the turbo is found on the left-hand side of the engine (looking from the front of the car), and the diverter is lower down.
- Remove the engine cover by pulling up on each side in the locations indicated (
![]() ), to pop the rubber grommets that hold it on. Remove and set aside.
), to pop the rubber grommets that hold it on. Remove and set aside.

- Locate the factory diverter valve, which is mounted on the front left side of the turbo next to the intake pipe. Using a 5mm hex driver/key, undo the 3 screws holding the diverter - take care not to drop them!
- The electrical connector features a doublelocking clip. It helps to use a small flat screwdriver to carefully push the grey tab down and simultaneously slide it out.
You can then push the top of the grey latch down and slide the connector off the diverter.

- Separate the factory valve mechanism from the solenoid body by pulling on the plastic sleeve (
![]() ) that surrounds the diaphragm - don't pull on the valve itself as the diaphragm may tear.
) that surrounds the diaphragm - don't pull on the valve itself as the diaphragm may tear.


Leave the yellow o-ring in place as this is reused.
Remove the valve, plastic sleeve, and spring. Keep these pieces in a safe place together with the 3 bolts, as these parts are not re-used.
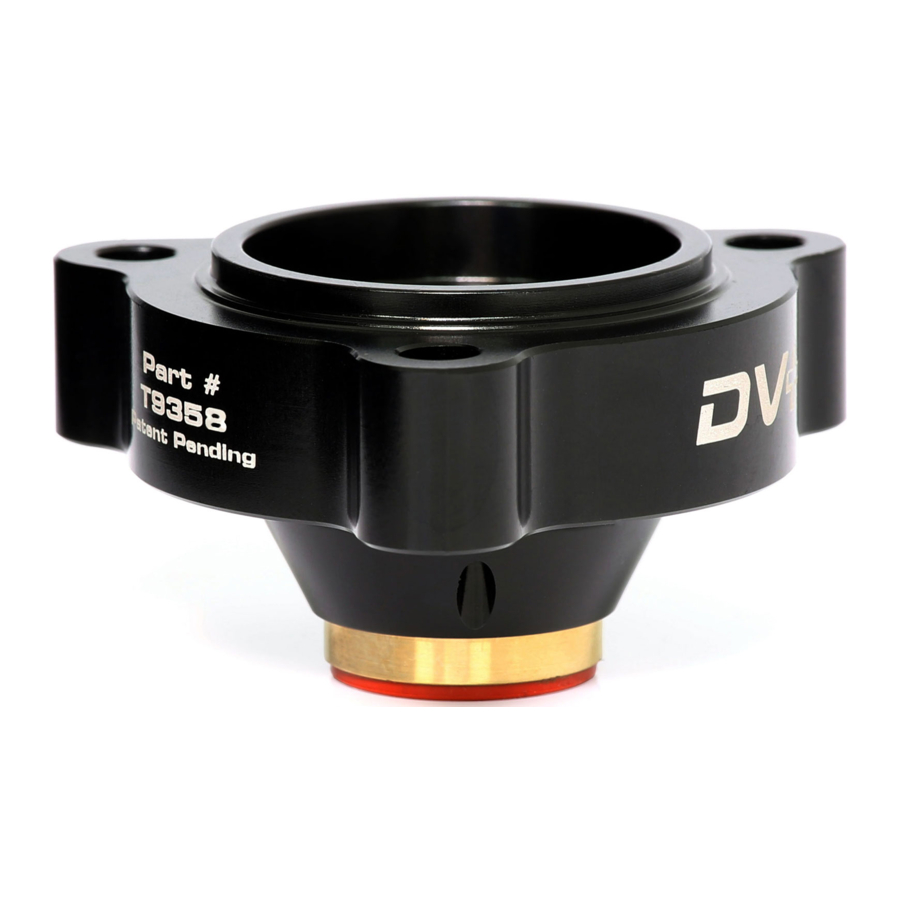
- Install the DV+ assembly onto the turbo, making sure to hold the piston with your finger so it doesn't fall out during this process. Don't forget to use the supplied longer screws. Because of the asymmetric bolt holes, the assembly can only be installed in one orientation.

- Clip the electrical connector back on, then re-install the engine cover.

ASSEMBLING THE DV+
- Assemble the GFB DV+ parts onto the factory solenoid body as shown in the exploded view below, making sure to use the GFB-supplied plunger spring and longer bolts. Apply some engine oil to the piston during this process. Note that regular re-lubrication is NOT required.


During assembly, check that the piston slides freely in the body without sticking or binding. It is a very close fit and can sometimes be difficult to get started into the bore, but once in it should move without needing to be forced.
Note that the bolt holes are NOT SYMMETRICAL. When you assemble the DV+ body onto the solenoid body, check the alignment of the holes - if they do not line up properly, rotate the DV+ body until the bolt holes line up correctly before installing on the car.

TECH SUPPORT
Just installed your shiny new DV+ and something doesn't seem right? Do you have a question about the product? Have you heard conflicting information and need some clarity? We want you to get the best advice, first time. No-one has as much experience with these products as our own engineers, so make us your first point of contact! Head to www.gfb.com.au/contact-us to get in touch, or use the QR code:

Documents / ResourcesDownload manual
Here you can download full pdf version of manual, it may contain additional safety instructions, warranty information, FCC rules, etc.
Advertisement


Need help?
Do you have a question about the DV+ and is the answer not in the manual?
Questions and answers