Advertisement
- 1 Overview
- 2 Technical Data
- 3 Follow these simple steps for normal photography
- 4 Mercury Battery Loading and Checking
- 5 Film Winding
- 6 Shutter and Aperture Adjustment
- 7 Using Built-In Exposure Meter
- 8 Exposure Settings
- 9 Coupling Range of Built-ln Exposure Meter
- 10 Focusing
- 11 Composition
- 12 Holding the Camera
- 13 Film Loading
- 14 Film Rewinding
- 15 Synchronizing Flash Unit
- 16 Uses of Lenses
- 17 Using Self-Timer
- 18 Double Exposures
- 19 Filters
- 20 Interchangeable Lenses and Accessories
- 21 Canon Booster
- 22 Proper Care of the Camera
- 23 Documents / Resources
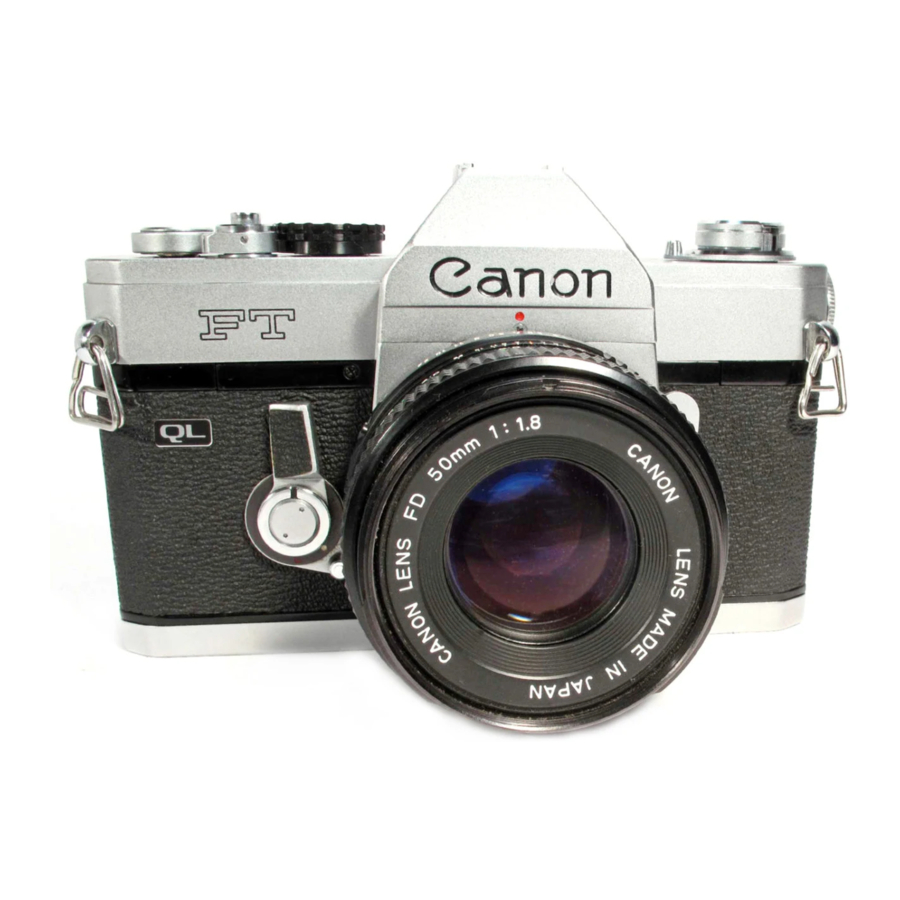
Overview


Technical Data
- Type: 35mm single-lens reflex camera.
- Viewfinder: Eye-level using pentagonal prism. Angle Finder A can be attached.
- Focusing Screen: Highly efficient in resolving power, using Fresnel lens and microprism screen rangefinder.
- Mirror: Shockless quick return system. Mirror can be fixed upwards.
- Standard Lens: Canon Lens FL 50mm F 1.8, FL 50mm F 1.4, FL 55mm F 1.2. With FL (breech-lock bayonet) mount,
- Aperture: Automatic pre-set aperture mechanism built-in. Instant-return diaphragm. Pre-set is possible to release for previewing depth-of-field.
- Shutter: Cloth focal-plane shutter with speeds from 1/1000 to 1 sec., B(T) and X. Single pivot dial.
- Exposure Meter: Built-in. Using CdS photocell. Zero-adjustment type coupled to shutter speed dial and aperture setting, ASA 25-2000, With ASA 100 film, EV 2.5 (f/1.2 at 1/4 sec.) - EV18 (f/16 at 1/1000 sec.) one stage system. Powered by one 1.3v M20 (#625) mercury battery.
- Light Measurement: TTL (Through The-Lens) system using condenser lens. Exposure meter functions with the metering lever. Semi-spot meter reading system, measures 1/3 of the angle-of-view. Continuous measurement is possible with the metering lever lock. Battery checker built in.
- Measuring of Ultra-Low IIlumination: EV 2.5 1/4 sec. - EV - 3.5 15 sec. at f/1.2 can be measured with the attachment of the Canon Booster (auxiliary meter for extremely dim lighting).
- Flash Synchronization: FP and X contact. Synchronizing possible for FP, M and MF flash bulbs and electronic flash units.
- Self-Timer: Built-in.
- Film Rewinding: By button and crank.
- Film Advance Lever: Single operation 174°, possible to wind with several short strokes.
- Film Loading: By opening back cover. Accepts any standard 35mm film roll in cartridge. QL mechanism for quick loading of film.
- Interchangeable Lenses: Automatic pre-set aperture type Canon FL lenses.
- Frame Counter: Self-resetting type.
- Size: 144 x 93 x 43mm (55/8" x 35/8" x 1¾").
- Weight: 740 grams (1 lb. 101/8 oz.) - body only.
Subject to alterations.
Follow these simple steps for normal photography
- Load the film simply with the QL mechanism.

- Set the ASA film speed.

- Wind the film advance lever.
- Remove the lens cap.

- Look through the viewfinder and focus.
![]()
- Compose the picture.

- Determine the exposure with built-in meter.

- Press the shutter release button gently.


Mercury Battery Loading and Checking
The built-in exposure meter of the Canon FT functions only when the mercury battery is properly loaded.

- Insert a coin into the groove of the battery compartment cover and turn to the left to remove.
- Face the central contact of the mercury battery 'inwards and insert.
- Replace the cover by turning it to the right.
- Before inserting, wipe all battery poles clean of fingerprints or stains with a dry cloth. Unclean poles may cause corrosion and damage the contact points of the camera.
- A 1.3v M20 (#625) mercury battery should be used — equivalent to Mallory PX-625, Eveready EPX-625, Burgess Hg-625R.
- Be sure the battery is inserted in the correct direction by referring to the diagram on the compartment cover. Otherwise, the meter will not function properly and the cover cannot be screwed in.
- When the camera is not used for a long period, remove the mercury battery and keep in a dry place.
Battery Check
Check the mercury battery after loading it. Especially when loading a new battery, be sure to check the voltage.
- Set the film speed scale at ASA 100/DIN 21 and the shutter speed dial at "X". For the film speed setting, lift up the outer ring of the shutter speed dial and turn.

- An accurate check cannot be made if settings other than those mentioned above are used.
- Turn the battery check lever on the outer side of the film rewind crank to "C" index.
- If the meter needle inside the viewfinder swings up to or over the "o" index, the battery has sufficient power. If the needle stays below the edge of the "o" index, voltage is insufficient and the battery must be replaced.

- Life of the battery in normal use is approximately one year.


Film Winding
The film advance lever winds the film, cocks the shutter, and prepares the aperture and mirror for the ne xt shutter release all in one motion.
- Turn the film advance lever until it stops. The film will be advanced one frame and the shutter cocked. The frame counter is simultaneously advanced to the next number.

- When the shutter release button is pressed, the mirror flips up, the diaphragm simultaneously closes down to the pre-set f/stop and the sh utter operates. After the shutter is operated, the advance lever can be wound for the next frame.

- Be sure that the safety lock lever is set at "A".
- Winding may be done by moving the lever with several short strokes.
- After loading the film, make another wind, since the first winding may not be complete.
- The shutter will not function when the shutter release button is pressed unless the winding is completed. In such a case, check the winding once more.


Frame Counter
Each winding will advance the number of the frame counter , indicating the number of pictures taken. When the back cover is opened, the indicator automatically returns to starting position "S".
Safety Device for Shutter
When the safety lock lever around the shutter release button is turned to the "L" position, the shutter is locked and will not move. This device may be used when the camera is carried in a wound condition.

Attaching the Cable Release
Optional Canon Release can be attached to the FT by screwing it into the threaded hole in the center of the shutter release button. Even if the safety lock lever is at "L" position, the shutter will operate by using the cable release.

Shutter and Aperture Adjustment
Exposures are adjusted by the shutter and aperture. The shutter controls the exposure time and the aperture controls the amount of incoming light. The Canon FT uses the zero-adjustment coupled meter, a very simple method of obtaining proper exposures.
Shutter Speed Dial
Adjust the shutter speed by turning the shutter speed dial to the desired index number. The index on the dial shows the denominators of 1/1000 sec., 1/500 sec., etc.

- The shutter speed dial does not revolve between the indexes "B" and "X".
- Be sure to set the index at a position where the clickstop catches. In case of "B" index, adjust it to the white dot just below the " B " index.
- "B" indicates bulb exposure, and is used when making exposures of more than one second. When the shutter speed dial is set at "B", the shutter remains open as long as the shutter release button is pressed.
- For time exposures first set the shutter speed dial at "B". Keep the shutter release button pressed, and turn the time lock lever to "L". The shutter remains open even if the finger is removed from the button. When the lever is returned to "A", the shutter closes.
- Time exposure is also possible by using the lockable cable release.
- The "X" index is used for synchronizing an electronic flash unit such as the Canon Speed lite. Although the shutter speed at "X" is 1/60 sec., it is equivalent to a very short exposure time during the flash of the flash unit.
Aperture
Incoming light and depth-of-field are adjusted by turning the pre-set aperture ring to the desired f/stop.

- As the f/stop value gets larger, the amount of light reaching the film plane becomes correspondingly less. For each f/stop up, the light is reduced one-half. Accordingly, when the aperture is increased by one f/stop, the exposure is doubled, and when it is increased by two f/stops the exposure is quadrupled.
- Certain lenses, however, have no relation to the brightness being halved between the maximum and the next f/stops on the pre-set aperture ring.
- The pre-set aperture ring can also be set between two f/stops.
- The ratio between the aperture and the amount of exposure, using f/2 as the basis, is as follows:
![]()

Pre-Setting Aperture and Checking Depth-of-Field
Lens with A-M Ring
- Pre-Setting of Aperture: Set the A-M ring at "A". Then set the de sired f/stop on the pre-set aperture ring to the index. The diaphragm will close down to the pre-set f/stop only for the instant that the shutter is reo leased. Except for that instant, the diaphragm remains fully open.
- Manually Operated Aperture: When the A-M ring is set at " M the diaphragm closes down to any desired f/stop by turning the pre-set aperture ring and the depth-of-field at the time of shutter release can be checked. When the A-M ring is reset at "A" the diaphragm again returns to maximum opening.


Lens with Manual Aperture Ring![]()
- Pre-Setting of Aperture: Set the desired f/stop on the pre-set aperture ring to the index. Then set the index of the manual aperture ring to this pre-set f/stop. The diaphragm will close down to the pre-set f/stop only for the instant that the shutter is released.

- Manually Operated Aperture: When the manual aperture ring is turned in the direction of closing down the diaphragm, after setting the desired f/stop on the pre-set aperture ring to the index, the diaphragm will close down to the pre-set f stop and the depth-of-field can be checked. The manual aperture ring cannot be turned when set at the maximum f/stop.
- Refer to Depth-of-Field Scale concerning depth-of-field.

Relationship Between the Shutter, Diaphragm, and Mirror
Press the shutter release button.

Mirror begins to snap up.

The shutter clicks. The diaphragm closes down to pre·set f/stop.

Mirror is up.

The diaphragm returns to maximum opening.

Mirror returns to the former position.

Using Built-In Exposure Meter
The Canon FT provides the most accurate light measurement possible with its unique TTL (Through-The-Lens) system. The CdS photocell of the exposure meter is placed in the closest position to the beam-splitting condenser lens. The semi-spot meter reading system enables accurate measurement of the main subject even in counter-light conditions. The rectangular frame in the viewfinder represents the light measurement area of the CdS photocell. Place the main subject within this frame and measure the intensity of light so as to obtain the proper exposure.

Film Speed Setting
Set the ASA/DIN film speed scale to the speed of the film being used. Film speeds are normally shown on the film box cover and/or explanatory sheet.
Lift and turn the film speed set ring around the shutter speed dial. If the film is ASA 100, for example, make the correct setting by showing 100 in the small window.

- The following film speeds may be used:
![]()
Figures in parentheses represent intermediate film speeds. - When ASA 25 DIN 15 appear in the small windows, this is as far as the film speed set ring turns to the left. White dots at the right end read ASA 2000 and DIN 34.

Metering Lever
The exposure can be properly measured by pressing the metering lever towards the lens.
The metering lever can be fixed for continuous light measurement by pressing it towards the lens after setting the metering lever lock at "L" position. If the lock is returned to its original position (white dot) the metering lever will return to its original position.

- Correct exposure value cannot be obtained unless the metering lever is pressed.
- With the fixing of the metering lever, telephoto lenses can be conveniently handled. Also when shooting subjects with different light intensities, continuous light measurement is possible.
- Due to the characteristics of the CdS photocell, the movement of the meter needle may occasionally become slow, owing to changes in the degree of light.
- When not using the camera, attach the lens cap so as to f prevent unnecessary consumption of the mercury battery.
How to "Average " Exposures
When measuring a subject with greatly differing dark and bright parts, take two measurements, one each of the dark and bright parts. Then obtain the average value and set the f stop or shutter speed accordingly.
Exposure Settings
The built-in exposure meter, which is of the zero-adjustment type, is coupled to the shutter speed dial and preset aperture ring. The exact exposure is easily determined according to the brightness of the subject to be photographed. There are two ways of determining the exposure either by first selecting the shutter speed or by first selecting the f/stop of the aperture.

- With this latest FT, the meter needle may move even when the metering lever is not pressed. When the meter needle indicates the change of light volume, readjust settings to obtain the correct exposure value by pressing the metering lever.
Shutter Speed Priority Method
- Set the shutter speed dial at the desired speed.
- Face the camera towards the subject, lock into the viewfinder, and press the metering lever.
- Either keep pressing the metering lever or lock the lever and turn the pre-set aperture ring.
![]()
- Set the meter needle at the "o" index within the viewfinder for correct exposure.
![]()


f/Stop Priority Method
- Set the pre-set aperture ring at the desired f/stop.
![]()
- Face the camera towards the subject, look into the viewfinder, and press the metering lever.
![]()
- While pressing or locking the lever, turn the shutter speed dial.
![]()
- Set the meter needle at the "o" index within the viewfinder for correct exposure.


- Since the shutter speed dial cannot be set at the intermediate positions, the shutter speed priority method is recommended when exposure accuracy is a crucial factor.
- Light measurement at "B" and "X" of the shutter speed dial is not possible with the built-in exposure meter because "B" is used for long exposures over one second, and "X" is for the electronic flash unit.
- When the built-in exposure meter is outside the coupling range, the meter needle will point to the top of the viewfinder and will indicate that proper exposure cannot be obtained. Refer to "Coupling Range of Built-ln Exposure Meter" on the following page.
- Do not leave the camera on the conditions mentioned above since the battery discharges in maximum current and makes shorter the life. To prevent discharging be sure to re-adjust the shutter speed dial.
Coupling Range of Built-ln Exposure Meter
| Film Speed | Shutter Speed | ||||||||
| ASA 25 DIN 15 | 1 | 1/2 | 1/4 | 1/8 | 1/ 15 | 1/30 | 1/60 | 1/125 | 1/250 |
| ASA 50 DIN 18 | 1/2 | 1/4 | 1/8 | 1/15 | 1/30 | 1/60 | 1/125 | 1/250 | 1/500 |
| ASA 100 DIN 21 | 1/4 | 1/8 | 1/15 | 1/30 | 1/60 | 1/125 | 1/250 | 1/500 | 1/1000 |
| ASA 200 DIN 24 | 1/8 | 1/15 | 1/30 | 1/60 | 1/125 | 1/250 | 1/500 | 1/1000 | ... |
| ASA 400 DIN 27 | 1/15 | 1/30 | 1/60 | 1/125 | 1/250 | 1/500 | 1/1000 | ... | ... |
| ASA 800 DIN 30 | 1/30 | 1/60 | 1/125 | 1/250 | 1/500 | 1/1000 | ... | ... | ... |
| ASA 1600 DIN 33 | 1/60 | 1/125 | 1/250 | 1/500 | 1/1000 | ... | ... | ... | ... |
| ASA 2000 DIN 34 | 1/125 | 1/250 | 1/500 | 1/1000 | ... | ... | ... | ... | ... |
| f/Stops | f/1-22 | f/1-22 | f/1-22 | f/1-22 | f/1-22 | f/1-22 | f/1-22 | f/1-22 | f/1-16 |
The built-in exposure meter couples to the following range of f/stops and shutter speeds With respective film speeds. When using the Canon Lens FL 50mm F 1.4 and ASA 100 film, for example, the exposure meter couples fully within the range of f/1.4 at 1/4 sec, (EV 3) and f/16 at 1/1000 sec (EV 18).
Focusing
The center of the viewfinder (circular section) is a microprism screen rangefinder made up of microscopic prisms for fast and precise focusing.
While looking through the viewfinder, rotate the focusing ring. It is in focus when the image in the rangefinder becomes sharp and clear.

- An optical curve may sometimes be visible in the lower part of the viewfinder according to the angle of the incoming light. This is a reflection of the beam-splitting mirror on the condenser lens in the TTL light measurement system.
Composition
The exact picture image to be photographed can be seen on the focusing screen of the viewfinder without any parallax. This enables you to determine the exact composition of your scene before pressing the shutter release button.

- Canon's Angle Finder A can be attached to the eyepiece for copying, macrophotography and photomicrography. In these cases, images are reversed between left and right.
- Dioptric adjustment lenses are available as optional attachments. When a dioptric adjustment lens is attached to the viewfinder eyepiece, those who are far- or near-sighted can take pictures without glasses. Four different diopters of + 1.5, 0, —2.5 and —4 are available.
Holding the Camera
Hold the camera firmly in order to take a clear picture. Hold the camera either in a vertical or horizontal position, look through the viewfinder, and focus. Then press the shutter release button gently. The following steps are important.

- Hold the camera snugly in both hands. The camera should be pressed firmly to your cheek or forehead.
- When the camera is in a horizontal position, both elbows should be firmly pressed against the body, and at least one elbow should be resting against the body when in a vertical position.
- Hold your breath and press the shutter release button with a smooth, steady stroke. Otherwise, you will have a blurred picture.
- When using slow shutter speeds below 1/30 sec, the use of a tripod and cable release is recommended.
- When taking pictures against the light, always use a lens hood.
Film Loading
The Canon FT accepts any standard 35mm film roll in cartridge for daylight loading. When loading a new film, always avoid direct sunlight.

- Raise the back cover lock and make a half turn counterclockwise. The cover will rise slightly.
- Open the cover fully. When the back cover is opened, the QL cover opens simultaneously.
- The QL cover automatically opens and closes with the back cover. Do not touch the QL cover.
- Raise the film rewind crank and pull it all the way up. Face the film cartridge as illustrated, and insert it into the cartridge compartment. Push the crank back to its former position again. The crank fork will slip into the axis of the film cartridge. In case the crank does not fully return, turn it slightly to the left or right.

- Hold the film cartridge down with the left hand so that it does not rise, and lay the tip of the leader above the "red" film set mark.

- Bring down the QL cover to hold the film in place by closing the back cover. Look through the sprocket window to see if the film is correctly engaged on the sprocket.

- Press down on the back cover to prevent it from rising, and turn the back cover lock clockwise.

- If the film is sagging, the cartridge will rise and the back cover will not close.
- Leave the lens cap on and make three blank shots, each time turning the film advance lever. The frame counter will advance from the "S" mark to "0". With one more advance, the camera will be ready for the first shot.


Checking Correct Film Loading
The film is properly loaded and advanced if the film rewind crank rotates when you wind the film advance lever. If the rewind crank does not rotate, take out the film, as explained on the following page, and reload.

Setting the Film Speed
When loading the film, be sure to set the film speed scale at the proper position. See "Film Speed Setting".

- When repacking a long-wound film for darkroom loading into an ordinary cartridge, be sure to trim the tip of the leader between perforations.
![]()

Film Rewinding
When the film reaches the end and the film advance lever stops, rewind the film into the cartridge as soon as possible. Be sure not to open the back cover before rewinding. Otherwise, the entire roll will be exposed and ruined as the exposed film is naked within the camera.
- Press in the rewinding button.

- Raise the film rewind crank, turn it in the direction of the arrow, and rewind the film into the cartridge. When the rewinding button stops revolving and rewinding resistance becomes light, stop rewinding immediately.

- Open the back cover.
- Pull up the rewind knob fully and remove the cartridge.


- Once the rewinding button has been pressed, the finger may be removed. The button will pop out automatically when the film advance lever is wound.
- If you force the film advance lever after the film reaches its end, the film will become detached from the cartridge spool or tear, and rewinding will become impossible. If this happens, open the back cover and remove the film only in a darkroom.
Synchronizing Flash Unit
By connecting the cord of the flash bulb unit or the electronic flash unit to the FT 's flash socket, synchronization becomes possible with the following shutter speeds.

- A lens hood should be attached when taking pictures with a flash unit.
| Type | Synchronized Shutter Speeds | |
| Flash Bulb | FP class (#6, Press 26) | 1/60 or faster 1/15 or slower |
| M class (M3, #5, Press 25) | 1/15 or slower | |
| MF class ((AG-1, AG-3, M2, Flashcube) | 1/15 or slower | |
| Electronic Flash Unit | Speedlite | 'X" setting (equiv. to 1/60 sec.) 1/30 or slower |
Uses of Lenses
Changing Lenses
- Be sure to unlock the metering lever lock. If the metering lever is pressed or is locked, the red dot appears inside the camera mount. The pre-set aperture pin, at the back end of the lens, cannot be connected to the coupling part on the camera body and the pre-set aperture will not function.
- Remove the lens from the camera body by turning the bayonet ring of the lens to the left until the red dot on the lens coincides with the red dot on the camera mount.

- Mount the lens by matching the red dot of the lens to the red dot on the camera mount. Turn the bayonet ring to the right and fasten. Before mounting, turn the bayonet ring of the lens sufficiently to the left and align the red dot and guide pin of the lens.


- Attach the lens quickly in the shade. The film will sometimes become foggy if the lens is left unattached.
- Whenever a lens is removed, be sure to put on its dust cap to protect the aperture pin.
- When not in use for a long time, protect the mirror with a flange cap.
Distance Scale
The distance scale indicates the distance between the focused subject and the film plane. The scale is necessary for checking the depth-of-field, for flash and infrared photographies.

- The correct position of the scale is in the center of each value. For example, the correct position of a two-digit value is the center of the two figures.
Infrared Index "R"
For infrared photography, correction of the distance scale is necessary because the focal point slightly deviates from ordinary photography. Focus first in the ordinary manner, then adjust that distance scale to the infrared mark " R ". For instance, if the distance scale reads 10m after focusing, merely shift the 10 scale to "R" position.
The position of "R" on the FT is based on using film with the highest wave-length sensitivity figure of 800mµ, such as Kodak IR 135 film and Wratten 87 filter.
Film Plane Indicator
In case the focusing is done by actual measurement, measure the distance from the film plane indicator and interpret the measured distance on to the distance scale.

Depth-of-Field Scale
The depth-of-field scale indicates the range of subjects which will be in focus sharply on the film. This range will vary with the following factors: The depth-of-field will be deeper the smaller the aperture opening, the further the distance of the subject, and/or the shorter the lens focal length. The depth-of-field will be shallower the larger the aperture opening, the nearer the distance of the subject, and/or the longer the lens focal length.

For example, if the lens used is 50mm and the subject has been focused at a distance of 3m (10'), with an f/8 aperture value read off from both indexes on either side of the indicator (orange line), the depth-of-field is from approximately 2.3m (8') to 4.3m (14').
If the aperture is closed down to f/16, the picture will become sharp between 1.9m (6') to 7.6m (25') from the camera. This range will vary with the f/stop selected.

- Canon FL lenses let you see the actual sharpness through the viewfinder by turning the manual aperture ring or the A-M ring.
![]()
- Although air bubbles may sometimes be seen in a lens, they do not affect the resolution power or the sharpness of the picture.

Lens Mount (FL and R Series Lenses)
All Canon FL lenses which have the FL mounts can be used with the Canon FT, except the FLP 38mm F 2.8.
- It is also possible to attach and use all the R lenses for Canonflex use. However, as the pre-set aperture mechanism differs, pictures must be taken by controlling the aperture manually.
Fixing Mirror Upwards
In case the Canon Lens FL 19mm F 3.5 is used, the mirror should be fixed upwards. For mounting the lens, turn the mirror lock lever in the direction of the arrow. The mirror is thus fixed to a position under the focusing screen. The lens is then attached and used with the mirror in the fixed-up position.

- Attach the lens quickly in the shade. The film will sometimes become foggy if the lens is left unattached.
- When the mirror is locked, combined usage of the separate viewfinder for this lens becomes necessary.
Do not use the mirror lock for ordinary photography with the automatic aperture. When its use becomes necessary, however, release the pre-set aperture and take the pictures under "manual" conditions. - When the mirror is locked, always keep the lens covered when not in use. If it is turned in the direction of the sun without the cap, there is the danger of the shutter curtain being burned.
- After the mirror lock device has been used, be sure to return the mirror lock lever completely to its original position. Failure to do this will result in inexact focusing.
Using Self-Timer
- Wind the film advance lever.
- Turn the self-timer lever in the direction of the arrow (counter-clockwise) until it stops.

- Depress the shutter release button. The shutter will be actuated approximately 10 seconds later.

- Be sure to wind the film advance lever. Otherwise, the self-timer will act but the shutter will not be actuated.
- The metering lever can be used in the normal manner even after the self-timer is charged.
Double Exposures
Although Canon FT is designed to prevent double exposures being made by mistake, a double exposure can be made by the following steps:

- When the first exposure has been made, press in the rewinding button.
- Rewind the film with the rewinding crank by watching the mark on the rewinding button carefully. Stop rewinding when the mark has made a 3/4 turn, i.e., 270°.
- Next, wind the film advance lever while lightly holding the rewinding crank. When resistance is felt on the rewinding crank, stop winding.
- Wind the film advance lever once more. The camera is ready for another exposure.
- By repeating the above process, any number of exposures on the same frame can be made. The frame counter will, however, continue to advance with each exposure.
Filters
Various types of 48mm (for FL 50mm F 1.8) and 58mm (for FL 50mm F 3.5, F 1.4, 55mm F 1.2) screw-in type filters are available for special effects in both color and black and white photography. The TTL exposure measurement system of the Canon FT does not require exposure factor compensation.

| Type | Effectiveness of Filters | |
 | UV | Absorbs only uItra-violet rays. Especially effective at seas ide, and in high mountains. Recommended for use in co lor photography. |
 | Y1 Y3 | Increases contrast of black and white film. Enhances clouds, darkens the blue sky. Brightens red and yellow. |
| O1 | Darkens blue, increases yellow and red perceptibly. Good for contrasts especially in distant landscapes. |
| R1 | Makes strong contrasts. May also be used with infrared film. |
| G1 | Prevents red from turning radically into white. Lightens sky and face appropriately, and reflects the lightness of fresh greenery. |
| ND 4 ND 8 | ND4 reduces light values by 1/4, ND 8 by 1/8. No effect on the rep roduction of colors. |
 | SKYLIGHT | Acts to harmonize the blue sky and shade. |
| CCA 4 | For use with daylight type film under the cloud. |
| CCA 8 | For use with universal type (color negative) film under the cloud or tungsten type film under the morning sun or sunset. |
| CCA (12) | For use with tungsten type film under sunlight. |
| CCB 4 | For use with daylight type film under the morning sun or sunset. |
| CCB 8 | For use with daylight type film and clear flash bulb. |
| CCB (12) | For use with daylight type film under tungsten light. |
For black and white film.
For color film.
Interchangeable Lenses and Accessories
A wide range of interchangeable lenses from 19mm to 1000mm and various accessories are available to further enhance your Canon FT.

Canon Interchangeable Lenses
FL 19mm F 3.5R
FL 28mm F3.5
FL 35mm F2.5
FL 35mm F 3.5 (Compact)
FL 50 mm F 3.5 (Macro)
FL 50mm F 1.8
FL 50mm F 1.4
FL 55mm F 1.2
FL 85mm F 1.8
FL 100mm F 3.5
FLM 100mm F 4 (Macro)
FL 135mm F 3.5 (CompClct)
FL 135mm F 2.5
FL 200mm F 4.5 (Compact)
FL 200mm F 3.5
R 300mm F 4
R 400mm F 4.5
R 600mm F 5.6
R 800mm F 8
R 1000mm F 11
FL-F 300mm F 5.6
FL-F 500mm F 5.6
Canon Zoom Lenses
Canon zoom lenses offer top performance with automatic pre-set apertures.
FL 55 - 135mrn F3.5
FL 100 - 200mm F 5.6 (Compact)
FL 85 - 300mm F 5
Accessories

Filters (48 and 58mm screw-in type)
Lens Hood
Canon Speedlite 102, 200
Flash V-3
Canon Release
Angle Finder A
Bellows FL
Bellows R
Copy Stand 3F
Handy Stand F
58mm Close-Up Lens 240, 450, 1800
Camera Holder R4-2
Canon Photomicro Unit F
Dioptric Adjustment Lenses
Canon Booster
A separately available Canon Booster is an auxiliary meter that is attached to the FT and PELLIX QL for measuring the subjects under dim lighting conditions.

Technical Data
Light Measuring Range: Using ASA 100 film; EV 2.5 1/4 sec.-EV - 3.5 15 sec. at f/1.2.
Measuring Method: Zero-method direct reading type.
Photocell: Utilizes CdS photocell of the camera.
Exposure Time Dial: In the case of FT; 30, 15, 8, 4, 2, 1, 1/2, 1/4, 1/8, 1/15, 1/30, 1/60 sec.
Power Sources: For operating meter, use two 1.3 v M20 (#625) mercury batteries.
For illumination of meter indicator window, use one 1.3 v M20 mercury battery (use the battery removed from the camera).
Battery Check: Can be checked by the switch.
Size: 65 x 54 x 39mm (2½" x 21/8 x 1½").
Weight: 180 grams (63/8 oz.).
Proper Care of the Camera
Moisture and dust are harmful to your camera. If your camera is to be stored for a lo ng time, it should be removed from its case, and silica gel or another drying agent should be placed alongside it.
When you use your camera on a rainy day,.or at the beach, moisture and salt air adhere to it, wh ich can result in stains, rust, and corrosion. Use a soft brush to get rid of dust and a soft dry c loth for wiping.

- In extremely cold areas, expose the camera to the outer air only when in use. When using, expose the camera gradually to the outer air to prevent the lens from clouding.
- In hot climates, do not leave the camera in side closed automobiles during the daytime or in direct sunlight. It is not good for the CdS photocell.
Cleaning the Lens
Use a blower or a brush to remove dust on the lens. If you should get a finger-print on the lens, soak a little pure alcohol or ether on lens cleaning tissue , then wrap the tissue around a matchstick and wipe the lens lightly in a circular motion.
CANON INC.
9-9, Ginza 5-chome, Chuo-ku, Tokyo 104, Japan
CANON U.S.A., INC.
64-10 Queens Blvd., Woodside, Queens, New York 11377, U.S.A.
CANON U.S.A., INC., CHICAGO OFFICE
457 Fullerton Avenue, Elmhurst, Illinois 60126, U.S.A.
CANON OPTICS & BUSINESS MACHINES CO., INC.
3113 Wilshire Blvd., Los Angeles, California 90005, U.S.A.
CANON AMSTERDAM N.V.
Gebouw 70, Schiphol Oost, Holland
CANON LATIN AMERICA, INC.
Apartado 7022, Panama 5, Panama
Documents / ResourcesDownload manual
Here you can download full pdf version of manual, it may contain additional safety instructions, warranty information, FCC rules, etc.
Advertisement


Need help?
Do you have a question about the FT and is the answer not in the manual?
Questions and answers