Rock Tamers 00108, 00110, 00112 Manual
- Instruction manual (18 pages) ,
- Instruction manual (10 pages) ,
- Instruction manual (35 pages)
Advertisement
Bolt Torque Conversion Table
| Inch-Pounds (in-lbs) | Foot-Pounds (ft-lbs) | Newton-Meters (N-m) | Kilogram-Centimeters (kgf-cm) |
| 20 | 1.7 | 2.3 | 23 |
| 30 | 2.5 | 3.4 | 34 |
| 70 | 5.87 | 7.9 | 79 |
| 80 | 6.7 | 9.0 | 90 |
| 180 | 15 | 20 | 203 |
| 1500 | 125 | 169 | 1690 |
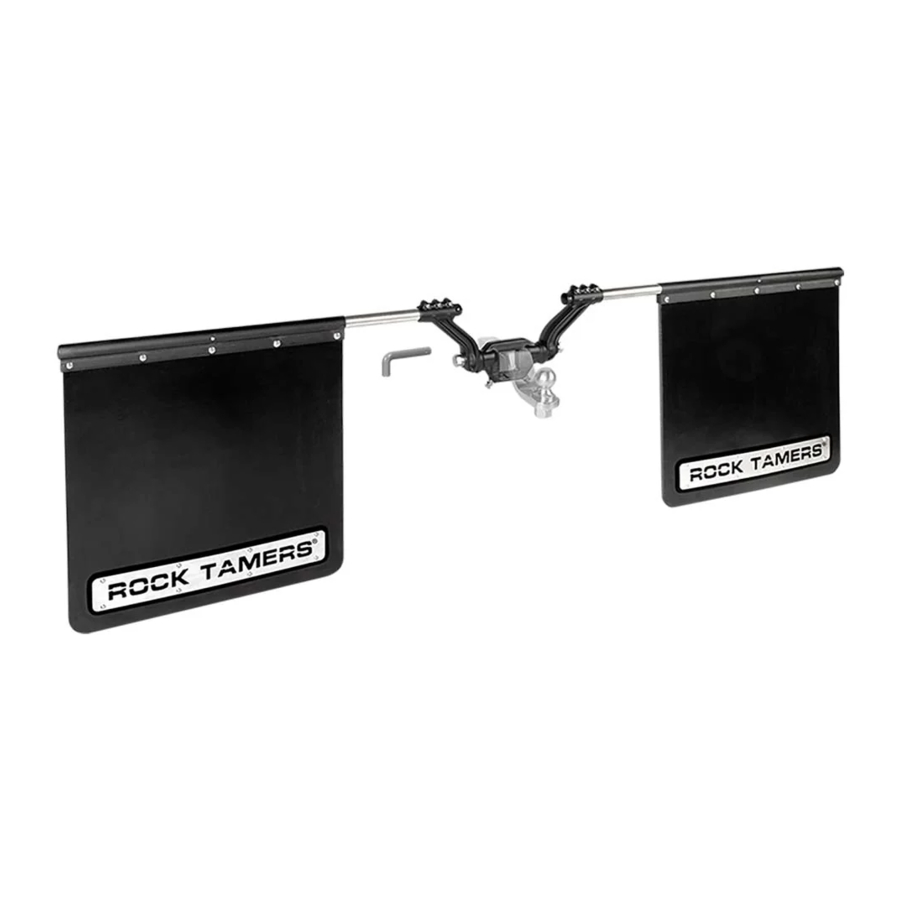
Parts List

Assembly Hints
- Refer to Figure 1 for component names and general definitions. Names in ALL CAPITALS refer to parts named in the illustrations.


- It may be easier to assemble the system while attached to a BALL MOUNT on the vehicle. However, it may also be assembled on a floor or workbench.
- The MUDFLAP length may require cutting to fit your specific vehicle. Be sure of the required length by measuring with full tongue weight attached.


Tools Required
- Wrench or socket sizes:
- 8mm, 10mm, 13mm, 17mm, & 27mm
(or a wrench adjustable up to 1 1/8" or 27mm) - Locking STAR PINTM wrench included
- 5mm locking Allen wrench included
- 8mm, 10mm, 13mm, 17mm, & 27mm
- Utility knife
- Tape measure or yardstick.
- Straight edge for cutting guide at least 24" or 61 cm long
- Hammer or mallet
Assembly Instructions
Account for all parts listed in the Parts List.
- Slide HUB ASSEMBLY onto BALL MOUNT and insert into vehicle RECEIVER HITCH.

- Secure the BALL MOUNT with HITCH PIN. Adjust HUB ASSEMBLY to desired position.
- Tighten the two M10 BALL MOUNT CLAMP BOLTS to hold CENTER HUB in place. (For assembly only) See Figure 3.
- Loosen or Remove all three M6 ARM CLAMP BOLTS from each HUB ARM. Carefully insert the two FLAP SUPPORT RODS thru HUB ARMS. Place ROD END CAP over the end of rods, hex side facing away from vehicle, insert END CAP BOLT thru END CAP BOLT HOLE, tighten securely with M5 NYLON INSERT HEX NUT.

- Re-install M6 ARM CLAMP BOLTS and M6 NYLON INSERT HEX NUTS back into HUB ARMS after the SUPPORT ROD is inserted. (Do not tighten yet.)
- Position the left and right FLAP SUPPORT RODS so the width adjustment holes face forward horizontally.

- Slide FLAP CLAMPS over the FLAP SUPPORT RODS with square holes facing away from vehicle. Do not secure with FLAP RETAINER BOLTS yet. (See Figure 6 for orientation of flap retainer bolt hole and flap support rod positioning holes.) (Note: MUDFLAP not yet attached.)

![]()
This next step is critical in ensuring that the MUDFLAP SYSTEM is properly installed. All measurements should be made while tow vehicle has full tongue weight. - Make sure SUPPORT RODS are level on both sides and measure the distance from the bottom of FLAP SUPPORT ROD to the ground. Subtract the desired ground clearance (3"- 4" recommended or 75 mm – 100 mm).

- Lay MUDFLAP down with grooved side up on flat surface. Measure desired MUDFLAP length from the bottom up. Find the nearest pre-molded CUT LINE GROOVE and mark.

![]()
Before cutting and drilling/punching holes, make sure to place either a scrap piece of wood or thick cardboard underneath MUDFLAP to avoid any surface damage. - Use a sharp utility knife to cut through MUDFLAP using the groove and a straight edge as a guide. This may take several passes to completely cut through MUDFLAP. See Figure 8.
Repeat procedure for 2nd MUDFLAP.
![]()
Place a scrap piece of wood under the MUD FLAPS when punching or drilling holes, as the punch will dull and may damage the surface underneath. - Punch the top row of pre-molded holes in the MUDFLAP using the included BOLT HOLE PUNCH.

- Assemble cut end of MUDFLAP into FLAP CLAMP by either sliding or pushing it down onto top of MUDFLAP with the square holes on the smooth side.
Note: Should it be difficult to slide MUDFLAP into FLAP CLAMP, moisten the cut end of MUDFLAP surface before inserting.
Insert the five M8 FLAP CLAMP BOLTS through the square holes. Loosely attach the M8 FLAT WASHER and M8 NYLON INSERT HEX NUT to the back as shown. (Do not tighten yet.)

Repeat for 2nd MUDFLAP. - Slide the FLAP CLAMP with attached MUDFLAP over the FLAP SUPPORT ROD with the NYLON INSERT HEX NUTS facing your vehicle.
Position the MUDFLAPS and FLAP SUPPORT RODS (left and right) as desired for your vehicle. Line up small hole in FLAP CLAMP with one of the three flap adjustment holes in SUPPORT ROD depending on vehicle size.- Inner Hole - for small and mid-sized vehicles
- Center Hole - for full-size vehicles
- Outer Hole - for large vehicles, such as dually trucks and small motor homes
Finally, insert the small M5 FLAP RETAINER BOLT through FLAP CLAMP and SUPPORT ROD and attach the M5 NYLON INSERT HEX NUT. Figures 1 & 6. Repeat for 2nd MUDFLAP.
- Assemble TRIM PLATES. Insert M6 TRIM PLATE SPACERS into holes in raised bottom portion of MUDFLAP. Attach the ROCK TAMERS TRIM PLATE with the eight M6 TRIM PLATE BOLTS (Locking STAR PINTM [STAR PINTM wrench included]), M6 FLAT WASHERS, and M6 NYLON INSERT HEX NUTS as shown in Figure 10. (20 in-lbs torque [10 mm socket or wrench]).
Repeat for 2nd MUDFLAP.
Note: DO NOT over tighten, as it will damage the TRIM PLATE. - The ARMS of the HUB ASSEMBLY may be loosened and rotated to fit your vehicle application. The FLAP SUPPORT RODS must also be rotated slightly so the MUDFLAPS hang vertical.

- Finalize all positioning and adjustments. For all conversions see Torque conversion table.
- Make sure the M10 SPLIT WASHERS and M10 JAM NUTS remain loose on the M10 BALL MOUNT CLAMP BOLTS and finish tightening the M10 CLAMP BOLTS evenly onto BALL MOUNT. (120-180 in-lbs torque [17 mm socket or wrench]).
Once the M10 BALL MOUNT CLAMP BOLTS are tight, tighten the M10 WASHERS AND JAM NUTS securely.

- Tighten the large CENTER HUB M18 ARM PIVOT BOLTS. (1500 inlbs torque [27mm socket or wrench]). Figure 1.
Note: Make sure the ARM PIVOT BOLTS and SUPPORT RODS have sufficient clearance away from the bumper so that they do not rub up against it. - Finalize width adjustment of FLAP SUPPORT RODS by sliding them in or out of the HUB ARMS. Figure 5.
Notes: It is recommended that final MUDFLAP position extends a minimum of 2" from outer edge of tire.
![]()
Evenly tighten the three M6 ARM CLAMP BOLTS beginning with the center bolt and moving from one to another on each side until all are tight.
The SLOT will NOT close. (70-80 in-lbs torque [5mm ALLEN WRENCH]). - Tighten the five M8 FLAP CLAMP BOLTS on each of the FLAP CLAMPS. Figure 10. (30 in-lbs torque [13mm socket or wrench])
![]()
SUPPORT RODS MUST NOT BE ABLE TO ROTATE or MOVE IN HUB ARMS or FLAP CLAMPS. - Tighten the M5 FLAP RETAINER BOLTS on each side. Figure 6
![]()
FLAP RETAINER BOLTS are not intended to hold FLAP CLAMP on FLAP SUPPORT ROD. The RETAINER BOLTS must be used for proper positioning and safety. - Complete the assembly by inserting the FLAP END CAPS into the FLAP CLAMPS. Figure 1.
- The ROCK TAMERS Mudflap System is now ready to use. As a final safety procedure, check bolts to see that they are tight and properly assembled. For optimum service and life, check components and the torque on all bolts prior to each use.
![]()


- FORGED ALUMINUM HUB & ARMS
- STAINLESS SLEEVED STEEL RODS
- UV PROTECTED MATTE BLACK FINISH
- STAINLESS, CHROME AND ZINC PLATED HARDWARE
ROCK TAMERS BOLT BUMPERS


Exhaust Systems
Note: Any modifications to the factory installed exhaust system may void your manufacturer's warranty.
Car Washes
You must remove mudflap system before entering any drive-through car wash.

Consumer assumes all risks associated with product performance after installation. Rock TamersTM will not protect everything and everyone from harm. Results may vary depending upon road surface and conditions, vehicle types, weather conditions, installation, and driving input. Please apply common sense to your expectations relating to product performance.
This product and its packaging contain chemicals known to the state of CA to cause cancer, birth defects or other reproductive harm.
19475 Beacon Lite Road
Monument, CO 80132
1.800.545.1894

www.rocktamers.com
Documents / Resources
References
Download manual
Here you can download full pdf version of manual, it may contain additional safety instructions, warranty information, FCC rules, etc.
Advertisement


Need help?
Do you have a question about the 00108 and is the answer not in the manual?
Questions and answers