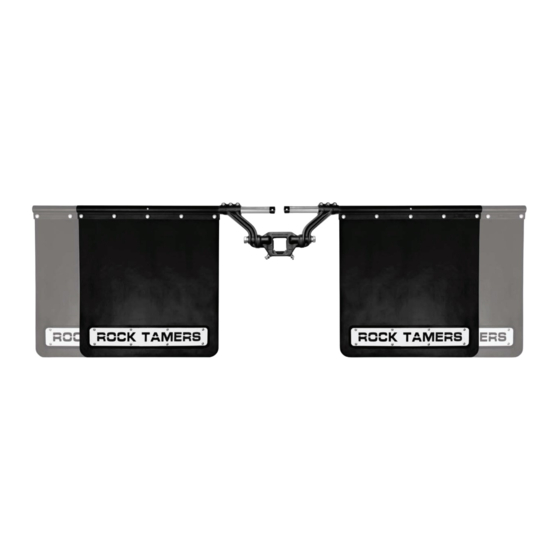
Rock Tamers 00108 Instruction Manual
Hide thumbs
Also See for 00108:
- Instruction manual (10 pages) ,
- Instruction manual (35 pages) ,
- User manual
Summary of Contents for Rock Tamers 00108
- Page 1 INSTRUCTION MANUAL Removable and Adjustable Mudflap System IMPORTANT! Please Read Booklet prior to assembly of your Rock Tamer Kit.
- Page 2 Part No. Qty. Description IMPORTANT! RT034 2.0" Center Hub/Matte Black Finish.* Exhaust Systems (Only if 00108 is purchased.) RT035 M10 Ball Mount Clamp Bolt* system may void your manufacturer’s warranty. RT036 M10 Jam Nut* Car Washes RT037 M10 Split Washer*...
- Page 3 Figure 1 Assembly Hints Tools Required • Refer to Figure 1 a. Wrench or socket sizes: – 8mm, 10mm, 13mm, 17mm, & 27mm (or a wrench adjustable up to 1 1/8” or 27mm) MOUNT on the vehicle. However, it may also be assembled on a –...
- Page 4 Assembly Instructions 5. Re-install M6 ARM CLAMP BOLTS and M6 NYLON INSERT HEX NUTS Account for all parts listed in the Parts List. back in (Do not Figure 2 1. Slide HUB ASSEMBLY onto BALL MOUNT and insert into vehicle adjustment holes face forward horizontally.
- Page 5 MUDFLAP SYSTEM is properly installed. All measurements should be made while tow vehicle has full tongue weight. 8. Make sure SUPPORT RODS are level on both sides and measure groove and a straight edge as a guide. This may take several the dis passes to completely cut through MUDFLAP.
- Page 6 14. Assemble TRIM PLATES. Insert M6 TRIM PLATE SPACERS into TAMERS TRIM PLATE with the eight M6 TRIM PLATE BOLTS (Locking STAR PIN [STAR PIN wrench included]), M6 FLAT 12. Assemble cut end of MUDFLAP into FLAP CLAMP by either sliding WASHERS, and M6 NYLON INSERT HEX NUTS as shown in or pushing it down onto top of MUDFLAP with the square holes Figure 10.
- Page 7 Notes: extends Torque conversion table on page 1. 17. Make sure the M10 SPLIT WASHERS and M10 JAM NUTS remain (120-180 in-lbs torque [17 mm socket or wrench]). beginning with the center bolt and moving from one to another on The SLOT will NOT close.
-
Page 8: Limited Warranty
LIMITED WARRANTY Cruiser Accessories LLC warrants this product to be free of defects in material and workmanship under normal use and service for the period of one (1) year from the components and the torque on all bolts prior to each use. original consumer date of purchase. - Page 9 Cruiser Accessories LLC 19475 Beacon Lite Road, Monument, CO 80132 USA: 1-800-545-1894 For related accessories go to: www.rocktamers.com Follow us on: WARNING: This product can expose you to chemicals including chromium, which is known to the state of California to case cancer. For more informa�on go to www/p65warnings.ca.gov...
- Page 10 IMPORTANT ! Systèmes d’échappement d’échappement installé en usine peut entraîner Lave-autos ATTENTION 00108/00110/00112 Le consommateur porte la responsabilité des risques GUIDE D’INSTRUCTIONS ne protège pas tout ni tout le monde des blessures. Les résultats peuvent chimiques qui sont reconnus par l’État de Californie comme cancérigènes et à...
- Page 11 N de pièce Description RT034 CHACUN Moyeu central / Finition noire mate* RT035 CHACUN RT037 DE CHAQUE Rondelle fendue M10* RT038 DE CHAQUE Rondelle plate M10* RT039 DE CHAQUE Bras du moyeu (droit) / Finition noire mate* RT040 DE CHAQUE Bras du moyeu (gauche) / Finition noire mate* RT041 DE CHAQUE...
- Page 12 Consignes d’assemblage Nomenclature des pièces. 1. Faire glisser l’ASSEMBLAGE Schéma 2 DU MOYEU sur la MONTURE DE ROTULE et insérer dans la BARRE D’ATTELAGE du véhicule. Consulter les Schémas 2 et 3. 2. Fixer solidement la MONTURE DE ROTULE avec la GOUPILLE D’ATTELAGE.
- Page 13 Schéma 5 MÂCHOIRE DE FIXATION DES BRAS M6 de chaque BRAS DU MOYEU. BAVETTES par LES BRAS DU MOYEU. hexagonal dirigé à l’opposé du véhicule, insérer le BOULON avec L’ÉCROU HEXAGONAL D’INSERTION EN NYLON M5. Consulter le Schéma 4. 7. Faire glisser les SERRE-PATTES sur les TIGES DE MAINTIEN DES BAVETTES de sorte que les trous carrés soient dirigés à...
- Page 14 8. Veiller à ce que les TIGES DE MAINTIEN soient à niveau de part et 10. Servez-vous d’un couteau tout usage aiguisé pour couper la BAVETTES jusqu’au sol. Soustraire l’espace de dégagement au sol guide. Il est possible que vous ayez à repasser plusieurs fois pour Schéma 7.
- Page 15 1. inférieure surélevée de la BAVETTE GARDE-BOUE. Fixer la PLAQUE DE GARNITURE ROCK du système ROCK TAMERS 17. Veiller à ce que les RONDELLES FENDUES M10 et LES CONTRE- comportant les huit BOULONS DE PLAQUE DE GARNITURE M6 ÉCROUS M10 restent desserrés sur les BOULONS DE LA MÂCHOIRE...
- Page 16 20. Serrer les cinq BOULONS DU SERRE-PATTE M8 sur chaque SERRE- PATTE. Schéma 10. (couple de 30 po-lb [douille ou clé de 13 Schéma 12 mm]). IMPORTANT : LES TIGES DE MAINTIEN NE DOIVENT PAS ÊTRE EN MESURE DE PIVOTER ni de SE DÉPORTER À L’INTÉRIEUR DES BRAS DU MOYEU ou des SERRE-PATTES.
-
Page 17: Garantie Limitée
Tous les retours doivent être expédiés EN FRAIS DE TRANSPORT PRÉPAYÉS à l’adresse indiqué sur l’extérieur du colis : Cruiser Accessories LLC 19475 Beacon Lite Rd. Monument, CO 80132 �.-U � l’a�en�on de : Returns (Retours) La présente garantie ne peut s’appliquer à un quelconque produit ou une quelconque pièce dont l’installation ou l’utilisation n’est pas conforme aux consignes imprimées stipulées par >... - Page 18 Cruiser Accessories LLC 19475 Beacon Lite Road, Monument, CO 80132 É.-U : 1-800-545-1894 Pour consulter les accessoires liés, rendez-vous sur : www.rocktamers.com Suivez-nous sur : AVERTISSEMENT: Ce produit peut vous exposer à des agents chimiques, y compris chromium, iden�fiés par l'État de Californie comme pouvant causer le cancer. Pour de plus amples informa�ons, prière de consulter www.P65Warnings.ca.gov.


Need help?
Do you have a question about the 00108 and is the answer not in the manual?
Questions and answers