LG S40TR, SPT41-W, SPT8-S, SPT8-SPK Manual
- Owner's manual (60 pages) ,
- Simple manual (76 pages)
Advertisement
- 1 Installing and using the Product
- 2 Installation
- 3 Exploring the Product
- 4 Various settings for convenience
- 5 Connecting to the TV
- 6 Connecting to an External Device
- 7 Using the Product as an Audio System
- 8 Safety Precautions
- 9 Before Reporting Product Malfunction
-
10
Troubleshooting
- 10.1 The product does not work properly
- 10.2 The power does not turn on
- 10.3 There is no sound
- 10.4 The subwoofer does not produce sound
- 10.5 The remote control does not work properly
- 10.6 The Auto Power function does not work
- 10.7 LG Sound Sync does not work
- 10.8 The product volume is low
- 10.9 The product fails to recognize a USB storage device
- 10.10 A Bluetooth device cannot be paired
- 10.11 There is radio interference
- 10.12 The remote control does not work
- 11 Specifications
- 12 Documents / Resources
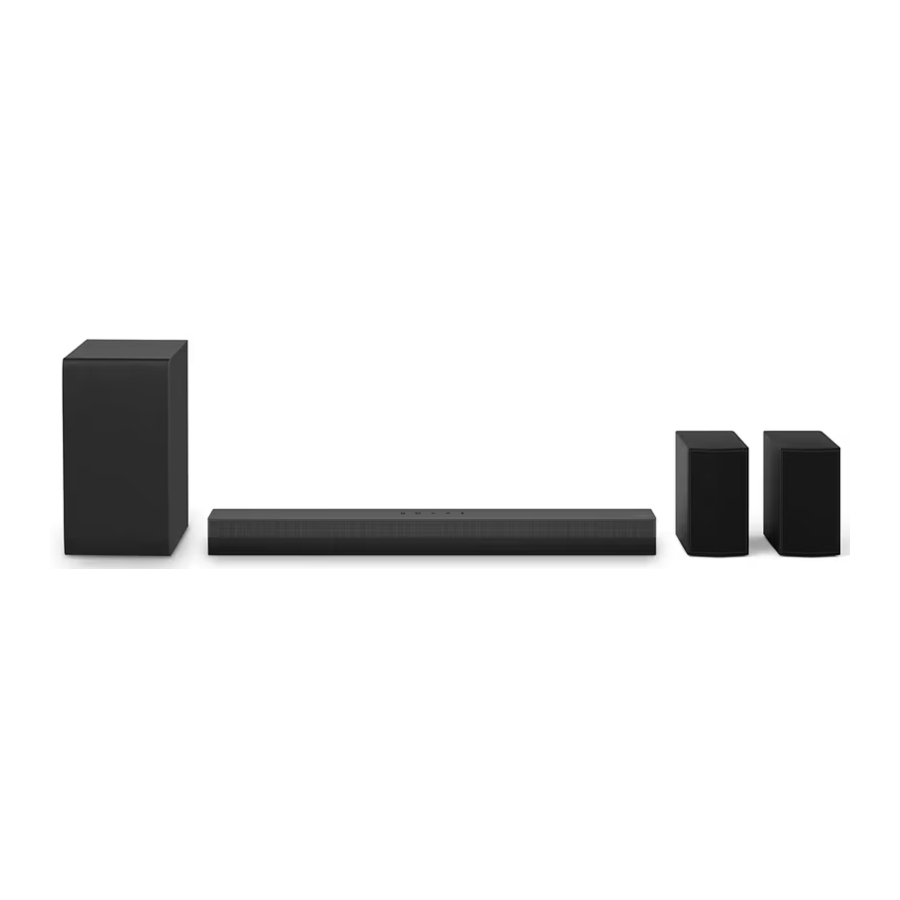
Installing and using the Product
- Connect the soundbar to your TV via an optical cable or an HDMI cable.


- Soundbar
- Remote Control Receiver
- Status LED (
![]() )
) - Rear Speakers
- Wireless Subwoofer - Install it close to the soundbar.
- External Device - (Blu-ray player, game console, etc.)

- If you are using an external device (ex. Set-top box, Blu-ray player, game console, etc.), connect it to the TV via an HDMI cable.
- Connect the rear speakers via a speaker cable. When connecting the rear speakers, connect the black striped cable to the negative terminal of each speaker and the remaining cable to the positive terminal of each speaker.
- Connect to power in the following order: wireless subwoofer
![]() rear speakers
rear speakers ![]() soundbar. Then, turn on the soundbar. When the connection is automatically established with the soundbar, LEDs on the wireless subwoofer and the rear speaker will light up in green. (
soundbar. Then, turn on the soundbar. When the connection is automatically established with the soundbar, LEDs on the wireless subwoofer and the rear speaker will light up in green. (![]() See "Connecting the Product".)
See "Connecting the Product".) - Connecting the product to your smartphone via Bluetooth (
![]() See "Connecting via Bluetooth".)
See "Connecting via Bluetooth".) - Tap the Settings
![]() button on your smartphone and select Bluetooth. Turn on the Bluetooth function. (
button on your smartphone and select Bluetooth. Turn on the Bluetooth function. (![]() Off >
Off > ![]() On)
On) - Press the Bluetooth pair
![]() button. After a moment, LED1 and LED2 blink white.
button. After a moment, LED1 and LED2 blink white. - Find and select the Soundbar on your smartphone. The product should appear as "LG S40TR(XX)".
- When the product is connected to your smartphone via Bluetooth, LED1 and LED2 light up white.
- Tap the Settings
- Connecting to the LG ThinQ app (
![]() See "Connecting with the product via LG ThinQ app".)
See "Connecting with the product via LG ThinQ app".) - Find and install the LG ThinQ app on Google Play or App Store from your smartphone.
![www.apple.com]()
![play.google.com]()
- You can get more information regarding its use by selecting [Help] in [Setting].
- Find and install the LG ThinQ app on Google Play or App Store from your smartphone.
 button on your smartphone and select Bluetooth. Turn on the Bluetooth function. (
 Off >
Off >  On)
On) button. After a moment, LED1 and LED2 blink white.

Manually connecting the soundbar to the wireless subwoofer or rear speakers ( See "Connecting the wireless subwoofer manually", "Manual connection".)
If you see a red LED on the wireless subwoofer or rear speaker, it means that the soundbar is not connected to the speakers. If this is the case, connect them in the following order.
- Press the Power
![]() button on the soundbar to turn it off.
button on the soundbar to turn it off. - Press the PAIRING button on the back of the wireless subwoofer or rear speaker. Check if each LED blinks green.
- If you still see a red LED on the wireless subwoofer, press and hold the button on the back of the subwoofer again.
- Press the Power
![]() button on the soundbar to turn it on.
button on the soundbar to turn it on. - When the connection is established, you will see a green LED light on the wireless subwoofer or rear speaker light up.
Installation
Connecting the Product
You can enjoy a richer sound by connecting the soundbar to the wireless subwoofer.
Connecting the wireless subwoofer automatically
After completing installation, the wireless subwoofer will automatically be connected to the soundbar. Connect the soundbar to the subwoofer in the following order.

- Plug the power cable into the wireless subwoofer.
- Plug the power cable connected to the wireless subwoofer into an outlet.
- Connect the AC adapter cable to the DC IN (AC adapter input) terminal on the back of the product.
- Plug the power cable into the AC adapter.
- Plug the power cable connected to the AC adapter into an outlet.
- Press the Power
![]() button on the soundbar to turn it on.
button on the soundbar to turn it on. - When the connection is automatically established, you will see the LED on the wireless subwoofer light up in green.
Checking the connection with the LED on the wireless subwoofer
You can check the connection status by looking at the LED on the wireless subwoofer.
| LED Color | Status |
| Blinking green | Connecting in progress |
| Green | Connected successfully |
| Red | Bad connection, or the subwoofer is in standby |
| Off | Power cable not connected |
Connecting the wireless subwoofer manually
If you see a red LED on the wireless subwoofer, it means that the soundbar is not connected to the subwoofer. If this is the case, connect them in the following order.
- Press the Power
![]() button on the soundbar to turn it off.
button on the soundbar to turn it off. - Press the PAIRING button on the back of the wireless subwoofer. Check if the LED on the subwoofer is blinking green. If you still see a red LED on the wireless subwoofer, press and hold the button on the back of the subwoofer again.


- Press the Power
![]() button on the soundbar to turn it on.
button on the soundbar to turn it on. - When the connection is established, you will see the LED light on the wireless subwoofer light up in green.
Note
- Install the soundbar as close to the wireless subwoofer as possible. The closer the distance between the soundbar and the wireless subwoofer, the better the sound quality.
- Please ensure there are no obstacles between the soundbar and the wireless subwoofer.
- To prevent wireless interference, maintain a distance of at least 1 m (3.3 ft) between the soundbar or the wireless subwoofer and any peripheral devices that generate strong electromagnetic waves (ex. wireless routers, microwave ovens, etc.).


Connecting the rear speakers
Automatic connection
After completing installation, the rear speakers will automatically be connected to the soundbar. Connect the soundbar to the rear speakers in the following order.
- Connect the speaker cables to the corresponding terminals on the rear speakers (left, right). Connect the black striped cable to the negative terminal and the other cable to the positive terminal.

- Plug the power cable into the rear speaker.
- Plug the power cable connected to the rear speaker into an outlet.
- Press the Power
![]() button on the soundbar to turn it on.
button on the soundbar to turn it on. - When the connection is automatically established, you will see the LED on the rear speaker light up in green.

Note
- Please only use the speakers provided with the product. Using other speakers may cause malfunction.
- Connect the speaker cables to the corresponding terminals. Connect to the positive cable to the positive terminal and the negative cable to the negative terminal. An incorrectly connected cable will distort the sound or produce no bass.
- Connect the product to the speakers and cables provided at the time of product purchase.
- If you connect the product to speakers or cables other than those provided at the time of product purchase, there can be a deterioration of sound quality or a speaker malfunction.
- When you connect speakers to the product, connect only one speaker to the output port that fits the speaker.
- If you connect multiple speakers to one output port, it may cause a product or speaker malfunction.
- If the position of the power plug is different during rear speakers installation, you can change the position of the L/R channel of rear speaker's through the LG ThinQ app.


Checking connection status with the LED color
You can check the connection status with the LED on the rear speaker.
| LED Color | Status |
| Blinking green | Connecting In progress |
| Green | Connected successfully |
| Red | Bad connection, or the rear speakers are in standby |
| Off | Power cable not connected |
Manual connection
If you see a red LED on the rear speaker, it means that the soundbar is not connected to the rear speakers. If this is the case, connect them in the following order.
- Press the Power
![]() button on the soundbar to turn it off.
button on the soundbar to turn it off. - Press the PAIRING button on the back of the rear speaker. Check if the LED on the rear speaker is blinking green.
![]()

- Press the Power
![]() button on the soundbar to turn it on.
button on the soundbar to turn it on. - When the connection is established, you will see the LED light on the rear speaker light up in green.
Note
- Keep the rear speakers at least 30 cm (11.8 inch) away from the TV or monitor.
- To prevent wireless interference, maintain a distance of at least 1 m (3.3 ft) between the soundbar or the rear speakers and any peripheral devices that generate strong electromagnetic waves (ex. wireless routers, microwave ovens, etc.).
![]()

Organising cables (Optional)
You can organise the speaker cable with supplied cable ties.
")
Note
- After all connections are completed, you can arrange cables as needed.
Setting up surround sound
The surround sound function allows you to hear immersive 3D sound produced by multiple audio channels from the speakers, regardless of the channels in the originally recorded content.
For example, if you listen to music recorded in 2.0 channels with standard sound effects while the rear speakers are connected, you can hear the following difference.

Note
- Speaker positions are as follows.
- Front speakers
- Subwoofer
- Rear speakers
Turning surround sound on/off
- Press Settings
![]() button. LED2 blinks white.
button. LED2 blinks white.
![]()
- While the LED2 is blinking, press Left/Right button to choose the surround sound setting.
![]()
- While the LED2 is blinking, press Up/Down button. If the surround sound setting is on, LED1 blinks white. If the surround setting is off, LED3 blinks white.
![]()


Speaker sound based on input channels
| Sound Effects | ||
| Input | Output | |
| Rear speakers not connected | Rear speakers connected | |
| AI SOUND PRO Sound customized with artificial intelligence | ||
| 2.0 channels |  |  |
| 5.1 channels | ||
| STANDARD You can enjoy optimized sound. | ||
| 2.0 channels | |  |
| 5.1 channels | | |
| CINEMA Cinematic 3D sound | ||
| 2.0 channels | | |
| 5.1 channels | ||
| GAME Optimized sound for game | ||
| 2.0 channels | | |
| 5.1 channels | ||
Exploring the Product
Front

- Power
![]()
This turns the product on/off.
![]() Function
Function
Press the button repeatedly to select the desired function or input mode.


- Optical/ARC: Connects the product to a TV that supports an optical cable, ARC, or LG Sound Sync
- Bluetooth
- Connects the product via Bluetooth
- Connects the product to a TV that supports LG Sound Sync (Wireless)
- USB: Connects the product to a USB storage device
Volume![]()
Adjusts the sound volume.
Bluetooth pair![]()
It allows you to pair your Bluetooth device such as a smartphone to this product for three minutes. (![]() See "Connecting via Bluetooth".)
See "Connecting via Bluetooth".)


- Remote Control Receiver
This receives wireless signals from the remote control. - Status LED
Options such as input mode and volume light up. (![]() See "Status LED".)
See "Status LED".)
- The status LED can be controlled as auto, off, and on. (
![]() See "Display".)
See "Display".)
Note
- To reduce power consumption, the product will automatically turn off after 15 minutes of no input signal from an external device.
Status LED
 | On (White, Orange, Purple, Green, Yellow, Red) |
 | Off |
 | Blink |
| Power on / Power off | |||
 | LED1 blinks red. | ||
| Volume control | |||
 |
| ||
| Mute | |||
 | All LEDs blink orange. | ||
| Function | |
 | OPTICAL/HDMI ARC LED1 lights up white. |
 | Bluetooth ready LED1 and LED2 blink white. |
 | Bluetooth LED1 and LED2 light up white. |
 | USB LED1 lights up purple. |
| The other button inputs | |
 | LED2 blinks red once when you press the button: Sound Effects (AI SOUND PRO  , CINEMA , CINEMA  , STANDARD , STANDARD  , GAME , GAME  ), Up/Down / Left/Right, Play/Pause ), Up/Down / Left/Right, Play/Pause |
Back

- DC IN
Plug in the AC adapter. to the product. - HDMI™
![]() TV (ARC)
TV (ARC)
Plug in an HDMI cable to connect the TV to the product. - USB port
Plug in a USB storage device to play music with the product. - OPTICAL IN
Plug in an optical cable to connect the TV to the product.
 TV (ARC)
 Exploring Remote Control
You can use the remote to control all functions of the product, from turning the power on/off to enabling cinematic sound.

Replacement of Battery

Use AAA 1.5V batteries. Replace the two batteries by inserting them into the remote control in accordance with the directions indicated.
- Open the battery cover on the back of the remote control.
- Insert the batteries with the + and – ends corresponding to the markings.
- Close the battery cover.
Risk of fire or explosion if the battery is replaced by an incorrect type.
- Power
![]()
Turns the product on/off. - VOL(Volume)
![]()
Adjusts the sound volume. - Bluetooth pair
![]()
It allows you to pair your Bluetooth device such as a smartphone to this product for three minutes. (![]() See "Connecting via Bluetooth".)
See "Connecting via Bluetooth".) - Mute
![]()
This turns off the sound from the product. - AI Sound Pro
![]()
Artificial intelligence selects the optimal sound settings to suit your content. - Up/Down/Left/Right
These buttons are used to adjust the settings of the convenient functions.
![]()
Left/Right: To play the previous song, press Left button. To play the next song, press Right button. - Play/Pause
![]()
To play or pause a song, press this button.


- When listening to music on a USB storage device, you can select the play mode by pressing this button for 3 seconds or longer, then press the button repeatedly to select the desired Repeat option.
- REPEAT ONE: Plays the current file repeatedly
- REPEAT FOLDER: Only plays the files in the folder on a loop
- REPEAT ALL: Plays all files on a loop
- REPEAT SHUFFLE: Plays a random file until all files are played, then ends playback
- REPEAT OFF: Plays the files in order, then ends playback
- Cinema
![]()
Play content with 3D sound similar to a movie theater. - Function
![]()
Press the button repeatedly to select the desired input mode or function. - Settings
![]()
It allows you to adjust the settings of this product: AUTO POWER, SURROUND, NIGHT TIME, DISPLAY, REAR CH CHANGE. Press Settings![]() button and select the setting by using Left/Right button before you press the Up/ Down button to turn on/off the setting.
button and select the setting by using Left/Right button before you press the Up/ Down button to turn on/off the setting.


- AUTO POWER: When the TV or an external device is turned on or off, the product will also turn on or off automatically. It is available only when the product is connected to the TV with an optical cable. (
![]() See "Auto Power".)
See "Auto Power".) - SURROUND: The surround sound function allows you to hear immersive 3D sound produced by multiple audio channels from the speakers, regardless of the channels in the originally recorded content. (
![]() See "Turning surround sound on/off".)
See "Turning surround sound on/off".) - NIGHT TIME: This reduces the general sound volume, but raises the volume of soft and delicate sounds. This is useful when enjoying music or a movie late at night. (
![]() See "Night Time".)
See "Night Time".) - DISPLAY: The status LED can be controlled as auto, off, and on. (
![]() See "Display".)
See "Display".) - REAR CH CHANGE: You can change the rear speaker position as you like. (
![]() See "Rear channel change".)
See "Rear channel change".)
- Sound Tuning
![]()
This adjusts the sound level of the connected speaker. Press the Sound Tuning![]() button and then Left/ Right button to select the desired speaker before you press the Up/Down button to increase/decrease the sound volume. Adjustable speakers and adjustment ranges are as follows:
button and then Left/ Right button to select the desired speaker before you press the Up/Down button to increase/decrease the sound volume. Adjustable speakers and adjustment ranges are as follows: - Subwoofer: -15 ~ 6
- Rear: -6 ~ 6
- Treble: -6 ~ 6
- Mid: -6 ~ 6
- Bass: -6 ~ 6
- Adjusting subwoofer and rear speakers level is applied only when the subwoofer and rear speakers are connected.

- Standard
![]()
You can enjoy optimized sound. - Game
![]()
Optimized sound for game.
Various settings for convenience
Convenient functions
Auto Power
This function automatically turns the product on or off when the TV or external device is turned on or off.
When the connected device is turned on, the product turns on automatically and selects a function according to the input signal.
Night Time
This reduces the general sound volume, but raises the volume of soft and delicate sounds. This is useful when enjoying music or a movie late at night.
Display
The status LED can be controlled as auto, off, and on.
| Option | LED Status |
| Auto | Dimmed after 20 seconds of button input. |
| Off | Turned off after 20 seconds of button input. |
| On | Always on |
Rear channel change
You can change the speaker position as you like. If the outlet is on the left side of the soundbar, place the speaker with power cord on the left and set the speaker position.
Note
- You can change the speaker position after connecting the rear speakers to the soundbar. Additionally, you can change it only if the rear speaker is turned on.
How to change the settings
- Press Settings
![]() button. The product enters the setting mode and LED2 blinks white.
button. The product enters the setting mode and LED2 blinks white.
![]()
- While the LED2 is blinking, press Left/Right button to choose the setting you want.
![]()
- While the LED2 is blinking, press Up/Down button. If the setting is on or auto, LED1 blinks white. If the setting is off, LED3 blinks white.
![]()


Sound tuning
You can adjust the sound level of each speaker and sound tone.
- Press Sound Tuning
![]() button. The product enters the setting mode and displays the current level of the product.
button. The product enters the setting mode and displays the current level of the product. - Press Left/Right button to choose the speaker you want to adjust.
- Press Up/Down button to adjust the sound level.


Note
- If you press Up/Down button even when the level has reached the maximum or minimum, the current function LED will blink 3 times.
Voice feedback function
When you select a function or sound, the current status of the product is guided by voice. (English voice only)
You can turn this function on and off with app only.
Note
- Voice feedback and soundbar volume level work together from 5 to 13. However the voice feedback level cannot be adjusted below 5 or above 13.
- During voice feedback, all sounds except for voice feedback becomes low temporarily.
- Regardless of setting this function, you can hear voice feedback for the settings, sound tuning, and information.
How to deactivate the wireless network connection(s).
Set up the Auto power function to off by the app and turn off the product.
Connecting to the TV
Connecting with an Optical Cable
Transmit your TV's audio to the product by connecting it to the TV with an optical cable. You can add a variety of 3D effects to the original audio to fill the room with a deep, rich sound.
Watching TV after connecting with an optical cable
- If the digital cable terminal has a cover, first remove the covers from both ends.
![]()
- Using an optical cable, connect the OPTICAL IN terminal on the back of the product to the Optical Digital Output (OPTICAL OUT) terminal on the TV as shown in the picture.

- Press the Function
![]() button repeatedly until LED1 lights up white.
button repeatedly until LED1 lights up white.
![]()
- Press the Settings button on the TV remote control to enter the [Speaker] menu and set the output speaker to [Optical] or [External Speaker]. Settings and menu items may vary depending on the TV manufacturer.


Note
- If the optical input signal and the ARC signal attempt to connect at the same time, the ARC signal will take priority.
When you use an LG TV
You can adjust the volume with the LG TV remote control if the TV is connected to the product with an optical cable. You can only do so on a TV that supports the LG TV Sound Sync function. Check your TV's user manual to see if your TV is supported.
Functions controllable with an LG TV remote control
Volume, mute on/off
Note
- When using the product with an LG TV remote control, the volume and mute status set on the TV will automatically be applied to the product.
- You can still use the product's remote control even after connecting it to an LG TV.
- To use LG Sound Sync, you may have to change the sound setting of your TV. It may vary depending on the TV.
Connecting via Bluetooth
You can adjust the volume with the LG TV remote control if the TV is connected to the product with LG Sound Sync (Wireless). Check out the TV user manual to see if your TV is supported.
Watching TV after connecting it wirelessly
- Press the Bluetooth pair
![]() button. After a moment, LED1 and LED2 blink white.
button. After a moment, LED1 and LED2 blink white. - Press the Settings button on the TV remote control, enter to the [Speaker] menu, and connect the product to the TV.
- Find and select "LG S40TR(XX)". d When the product is connected to the TV via Bluetooth, LED1 and LED2 light up white.

 button. After a moment, LED1 and LED2 blink white.
Note
- When reconnecting after the first connection with LG Sound Sync, immediately lights up as a white LED.
- When using the product with an LG TV remote control, the volume and mute status set on the TV will automatically be applied to the product.
- You can still use the product's remote control even after connecting it to an LG TV.
- If you turn off the power of the product with the Power
![]() button, the LG Sound Sync (Wireless) will be disconnected.
button, the LG Sound Sync (Wireless) will be disconnected. - Depending on the TV, the product may be connected to the LG TV even if it is connected with the Bluetooth function.
Connecting with an HDMI Cable
You can transmit TV audio to the product by connecting the TV to the product with an HDMI cable. Add a variety of 3D effects to the original audio to fill the room with a deep, rich sound.
Watching TV after connecting with an HDMI cable
- Using the HDMI cable, connect the HDMI™
![]() TV (ARC) terminal on the back of the product to the HDMI IN (ARC) terminal on the TV as shown in the picture.
TV (ARC) terminal on the back of the product to the HDMI IN (ARC) terminal on the TV as shown in the picture.

- Press the Function
![]() button repeatedly until LED1 lights up white.
button repeatedly until LED1 lights up white.
![]()
- Press the Settings button on the TV remote control to enter the [Speaker] menu and set the output speaker to [HDMI ARC]. Settings and menu items may vary depending on the TV manufacturer.
 TV (ARC) terminal on the back of the product to the HDMI IN (ARC) terminal on the TV as shown in the picture.

Note
- Make sure that your TV supports the ARC function before you press the Setting button on the TV remote control and turn on ARC. For more information on how to set the function, refer to the TV user manual as it may differ depending on the TV.
- Use a certified cable with the HDMI logo.
SIMPLINK
- SIMPLINK refers to the HDMI-CEC function that allows you to use a single TV remote control to easily operate an audio device or player connected to an LG TV via HDMI.
- Functions controllable with a SIMPLINK-compatible LG TV remote control: Power on/off, volume control, mute on/off, etc.
- For more information on how to set up SIMPLINK, consult your LG TV's user manual.
![]()

Note
- The SIMPLINK function may not work properly depending on the status of the product or other connected devices.
- HDMI-CEC features by TV manufacturer: LG SIMPLINK, Sony BRAVIA Sync/Link, Philips EasyLink, Samsung Anynet+, etc.
Connecting to an External Device
Connecting with an HDMI Cable
Connect the TV and external device (game console, DVD player, etc.) with an HDMI cable and enjoy a deep and rich sound.
Connecting an external device via HDMI
- Connect an external device such as a Set-top box, DVD or Blu-ray player. Following the picture below, connect the HDMI OUT terminal of the device to the HDMI IN terminal on the TV.
- Using the HDMI cable, connect the HDMI™ d TV (ARC) terminal on the back of the product to the HDMI IN (ARC) terminal on the TV.

- Press the Function
![]() button repeatedly until LED1 lights up white.
button repeatedly until LED1 lights up white.
![]()
- When the external device is properly connected to the product, you can listen to the sound of the device.


Note
- Please check the audio output settings in the Settings menu of your external device (ex. Blu-ray player or TV). The audio output should be set to [No encoding], [Bitstream], [Auto], or [Pass through]. For more information on how to set the output, please refer to your external device's user manual.
- Use a certified cable with the HDMI logo.
Connecting with an Optical Cable
Connect the TV and external device (game console, DVD player, etc.) with an optical cable and enjoy a deep and rich sound.
Connecting an external device via optical cable
- Use the optical cable to connect the OPTICAL IN terminal on the back of the product to the OPTICAL OUT terminal of your external device (ex. TV, Blu-ray player) as shown in the picture.

- Press the Function
![]() button repeatedly until LED1 lights up white.
button repeatedly until LED1 lights up white.
![]()


Using the Product as an Audio System
Connecting via Bluetooth
You can play music files stored on a Bluetooth device, or run music apps to enjoy the music with this product.
Please check the following first.
- Bluetooth devices to be connected to the product should meet the following specifications.
- Bluetooth 5.3 technology
- Codec: SBC, AAC
- Steps to connect the device to the product may vary depending on the Bluetooth device type and model. For more information on how to connect the device, please refer to your external device's user manual.
Select the [Bluetooth] from your smartphone's Settings menu.
Settings menu items may vary depending on your smartphone manufacturer and model.
- Turn on the product.
- Press the Bluetooth pair
![]() button. After a moment, LED1 and LED2 blink white.
button. After a moment, LED1 and LED2 blink white.

- Tap the Settings (
![]() /
/ ![]() ) button on your smartphone and select Bluetooth.
) button on your smartphone and select Bluetooth.


 ) button on your smartphone and select Bluetooth.

- Turn on the Bluetooth function. (
![]() Off >
Off > ![]() On)
On) - You will see a list of connectable devices on your smartphone. Find and tap "LG S40TR(XX)".
![]()

- When the product is connected to the smartphone via Bluetooth, LED1 and LED2 light up white.
- If you cannot find the product "LG S40TR(XX)", tap the Refresh
![]() button at the top right of the screen on the Android smartphone or turn the Bluetooth off and turn it on again on iPhone.
button at the top right of the screen on the Android smartphone or turn the Bluetooth off and turn it on again on iPhone.
![]()
- Run a Music app and listen to music on the smartphone.
![]()


Note
- The closer the Bluetooth device is to the product, the better your connection.
- If you pressed the Bluetooth pair
![]() button of the product and selected the "Bluetooth" option, but could not connect to the Bluetooth device, LED1 and LED2 blink white for 3 minutes. Check the status of the Bluetooth device.
button of the product and selected the "Bluetooth" option, but could not connect to the Bluetooth device, LED1 and LED2 blink white for 3 minutes. Check the status of the Bluetooth device. - When using Bluetooth, you should adjust the volume level to an appropriate level.
- XX is the last 2 digits of the MAC address of the product. For example, if the MAC address is 9C:02:98:4A:F7:08, it will be displayed as "LG S40TR(08)".
Connecting with the product via LG ThinQ app
Please use the LG ThinQ app to run various functions of the product conveniently.
Please check the following first.
- The LG ThinQ app is available in the versions listed below.
- Android™ OS: Version 9.0 or higher
- iOS OS: Version 15.0 or higher
- Minimum supported versions for each OS may change later.
Installing the LG ThinQ app and registering the product
You can manage your home appliance whenever wherever by the LG ThinQ app.
Product without the QR code
- Go to the Google Play or the App Store on your smartphone and search for the LG ThinQ app to install it.
- Run the LG ThinQ app and log in to the app with your account. If you don't have an account, you can also create a new one.
- Press the add (o) button and follow the instructions on the LG ThinQ app to register your product.
Product with the QR code
Scan the QR code on the bottom of the product with your smartphone camera or a QR code scan app.

Note
- Please note that the QR code may not be available at the time of purchase.
- The QR code attachment location may differ depending on the product.
- Settings menu items may vary depending on the smartphone manufacturer and OS.
- Google, Android and Google Play are trademarks of Google LLC.
Connecting to a USB Storage Device
Enjoy high-quality sound by connecting a USB storage device containing music files to the product.
Connecting the product to a USB storage device
- Plug the USB storage device into the USB port on the back of the product.
- The product cannot play any devices connected via a USB storage device hub or a USB storage device cable.
- The product cannot be connected to any USB storage device, USB type MP3 player, or card reader that requires a separate device drive to be installed.

- Press the Function
![]() button repeatedly until LED1 lights up purple.
button repeatedly until LED1 lights up purple.
![]()
- Press the Play/Pause
![]() button on the remote control to enjoy the music.
button on the remote control to enjoy the music.
![]()


Note
- It is recommended that you purchase a separate USB gender changer to make it easier to plug in and out USB storage devices.
- Purchase a USB gender changer with a USB 2.0 extension cable.
- USB devices with a large storage volume may take several minutes to browse through files.
- LG Electronics is not responsible for any data loss. Please always back up the data on your USB storage device to minimize damage caused by data loss.
- Only FAT16/FAT32/NTFS formats are supported. exFAT format is not supported.
- Use the USB port of this product only for playing a media file. You cannot charge external devices with the USB port.
USB storage devices supported
- MP3 player
- Flash MP3 player
- USB flash device
- USB 2.0 This product may not recognize some USB storage devices.
Playable file specifications
| File extension | Sampling frequency / Bitrate |
| MP3 | 32 kHz - 48 kHz / 8 kbps - 320 kbps |
| WMA | 32 kHz - 48 kHz / 5 kbps - 330 kbps |
| OGG | 32 kHz - 48 kHz / 30 kbps - 500 kbps |
| File extension | Sampling frequency |
| FLAC (16 bit/24 bit) | 32 kHz, 44.1 kHz, 48 kHz, 88.2 kHz, 96 kHz, 176.4 kHz, 192 kHz |
| WAV (16 bit/24 bit) | 32 kHz, 44.1 kHz, 48 kHz, 88.2 kHz, 96 kHz, 176.4 kHz, 192 kHz |
- Number of playable files: Up to 2,000
- Maximum number of directories: Up to 200
- This product cannot play files protected by DRM (Digital Rights Management).
- This product cannot play video files from a USB storage device.
Safety Precautions
Safety and Regulatory

RISK OF ELECTRIC SHOCK DO NOT OPEN
TO REDUCE THE RISK OF ELECTRIC SHOCK DO NOT REMOVE COVER (OR BACK). NO USER- SERVICEABLE PARTS INSIDE. REFER SERVICING TO QUALIFIED SERVICE PERSONNEL.
 This lightning flash with arrowhead symbol within an equilateral triangle is intended to alert the user to the presence of uninsulated dangerous voltage within the product's enclosure that may be of sufficient magnitude to constitute a risk of electric shock to persons.
 The exclamation point within an equilateral triangle is intended to alert the user to the presence of important operating and maintenance (servicing) instructions in the literature accompanying the product.

- TO PREVENT FIRE OR ELECTRIC SHOCK HAZARD, DO NOT EXPOSE THIS PRODUCT TO RAIN OR MOISTURE.
- Do not install this equipment in a confined space such as a book case or similar unit.

- Do not use high voltage products around this product. (ex. Electrical swatter) This product may malfunction due to electrical shock.
- No naked flame sources, such as lighted candles, should be placed on the apparatus.
- Do not block any ventilation openings. Install in accordance with the manufacturer's instructions. Slots and openings in the cabinet are provided for ventilation and to ensure reliable operation of the product and to protect it from over heating. The openings should never be blocked by placing the product on a bed, sofa, rug or other similar surface. This product shall not be placed in a built-in installation such as a bookcase or rack unless proper ventilation is provided or the manufacturer's instruction has been adhered to.
- The apparatus should not be exposed to water (dripping or splashing) and no objects filled with liquids, such as vases, should be placed on the apparatus.
- For safety marking information including product identification and supply ratings, please refer to the main label on the bottom or the other surface of the product.
- Be careful to make sure children do not put their hands or any objects into the *speaker duct. - * speaker duct: A hole for plentiful bass sound on speaker cabinet. (enclosure)
concerning the Power Cord
Install this apparatus in a location where the power plug can be easily unplugged and plugged in. If there is a fire or problem with this apparatus, unplug it quickly.
Check the specification page of this owner's manual to be certain of the current requirements.
Do not overload wall outlets. Overloaded wall outlets, loose or damaged wall outlets, extension cords, frayed power cords, or damaged or cracked wire insulation are dangerous. Any of these conditions could result in electric shock or fire. Periodically examine the cord of your device, and if its appearance indicates damage or deterioration, unplug it, discontinue use of the device, and have the cord replaced with an exact replacement part by an authorized service center.
Protect the power cord from physical or mechanical abuse, such as being twisted, kinked, pinched, closed in a door, or walked upon. Pay particular attention to plugs, wall outlets, and the point where the cord exits the device.
For models using an adapter
Only use the AC adapter supplied with this device. Do not use a power supply from another device or another manufacturer. Using any other power cable or power supply may cause damage to the device. The LG limited warranty does not cover damage caused by the use of third party accessories.
For models using a battery
This device is equipped with a portable battery or accumulator.
Risk of fire or explosion if the battery is replaced by an incorrect type.
For models using a built-in battery
Do not store or transport at pressures lower than 11.6 kPa (0.116 bar) and at above 15,000 m (9.32 miles) altitude.
- replacement of a battery with an incorrect type that can defeat a safeguard (for example, in the case of some lithium battery types);
- disposal of a battery into fire or a hot oven, or mechanically crushing or cutting of a battery, that can result in an explosion;
- leaving a battery in an extremely high temperature surrounding environment that can result in an explosion or the leakage of flammable liquid or gas;
- a battery subjected to extremely low air pressure that may result in an explosion or the leakage of flammable liquid or gas.
Symbols
 : Alternating current (AC).
 : Direct current (DC).
 : This is a class II equipment.
 : Standby power state.
 : The power is turned on.
 : Danger voltage.
Prevention of product misuse
To prevent misuse of the product, please be sure to check the contents below.
Precautions for installing the product
- Do not install the product in an unstable or vibrating place, such as on a shaking shelf or inclined surface. Install the product on a firm and level surface.
- Otherwise, the product may fall or tip over and cause injury.
- If you install the product on an unstable surface, the product may not work properly.
- If you install the product on a piece of furniture or shelf, make sure that the bottom front of the product does not protrude. Always use a piece of furniture or shelf that fits the product size.
- Otherwise, the product may lose its balance and fall, causing injury or product damage.
- Install the product in a safe place. Otherwise, a child may bump into an edge of the product and get injured.
- Install the product in a place free from electromagnetic interference for proper operation.
- If you install the product in a place that does not meet the general use conditions, an unexpected quality problem may arise. So, make sure that you contact the service center first before installing the product in such a place.
- Do not keep the product in a place where the temperature is too high (above 40°C (105°F)) or too low (below 5°C (41°F)) or a place with too much humidity.
- Avoid places exposed to direct sunlight or heat, e.g., near a heater. Do not use or keep flammable sprays or substances near the product.
- Otherwise, there is a risk of explosion or fire.
- Do not install the product in a place with too much moisture, dust or soot.
- Otherwise, it may cause a fire or electric shock.
- Do not install the product in a narrow space, such as inside a bookshelf, that does not ventilate well. Do not cover the product with a table cover or curtain.
- Otherwise, it may increase the product temperature, causing a breakdown or fire.
- Connect the power plug of the product to a power outlet that is easily accessible.
- When a fire or other problem occurs in the product, you must be able to remove the power plug quickly.
- Do not connect multiple products to one power outlet at the same time.
- Otherwise, it may cause overheating, resulting in a fire.
Precautions for using the product
- Do not lift or move the product while it is operating.
- Otherwise, it may cause a breakdown.
- When moving the product, pull out the power cord and all cables connected to the product.
- Otherwise, it may cause a fire or electric shock.
- Stop using the product immediately if you notice smoke or a strange odor. In this case, turn off the power immediately, disconnect the power plug, and contact the service center.
- Using the product in this state may result in a fire or electric shock.
- Do not insert metal objects such as coins and hairpins or flammable objects such as paper and matchsticks into the product. Make sure that you tell any children not to do so.
- Otherwise, it may cause a breakdown.
- If a foreign substance is inserted into the product, is connect the power plug and contact the service center.
- Do not put a heavy object on top of the product.
- Otherwise, it may tip over or fall, causing injury.
- Make sure that a child does not hang on the product or get on it.
- Otherwise, the product may tip over or fall, causing injury. Make sure that you tell any children not to do so.
- Remove the power plug during thunderstorms.
- Otherwise, it may cause a fire.
- Do not place vessels with liquid, such as a vase, pot, cosmetics, or medicine, on top of the product.
- Otherwise, it may result in a fire, electric shock, or injury due to its fall, etc.
- Make sure that you connect the power plug firmly. Do not use voltage other than the rated voltage indicated on the product.
- An insecure connection may result in a fire.
- Do not insert a conductor, such as chopsticks, into the groove on the other side of the product while the power plug is connected to an outlet. Do not touch the power plug immediately after unplugging it from the outlet.
- Otherwise, it may cause electric shock.
- Hold the power plug with dry hands.
- Otherwise, it may cause electric shock.
- Do not move or push the product while holding a product cable such as a power cord.
- The cable may get damaged and cause a breakdown or result in a fire or electric shock.
- When removing a cable plugged into the product, make sure that you hold the connector at the end of the cable. Do not hold the cable line.
- Otherwise, it may result in an injury or the product may fall and cause a breakdown.
- Do not keep the product in a place exposed to heat, e.g., near a heater.
- Otherwise, it may cause a fire or malfunction.
- Do not disassemble, repair, or modify the product.
- Otherwise, it may cause a breakdown, resulting in a fire, electric shock, or injury.
- Keep plastic wraps out of reach of toddlers.
- Otherwise, toddlers may choke on the plastic wraps.
- Do not drop an object on the product or make an impact on it. Keep the product away from places with severe vibrations or magnets.
- Do not damage, modify, bend, twist, or heat a power cord.
- Otherwise, it can damage the power cord, resulting in a fire or electric shock.
- When you are not using the product for a prolonged period, such as when you are away from home, unplug the power cord from the power outlet.
- If dust accumulates, it can cause heat, resulting in electric shock or fire due to a short circuit.
- Do not dispose of waste batteries together with regular waste. Dispose of them separately.
- Otherwise, there is a risk of explosion or fire.
- Do not use high voltage products around this product. (ex. Electrical swatter)
- This product may malfunction due to electrical shock.
- Do not touch the power plug immediately after unplugging it from the outlet.
- Otherwise, it may cause electric shock.
- Connect the power plug to a grounded outlet or extension cord. (This does not apply to products without a ground.)
- Otherwise, it may cause a breakdown or electric shock due to a short circuit.
- In the case of a product with a vent, keeping the product turned on for a prolonged period can result in the vent getting hot. Do not touch the vent when it is hot. The heat is not a fault of the product and does not cause any malfunction. So, you may use the product without worry.
- Do not damage the power cable, AC adapter, or power plug. Do not place a heavy object on top of the power cable or AC adapter.
- Otherwise, it may cause a fire or electric shock.
- If dust, dirt, etc. is found on the power plug pins, an AC adapter, or a power outlet, wipe it completely.
- Otherwise, it may cause a fire.
- In the case of a product with a power cord or AC adapter, use only genuine power cords and AC adapters provided by LG Electronics.
- Otherwise, it may cause a fire or electric shock.
- If you are using headphones or earphones, do not turn on the volume too loudly or use them for a prolonged period. [This only applies to models that support headphones or earphones]
- Otherwise, it may negatively affect your hearing ability.
- The software of this product can be updated. Do not turn off the power of the product while updating the software. Once the update is complete, the product power turns off automatically.
- If you turn off the power of the product while the software is being updated, it may cause a product malfunction.
The following only applies to models with a remote control
- Do not let children use the remote control. Keep the remote control out of reach of toddlers.
- Do not let children put the remote control in their mouth. Make sure that children don't swallow the remote control cover or a battery. If a child swallowed one, consult a physician immediately.
- Beware that children may step on the remote control cover and get injured.
- Remove obstacles between the product and the remote control for the smooth operation of the remote control.
The following only applies to models that use optical discs
- Do not insert your hand into a disc drive or pull it out forcefully.
- Make sure that children do not insert their hands into the disc drive.
The following only applies to models that able to watch video
- Refrain from watching a 3D video if you didn't have enough sleep or after drinking alcohol.
- Some 3D videos may surprise or excite people.
- If any of the following symptoms occur while watching a video, stop watching it immediately and take a rest.
- If any of the symptoms continue, consult a physician. Vertigo, burning sensation of eyes or face, unconscious motion, spasm, clouded consciousness, confusion, disorientation, nausea.
- You may suffer a symptom such as a seizure when you watch a certain image in a video or game or a video with a certain pattern or flashing lights. If you or any of your relatives have a history of epilepsy or seizures, consult a physician before watching.
- When you watch a 3D video, remove objects that are fragile or can cause injury from your surroundings.
- If you mistake a 3D video as real or move your body with surprise, you or your nearby relatives may get injured or objects near you may get damaged.
Precautions for cleaning the product
- Do not spray water directly onto the product when cleaning it.
- Otherwise, it may cause a fire or electric shock.
- When cleaning the product, make sure that you pull out the power cord first and wipe the surface of the product lightly with a dry cloth. Do not use chemicals or detergents when cleaning the product. They may deteriorate the product surface or peel off the paint from the product (benzene, alcohol, etc.).
Before Reporting Product Malfunction
Troubleshooting
If you experience the following issues while using the product, please perform several checks, as they may not be malfunctions.
General Errors
| Issue | Solution |
The product does not work properly |
|
The power does not turn on |
|
There is no sound |
|
The subwoofer does not produce sound |
|
The remote control does not work properly |
|
The Auto Power function does not work |
|
LG Sound Sync does not work |
|
The product volume is low |
|
The product fails to recognize a USB storage device |
|
A Bluetooth device cannot be paired |
|
Problems in Wireless Connection
| Issue | Solution |
There is radio interference |
|
| The Bluetooth connection is causing a malfunction or making noise |
|
Turning off the Demo Mode
| Issue | Solution |
The remote control does not work |
|
 button on the product to set the volume level to 0, then press and hold the Function
 Specifications
| General | |
| Power Consumption | Refer to the main label. |
| AC adapter |
|
| Dimensions (W x H x D) | Approx. 720.0 mm x 63.0 mm x 87.0 mm (including the base) (28.3 inch x 2.5 inch x 3.4 inch) |
| Operation Temperature Range | 5°C - 40°C (41°F to 104°F) |
| Operation Humidity Range | 5% - 80% RH |
| Bus Power Supply (USB) | 5 V  500 mA 500 mA |
| Available Digital Input Audio Sampling Frequency | 32 kHz, 44.1 kHz, 48 kHz, 88.2 kHz, 96 kHz, 176.4 kHz, 192 kHz |
| Available Digital Input Audio format | Dolby Digital, DTS Digital Surround, PCM |
| Input/Output | |
| OPTICAL IN | 3.0 V (p-p), (optical audio connection terminal) × 1 |
HDMI™  TV (ARC) TV (ARC) | 19-pin (Type A, HDMI™ connection terminal) × 1 |
| Wireless Subwoofer | |
| Power Requirement | Refer to the main label on the Wireless Subwoofer. |
| Power Consumption | Refer to the main label on the Wireless Subwoofer. |
| Type | 1-way 1 speaker |
| Impedance | 3 Ω |
| Dimensions (W x H x D) | Approx. 171.0 mm × 320.0 mm × 252.0 mm (including the base) (6.7 inch x 12.6 inch x 9.9 inch) |
Rear Speakers (SPT8-S (SPT8-S, SPT8-SPK))
| Wireless Receiver (Included in the Rear Speaker) | |
| Power Requirement | Refer to the main label on the wireless receiver. |
| Power Consumption | Refer to the main label on the wireless receiver. |
| Operation Temperature Range | 5°C - 40°C (41°F to 104°F) |
| Operation Humidity Range | 5% - 80% RH |
| Rear Speakers (Each) | |
| Type | 1-way 1 speaker |
| Impedance | 4 Ω |
| Dimensions (W x H x D) | Approx. 100.0 mm x 176.5 mm x 120.0 mm (including the base) (3.9 inch x 6.9 inch x 4.7 inch) |
- Actual features, functionality, and other product specifications may differ and are subject to change without notice.
Handling the Product
When shipping the Product
Please save the original shipping carton and packing materials. If you need to ship the product, for maximum protection, re-pack the product as it was originally packed at the factory.
Keeping the exterior surfaces clean
- Do not use volatile liquids such as insecticide spray near the product.
- Wiping with strong pressure may damage the surface.
- Do not leave rubber or plastic products in contact with the product for a long period of time.
Cleaning the product
To clean the product, use a soft, dry cloth. If the surfaces are extremely dirty, use a soft cloth lightly moistened with a mild detergent solution. Do not use strong solvents such as alcohol, benzine, or thinner, as these might damage the surface of the product.
Documents / Resources
References
Download manual
Here you can download full pdf version of manual, it may contain additional safety instructions, warranty information, FCC rules, etc.
Advertisement


Need help?
Do you have a question about the S40TR and is the answer not in the manual?
Questions and answers