Table of Contents
Advertisement
Quick Links
Advertisement
Table of Contents

Related Manuals for Farberware FCD06SDWHT


Summary of Contents for Farberware FCD06SDWHT
- Page 1 DISHWASHER INSTRUCTION MANUAL Model: FCD06SDWHT Read these instructions carefully before using your dishwasher. If you follow the instructions, your dishwasher will provide you with many years of good service. SAVE THESE INSTRUCTIONS CAREFULLY (rev. 10/31/2023 MD)
-
Page 3: Read This Manual
READ THIS MANUAL Dear Customer, ■ Please carefully read this manual before using the dishwasher. It will help you to use and maintain the dishwasher properly. ■ Keep it to refer to at a later date. ■ Pass it on to any subsequent owner of the appliance. This manual contains sections of Safety Instructions, Operating Instructions, Installation Instructions and Troubleshooting Tips, etc. -
Page 4: Table Of Contents
Table of Contents SAFETY INFORMATION ............. 6 OPERATING INSTRUCTIONS ..........9 CONTROL PANEL ............... 9 DISHWASHER FEATURES ..........10 PRIOR USING FOR THE FIRST TIME ......... 11 FILL THE RINSE AID DISPENSER ........11 FUNCTION OF DETERGENT ..........13 LOADING THE DISHWASHER BASKET ......16 BEFORE OR AFTER LOADING ........... - Page 5 BEFORE CALLING FOR SERVICE ........33 ERROR CODES ..............35 TECHNICAL INFORMATION ..........35 Farberware is a registered trademark of Farberware Licensing Company, LLC Manufactured and sold pursuant to a license from Farberware Licensing Company, LLC © 2023 Farberware Licensing Company, LLC. All rights reserved.
-
Page 6: Safety Information
IMPORTANT SAFETY INFORMATION READ ALL INSTRUCTIONS BEFORE USING WARNING! When using your dishwasher, follow the precautions listed below: GROUNDING INSTRUCTIONS ■ This appliance must be grounded. In the event of a malfunction or breakdown, grounding will reduce the risk of electric shock by providing a path of least resistance of electric current. - Page 7 WARNING! ■ Improper connection of the equipment-grounding conductor can result in a risk of electric shock. ■ Check with a qualified electrician or service representative if you are in doubt whether the appliance is properly grounded. Do not modify the plug provided with the appliance; If it is not fit for the outlet.
- Page 8 WARNING! PROPER USE (Cont.) ■ The door should not be left in the open position since this could present a tripping hazards. ■ If the supply cord is damaged, it must be replaced by the manufacturer or its service agent or a similarly qualified person in order to avoid a hazard.
-
Page 9: Operating Instructions
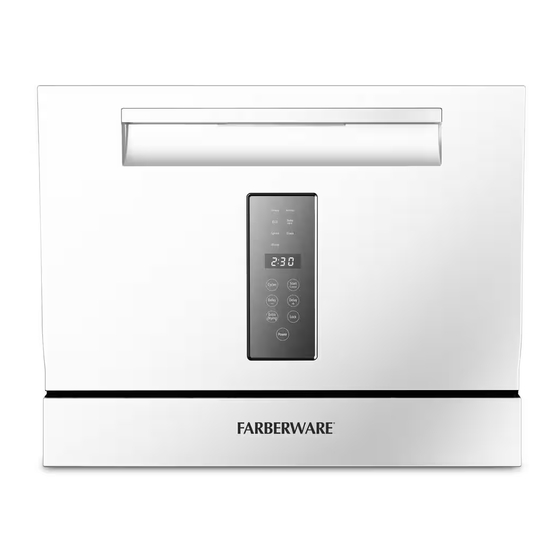
OPERATION INSTRUCTIONS IMPORTANT To get the best performance from your dishwasher, read all operating instructions before using it for the first time. CONTROL PANEL OPERATION (Button) 1. Power Press this button to turn on your dishwasher. 2. Extra Drying For better drying result. (It can only be used with Heavy, Normal, ECO, Baby care, Glass) 3. -
Page 10: Dishwasher Features
Display • Rinse Aid • If the “ “ indicator is lit, it means the dishwasher is low on dishwasher rinse aid and requires a refill • Water Supply Failure • If the “ “ indicator is lit, it means that no water is 7. -
Page 11: Prior Using For The First Time
PRIOR USING FOR THE FIRST TIME FILL THE RINSE AID DISPENSER Rinse Aid Dispenser The rinse aid is released during the final rinse to prevent water from forming droplets on your dishes. That can leave spots and streaks. It also improves drying by allowing water to sheet off the dishes. -
Page 12: Adjusting Rinse Aid Dispenser
To open the dispenser, turn the cap to the “open” (left) arrow and lift it out. Pour the rinse aid into the dispenser, being careful not to overfill. Replace the cap by inserting it aligned with “open” arrow and turning it to the closed (right) arrow. -
Page 13: Function Of Detergent
FUNCTION OF DETERGENT Proper Use of Detergent Detergents with its chemical ingredients are necessary to remove dirt, crush dirt and transport it out of the dishwasher. Use only detergent specifically made for use in dishwashers. Keep your detergent fresh and dry. Don’t put powder detergent into the dispenser until you’re ready to wash dishes. -
Page 14: Detergent Dispenser
Detergent Dispenser The dispenser must be refilled before the start of each wash cycle following the instructions provided in the Wash Cycle Table. Your dishwasher uses less detergent and rinse aid then conventional dishwasher. Generally, only one tablespoon of detergent is needed for a normal wash load. -
Page 15: Fill In Detergent
Fill In Detergent Fill the detergent dispenser with detergent. The marking indicates the dosing levels, as illustrated on right: For a normal soil level fill to the The place can load 15g detergent. MAX fill line B (25 grams). Fill detergent to the lower fill line A (15 grams) for lightly soiled dishes such as glassware. -
Page 16: Loading The Dishwasher Basket
LOADING THE DISHWASHER BASKETS Recommendation • Consider buying utensils which are identified as dishwasher-proof. • Use a mild detergent that is described as ‘kind of dishes’. If necessary, seek further information from detergent manufacturers. • For particular items, select a program with as low a temperature. •... - Page 17 Note: Very small items should not be washed in the dishwasher as they could easily fall out of the basket • Load hollow items such as cups, glasses, pans etc. With the opening downward so that water cannot collect in the container or a deep base. •...
-
Page 18: Loading The Basket
Loading The Basket Position the dishes and cookware so that they will not get moved by the spray of water. Aham: 6 Place Setting Cups Serving bowl Glasses Saucers Oval platter Fruit bowl Bread and Dinner plates butter plates Cutlery basket Plate racks of Basket The basket is fitted with plate racks which can be stowed horizontal if required. -
Page 19: Cutlery Basket
Cutlery Basket Cutlery should be placed in the cutlery basket with handles at the bottom. If the rack has side baskets, the spoon should be loaded individually into the appropriate slots, especially long utensils should be placed in the horizontal position at the front of the upper basket as shown. 1 Dinner forks 2 Salad forks Knives... -
Page 20: Loading The Basket And Cutlery Basket
Loading The Basket And Cutlery Basket Position the dishes and cookware so that they will not get moved by the spray of water. Doe: 4 Place Settings Cups Serving bowl Glasses Saucers Oval platter Fruit bowl Bread and Dinner plates butter plates Cutlery basket 1 Dinner forks... -
Page 21: Starting A Washing Program
STARTING A WASHING PROGRAM Wash Cycle Table NOT E : Means: need to fill rinse into t he Rinse-Aid Dispenser. Normal : This program is the test cycle, the rinse-aid dispenser setting is recommended to Position 3. Detergent Cycle Selection Description Running Water... -
Page 22: Turning On The Appliance
Turning On The Appliance Starting a wash cycle: Draw out the basket(see the section entitled “Loading the Dishwasher “ ); Pour in the detergent (see the section entitled “Detergent and Rinse Aid “ ); Insert the plug into the socket. The power supply is 120V/60 Hz; Make sure that the water supply is turned on to full pressure;... -
Page 23: At The End Of The Wash Cycle
At The End Of The Wash Cycle When the working cycle has finished, the buzzer of dishwasher will sound 8 seconds, then stop. Turn off the appliance using the Power button, shut off the water supply and open the door of the dishwasher. Wait a few minutes before unloading the dishwasher to avoid handling the dishes and utensils while they are still hot and more susceptible to breakage. -
Page 24: Maintenance And Cleaning
MAINTENANCE AND CLEANING Filtering System The filter prevent larger remnants of food or other objects from getting inside the pump. The filter system consists of a coarse filter, a flat (Main filter) and a micro filter (fine filter). Main filter Food and soil particles trapped by this filter are pulverized by a special jet on the spray arm and washed down to drain. -
Page 25: Cleaning The Filter
Ope n Step 1:Counter-rotate the filter assembly(A,B and C), then lift it all up. Step 2: Lift B and C up from A; The End Note: If you follow from Step 1 to Step 3, the filter system will be removed. If you reverse the steps from Step 3 to Step 1, the filter system will be installed. -
Page 26: Caring For The Dishwasher
Caring For The Dishwasher The control panel can be cleaned by using a lightly dampened cloth and dry thoroughly. The exterior use a good appliance polish wax. Never use sharp objects, scouring pads or harsh cleaners on any part of the dishwasher. Cleaning The Door To clean the edge around the door, you should use only a soft warm, damp cloth. -
Page 27: Cleaning The Spray Arms
Cleaning The Spray Arms The spray arms can be easily removed for periodic cleaning of the nozzles, to prevent possible clogging. Wash them under running water and carefully replace them in their seats, checking that their rotary movement is in no way impeded. Grasp the middle of the spray arm, pull it upwards to remove it. -
Page 28: Installation Instruction
INSTALLATION INSTRUCTION Warning Attention: Electrical Shock Hazard Disconnect electrical power before The installation of the pipes and installing dishwasher. electrical equipments should be done by professionals. Failure to do so can result in death or electrical shock. Installation Preparation The installation position of dishwasher should be near the existing inlet and drain hoses and power cord. -
Page 29: Electrical Requirements
Electrical Requirements Use the required fuse 10 amp, time delay fuse or circuit breaker recommended and provide separate circuit serving only this appliance. Electrical Connection Ensure the voltage and frequency of the power being Insure proper ground corresponds to those on the rating plate. Only insert the exists before use plug into an electrical socket which is earthed properly. -
Page 30: Water Connection
Water Connection Back View Your dishwasher comes equipped with a ‘quick connect’ assembly (includes inlet and drain hose). The faucet adapter must be installed on the faucet before you can connect the dishwasher. This adapter is included inside your dishwasher. The faucet adapter is compatible with faucets inclusive of either male (outside) or female (inside) threaded faucet connections. - Page 31 1. Screw the faucet adapter onto (or into) the faucet tap. Check for leaks (use Teflon tape to eliminate if necessary). 2. Connect the six-sided connection of the drain hose to the drain port connection on the back of the dishwasher cabinet. Do not over-tighten (to avoid damage to threads). 3.
-
Page 32: Start Of Dishwasher
Disconnecting Your Dishwasher 1. Shut off the water supply at the faucet. 2. Disconnect the power supply cord Start Of Dishwasher The following things should be checked before starting the dishwasher. 1. The dishwasher is level and fixed properly 2. The inlet valve is open 3. -
Page 33: Troubleshooting Tips
TROUBLESHOOTING TIPS Before Calling For Service Review the charts on the following pages may save you from calling for service. Problem Possible Causes What To Do Dishwasher doesn't Fuse blown, or the Replace fuse or reset circuit breaker. Remove any other start circuit breaker tripped. - Page 34 Problem Possible Causes What To Do The dishes The dishes were not See notes in " Loading t he Dishwasher Baskets ". are not clean loaded correctly. The program was Select a more intensive program. not powerful enough. See" Wash Cycle Table ". Not enough detergent Use more detergent, or change your detergent.
-
Page 35: Error Codes
Error Codes When some malfunctions come on, the appliance will display error codes to warn you: Codes Meanings Possible Causes Longer inlet time. Faucets is not opened, or water intake is restricted, or water pressure is too low. Not reaching required temperature. Malfunction of heating element Overflow Some element of dishwasher leaks. -
Page 36: Technical Information
Technical Information Height 438mm Width 550mm Depth 500mm Voltage Connected Load See Rating Label Water Pressure 0.04-1.0mpa Hot Water Connection Should Be 120°F Power Supply See Rating Label Capacity 6 Place Settings... -
Page 37: One-Year Limited Warranty
ONE YEAR LIMITED WARRANTY This warranty applies to products purchased and used in the U.S. and Canada. This is the only expressed warranty for this product and is in lieu of any other warranty or condition. This product is warranted to be free from defects in material and workmanship for a period of one (1) year from the date of original purchase.
Need help?
Do you have a question about the FCD06SDWHT and is the answer not in the manual?
Questions and answers