Advertisement
Table of Contents
Contents
Poolmaster 54507 Manual
Contents

Recommended Tools

Assembly Instructions
Before You Begin: Please note that the SPRAY HEIGHT of the Poolmaster Waterfall Fountain can be adjusted to your specifications. To do this, some trial and error testing must be done by opening or closing the inlet connector which is explained in Step 5. Throughout this testing process, the pool pump must be turned off and on until the desired height is achieved.
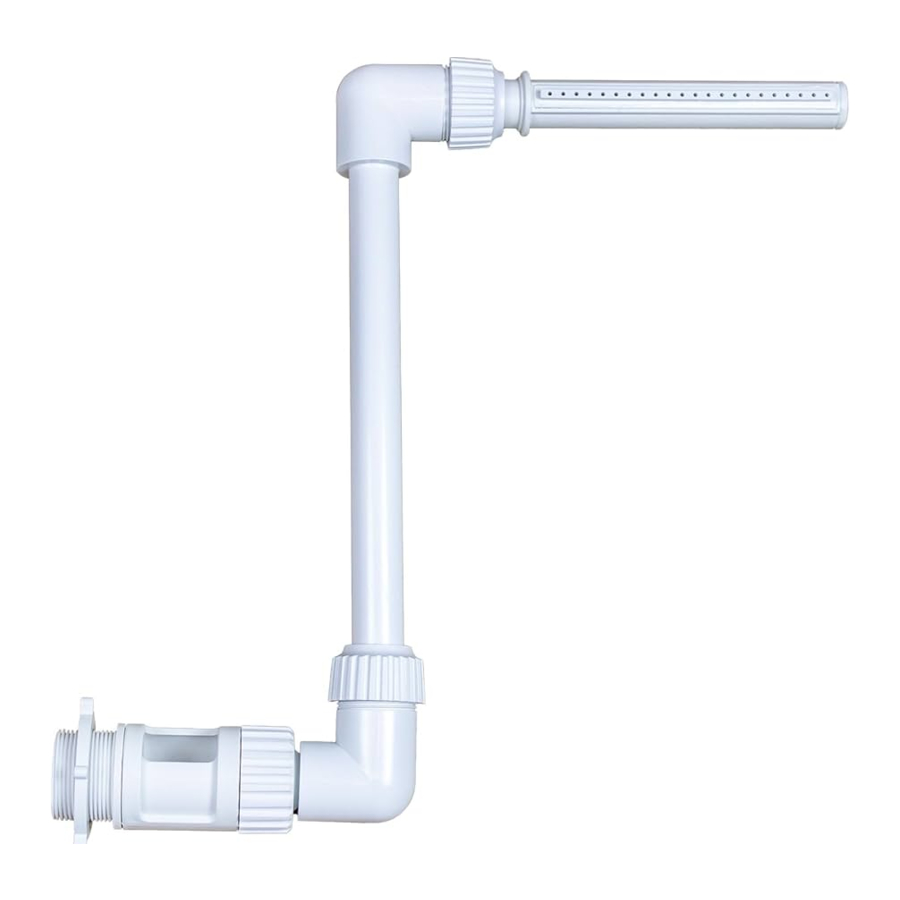
- Attach the Inlet Connector (D) to pool return until secure. Use the rotating ring to help securely tighten in place, ensuring that the connector opening faces UP as shown. This will allow you to adjust the spray height easier in Step 5.
![]()
- Attach Elbow Connector (C) to Inlet Connector (D) - Loosely secure. DO NOT tighten completely.
![]()
- Attach Spray Head (A) to Riser (B). Loosely secure. Do NOT tighten completely.
![]()
- When attaching assembly (A) and (B) to previously assembled (C) and (D), push down to secure and loosely tighten. Before tightening the collar nuts for the Spray Head (A) and Riser (B), make sure that both the Spray Head and Riser Arm are oriented in the right direction you desire for the waterfall to spray. Once in their desired positions, hand tighten all the collar nuts to secure the Spray Head (A) and Riser (B).
![]()
- Adjusting your waterfall height is a trial and error process. Turn your pool pump off to start this process. Once your pump is off, rotate the Inlet Connector sleeve to a large or small opening, depending upon your desired height. A smaller opening will yield a higher waterfall. A larger opening will yield a lower waterfall. Once the sleeve is rotated to the estimated opening, securely tighten the collar nut on the Inlet Connector and turn your pool pump on to test the waterfall height. Repeat this process as needed until desired waterfall height is achieved.

- Once waterfall height is achieved, go back and securely tighten the collar nuts in all locations. Gentle use of a wrench, such as a pipe wrench or channel lock plier is recommended.


Need Assistance?
Call our Customer Service Line:
800.854.1492
poolmaster.com
info@pooImaster.com
POOLMASTER
We Make Water Fun!
770 Del Paso Road, Sacramento, CA 95834-0308
Documents / Resources
References
Download manual
Here you can download full pdf version of manual, it may contain additional safety instructions, warranty information, FCC rules, etc.
Advertisement

Need help?
Do you have a question about the 54507 and is the answer not in the manual?
Questions and answers