
Subscribe to Our Youtube Channel
Related Manuals for Honeywell HDS24SS


Summary of Contents for Honeywell HDS24SS
- Page 1 24” Stainless Steel Dishwasher User Manual Read and save these instructions before use HDS24SS...
-
Page 3: Table Of Contents
CONTENTS 1 Important Safety Instructions 1.1 Proper installation ............. . 1 1.2 Basic precautions before use . - Page 4 7 Preparing and Loading Dishes 7.1 Adjustable Upper Rack ............26 7.2 Dish Preparation .
-
Page 5: Important Safety Instructions
1 IMPORTANT SAFETY INSTRUCTION WARNING: For your safety, please follow the information in this manual to minimize the risk of fire, explosion, electric shock and to help prevent property damage or personal injury. 1.1 Proper Installation Please install your dishwasher properly by following the installation guide. •... - Page 6 • Do not let children hit, sit or stand on door or racks of the dishwasher. • Under certain conditions, hydrogen gas may be produced in a hot water system that has not been used for two weeks or more. HYDROGEN GAS IS EXPLOSIVE. If the hot water system has not been used for such a period, before using the dishwasher, turn on all hot water faucets and let water flow for several minutes.
-
Page 7: Installation Introduction
2 INSTALLATION INTRODUCTION BEFORE YOU BEGIN Read these instructions completely and carefully. IMPORTANT Observe all governing codes and ordinances. NOTE TO INSTALLER Be sure to leave these instructions for the consumer’s and local inspector’s use. NOTE TO CONSUMER Keep these instructions with your Owner’s Manual for future reference. -
Page 8: Installation Instructions
2.1 Installation Instructions Read the installation instructions clearly , and futher more, pay attention to the following lists: 01 The power-supply receptacle for the appliance shall be installed in a cabinet or on a wall adjacent to the undercounter space in which the appliance is to be installed. 02 There shall be an opening through the partition between the compartments specified in (a) that is large enough for the attachment plug to pass through. -
Page 9: Tools Needed
Materials Needed for New Installations Only • Air gap for drain hose, if required • Waste tee for house plumbing, if applicable • Electrical cable or power cord, if applicable • Screw type hose clamps • Strain relief for electrical connection •... -
Page 10: Installation Preparation
3 INSTALLATION PREPARATION • The rough cabinet opening must be at least 24” deep. The opening should be 35” max. height. • The dishwasher must be installed so that drain hose is no more than 10 feet in length for proper drainage. •... -
Page 11: Drain Requirements
Drain Requirements • Follow local codes and ordinances. • Do not exceed 10 feet distance to drain. • Do not connect drain lines from other devices to the dishwasher drain hose. • Dishwasher must be connected to waste line with an air gap (not supplied) or 32”... -
Page 12: Cabinet Preparation And Wire Routing
Grounding Instructions — Power Cord Models This appliance must be grounded. In the event of a malfunction or breakdown, grounding will reduce the risk of electrical shock by providing a path of least resistance for electric current. The plug must be plugged into an appropriate outlet that is installed and grounded in accordance with local codes and ordinances. -
Page 13: Water Line Connection
Water Line Connection • Turn off the water supply. • Install a hand shut-off valve in an accessible location, such as under the sink. (Optional, but strongly recommended and may be required by local codes.) • Water connection is on the left side of dishwasher. Install the hot water inlet line, using no less than 3/8”... -
Page 14: Installation
4 INSTALLATION 4.1 Installation Instructions CAUTION Opening the door will cause the dishwasher to tip forward. DO NOT open the door until you are ready to install the dishwasher. If it is necessary to open the door, hold the top of the dishwasher securely with one hand and hold the door with the other hand. - Page 15 05 Install 90° elbow. • Wrap 90° elbow with thread seal tape. Do not use plumber’s putty. • Install a 90° elbow onto the water valve. • Do not over tighten 90° elbow, water valve bracket could bend or water valve fitting could break.
- Page 16 10 Level dishwasher. IMPORTANT Dishwasher must be level for proper dish rack operation and wash performance. • Place level on door and rack track inside the tub as shown to check that the dishwasher is level. • Level the dishwasher by adjusting the four leveling legs individually. TIP Pull lower rack out, about halfway.
-
Page 17: Drain Line Installation
12 Connect water supply. Connect water supply line to 90° elbow. • Slide compression nut, then ferrule over end of water line. • Insert water line into 90° elbow. • Slide ferrule against elbow and secure with compression nut. IMPORTANT Check to be sure that door spring does not rub or contact the fill hose or water supply line. - Page 18 14 Connect power supply. Skip this step if equipped with power cord. Verify that power is turned off at the source. • Remove junction box cover “A”. • Locate the three dishwasher wires, (white, black and green) with stripped ends. Insert dishwasher wires through the small hole in the junction box “B”. •...
- Page 19 • Turn on the sink hot water faucet and verify water temperature. Incoming water temperature must be between 120°F and 150°F. A minimum of 120°F temperature is required for best wash performance. See “Prepare Hot Water Line,” page 5. • Add 2 litres of water to the bottom of the dishwasher to lubricate the pump seal.
- Page 20 17 Replace toekick. • Place 1-piece toekick against the legs of the dishwasher. The slots should align with toekick bracket screw holes. Allow the toekick to touch the floor. Install the toekick screws. 18 Literature. Be sure to leave complete literature package and installation instructions with consumer.
-
Page 21: Features Of Your New Dishwasher
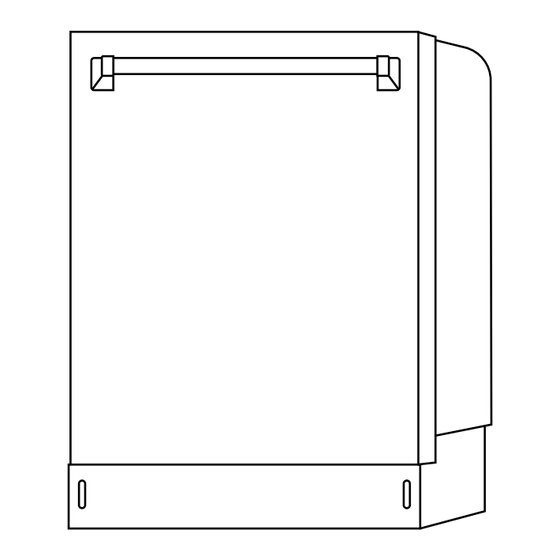
5 FEATURES OF YOUR NEW DISHWASHER 5.1 Specifications Capacity 14 place settings Dimension 23.89” x 25.6” x 33.74” (W x D x H) Power Supply 120 volts, 60 Hz Rated Power Usage Wash motor 50 W, Heater 840 W Water Feed Pressure 20 ~ 120 psi (138 ~ 828kPa) Names of Components Top Light... -
Page 22: Features
5.2 Features Filter System Your dishwasher has a multiple Filter System. In the System there are four filter- meshes. It can separate soiled water and clean water in different chambers. The multiple filter system helps your dishwasher to get better performance with less water and less energy. -
Page 23: How Your Dishwasher Cleans
Adjustable Upper Rack The Upper Rack can be raised or lowered to accommodate loading taller dishes in either rack. The Upper Rack clearance height H1 goes from 8” to 10”. The Bottom Rack clearance height H2 is 11” to 13”. 5.3 How Your Dishwasher Cleans Your dishwasher cleans by spraying a mixture of hot water and detergent through the spray arms against soiled surfaces. -
Page 24: Getting Started
5.4 Getting Started 01 Load dishwasher (See preparing and loading dishes). 02 Add detergent (See Fill detergent to the dispenser). 03 Add rinse aid, if needed (See Fill rinse aid dispenser). 04 Select desired CYCLE (See Cycle Chart). The indicator light beside the pad will glow when selected. - Page 25 Functions AIR EXCHANGE Select the “Air exchange function, the dishwasher will exchange the air every 6 hours to keep the air in the dishwasher fresh. STEAM WASH For use with heavily soiled items, this STEAM option adds 30 minutes t o the cycle time. The option is available with the cycles of “HEAVY WASH” and “NORMAL WASH”.
-
Page 26: Operating The Dishwasher
6 OPERATING THE DISHWASHER 6.1 Start/Cancel 01 Open the door, select a wash cycle you desired, the indicator light will turn on. Press the Start/Cancel button and close the door within 4 seconds, then the selected program light begins to blink and the cycle progress indicator in control panel will light on, the washing cycle is running. -
Page 27: Status Window
6.4 Indicator Lights Rinse Aid Indicator Light Need to add rinse aid to the dishwasher. Sanitized Indicator Light If a cycle with the sanitize function is finished, the sanitized indicator light turns on. If you open the door, it will turn off after 30 seconds. Clean Indicator Light Turns on after a cycle finished. -
Page 28: Cycle Chart
6.7 Cycle Chart Program Cycle Description Water (L) Cycle Time (min) Pre Wash Pre Wash Wash (48C) Pots & Pans 22.8 Rinse Rinse Rinse (58C) Drying Pre Wash Auto Normal Wash 10.8~23.0 105~135 Rinse Drying Pre Wash Pre Wash Wash (48C) China 19.3 Rinse... -
Page 29: Preparing And Loading Dishes
7 PREPARING AND LOADING DISHES 7.1 Adjustable Upper Rack The upper rack height can be easily adjusted to accommodate loading taller dishes in either rack. To accommodate taller dishes in the bottom rack, there are 2 positions available: 01 Lift the rack for upper position. 02 Press up on the handle to lower the rack. -
Page 30: Dish Preparation
7.2 Dish Preparation Scrape away large pieces of food, bones, pits, toothpicks, etc. The continuous filtered wash system will remove the remaining food particles. Burned-on foods should be loosened before loading. Empty liquids from glasses and cups. Foods such as mustard, mayonnaise, vinegar, lemon juice and tomato based products may cause discoloration of stainless steel and plastics if allowed to sit for a long period of time. - Page 31 Upper rack 8 place settings Upper rack 12 place settings Upper rack 14 place settings Bottom rack 8 place settings Bottom rack 12 place settings Bottom rack 14 place settings...
-
Page 32: Adjusting The Top Rack
7.3 Adjusting the Top Rack This dishwasher has a convenient top rack for silverware, cutlery, and small items. This rack can be adjusted to accommodate varying loads, as shown below. Left rack adjusted to lower position and right rack angled Left rack adjusted to lower position and right rack to upper position Left rack adjusted to lower position and right rack moved to the left Left rack adjusted to lower position and right rack removed... -
Page 33: Loading The Top Rack
Loading the Top Rack You can place the items in the top rack randomly or in an orderly fashion. The image below shows how to load the top rack for 16 place settings: Knives Small Spoons Small Forks Large Spoons Large Forks Forks Spoons... -
Page 34: Adding A Dish
Adding a Dish To add or remove items after wash cycle starts: 01 Open door slightly and wait a few seconds until wash action stops before completely opening. 02 Add the item. 03 Press the Start/Pause pad, then close the door latch firmly within 4 seconds, the cycle will automatically resume. - Page 35 02 Add rinse aid until the indicator point to max. 03 You can adjust the amount of the rinse aid released during the rinse operation, the greater number indicates the larger amount of rinse aid released. 04 Replace the dispenser cap.
-
Page 36: Filling The Detergent Dispenser
Filling the Detergent Dispenser 01 Push the dispenser cover latch downwards and open it. 02 Add the detergent to the main wash compartment. 03 Close the dispenser cover. -
Page 37: Care And Cleaning
8 CARE AND CLEANING 8.1 Cleaning the Door Cleaning the Exterior Door and Panel Cleaning the Stainless Steel Panel Clean the stainless steel door and handle regularly to remove the debris with cleaning soft cloth. Do not use appliance wax, polish, bleach or products containing chlorine to clean the stainless steel door. -
Page 38: Cleaning The Fine Filter
Cleaning the Fine Filter Take out the Cylinder Filter and remove the Fine Filter from the dishwasher tub bottom. To remove the Fine Filter you must first remove the bottom spray arm as shown below. Flush the Fine Filter by holding it under running water and replace. 8.3 Cleaning the Inside The inside of the dishwasher is self-cleaning with normal use. - Page 39 To Disconnect Service 01 Turn off electrical power to the dishwasher at the supply source by moving fuses or tripping circuit breaker. 02 Turn off the water supply. 03 Place a pan under the inlet valve. Disconnect water line from inlet valve and drain into pan.
-
Page 40: Troubleshooting
9 TROUBLESHOOTING Before Calling for Service Problem Possible Cause Solution Door may not be closed properly Shut the door completely, make sure it is latched Power supply or power line is not connected Check and connect the power Dishwasher won’t start supply, refer to this manual to reset Delay Start option has been selected... - Page 41 Problem Possible Cause Solution Water hardness is too high For extremely hard water, install a water softener Improper loading of dishes Spots and filming Load the dishes again as indicated Old or damp powder Rinse Aid on dishes Use fresh Rinse Aid is used Add Rinse Aid to the Dispenser Rinse Dispenser empty...
-
Page 42: Error Codes
Problem Possible Cause Solution Detergent cup opening/Drain pump sound This is normal Noises A hard object has entered the wash If the noise persists after a module. When the object is ground complete cycle, call for service up, the sound should stop Water valve is turned off Check if the water valve is turned on... - Page 43 If your product needs repair, please contact us via email or phone. ©2022 BHRS Group, LLC. All Rights Reserved. BHRS Group, LLC The Honeywell Trademark is used under license from 585 Prospect St. Honeywell International Inc. Honeywell International Lakewood, NJ 08701 Inc.
Need help?
Do you have a question about the HDS24SS and is the answer not in the manual?
Questions and answers