Table of Contents
Advertisement
Available languages
Available languages
Advertisement
Table of Contents

Related Manuals for Hyper Tough HT22-401-03-02


Summary of Contents for Hyper Tough HT22-401-03-02
- Page 1 Operator’s Manual 20-VOLT LITHIUM-ION BRUSHLESS STRING TRIMMER Model No. HT22-401-03-02 ѥ WARNING: Read, understand and follow all Safety Rules and Operating Instructions in this Manual before using this product. Walmart Inc. Bentonville, AR 72716...
-
Page 2: Table Of Contents
TABLE OF CONTENTS Safety Symbols..................Pages 3-4 Safety Instructions.................. Pages 5-10 Description..................... Pages 11-12 Unpacking..................... Page 13 Operation....................Pages 14-25 Maintenance................... Pages 26-27 Troubleshooting..................Page 28 SAVE THESE INSTRUCTIONS READ ALL INSTRUCTIONS This cordless string trimmer has many features for making its use more pleasant and enjoyable. -
Page 3: Alternating Current
Alternating Current SAFETY SYMBOLS The purpose of safety symbols is to attract your attention to possible dangers. Direct Current The safety symbols and the explanations with them deserve your careful attention and understanding. The symbol warnings do not, by themselves, eliminate any danger. - Page 4 SAVE THESE INSTRUCTIONS Some of these following symbols may be used on this tool. Please study them and learn their meaning. Proper interpretation of these symbols will allow you to operate the tool better and more safely. SYMBOL NAME DESIGNATION/EXPLANATION Volts Voltage Amperes...
-
Page 5: Safety Instructions
SAFETY INSTRUCTIONS General Power Tool Safety Warnings ѥ WARNING: Read all safety warnings, instructions, illustrations and specifications provided with this power tool. Failure to follow all instructions listed below may result in electric shock, fire and/or serious injury. Save all warnings and instructions for future reference. WORK AREA SAFETY •... - Page 6 • Dress properly. Do not wear loose clothing or jewellery. Keep your hair and clothing away from moving parts. Loose clothes, jewellery or long hair can be caught in moving parts. • If devices are provided for the connection of dust extraction and collection facilities, ensure these are connected and properly used.
-
Page 7: Important Safety Instructions
• Recharge only with the charger specified by the manufacturer. A charger that is suitable for one type of battery pack may create a risk of fire when used with another battery pack. • Use power tools only with specifically designated battery packs. Use of any other battery packs may create a risk of injury and fire. - Page 8 READ ALL INSTRUCTIONS ѥ DANGER! Do not rely on the tool’s insulation against electric shock. To reduce the risk of electrocution, never operate the tool in the vicinity of any wires or cables which may carry electric current. ѥ CAUTION! Wear appropriate personal hearing protection during use. Under some conditions and durations of use, noise from this product may contribute to hearing loss.
- Page 9 • Clear the area to be cut before each use. Remove all objects such as rocks, broken glass, nails, wire, or string that can be thrown or become entangled in the cutting attachment. Make sure that other persons and pets are at least 100 ft.
- Page 10 Use only with the battery packs and chargers listed below: BATTERY PACK HT21-401-003-10 / 8704 : 20V 2.0Ah HT21-401-003-11 / 8711.1 : 20V 4,0Ah BATTERY CHARGER HT21-401-003-12 HT21-401-003-13 / JCM2130-117U JS-22055-117U/ JS-22055-117UN • Do not dispose of the battery in a fire. The cells may explode. Check with local codes for possible special disposal instructions.
-
Page 11: Description
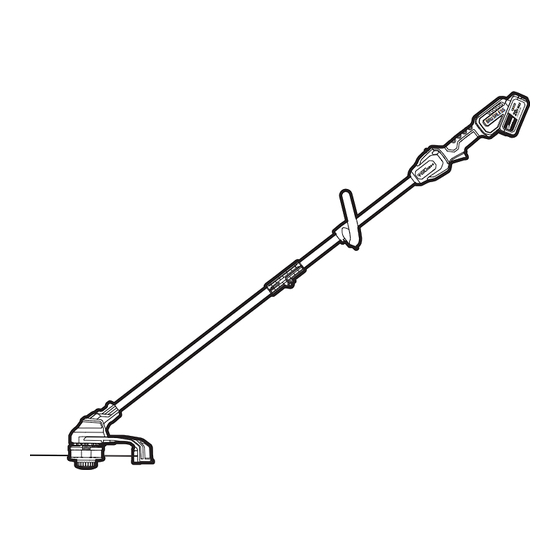
DESCRIPTION KNOW YOUR STRING TRIMMER (Fig.1) Fig. 1 Battery Pack Soft Grip Handle Trigger Switch Adjustable Front-Assist Handle Shaft Hinge Trimmer Head Guard Bump Knob Bump Knob Cutting Line Release Tab... - Page 12 PRODUCT SPECIFICATIONS Voltage 20V d.c. Low: 5000 RPM No-load speed High: 6000 RPM Cutting mechanism Bump Knob Cutting line type 0.080 in. (2.0mm) nylon twist line Cutting Width 13" (33 cm) Recommended Operating 41–104 °F (5–40 °C) Temperature Recommended Storage Temperature 41–104 °F (5–40 °C) ѥ...
-
Page 13: Unpacking
UNPACKING ѥ WARNING: If any parts are damaged or missing, do not operate this product until the parts are replaced. Use of this product with damaged or missing parts could result in serious personal injury. ѥ WARNING: Do not attempt to modify this product or create accessories not recommended for use with this string trimmer. -
Page 14: Operation
OPERATION ѥ WARNING: Do not allow familiarity with this product to make you careless. Remember that a careless fraction of a second is sufficient to inflict serious injury. ѥ WARNING: Always wear eye protection with side shields marked to comply with ANSI Z87.1, along with hearing protection. -
Page 15: Mounting The Guard
Use a phillips head screw- Fig. 3 Hinge screws driver (not included) to lock the shaft with the two screws supplied (Fig. 3). MOUNTING THE GUARD Fig. 4 (Fig. 4–5) ѥ Guard WARNING: Always wear gloves when mounting or replacing the guard. Be careful of the blade on the guard and protect your hands from being injured by the blade. - Page 16 MOUNTING AND Fig. 6 POSITIONING THE FRONT- Front-assist Handle ASSIST HANDLE (Fig. 6) Remove the battery pack from the trimmer. Remove the screw knob and the bolt from the front-assist handle. Press the front-assist handle onto the shaft of the string trimmer. Make sure that the front-assist handle faces upward so Screw Knob...
- Page 17 ATTACHING/DETACHING Fig. 7 Battery-releas THE BATTERY PACK (Fig. 7) Button Attach ѥ WARNING: Battery tools are always in operating condition. Therefore, remove the battery when assembling parts, making adjustments, cleaning, when the tool is not in use, or when carrying Detach it at your side.
- Page 18 HOLDING THE STRING Fig. 8 TRIMMER (Fig. 8) ѥ WARNING: Dress properly to reduce the risk of injury when operating this tool. Do not wear loose clothing or jewelry. Wear eye and ear/ hearing protection. Wear heavy, long pants, boots and gloves.
- Page 19 TURNING THE STRING Fig. 9 TRIMMER ON/OFF Lock-off Button Before starting the string trimmer: Make sure that you have a secure and balanced footing. Stand upright and hold the Trigger Switch string trimmer in a relaxed position. Make sure that the cutting line is not touching the ground or any other objects.
- Page 20 TIPS FOR BEST TRIMMING Fig. 11 RESULTS (Fig. 11) The correct angle for the Direction of cutting attachment is Rotation parallel to the ground. Do not force the trimmer. Allow the very tip of the line to do the cutting (especially along walls).
- Page 21 ADJUSTING CUTTING LINE Fig. 12 LENGTH (Fig. 12) The trimmer head allows the operator to release more cut- ting line without stopping the motor. As line becomes frayed or worn, additional line can be released by lightly tapping the bump Knob on the ground while operating the trimmer.
-
Page 22: Line Replacement
LINE REPLACEMENT Fig. 13 (Fig. 13–15) NOTICE: Always use the recom- mended nylon cutting line with a diameter that does not exceed 0.080 in. (2.0 mm). Using line other than that specified may cause the string trimmer to overheat or become damaged. “LOAD”... - Page 23 RELOADING THE CUTTING Fig. 16 LINE (Fig. 16–18) Note: When the cutting line breaks from the line outlet or Release the cutting line is not released Tabs when the bump head is tapped, you need to remove the remain- ing cutting line from the spool retainer and follow the steps below to reload the line.
-
Page 24: Operating The Trimmer
OPERATING THE TRIMMER ѥ WARNING: To avoid serious personal injury, wear goggles or safety glasses at all times when operating this unit. Wear a face mask or dust mask in dusty locations. Clear the area to be cut before each use. Remove all objects, such as rocks, broken glass, nails, wire, or string that can be thrown or become entangled in the cutting attachment. - Page 25 • Turn on the motor only when the hands and feet are away from the cutting line. • Before using the trimmer and after any impact, check for signs of wear or damage and repair as necessary. • Always disconnect the battery pack from the trimmer - whenever leaving the trimmer unattended;...
-
Page 26: General Maintenance
MAINTENANCE ѥ WARNING: When servicing, use only identical replacement parts. Use of any other parts may create a hazard or cause product damage. To ensure safety and reliability, all repairs should be performed by a qualified service technician. ѥ WARNING: To avoid serious personal injury, always remove the battery pack from the product when cleaning or performing any maintenance. - Page 27 STORAGE • Remove the battery pack from the trimmer. • Clean the tool thoroughly before storing it. • Store the tool in a dry, well-ventilated area, locked-up or up high, out of the reach of children. Do not store the unit on or adjacent to fertilizers, gasoline, or other chemicals.
-
Page 28: Troubleshooting
TROUBLESHOOTING PROBLEM CAUSE SOLUTION The trimmer 1. The battery pack is too hot. 1. Allow the battery pack to unexpectedly cool. switches off. 2. The battery pack is 2. Charge the battery pack. discharged. 3. The trimmer is too hot. 3. - Page 29 Operator’s Manual ORILLADORA DE HILO DE ION LITIO DE 20 V SIN ESCOBILLAS Núm. de modelo HT22-401-03-02 ѥ ADVERTENCIA: lea, comprenda y siga todas las normas de seguridad y las instrucciones de funcionamiento en este manual antes de utilizar el producto.
- Page 30 TABLA DE CONTENIDOS Símbolos de Seguridad............... Páginas 31-32 Instrucciones de Seguridad..............Páginas 33-39 Descripción..................Páginas 40-41 Desempaquetado..................Página 42 Operación....................Páginas 43-55 Mantenimiento................... Páginas 56-57 Detección de problemas................Página 58 ¡GUARDE ESTAS INSTRUCCIONES ¡LEA TODAS LAS INSTRUCCIONES Esta orilladora inalámbrica cuenta con muchas características que harán su uso más cómodo y placentero.
-
Page 31: Símbolos De Seguridad
Minutes SÍMBOLOS DE SEGURIDAD Alternating Current El objetivo de los símbolos de seguridad es captar su atención ante posibles peligros. Los símbolos de seguridad y sus explicaciones merecen su atención y comprensión cuidadosa. Las advertencias del símbolo no eliminan por sí mismas ningún peligro. Las instrucciones y las advertencias que se dan no sustituyen las medidas adecuadas Direct Current de prevención de accidentes. - Page 32 GUARDE ESTAS INSTRUCCIONES Algunos de los siguientes símbolos pueden aplicarse al uso de esta herramienta. Obsérvelos y aprenda su significado. La interpretación correcta de estos símbolos le permitirá utilizar la herramienta de manera eficaz y segura. SÍMBOLO NOMBRE DESIGNACIÓN/EXPLICACIÓN Voltios Voltaje Amperios Corriente...
-
Page 33: Instrucciones De Seguridad
INSTRUCCIONES DE SEGURIDAD Advertencias de seguridad general en el manejo de herramientas eléctricas ѥ ADVERTENCIA: lea todas las advertencias de seguridad, las instrucciones, las ilustraciones y las especificaciones que se incluyen con esta herramienta eléctrica. No seguir todas las instrucciones que se detallan a continuación podría provocar descargas eléctricas, incendios o lesiones graves. -
Page 34: Uso Y Cuidado De Las Herramientas Eléctricas
• Retire todas las llaves de ajuste o llaves inglesas antes de encender la herramienta eléctrica. Si se deja una llave inglesa o una llave conectada a una pieza en movimiento de la herramienta eléctrica, se pueden producir lesiones personales. •... -
Page 35: Uso Y Cuidado De La Herramienta A Batería
• Mantenga las herramientas de corte afiladas y limpias. Las herramientas de corte con mantenimiento adecuado y bordes de corte afilados son menos propensas a trabarse y más fáciles de controlar. • Use la herramienta eléctrica, los accesorios, las brocas, etc. de acuerdo con estas instrucciones, considerando las condiciones de trabajo y el trabajo que desea realizar. -
Page 36: Instrucciones Importantes De Seguridad
• Siga todas las instrucciones de carga y no cargue el paquete de baterías ni las herramientas fuera del rango de temperatura especificado en las instrucciones. La carga inadecuada o a temperaturas fuera del rango especificado podría dañar la batería y aumentar el riesgo de incendio. REPARACIÓN •... - Page 37 • No se extienda demasiado: mantenga una posición y un equilibrio adecuados en todo momento. • Esté alerta: preste atención a lo que está haciendo. Use el sentido común. Si está cansado, no use la orilladora. • No use la orilladora bajo los efectos del alcohol o de las drogas. •...
- Page 38 • Si el equipo comienza a vibrar de manera anormal, detenga el motor y busque la causa de inmediato. Por lo general, la vibración advierte acerca de un problema. Un cabezal suelto puede vibrar, agrietarse, romperse o salirse de la orilladora, lo cual puede producir lesiones graves o fatales.
- Page 39 • No abra ni mutile la batería. Los electrolitos liberados son corrosivos y pueden causar daños en los ojos o la piel. Puede ser tóxico si se ingiere. • Tenga cuidado al manipular las baterías para que hacer corto circuito con la batería con materiales conductores como anillos, pulseras o llaves.
-
Page 40: Descripción
DESCRIPCIÓN CONOZCA SU ORILLADORA DE HILO (Fig. 1) Fig. 1 Paquete de batería Mango de agarre blando Interruptor gatillo Mango auxiliar delantero ajustable Bisagra del eje Cabezal de la orilladora Protector Perilla de accionamiento por golpeo Perilla de accionamiento por golpeo Hilo de corte Lengüeta de liberación... - Page 41 ESPECIFICACIONES DEL PRODUCTO Tensión 20 V c.c. Baja: 5000 RPM Velocidad sin carga Alta: 6000 RPM Mecanismo de corte Perilla de accionamiento por golpeo Hilo trenzado de nylon de 0,080 Tipo de hilo de corte pulgadas (2,0 mm) Anchura de corte 13 pulgadas (33 cm) Temperatura de funcionamiento 41–104 °F (5–40 °C)
-
Page 42: Desempaquetado
DESEMPAQUETADO ѥ ADVERTENCIA: Si cualquiera de las piezas está dañada o falta, no utilice este producto hasta que las piezas hayan sido remplazadas. La utilización de este producto con piezas dañadas o si le faltan piezas podría causar lesiones corporales graves. ѥ... -
Page 43: Operación
OPERACIÓN ѥ ADVERTENCIA: No permita que la familiaridad con este producto lo vuelva descuidado. Recuerde que un descuido de una fracción de segundo es suficiente para provocar lesiones graves. ѥ ADVERTENCIA: Siempre use lentes de protección con protectores laterales que cumplan con la norma ANSI Z87.1, junto con auriculares de seguridad. De lo contrario, los objetos que salgan despedidos pueden ingresar a los ojos y causar otras lesiones graves. - Page 44 Utilice un destornillador Fig. 3 Tornillos de bisagra de cabeza Phillips (no incluido) para fijar el eje con los dos tornillos de bisagra suministrados (Fig. 3). MONTAJE DEL PROTECTOR Fig. 4 (Fig. 4–5) ѥ Protector ADVERTENCIA: Use siempre guantes cuando monte o reemplace el protector.
- Page 45 MONTAJE Y Fig. 6 POSICIONAMIENTO DEL Front-assist Handle MANGO AUXILIAR DELANTERO (Fig. 6) Retire el paquete de batería de la orilladora. Retire la perilla tipo tornillo y el perno del mango auxiliar delantero. Presione el mango auxiliar delantero sobre el eje de la orilladora de hilo.
- Page 46 INSTALACIÓN/ Fig. 7 Botón de DESINSTALACIÓN DEL liberación de PAQUETE DE BATERÍA Instalar la batería (Fig. 7) ѥ ADVERTENCIA: Las herramientas a batería siempre están en condiciones de funcionamiento. Por lo tanto, retire la batería cuando esté Desinstalar ensamblando piezas, haciendo ajustes, realizando limpieza, cuando la herramienta no esté...
- Page 47 CÓMO AGARRAR LA Fig. 8 ORILLADORA DE HILO (Fig. 8): ѥ ADVERTENCIA: Vístase adecuadamente para reducir el riesgo de lesiones cuando utilice esta herramienta. No use ropa holgada ni joyas. Use protección ocular y de oídos/ audición. Use pantalones largos gruesos, botas y guantes.
- Page 48 ENCENDIDO Y APAGADO Fig. 9 DE LA ORILLADORA DE Botón de fijación en HILO apagado Antes de arrancar la orilladora de hilo: Asegúrese de que tiene un apoyo de los pies seguro y equilibrado. Interruptor Colóquese de pie y agarre gatillo la orilladora de hilo en una posición relajada.
- Page 49 SELECTOR DE VELOCIDAD Fig. 10 (Fig. 10) Esta orilladora de hilo le ofrece a usted la opción de Selector de utilizarla a una velocidad de velocidad mayor eficiencia energética para prolongar el tiempo de funcionamiento, con el fin de realizar trabajos más grandes, o acelerar la velocidad de la orilladora para realizar cortes de alto rendimiento.
- Page 50 CONSEJOS PARA OBTENER Fig. 11 LOS MEJORES RESULTADOS DE ORILLADO (Fig. 11) Sentido de El ángulo correcto para el rotación aditamento de corte es paralelo al terreno. No fuerce la orilladora. Deje que el extremo de la punta del hilo haga el corte (especialmente a lo largo Área de corte óptima Área de corte peligrosa...
- Page 51 AJUSTE DE LA LONGITUD Fig. 12 DEL HILO DE CORTE (Fig. 12) El cabezal de la orilladora permite al operador liberar más hilo de corte sin detener el motor. A medida que el hilo se deshilacha o se desgasta, se puede liberar hilo adicional golpeando ligeramente la perilla Perilla de acciona- de accionamiento por golpeo...
- Page 52 REEMPLAZO DEL HILO Fig. 13 (Fig. 13–15) AVISO: Utilice siempre el hilo de corte de nylon recomendado con un diámetro que no exceda 0,080 pulgadas (2,0 mm). Es posible que el uso de un hilo que no sea el especificado haga que la oril- ladora de hilo se sobrecaliente o Flecha Marca...
- Page 53 Empuje hacia abajo el cabezal de la orilladora mientras jala los hilos para hacer avanzar manualmente el hilo y para comprobar la instalación correcta del hilo de corte. RECARGA DEL HILO DE Fig. 16 CORTE (Fig. 16–18) Nota: Cuando el hilo de corte se rompa y se separe de la salida del Lengüetas hilo o dicho hilo no sea liberado...
- Page 54 UTILIZACIÓN DE LA ORILLADORA ѥ ADVERTENCIA: Para evitar lesiones corporales graves, use anteojos o gafas de seguridad en todo momento cuando utilice esta unidad. Use una careta o una máscara antipolvo en lugares donde se generen grandes cantidades de polvo. Despeje el área que se vaya a cortar antes de cada uso.
- Page 55 • Evite utilizar la máquina en malas condiciones climáticas, especialmente cuando haya riesgo de rayos. • Utilice el producto solo bajo luz diurna o buena luz artificial. • No utilice nunca la orilladora con un protector dañado o sin tener el protector instalado.
-
Page 56: Mantenimiento
MANTENIMIENTO ѥ ADVERTENCIA: al realizar el mantenimiento, utilice solo piezas de repuesto idénticas a las de fabricación. El uso de cualquier otra pieza puede crear un peligro o causar daños en el producto. Para garantizar la seguridad y confiabilidad, toda reparación debe ser realizada por un técnico de reparación calificado. - Page 57 Limpie el pasto que pueda cubrir el eje del motor o el cabezal de la orilladora. Use solo jabón suave y un paño húmedo para limpiar la herramienta. Nunca deje que ingresen líquidos a la herramienta; nunca sumerja alguna pieza de la herramienta en líquido.
-
Page 58: Resolución De Problemas
RESOLUCIÓN DE PROBLEMAS PROBLEMA CAUSA SOLUCIÓN La orilladora 1. El paquete de batería está 1. Deje que el paquete de se apaga demasiado caliente. batería se enfríe. inespera- 2. El paquete de batería está 2. Cargue el paquete de damente. descargado.
Need help?
Do you have a question about the HT22-401-03-02 and is the answer not in the manual?
Questions and answers
Will a metal cutting blade work on this hypertough 20 volt lithium ion brushless weed eater model no. Ht22 401 03 02
No, a metal cutting blade should not be used on the Hyper Tough HT22-401-03-02 20V lithium-ion brushless weed eater. The manual specifically warns against using wire, metal-reinforced line, or other materials in place of the nylon twist cutting lines, as they can break off and be thrown at high speed, creating a serious safety hazard.
This answer is automatically generated
i need replacement bump knob model ht-22 401-03-02
To find a replacement bump knob for the Hyper Tough model HT22-401-03-02, check the parts section of the manual and use the exact model number when searching. You can also contact technical support for assistance.
This answer is automatically generated
Which steel wire will fit my hyper tough weed eater
Steel wire is not compatible with the Hyper Tough weed eater model HT22-401-03-02. Only nylon twist cutting lines should be used. Using wire or metal-reinforced line can cause serious injury.
This answer is automatically generated
Runs but shuts off after 5 seconts
The Hyper Tough HT22-401-03-02 string trimmer may shut off after 5 seconds if the lock-off button and trigger switch are not both properly engaged. The motor only starts when both are depressed. If either is released, the tool will stop. Another possible cause could be a low or improperly connected battery, as the manual advises removing the battery during breaks and after work, indicating its critical role in operation.
This answer is automatically generated
What is the nut size that secures the head onto the device.
how do i start the hyper tough 20v max brushless string trimmer
need the spring to the spool on my hyper tough brushless weed eater, model 401-03-02 did not put the cover on good when i start it up the cover came off and mess up the spring
do you have a replacment bump knob for this model trimmer (can not seem to find the rigth one)