Table of Contents
Advertisement
Quick Links
Advertisement
Table of Contents

Related Manuals for Full Spectrum Laser A Series

Summary of Contents for Full Spectrum Laser A Series
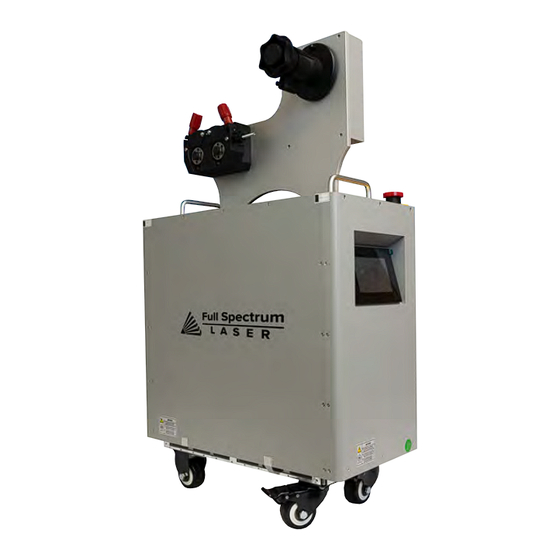
- Page 1 User Guide for A series Laser Welder...
-
Page 2: Table Of Contents
User Guide for A series Laser Welder CONTENT CONTENT ..................I Chapter 1 Safety Information ............3 1.1 Safety Sign ............................. 3 1.2 Laser Safety Classification ........................3 1.3 Labels on the Product ..........................3 1.4 Safety Instructions for Optical Operation ....................5 1.5 Safety Instructions for Electrical Operation ................... - Page 3 User Guide for A series Laser Welder 6.4 Selection of wire feed roller ......................... 27 6.5 Use of copper nozzle ........................... 28 6.6 Process parameter reference ......................28 Chapter 7 Cleaning and Replacing of lens ........31 7.1 Cleaning and replacing window mirrors ....................31 7.2 Cleaning and replacement of focusing lens ..................
-
Page 4: Chapter 1 Safety Information
User Guide for A series Laser Welder Chapter 1 Safety Information Thank you for choosing the A series Laser Welder from Reci laser. In order to ensure operation safety (personnel safety, equipment safety, production safety.) and product operation in the best state. We compile this document with important safety, operating, maintaining and other information. - Page 5 User Guide for A series Laser Welder (3)Rear view (2)Side view Welding gun (4) Figure 1.1 Product safety signs and their locations These safety signs mainly include: laser product category warning, laser radiation hazard warning, strong current hazard warning, product nameplate, etc. The details of identification are shown in the table below: Table 1.1 Product safety label details...
-
Page 6: Safety Instructions For Optical Operation
User Guide for A series Laser Welder (5)Laser output position warning (6)Nameplate (7)Other warnings 1.4 Safety Instructions for Optical Operation (1)Never look directly into the optical output when the Electrical switch is on. (2)Make sure that a pair of appropriate and approved laser safety protective glasses is worn all the time while the laser is operating. -
Page 7: Safety Instructions For Electrical Operation
User Guide for A series Laser Welder (6)If the welding gun is heated during use, please stop using it immediately and check the problem. (7) The welding gun cannot be pointed at people. 1.5 Safety Instructions for Electrical Operation Make sure the power source connected to the equipment is properly grounded with PE (1)... -
Page 8: Chapter 2 Product Description
User Guide for A series Laser Welder Chapter 2 Product Description 2.1 Property Introductions The laser used in this product is a fiber laser. Compared with traditional gas and solid lasers, it has high electro-optical conversion efficiency and superior beam quality. Due to the low cost of optical fiber, the cost of fiber laser is also relatively low. -
Page 9: Product Parameters
User Guide for A series Laser Welder (2) Excessive ambient temperature and ambient humidity will shorten the life of the Laser welder and reduce the output power. This laser welder adopts air-cooling heat dissipation. When placing it, please operate it in a non-enclosed and small space with good air circulation conditions. -
Page 10: Overall Dimensions
User Guide for A series Laser Welder MODEL A120 A150 A200 Operating Voltage AC 220V 50/60Hz Electric Power Consumption <3000W <3600W <4800W <7000W Specification Control Mode Touch screen Dimensions 273×614.9×396.3 273×634.9×527.7 273×634.1×527.7 323×684.2×629 W×H×D (mm3) (mm3) (mm3) (mm3) Weight (Wire feeder... - Page 11 User Guide for A series Laser Welder Figure 2.4.2 Overall dimensions of A120/A150 (3)A200 Figure 2.4.3 Overall dimensions of A200 (4)Welding gun...
- Page 12 User Guide for A series Laser Welder Figure 2.4.4 Overall dimensions of the Welding gun...
-
Page 13: Chapter 3 Unboxing And Function Introduction
User Guide for A series Laser Welder Chapter 3 Unboxing and function introduction 3.1 Unboxing and Inspection The packaging boxes are specially designed to ensure that the product is protected from damage during transportation. However, in order to prevent unpredictable situations during transportation, users still need to carefully check the packaging box before opening the box. -
Page 14: Function Introduction
User Guide for A series Laser Welder CAUTION : The output optical cable and welding gun are precision optical devices - twisting, excessive bending of the optical cable, strong vibration and impact on the laser output head will cause irreparable damage to the Laser Welder. -
Page 15: Rear Panel
User Guide for A series Laser Welder 3.2.2 Rear Panel Figure 3.3 Table 3.2 Functions of the specific interface on the rear Panel ITEMS FUNCTION DESCRIPTION CTRL-INTERFACE 12-pin interface connection, and see section 3.3 for details. Workpiece clamp cable attaches to this CLAMP. This closes the... - Page 16 User Guide for A series Laser Welder DESCRIPTION REMARK RS485A RS485 for the parameter setting or used for the wire feeder RS485B External Safety Interlock. Laser cannot be started without the INTERLOCK+ required safety interlocks being in place and satisfied.
- Page 17 User Guide for A series Laser Welder 3.2.4 Above Figure 3.6 Name DESCRIPTION AC220V Connect to 220V AC OUTPUT on the rear panel CTRL Connect to CTRL-INTERFACE on the rear panel damping shaft Used to placing wire spools wire feed wheel...
-
Page 18: Chapter 4 Preparation Before Use
User Guide for A series Laser Welder Chapter 4 Preparation before use 4.1 Precautions (1) The Laser Welder needs to be placed horizontally and fixed as necessary. It must not be inverted, sideways, vibrated or impacted. (2) When connecting the power cord and control line, be sure to ensure that the power supply is disconnected. - Page 19 User Guide for A series Laser Welder Figure 4.1 Figure 4.2 2、Connect the wire of the CTRL (as shown in Figure 4.3) to the CTRL-INTERFACE. Connect it according to the mark on the wire. Fix it tightly, and then install the protective cover..
-
Page 20: Gas Connection
User Guide for A series Laser Welder Warning: This product is powered by 220V AC. Disconnecting the product grounding will cause the product shell to be charged, which may cause personal injury to the operator. Do not plug or unplug the wire plug while the power is on. It is easy to cause electric shock and personal injury. -
Page 21: Installation Of Clamp
User Guide for A series Laser Welder 4.4 Installation of clamp Connect the round terminal on one end of the clamp to the CLAMP on the rear panel, and the other end is clamped to the welding workpiece.. Figure 4.9 4.5 Installation of welding wire... - Page 22 User Guide for A series Laser Welder 2. threading the welding wire Pay attention to choosing the appropriate wire feed wheel. 3. Tighten the welding wire Pay attention to moderate pressure. The bushing shown in the figure below is used to fix relatively thin wire spools.
-
Page 23: Chapter 5 Use Of Laser Welder
User Guide for A series Laser Welder Chapter 5 Use of laser welder 5.1 Power on check As shown in Figure 5.1, flip the air switch and power on the Laser Welder. At this time, the fan starts to rotate at a low speed, the touch screen lights up, and the welding gun has a red light output. -
Page 24: Use Of The Laser Welder
User Guide for A series Laser Welder (1)There is no red light or the position of the red light has a large deviation and cannot be emitted normally from the copper nozzle. You need to contact after-sales personnel. (2)The left and right offset of the red light position is relatively small and can be adjusted through the touch screen. -
Page 25: The Setting Of Fish-Scale Welding
User Guide for A series Laser Welder 5.3 The setting of fish-scale welding The operation steps are as follows (parameters are for reference only) (1) As shown in Figure 5.2, the working mode of the main interface is set to spot welding. -
Page 26: Signal Dect
User Guide for A series Laser Welder Figure 5.6 Fault Query Interface If the laser welder fails, you should contact the after-sales personnel in time to handle it as soon as possible. 5.6 Signal Dect Click Signal Dect on the main interface to see some status parameters of the Laser Welder, as shown below. -
Page 27: Chapter 6 Process Selection
User Guide for A series Laser Welder Chapter 6 Process selection 6.1 Focus 1. The laser focus is the laser focus position after focusing the parallel light after beam expansion through the focusing lens, and the thinnest part of the cone-shaped shape is the laser focus position Figure 6.1... -
Page 28: Shielding Gas Selection
User Guide for A series Laser Welder 6.2 Shielding gas selection Auxiliary air blowing is an essential process in high-power laser welding. On the one hand, it is to prevent metal materials from sputtering and contaminating the focusing mirror (coaxial protective gas);... -
Page 29: Use Of Copper Nozzle
User Guide for A series Laser Welder 6.5 Use of copper nozzle Figure 6.2 Suitable for tailor welding:AS-12,BS-16,CS-12,ES-12,FS-16,C Suitable for external fillet welding:AS-12,BS-16,CS-12,ES-12,FS-16 Suitable for internal fillet welding:AS-12,BS-16,CS-12,C Suitable for lap welding :AS-12,BS-16,CS-12,C Suitable for edge welds :AS-12,BS-16,CS-12,ES-12,FS-16 Suitable for cutting:Copper tip for cutting 6.6 Process parameter reference... - Page 30 User Guide for A series Laser Welder Table 6.1 A150 plate tailor welding data (wire feeding) Swing Swing Welding Wire feed Gas flow Thickness Power Material amplitude frequency wire speed volume Form (mm) (Hz) (mm) (cm/min) (L/min) (mm) 26-30 50-60...
- Page 31 User Guide for A series Laser Welder Table 6.2 Tailor welding data of A150 plate (without wire feeding) Thickness Swing amplitude Swing frequency Power Material Form (mm) (mm) (Hz) 15-20 30-50 60-75 Carbon Steel Through Galvanized Sheet Through 50-55 40-50...
-
Page 32: Chapter 7 Cleaning And Replacing Of Lens
User Guide for A series Laser Welder Chapter 7 Cleaning and Replacing of lens 7.1 Cleaning and replacing window mirrors This product uses a protective window mirror with a diameter of 18mm and a thickness of 2mm. If the window mirror is stained, it must be cleaned and replaced in time, otherwise it will cause damage to the welding gun and even the laser welder. -
Page 33: Cleaning And Replacement Of Focusing Lens
User Guide for A series Laser Welder 7.2 Cleaning and replacement of focusing lens The specifications of the focusing lens are 20mm in diameter and 150mm in focal length. If you need to replace it, please contact our sales staff in time to purchase it. -
Page 34: Cleaning Of Air Ducts
User Guide for A series Laser Welder 7.3 Cleaning of air ducts This product uses air cooling. Blockage of the air duct will result in poor heat dissipation and serious damage to the equipment. Therefore, the air duct needs to be cleaned regularly according to the working conditions. - Page 35 User Guide for A series Laser Welder Figure 7.5 Filter installation diagram...
-
Page 36: Chapter 8 Common Faults Treatment
User Guide for A series Laser Welder Chapter 8 Common faults treatment 8.1 Fault alarm and query In case of fault alarm, the laser will awelder utomatically turn off by turning off the internal power supply. At the same time, the fault signal in the 12-PIN CTRL-INTERFACE (ALARM_OUT+—pin 5 ,... - Page 37 User Guide for A series Laser Welder MESSAGE DESCRIPTION SOLUTION please contact our after-sales service personnel. Trial Expires Contact our after-sales service personnel to Trial time limit exceeded. Fault see if you can continue to use the laser. Timing Chip Please contact our after-sales service The timekeeping chip faults.
-
Page 38: Chapter 9 Warranty And Return
User Guide for A series Laser Welder Chapter 9 Warranty and Return 9.1 General warranty While all products manufactured according to the orders or specifications are delivered, the products with problems issued from materials and technologies shall be guaranteed by Reci, as long as the laser is used in accordance with specifications.
Need help?
Do you have a question about the A Series and is the answer not in the manual?
Questions and answers