Table of Contents
Advertisement
Quick Links
Advertisement
Table of Contents

Related Manuals for Reliable 5500SD


Summary of Contents for Reliable 5500SD
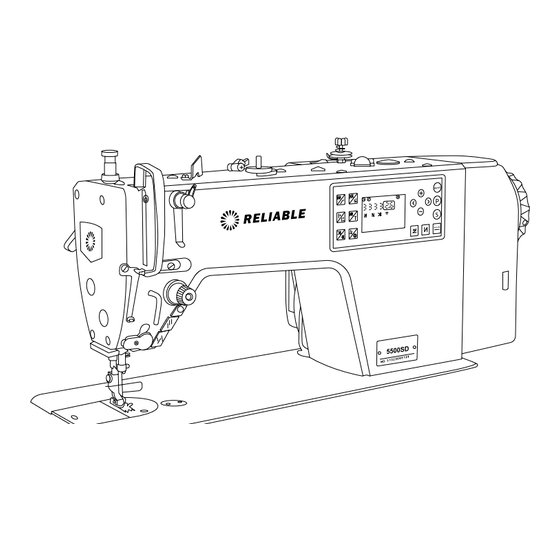
- Page 1 5500SD INDUSTRIAL SEWING MACHINES INSTRUCTION MANUAL AND PARTS BOOK...
- Page 3 In this manual, you’ll find instructions on how to use and prepare your machine. To watch the videos for 5500SD, please visit www.youtube.com/@ReliableCorporation for a complete video playlist.
-
Page 4: Table Of Contents
CONTENTS Attention before operation Caution in using Lubrication Adjusting oil flow for the rotating hook Mounting the needle Loading the bobbin Threading the needle Winding the bobbin thread Lifting of presser foot Built-in LED light Operating the treadle Adjusting the presser foot pressure Adjusting the tension of stitch thread Adjusting the take-up spring Adjusting the height of the needle bar... -
Page 5: Attention Before Operation
1. Before you put the machine into operation for the first time after the set-up, clean it thoroughly. 2. Though every machine is strictly inspected and tested before leaving Reliable, the machine parts may be loose or after long distance transportation due to jolt. A thorough examination must be performed after cleaning the machine. -
Page 6: Lubrication
3. Lubrication 1. Fill oil pan (1) with machine oil up to HIGH mark (A). 2. When the oil level drops below the LOW mark (B), refill the oil pan with the specified oil. 3. When you operate the machine after lubrication, you will see splashing oil through the sight window (2). -
Page 7: Mounting The Needle
5. Mounting the needle 1. Turn the hand wheel counterclockwise until the needle stops at its maximum height. 2. Loosen needle screw (2) using a screwdriver provided with the machine. 3. lnsert the needle (1) into the bottom of needle bar in direction of arrow till it reaches the end point. -
Page 8: Threading The Needle
7. Threading the needle Raise the needle bar so it stays at its highest position and lead the thread from the thread stand in the order as shown in the figure. -
Page 9: Winding The Bobbin Thread
8. Winding the bobbin Bobbin thread winding-up method 1. Insert bobbin (1) onto the bobbin winder post (2). 2. Feed the thread through the tension assembly. Wind the thread onto the bobbin clockwise for several turns. 3. Push winding lever (3) into the bobbin. The bobbin (1) is rotated in direction C and thread is reeled onto bobbin (1). -
Page 10: Built-In Led Light
10. Built-in LED light The sewing machine comes with a built-in LED light. The light has three illumination settings. When the machine is powered on, the LED light is turned on at level three, which is the brightest setting. Press the light button (1) in sequence to reduce the brightness until it switches off. -
Page 11: Adjusting The Presser Foot Pressure
12. Adjusting the presser foot pressure 1. Loosen locking nut (2). 2. Turn (1) screw in clockwise direction (A) to increase the pressure on the foot. 3. Turn (1) screw in counterclockwise direction (B) to decrease the pressure on the foot. 13. -
Page 12: Adjusting The Take-Up Spring
14. Adjusting the take-up spring The take-up spring The tension of keeps on take-up spring is too functioning till the high, so needle thread end. draws out of place B in process of the action. 1) Adjusting the tension of bobbin thread 1. -
Page 13: Adjusting The Height Of The Needle Bar
15. Adjusting the height of the needle bar 1. Turn the machine hand wheel to set the needle bar (1) to its lowest position. 2. Remove the rubber cap (2) from the face plate. 3. Loosen the needle bar locking screw (3) of needle bar, through moving the needle bar (1) up and down to adjust, when using needle DBx1, the mark A on the needle bar (1) should match to the bottom of needle bar lower bushing. -
Page 14: Programming
Programming 5500SD Safety Precautions Please read the operation manual and related sewing machine datasheet carefully for correct use. 1. Power voltage and frequency: please refer to motor and control box nameplate. 2. Interference from electromagnetic wave: please keep far away strong magnetic or high radiation environment in order to avoid obstructions and make to misoperation. - Page 15 Setting the Presser Foot Lift Press to engage the presser foot lift, when you stop sewing. Once selected, the presser foot lift key would be visible on the programmable panel. Press the key again to engage the presser foot lift after thread cutting.
- Page 16 Back Tack Stitching Start Back Tack/Secure Stitch • Push once for position 1 one, segment(A). For example, if position 1 is set to 3, the machine will back tack 3 stitches when starting to sew. • Push twice for two back tacks, position 1 and 2, Position 1 and 2 segment (A then B).
- Page 17 Advanced Operations Error Codes...
- Page 18 System Parameter Table...
-
Page 21: Parts Book
PARTS BOOK Please confirm the relative applications, reference number and part number when buying the parts. - Page 22 1. Machine frame mechanism...
- Page 23 1. Machine frame mechanism...
- Page 24 2. Main shaft and thread take-up & needle bar mechanism...
- Page 25 2. Main shaft and thread take-up & needle bar mechanism...
- Page 26 3. Hang lifter mechanism...
- Page 27 3. Hang lifter mechanism...
-
Page 28: Feed Mechanism
4. Feed mechanism... - Page 29 4. Feed mechanism...
- Page 30 5. Feed adjusting mechanism...
- Page 31 5. Feed adjusting mechanism...
- Page 32 6. Hook of driving shaft mechanism...
- Page 33 6. Hook of driving shaft mechanism...
-
Page 34: Lubrication Mechanism
7. Lubrication mechanism... - Page 35 7. Lubrication mechanism...
- Page 36 8. Oil reservoir and knee pan plate mechanism...
- Page 37 8. Oil reservoir and knee pan plate mechanism...
- Page 38 9. Accessories part mechanism...
- Page 39 9. Accessories part mechanism...
-
Page 40: Thread Trimmer Mechanism
10. Thread trimmer mechanism... - Page 41 10. Thread trimmer mechanism...
- Page 42 11. D2 Component...
- Page 43 11. D2 Component...
Need help?
Do you have a question about the 5500SD and is the answer not in the manual?
Questions and answers
Draining oil