Advertisement
Table of Contents
3499926COMS
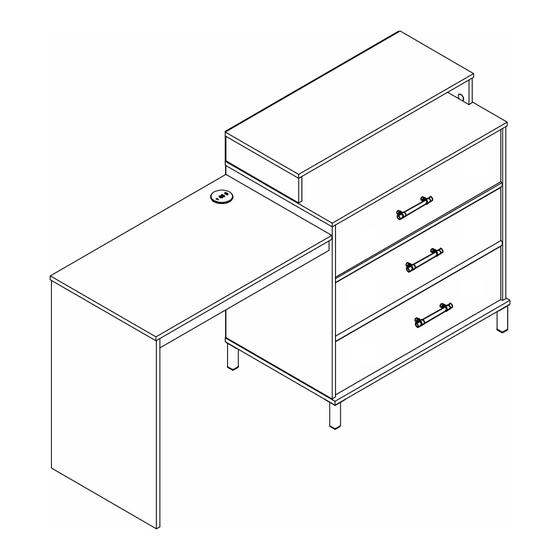
Kalissa Dresser - Desk Combo
Date of Purchase_ D,,_
Lot Number:
THIS INSTRUCTION BOOKLET CONTAINS IMPORTANT SAFETY INFORMATION. PLEASE READ A ND KEEP FOR FUTURE REFERENCE.
Do Not Return This Proc uct!
Contact our customer service team for help first
1-800-489-3351
Visit: www.ameriwoodhome.com
WARNING
A
-Unit can tip over causing severe injury or death.
-Anchor unitto stud in wall (if instructed to)
-Do not albw children climb on unit
- Put heavy items on lower shelves or drawers
L
Ameriwood·
B343499926COMS00AL
,i�
Easy
Tough
Assembly Difficulty Meter
Follow Ameriwood Home
HOME
Advertisement
Table of Contents

Subscribe to Our Youtube Channel
Related Manuals for Ameriwood HOME Kalissa 3499926COMS


Summary of Contents for Ameriwood HOME Kalissa 3499926COMS
- Page 1 Easy Tough Assembly Difficulty Meter WARNING Follow Ameriwood Home -Unit can tip over causing severe injury or death. -Anchor unitto stud in wall (if instructed to) -Do not albw children climb on unit - Put heavy items on lower shelves or drawers...
-
Page 2: Helpful Hints
Aneriwood· HOME Contact Us! Do NOT return this product! Contact our friendly customer service team first for help. Call us! 1-800-489-3351 Visit ameriwoodhome.com to view the limited warranty valid in the U.S. and Canada. Helpful Hints For optimal assembly, 2 people are recommended. ESTIMATED ASSEMBLY TIME: 60 MIN - Open your item in the area you plan to keep it to avoid excessive heavy lifting. -
Page 5: Board Identification
Aneriwood· HOME Board Identification Not actual size UPPER DRAWER TOP T3499926S010AL DRAWER TOP T3499926S020AL (x2) UPPER LEFT/ RIGHT PANEL T3499926S040AL LEFT SIDE PANEL T3499926S050AL CENTER PANEL (x2) RIGHT SIDE PANEL T3499926S060AL BRACE PANEL T3499926S070AL T3499926S080AL DESK TOP PANEL T3499926S090AL UPPER BACK (x3) PANEL APRON PANEL... - Page 6 Aneriwood· HOME Board Identification -----------------6----------------- ameriwoodhome.com IJ(QJ�EJII...
-
Page 7: Part List
For any replacement hardware,order Aneriwood· using part # 23499926COMS0AL Hardware Bag HOME 23499926COMS0AL Part List Not actual size 7 x 34mm Ø15 x 10mm 6 x 30mm # 10 x 3/8mm (x32) (x6) (x8) (x17) (x17) T (x20) TAL12120 TAL54520 TAL2531 TAL5101 TAL22620... - Page 8 Aneriwood· STEP 1 HOME -------------- 8 -------------- ameriwoodhome.com 11(QJ�EJII...
- Page 9 Aneriyt8£,�- STEP 2 --------------9-------------- ameriwoodhome.com IJ(QJ�EJII...
- Page 10 Aneriwood· STEP 3 HOME ---------- - 10 ---------- ameriwoodhome.com IJ(QJ�EJII...
- Page 11 Aneriwood· STEP 4 HOME -----------11---------- ameriwoodhome.com IJ(QJ�EJII...
- Page 12 Aneriwood· STEP 5 HOME --------------' 12 ---------- ameriwoodhome.com IJ(QJ�EJII...
- Page 13 An e r i yt 8 £, � - STEP 6 -----------13---------- ameriwoodhome.com IJ(QJ�EJII...
- Page 14 Aneriwood· S T E P 7 HOME --------------' 14 ---------- ameriwoodhome.com IJ(QJ�EJII...
- Page 15 Aneri yt8£, � - STEP8 --------------' 15 ---------- ameriwoodhome.com 11(QJ�EJII...
- Page 16 Aneriwood· STEP 9 HOME ----------- 16 ---------- ameriwoodhome.com 11(QJ�EJII...
- Page 17 Aneriwood· STEP10 HOME -----------17----------- ameriwoodhome.com 11(QJ�EJII...
- Page 18 Aneriwood· STEP11 HOME -----------18----------- ameriwoodhome.com 11(QJ�EJII...
- Page 19 Aneriwood· STEP12 HOME -----------19---------- ameriwoodhome.com IJ(QJ�EJII...
- Page 20 Ane r i wood· STEP13 HOME -----------20----------- ameriwoodhome.com IJ(QJ�EJII...
- Page 21 Aneriwood· STEP14 HOME PH Tapping ----------- 21 ---------- ameriwoodhome.com IJ(QJ�EJII...
- Page 22 Aneriwood· STEP15 HOME -Install Minifix Housing (3), Wood Dowel (4), L-Bracket (13) and PH Tapping (6) Into Modesty Panel (K) as shown below. -----------22----------- ameriwoodhome.com IJ(QJ�EJII...
- Page 23 Aneriyt8£,�- STEP16 • • -----------23---------- ameriwoodhome.com 11(QJ�EJII...
- Page 24 Aneriwood· STEP 17 HOME • • -----------24----------- ameriwoodhome.com 11(QJ�EJII...
- Page 25 Aneriwood· STEP18 HOME --------------2---------------- ameriwoodhome.com 11(QJ�EJII...
- Page 26 Aneriwood· STEP 19 HOME -------------- 2ft-- -------------- ameriwoodhome.com 11(QJ�EJII...
- Page 27 Aneri yt8£, � - STEP 20 -----------27----------- ameriwoodhome.com 11(QJ�EJII...
- Page 28 Aneriwood· STEP 21 HOME finished edge Pro Tip: Second person recommended for ease of assembly on this step to align dowels and switch lock pins. Pro Tip: Switch locks may be tight during initial adjustment. For leverage, to engage the switch, use a flat head screwdriver. --------------2-------------- ameriwoodhome.com 11(QJ�EJII...
- Page 29 Aneriwood· STEP 22 HOME - Install PWA Screw (6) on the top panel of the desk (I) and the side panel of the PH Tapping desk (F) as below shown. ------------------2------------------- ameriwoodhome.com IJ(QJ�EJII...
- Page 30 Aneriwood· STEP 23 HOME OPTION 1: Attachment into a wall stud (preferred method) Using a stud finder, locate a stud in the wall. Place your unit against the wall, with the safety bracket aligned in this location. To make driving the screw easier, you can drill a 1/8" diameter pilot hole (3mm) through the safety bracket into the stud.
- Page 31 Aneriwood· HOME STEP 24 -----------31---------- ameriwoodhome.com IJ(QJ�EJII...
- Page 32 Aneriwood· STEP 25 HOME PH Tapping -----------32---------- ameriwoodhome.com IJ(QJ�EJII...
-
Page 33: Star Rating
Visit your local retailer's website, rate your purchased product and leave us some feedbackl We would like to extend a big "Thank You"to alll of our customers for taking the time to assemble this Ameriwood Home product, and to give us your valuable feedback -------------------3-"r-------------------- ameriwoodhome.com... - Page 34 Aneriwood· STEP 27 HOME Cubierta Delantera Este libro de instrnrniones contiene informacion IMPORTANTE de seguridad. Par favor lea v mantengalo para referenda en el futuro. rese este producto! Comuniquese con nuestro amistoso equipo de servicio al cliente para obtener ayuda. Llamenos al: 1-800-489-3351 (Gratis) Visitar: www.ameniwoodhome.com...
- Page 35 Aneriwood· HOME STEP 28 --------------------3--------------------- ameriwoodhome.com 11(QJ�EJII...
- Page 36 Aneriwood· STEP 29 HOME (x12) (x3sets) - Install Drive Fastener (7) to Drawer Back (P). - Install Handle Arcylic Gold 128mm Sets (10a & 10b) to Drawer Front(L). - Flip unit to Front and repeat this for other drawers. --------------------3�------------------- ameriwoodhome.com 11(QJ�EJII...
- Page 37 Aneriwood· STEP 30 HOME -----------37---------- ameriwoodhome.com 11(QJ�EJII...
- Page 38 Aneriwood· Maximum Loads HOME ----------38--------- ameriwoodhome.com 11(QJ�EJII...
- Page 40 Aneriwood· Espanol HOME Cubierta Delantera Este libro de instrucciones contiene informaci6n IMPORTANTE de seguridad. Por favor lea y mantengalo para referenda en el futuro. No Regrese este producto! Comuniquese con nuestro amistoso equipo de servicio al cliente para obtener ayuda. Llamenos al: 1-800-489-3351 (Gratis) Visitar: www.ameriwoodhome.com PRECAUCION...
- Page 41 - lnstale la carcasa Minifix (3) y el pasador de madera (4) en el panel de refuerzo (H) - Ensamble el panel central (F) y el panel de refuerzo (H) coma se muestra a continuaci6n. - Ensamble el panel lateral derecho (G) y el panel de refuerzo (H) coma se muestra a Aneriwood·...
- Page 42 Aneriwood· Espanol HOME Pagina 17 - Ensamble el panel superior izquierdo/derecho (D) en la parte superior del caj6n (B) y en la parte superior del caj6n superior (A) coma se muestra a continuaci6n. Gire el interrupter para bloquear. Pagina 18 IMPORTANT! LE PANNEAU ARRIERE EST UNE PARTIE STRUCTURELLE DE CETTE UNITE ET DOIT ETRE INSTALLE CORRECTEMENT.
- Page 43 - Con otra ayuda para sujetar el panel modesto (K), ensamble el panel modesto (K) Aneriwood· Espanol HOME Pagina 23 - Con otra ayuda para sostener el panel de la plataforma (J), ensamble el panel de la plataforma (J) y el panel central (F) coma se muestra a continuaci6n. Pagina 24 y el panel central (F) coma se muestra a continuaci6n.
- Page 44 �eriwood· Espanol HOME Pagina 31 IMPORTANT: CE MEUBLE DOIT ETRE SECURISE AU MUR POUR EVITER QU'IL NE BASCULE. SUIVRE CES INSTRUCTIONS POUR INSTALLER LE SUPPORT DE SECURITE ANTI-BASCULEMENT FOURNI AVEC CE PRODUIT. AVERTISSEM ENT Des blessures graves ou mortelles peuvent se produire en cas de basculement des meubles. Pour eviter le basculement: * Installer la piece anti-basculement fournie Placer les objets les plus lourds dans les tiroirs les plus bas...
- Page 45 Aneriwood· Espanol HOME Pagina 34 - Ensamble el lateral del caj6n (M y con el tornillo PWA (6) y el soporte del caj6n (0) en el frente del caj6n (L). - Repita este paso para otros cajones. Pagina 35 - Deslice la parte inferior del caj6n (Q) hacia el lado del caj6n (M y y el frente del caj6n (L).
- Page 46 Visite el sitio web de su tienda local, califique su comprado y denos sus comentarios! Nos gustarfa enviar un gran "Agradecimiento" a todos nuestros clientes por tomarse el tiempo de ensamblar este producto de Ameriwood Home, y por darnos sus valiosos comentarios. Gracias 46----------- E@liJrJ�...
- Page 47 Aneriwood· Fran�ais HOME Couverture Avant CE LIVRET D'INSTRUCTION CONTI ENT DES INFORMATIONS IMPORTANTES SUR LA SECURITE. VEUILLEZ LIRE ET GARDER POUR UNE REFERENCE FUTURE Ne retournez pas ce produitl Contactez notre equipe de service la clientele amicale d'abord pour obtenir de l'aide.
- Page 48 Aneriwood· Fran�ais HOME Identification des cartes (Page 5) Panneaux de planches avec lettrage. Identification conjointe (Page 6) Pas de taille reelle. Liste des (Page 7) Pas de taille reelle. Page 8 - Installer le boulon Minifix (2) et la cheville en bois (4) dans le panneau central (F) comme indique ci-dessous.
- Page 49 Aneriwood· Fran�ais HOME Page 17 - Assemblez le panneau superieur gauche/droit (D) au haut du tiroir (B) et en haut du tiroir superieur (A) comme illustre ci-dessous. Basculez l'interrupteur pour verrouiller. Page 18 IMPORTANT! LE PANNEAU ARRI ERE EST UNE PARTIE STRUCTURELLE DE CET APPAREIL ET DOIT ETRE INSTALLE CORRECTEMENT A l'aide d'un autre, retournez delicatement votre appareil sur sa face avant.
- Page 50 Aneriwood· Fran�ais HOME Page 23 - A l'aide d'une autre aide pour soutenir le panneau de pant (J), assembler le panneau de pontplate-forme (J) et le panneau central (F) comme illustre ci-dessous. Page 24 - Avec une autre aide pour tenir le panneau de fond (K), assembler le panneau de fond (K) et le panneau central (F) comme illustre ci-dessous.
- Page 51 l'avant du tiroir (L). Installer le support de tiroir (5) sur la facade du tiroir (L) Aneriwood· Fran�ais HOME Page 31 IMPORTANT: CE MEUBLE DOIT ETRE SECURISE AU MUR POUR EVITER QU'IL NE BASCULE. SUIVRE CES INSTRUCTIONS POUR INSTALLER LE SUPPORT DE SECURITE ANTI-BASCULEMENT FOURNI AVEC CE PRODUIT.
- Page 52 Visitez le site Web de votre detaillant local, evaluez votre produit achete et laissez-nous quelques commentaires ! Nous tenons offrir un grand "Merci" tous nos clients pour avoir pris le temps d'assembler ce produit "Ameriwood Home", et de nous donner vos commentaires precieux. Merci ameriwoodhome.com...
Need help?
Do you have a question about the Kalissa 3499926COMS and is the answer not in the manual?
Questions and answers