Table of Contents
Advertisement
Quick Links
Advertisement
Table of Contents

Related Manuals for Jet JTSS-1600-T


Summary of Contents for Jet JTSS-1600-T
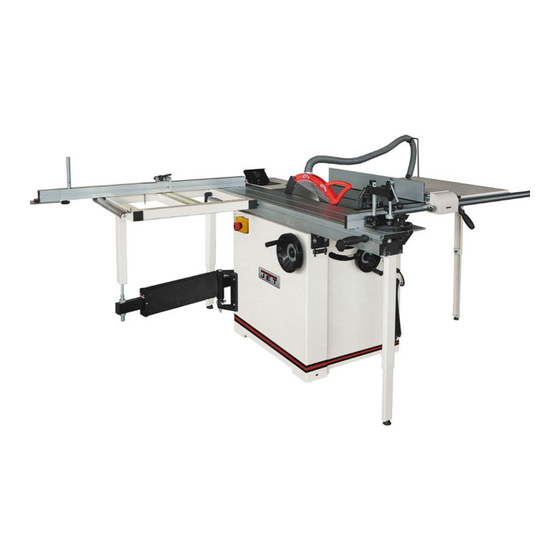
- Page 1 JTSS-1600 Panel Saw Original: Operating Instructions Translations: Gebrauchsanleitung Mode d´emploi JPW (Tool) AG Tämperlistrasse 5 CH-8117 Fällanden Switzerland Phone +41 44 806 47 48 +41 44 806 47 58 www.jettools.com M-10000044T 2017-03...
- Page 2 CE-Conformity Declaration CE-Konformitätserklärung Déclaration de Conformité CE Product / Produkt / Produit: Table saw Tischkreissäge la scie circulaire JTSS-1600 Brand / Marke / Marque: Manufacturer / Hersteller / Fabricant: JPW (Tool) AG, Tämperlistrasse 5, CH-8117 Fällanden Schweiz / Suisse / Switzerland We hereby declare that this product complies with the regulations Wir erklären hiermit, dass dieses Produkt der folgenden Richtlinie entspricht Par la présente, nous déclarons que ce produit correspond aux directives suivantes...
-
Page 3: Table Of Contents
Dear Customer, Many thanks for the confidence you have shown in us with the purchase of your new JET-machine. This manual has been prepared for the owner and operators of a JET JTSS-1600 Panel saw to promote safety during installation, operation and maintenance procedures. -
Page 4: General Safety Notes
Any other use exceeds authorization. In the event of unauthorized use of the machine, the manufacturer Use suitable table extensions and supporting aids for difficult renounces all liability and the responsibility is transferred to handle workpieces. exclusively to the operator. Always hold and guide the workpieces safely during machining. -
Page 5: Remaining Hazards
Keep children and visitors a safe distance from the work The raving knife thickness must be in between sawblade area. body thickness and width of cut. Never reach into the machine while it is operating or running Make sure that the sawblade is suitable for the work piece down. -
Page 6: Noise Emission
- Arbor pin - 3, 4, 5, 6 mm "L" wrench 4.2 Noise emission Push stick Determined according to EN 1870-18 (Inspection tolerance 4 dB) (Some parts are inside the main saw unit) Workpiece plywood 16mm: Edge shoe Acoustic power level (according to EN ISO 3746): Idling 98,3 dB (A) Operating... -
Page 7: Transport And Start Up
To avoid machine tiping and for static stability, the table support legs must always be installed and adjusted to the floor. The machine must be levelled in both directions to assure good sliding motion of the sliding table. If possible, the machine must be placed on rubber plates which act as shock absorbers and reduce the noise level. - Page 8 Mounting rip fence rail Insert 4-M10x80 hex head bolts into major table and extension tables. Loosely attach 2-M10 hex nuts to each Attach the diagonal support beam ( Fig 6). bolt. Screw the four bolts into rip fence rail, just 4-5 circles. First tighten two bolts to align the rail parallel With the table.
- Page 9 Mounting the sliding table: Fig 15 Slide two M8x70 carriage bolts with T-blocks into the T-slot of the sliding table, attach with 2 wing nuts. Fig 12 Adjust 4-M12 hex nuts (C) to bring the cross cut table into Lift the sliding table onto the machine and attach with T-bolts same plane with sliding table and machine table.
-
Page 10: Dust Connection
Place a T-nut into the top slot of fence, thread the stud of hold-down on fence. If need, put the hold down arm onto the stud (E). Reference to chapter 7.8 Mounting Mitre Fence See chapter 7.9 Mounting Sawblade See chapter 7.1 Mounting sawguard The riving knife has slots for different blade sizes Fig 18 Min blade size Ø... -
Page 11: Starting Operation
(Clockwise direction of the main spindle is correct). For safety reasons this must only be done without the sawblade installed! 5.5 Starting operation You can start the machine with the green On-button. The red Off-button stops the machine. The scoring sawblade is started and stopped simultaneously with the main sawblade. -
Page 12: Setup And Adjustments
Push sticks must have a minimum length of 400mm and a V- The sawblade teeth must point in cutting direction (down) mouth. Always wear suitable gloves when handling sawblades. WARNING: When installing or changing saw blade, always disconnect saw from power source, unplug! Push the sliding table to the front and open the lower sawblade cover. - Page 13 Put the locking pin (N) in the opening The sawguard (O, Fig 26) must always be used. of the saw table and turn the arbor with the spanner until the Attach the saw guard to the raving knife (P), in the slot (S) locking pin engages in the hole in the saw arbor pulley.
- Page 14 Each time the main sawblade is replaced by a new one, or even a newly sharpened sawblade, the scorer has to be adjusted to match the main sawblade teeth width. It is very important that this is done in the correct way to ensure a clean cut, free of splintering.
- Page 15 Crosscut table and telescopic arm are aligned ex works (The table surface must be in level with the sliding table). The crosscut table can be positioned along the sliding table. Start the machine with care. 7.8 Crosscut fence setup Crosscut fence setup shall never be performed when the machine is running.
- Page 16 The rip fence has a micro adjust feature. Lift the handel (1) Main drive belt tensioning: fully and rotate the micro adjust knob (4) Check regularly the condition of the belts and, if necessary, When cross cutting using the parallel fence, to avoid the tighten or replace.
- Page 17 The motor break works electro-mechanically (break motor). *Sawdust in mechanisms If breaking time should exceed 10 seconds, the motor break -clean-and regrease. assembly needs to be replaced. Contact your Jet service Sliding table does not move station immediately. *Sawdust in bearing guides -wipe out any sawdust.
-
Page 18: Parts List
JTSS-1600 Panel Saw 10000044T ~400V 50Hz PARTS LIST JPW (TOOL) AG Tämperlistrasse 5 CH-8117 Fällanden Switzerland Phone +41 44 806 47 48 +41 44 806 47 58 www.jettools.com P-10000044T 2015-09... - Page 19 Parts Breakdown For JTSS-1600 Panel Saw --------Part A...
- Page 20 Parts List for JTSS-1600 Panel Saw ----- Part A Index No. Part No. Description Size Qty. JTSS1600-A02 Lock Nut JTSS1600-A03 Pan Head Screw M5x16 JTSS1600-A04 Washer JTSS1600-A05 Pan Head Screw M6x12 JTSS1600-A06 Washer JTSS1600-A07 Dust Port Ø100mm JTSS1600-A09 Right Panel, Saw Base JTSS1600-A15 Washer JTSS1600-A19...
- Page 21 Parts Breakdown for JTSS-1600 Panel Saw --------Part B...
- Page 22 Parts List for JTSS-1600 Panel Saw ----- Part B Index No. Part No. Description Size Qty. JTSS1600-B01 Star - Type, Lock Handle JTSS1600-B02 Flat Washer JTSS1600-B03 Hex Screw M8x25 JTSS1600-B04 Hex Screw M8x40 JTSS1600-B05 Head Screw JTSS1600-B06 T- Base, Adjust JTSS1600-B07 Bracket, Sliding Carrier JTSS1600-B08...
- Page 23 Parts List for JTSS-1600 Panel Saw ----- Part B Index No. Part No. Description Size Qty. JTSS1600-B63 Push Handle JTSS1600-B64 Bush, Push Handle JTSS1600-B65 End Cap, Knob JTSS1600-B66 Star - Type Knob, Lock Pin JTSS1600-B67 Roll Pin 3x18 JTSS1600-B68 Bush, Lock Pin JTSS1600-B69 Spring, Lock Pin JTSS1600-B70...
- Page 24 Parts Breakdown for JTSS-1600 Panel Saw --------Part C...
- Page 25 Parts List for JTSS-1600 Panel Saw ----- Part C Index No. Part No. Description Size Qty. JTSS1600-C01 Frame - Blade JTSS1600-C02 Shaft- Main Blade JTSS1600-C03 Main Shaft JTSS1600-C04 Shaft Housing- Scoring Blade JTSS1600-C05 Shaft- Scoring Blade JTSS1600-C06 Pulley - Scoring Blade JTSS1600-C07 Gear House JTSS1600-C08...
- Page 26 Parts List for JTSS-1600 Panel Saw ----- Part C Index No. Part No. Description Size Qty. JTSS1600-C58 Thrust Bearing JTSS1600-C59 Washer JTSS1600-C60 JTSS1600-C61 Circle Ring JTSS1600-C62 Roll Pin 5x28 JTSS1600-C63 Set Screw M6x8 JTSS1600-C64 Roll Pin A6x8 JTSS1600-C65 Set Screw M8x12 JTSS1600-C66 Bearing...
- Page 27 Parts Breakdown for JTSS-1600 Panel Saw --------Part D...
- Page 28 Parts List for JTSS-1600 Panel Saw ----- Part D Index No. Part No. Description Size Qty. JTSS1600-D01 L Type Aluminum Baffle JTSS1600-D02 Locking Plate JTSS1600-D03 The Positioning Shaft JTSS1600-D04 Countersunk Head Screw M5x16 JTSS1600-D05 Connecting Plate JTSS1600-D06 Retaining Rings For Shafts JTSS1600-D07 L Type Aluminum Locking Shaft JTSS1600-D08...
- Page 29 Parts Breakdown for JTSS-1600 Panel Saw-------Part E...
- Page 30 Parts List for JTSS-1600 Panel Saw ----- Part E Index No. Part No. Description Size Qty. JTSS1600-E01 Scale, Cross Cut Table JTSS1600-E02 Washer JTSS1600-E03 Scale, Cross Cut Table JTSS1600-E04 Allen Screw M6x12 JTSS1600-E05 Eccentric Cam 80106 JTSS1600-E06 Washer JTSS1600-E07 Sunk Head Screw M6x10 JTSS1600-E08 "Z"...
- Page 31 Parts List for JTSS-1600 Panel Saw ----- Part E Index No. Part No. Description Size Qty. JTSS1600-E59 Stud, Flip Stop JTSS1600-E60 Flip Stop JTSS1600-E61 Scale, Extension Fence JTSS1600-E62 Extension Fence JTSS1600-E63 Scale, Cross Cut Fence JTSS1600-E64 Taping Screw ST4.2x12 JTSS1600-E65 End Cap, Cross Cut Fence JTSS1600-E66 Lock Stud, Cross Cut Fence...
- Page 32 Parts Breakdown for JTSS-1600 Panel Saw --------Part G...
- Page 33 Parts List for JTSS-1600 Panel Saw ----- Part G Index No. Part No. Description Size Qty. JTSS1600-G01 Rear Extension Table JTSS1600-G02 Washer JTSS1600-G03 Hex Nut JTSS1600-G04 Set Screw M6x12 JTSS1600-G05 Hex Screw M8x16 JTSS1600-G06 Flat Washer 10mm JTSS1600-G07 Rea Table Support JTSS1600-G08 Set Screw M10x70...
- Page 34 Parts Breakdown for JTSS-1600 Panel Saw --------Part H Parts List for JTSS-1600 Panel Saw ----- Part H Index No. Part No. Description Size Qty. JTSS1600-H01 Mitre Gauge Knob JTSS1600-H02 Washer JTSS1600-H03 Mitre Gauge Base JTSS1600-H04 Indicator JTSS1600-H05 Screw JTSS1600-H06 End Cap, Gauge Fence JTSS1600-H07 Gauge Fence JTSS1600-H08...
- Page 35 Wiring Diagram for JTSS-1600 Panel Saw 10000044T…………………..….. ~ 400V, 50Hz 3~400V, 50Hz...
Need help?
Do you have a question about the JTSS-1600-T and is the answer not in the manual?
Questions and answers