Table of Contents
Advertisement
Precautions . . . . . . . . . . . . . . . . . . . . . . . . . . 2
FCC Declaration . . . . . . . . . . . . . . . . . . . . . . 3
EIA Guidelines. . . . . . . . . . . . . . . . . . . . . . . . 4
Location of Controls . . . . . . . . . . . . . . . . . . . 6
Charging the Battery . . . . . . . . . . . . . . . . . . . 7
Downloading and Transferring Files . . . . . . . 8
Installing MP3 Player Utilities 5.10 . . . . . . . 12
(Video Converter) . . . . . . . . . . . . . . . . . . . . 14
General Operation . . . . . . . . . . . . . . . . . . . 16
• Turning the Power On/Off. . . . . . . . . . . . 16
• MENU/Lock Button . . . . . . . . . . . . . . . . . 16
• Headphones Jack. . . . . . . . . . . . . . . . . . 17
• Volume Buttons . . . . . . . . . . . . . . . . . . . 17
Operation-Music Playback Mode . . . . . . 18
• To Listen to MP3s/WMAs . . . . . . . . . . . . 18
• High-Speed Music Search . . . . . . . . . . . 21
• Forward/Reverse Skip . . . . . . . . . . . . . . 21
• Music Contextual Menu-Equalizer . . . . . 22
• Music Contextual Menu-Play Mode. . . . 23
TABLE OF CONTENTS
1
Operation-Video Playback Mode. . . . . . . 25
• To Watch Videos. . . . . . . . . . . . . . . . . . . 25
• High-Speed Video Search . . . . . . . . . . . 26
• Forward/Reverse Skip . . . . . . . . . . . . . . 26
Operation-Photo Playback Mode . . . . . . 27
• To View Photos. . . . . . . . . . . . . . . . . . . . 27
• Thumbnail View . . . . . . . . . . . . . . . . . . . 28
• Slide Show View. . . . . . . . . . . . . . . . . . . 28
Settings Menu . . . . . . . . . . . . . . . . . . . . . . 29
Troubleshooting Guide . . . . . . . . . . . . . . . 40
Formatting the Player . . . . . . . . . . . . . . . . 42
Resetting the Unit . . . . . . . . . . . . . . . . . . . 43
Updating the Firmware . . . . . . . . . . . . . . . 43
Specifications . . . . . . . . . . . . . . . . . . . . . . 44
Advertisement
Chapters
Table of Contents

Related Manuals for Memorex MMP8585


Summary of Contents for Memorex MMP8585
-
Page 1: Table Of Contents
TABLE OF CONTENTS Precautions ......2 Operation–Video Playback Mode..25 FCC Declaration . -
Page 2: Precautions
PRECAUTIONS COPYRIGHT: • Distributing copies of MP3, WMA with DRM or WAV tracks without permission is a violation of international copyright laws. SAFETY: • Vibration experienced during walking or exercising will not affect the player. However, dropping the player or dropping a heavy object on the player may result in damage or sound distortion. -
Page 3: Fcc Declaration
FCC DECLARATION This device complies with Part 15 of the FCC rules. Operation is subject to the following two conditions: 1) This device may not cause interference, and 2) This device must accept any interference received, including interference that may cause undesired operation. -
Page 4: Eia Guidelines
Dear Customer: Selecting fine audio equipment such as the unit you’ve just purchased is only the start of your musical enjoyment. Now it’s time to consider how you can maximize the fun and excitement your equipment offers. This manufacturer and the Electronic Industries Association’s Consumer Electronics Group want you to get the most out of your equipment by playing it at a safe level. - Page 5 Decibel Level Example Quiet library, soft whispers Living room, refrigerator, bedroom away from traffic Light traffic, normal conversation, quiet office Air conditioner at 20 feet, sewing machine Vacuum cleaner, hair dryer, noisy restaurant Average city traffic, garbage disposals, alarm clock at two feet THE FOLLOWING NOISES CAN BE DANGEROUS UNDER CONSTANT EXPOSURE: Subway, motorcycle, truck traffic, lawn mower Garbage truck, chain saw, pneumatic drill...
-
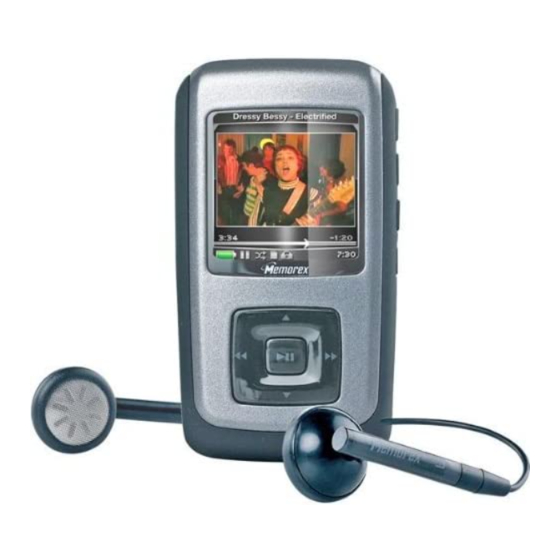
Page 6: Location Of Controls
LOCATION OF CONTROLS Headphone Jack Volume + Button Volume - Button (HEADPHONES PART NO. 10. MENU/Lock Button 261-32000-E010*) Display 11. Power On/Off Button Navigation π Button 12. Enter/Play/Pause ®p Button Navigation √/Skip/Search o 13. Navigation ®/Skip/Search n Button Button Navigation † Button USB Jack SOFTWARE DISC PART NO. -
Page 7: Charging The Battery
CHARGING THE BATTERY This unit has a built-in Lithium Polymer rechargeable battery. When the bars in the battery indicator (in the display) become low (see Figure 1) and especially when the bars turn red, recharge the battery as follows. Figure 1 1. -
Page 8: Downloading And Transferring Files
DOWNLOADING AND TRANSFERRING FILES SUPPORTED OPERATING SYSTEMS This unit is compatible with Windows XP (SP2) with Windows Media Player 10, or above. Please refer to the following pages to learn how to: transfer video, music and photo files, convert music on an audio CD into MP3 or WMA format using Windows Media Player 10, transfer MP3/WMA files and WMA files with DRM 9 or 10 using Windows Media Player 10. - Page 9 DOWNLOADING AND TRANSFERRING FILES (CONT.) For Windows XP, you can also utilize Windows Media Player 10 software to convert music on an audio CD into MP3 or WMA format as follows: Open the Windows Media Player 10 Browser, then click on the “Rip” icon on the top tool bar. Insert a music CD into the CD-Rom drive of your computer.
- Page 10 DOWNLOADING AND TRANSFERRING FILES (CONT.) TRANSFERRING MP3/WMA/VIDEO/PHOTO FILES AND WMA FILES WITH DRM 9 OR DRM 10 USING WINDOWS MEDIA PLAYER 10 (FOR WINDOWS XP ONLY) To transfer MP3/WMA/VIDEO/PHOTO/WMA files with DRM 9 or 10 to the player, follow the procedure described below using WMP (Windows Media Player) 10.
- Page 11 DOWNLOADING AND TRANSFERRING FILES (CONT.) CREATING A PLAYLIST Follow the steps below to create a playlist in the Music menu: 1. Connect your player to the USB port on your computer as shown on page 7. 2. Press and hold the Enter/Play/Pause ®p button for three seconds. 3.
-
Page 12: Installing Mp3 Player Utilities 5.10
INSTALLING MP3 PLAYER UTILITIES 5.10 Procedure to Install MP3 Player Utilities 5.10: 1. Insert the installation CD-Rom into the CD Drive, then the installation screen will appear. If the installation screen doesn't automatically appear, double-click My Computer then double-click on the CD drive, then double-click on “Setup.exe”. - Page 13 INSTALLING MP3 PLAYER UTILITIES 5.10 4. The “MP3 Player Utilities 5.10 Information” screen will appear. Read the information and click “Next”. 5. The “Confirm Installation” screen will appear. Click “Next”. 6. After the program is done installing, the “Installation Complete” screen will appear. Click “Close”...
-
Page 14: Using Mp3 Player Utilities 5.10 (Video Converter)
USING MP3 PLAYER UTILITIES 5.10 (Video Converter) Click to add files for conversion Click to select location of output file Setting Icon Help Icon In this window, place a checkmark in the “Select” column next to the “File name” of any files that you would like to convert. - Page 15 USING MP3 PLAYER UTILITIES 5.10 (Video Converter) 4. In the window of files to convert, place a checkmark in the “Select” column next to the “File name” of any files that you would like to convert. Then, click on the “Setting” icon (see illustration on the previous page for icon location).
-
Page 16: General Operation
Down” appears in the display. UNLOCKED appears in the display to cancel the NOTE: The Memorex screen will take several Lock function. seconds to several minutes to update the player’s library depending on the number of To Navigate the Menus: At any time, press the songs that you have transferred to the player. -
Page 17: Headphones Jack
GENERAL OPERATION (CONTINUED) HEADPHONES JACK VOLUME BUTTONS Plug the headphones (included) into the To control the volume, simply press the Volume +/- button during playback. Headphones jack on the top of the unit. NOTE: While changing the volume, the volume “pop up” indicator will be overlaid across the bottom of the existing screen and will disappear from the screen after three seconds if neither Volume button is pressed. -
Page 18: Operation-Music Playback Mode
OPERATION–MUSIC PLAYBACK MODE TO LISTEN TO MP3s/WMAs This unit supports the following audio formats: MP3, MPEG 1/2/2.5 Layer 3 with a bit rate of 32- 320 kbps, WMA files or WMA with DRM 9 or 10 with a bit rate of 48-192 kbps. Turn the unit on and access the main menu Use the Navigation 1 and/or... - Page 19 OPERATION–MUSIC PLAYBACK MODE (CONTINUED) To browse through your music, see more details below: Play Queue: “Play All”, “Clear All”, “Clear Track” and the song's name will appear in the display. Select Play All or the desired song using the Navigation 1 and/or 2 buttons then press the Enter/Play/Pause ®p button 3 to start playback.
-
Page 20: To Delete Songs From The Play Queue
OPERATION–MUSIC PLAYBACK MODE (CONTINUED) TO DELETE SONGS FROM THE PLAY QUEUE Enter the Play Queue submenu as To clear one track at a time from the queue, use the Navigation 1 and/or described on page 18. To clear all tracks in the queue, use the button to select Clear Track and then press the Enter/Play/Pause ®p button 3. -
Page 21: High-Speed Music Search
OPERATION–MUSIC PLAYBACK MODE (CONTINUED) HIGH-SPEED MUSIC SEARCH During playback, press and hold the Navigation ®/Skip/Search n button 1 or √/o 2 button to move the player forward or backward within a file to locate a specific musical passage. The player will move forward or backward at high speed as long as the button is held. -
Page 22: Music Contextual Menu-Equalizer
OPERATION–MUSIC PLAYBACK MODE (CONTINUED) MUSIC CONTEXTUAL MENU–EQUALIZER While in Music Playback mode (Now Scroll to the “Equalizer” option using the Playing screen), press the Navigation Navigation 1 and/or 2 buttons. button to open the Music Contextual menu. Select a desired “Equalizer” setting (None, Extra Bass, Rock, Jazz, Classical or Pop) using the Navigation ®/Skip/Search n 1 or √/o 2 button, followed by the Enter/... -
Page 23: Music Contextual Menu-Play Mode
OPERATION–MUSIC PLAYBACK MODE (CONTINUED) MUSIC CONTEXTUAL MENU–PLAY MODE While in Music Playback mode (Now Scroll to “Play Mode” using the Navigation Playing screen), press the Navigation 1 and/or 2 buttons. button to open the Music Contextual menu. NOTES: • Setting an option in the Music Contextual menu, pressing the MENU/Lock button or waiting three seconds without any activity will close the Music Contextual menu. -
Page 24: Music Contextual Menu-Color Theme
OPERATION–MUSIC PLAYBACK MODE (CONTINUED) MUSIC CONTEXTUAL MENU–COLOR THEME While in Music Playback mode (Now Scroll to “Color Theme” using the Playing screen), press the Navigation Navigation 1 and/or 2 buttons. button to open the Music Contextual menu. Select a desired “Color Theme” setting (Blue, Cyan, Green, Gold, Purple, Red or Black) using the Navigation ®/Skip/Search n 1 or √/o 2 button. -
Page 25: Operation-Video Playback Mode
OPERATION–VIDEO PLAYBACK MODE TO WATCH VIDEOS This unit supports the following video formats: AVI support (decoder: xvid, size: 128 x 128 resolution, Frame Per Second: 30fps max, Bit Rate: 768 kbps max, Frequency Range: 8-48kHz, Audio Format: 128kbps, 48kHz, Stereo CBR);... -
Page 26: High-Speed Video Search
OPERATION–VIDEO PLAYBACK MODE (CONTINUED) HIGH-SPEED VIDEO SEARCH During playback, press and hold the Navigation ®/Skip/Search n 1 or √/o 2 button to move the player forward or backward within a video to locate a specific scene. The player will move forward or backward at high speed as long as the button is held. -
Page 27: Operation-Photo Playback Mode
OPERATION–PHOTO PLAYBACK MODE TO VIEW PHOTOS– This unit supports baseline JPEGs. Turn the unit on and access the main menu 1 and/or Use the Navigation buttons to as described on page 16. Select Photo select between Slide show, Thumbnails or to using the Navigation button 1, followed select a particular photo. -
Page 28: Thumbnail View
OPERATION–PHOTO PLAYBACK MODE (CONTINUED) THUMBNAIL VIEW If you scrolled to Thumbnails in Step 2 on the Press the Enter/Play/Pause ®p button to view the desired photo. previous page, press the Enter/Play/Pause ®p button 1; a thumbnail view of the photos will appear in the display. -
Page 29: Settings Menu
SETTINGS MENU SETTING THE COLOR THEME Turn the unit on and access the main menu Press the Enter/Play/Pause ®p button to as described on page 16. Select Setting select “Color Theme”. using the Navigation button 1, followed by the Enter/Play/Pause ®p button 2. Select a desired “Color Theme”... - Page 30 SETTINGS MENU (CONTINUED) SETTING THE EQUALIZER Turn the unit on and access the main menu Scroll to “Equalizer” using the Navigation as described on page 16. Select Setting 1 and/or 2 buttons, followed by the using the Navigation button 1, followed Enter/Play/Pause ®p button 3 to select it.
-
Page 31: Setting The Play Mode
SETTINGS MENU (CONTINUED) SETTING THE PLAY MODE Turn the unit on and access the main menu as Scroll to “Play Mode” using the Navigation described on page . Select Setting using 1 and/or 2 buttons, followed by the the Navigation button 1, followed by the Enter/Play/Pause ®p button 3 to select it. - Page 32 SETTINGS MENU (CONTINUED) SETTING THE BRIGHTNESS Turn the unit on and access the main menu Scroll to “Brightness” using the Navigation as described on page 16. Select Setting 1 and/or 2 buttons, followed by the using the Navigation button 1, followed Enter/Play/Pause ®p button 3 to select it.
- Page 33 SETTINGS MENU (CONTINUED) SETTING THE POWER SAVINGS Turn the unit on and access the main menu Scroll to “Power Savings” using the as described on page 16. Select Setting Navigation 1 and/or 2 buttons, using the Navigation button 1, followed followed by the Enter/Play/Pause ®p by the Enter/Play/Pause ®p button 2.
- Page 34 SETTINGS MENU (CONTINUED) SETTING THE BACKLIGHT TIMER Turn the unit on and access the main menu Scroll to “Backlight Timer” using the as described on page 16. Select Setting Navigation 1 and/or 2 buttons, using the Navigation button 1, followed followed by the Enter/Play/Pause ®p by the Enter/Play/Pause ®p button 2.
- Page 35 SETTINGS MENU (CONTINUED) SETTING THE TIME Turn the unit on and access the main menu Scroll to “Time Set” using the Navigation as described on page 16. Select Setting 1 and/or 2 buttons, followed by the using the Navigation button 1, followed Enter/Play/Pause ®p button 3 to select it.
- Page 36 SETTINGS MENU (CONTINUED) SETTING THE LANGUAGE Turn the unit on and access the main menu Scroll to “Language” using the Navigation as described on page 16. Select Setting 1 and/or 2 buttons, followed by the using the Navigation button 1, followed Enter/Play/Pause ®p button 3 to select it.
- Page 37 SETTINGS MENU (CONTINUED) TO VIEW THE SYSTEM INFO (“ABOUT”) Turn the unit on and access the main menu Scroll to “About” using the Navigation as described on page 16. Select Setting and/or 2 buttons, followed by the using the Navigation button 1, followed Enter/Play/Pause ®p button 3 to select it.
- Page 38 SETTINGS MENU (CONTINUED) TO RESTORE THE DEFAULT SETTINGS Turn the unit on and access the main menu Scroll to “Default” using the Navigation as described on page 16. Select Setting and/or 2 buttons, followed by the using the Navigation button 1, followed Enter/Play/Pause ®p button 3 to select it.
- Page 39 SETTINGS MENU (CONTINUED) TO FORMAT THE PLAYER WARNING! Do not format this player unless it stops working and you are instructed to do so by technical support personnel. Turn the unit on and access the main menu Scroll to “Format” using the Navigation as described on page 16.
-
Page 40: Troubleshooting Guide
TROUBLESHOOTING GUIDE If you experience a problem with this unit, check the chart below before calling for service. SYMPTOM CAUSE SOLUTION Unit will not Battery is low/empty. Recharge battery as turn on. described on page 7. Power is not See page 16 for how to turn turned on. - Page 41 TROUBLESHOOTING GUIDE (CONTINUED) SYMPTOM CAUSE SOLUTION The Lock feature is Deactivate Lock feature as No buttons work. activated. described on page 16. Unit needs to be reset Reset unit and/or or firmware needs to be update firmware, see updated. page 43. Unit acting erratically.
-
Page 42: Formatting The Player
FORMATTING THE PLAYER Formatting the Player WARNING! Do not format this player unless it stops working and you are instructed to do so by technical support personnel. 1. Use the USB cable to connect the player and the computer. 2. Double click on My Computer, then right click “Media Player”... -
Page 43: Resetting The Unit
RESETTING THE UNIT If the unit acts erratically, reset the unit by inserting a thin object (such as a paper clip) into the recessed Reset button. For the Reset button, see page 6 for the button's location. FOR FIRMWARE UPGRADE Please visit our Web site at www.memorexelectronics.com to check if there is new firmware available. -
Page 44: Specifications
SPECIFICATIONS Audio Frequency Range 20Hz–20KHz Headphones Output 5mW, 32ohm (Max Vol) S/N Ratio 90dB (MP3) File Support MPEG 1/2/2.5 Layer 3 with a Bit Rate of 32-320 kbps Windows Media Audio (WMA file with DRM 9 or DRM 10) with a Bit Rate of 48-192 kbps decoder: xvid, size: 128 x 128 resolution, Frame Per Second: 30fps max, Bit Rate: 768 kbps max, Frequency Range: 8-... - Page 45 PLEASE VISIT OUR WEBSITE AT WWW.MEMOREXELECTRONICS.COM OR CONTACT CUSTOMER SERVICE AT 1-800-919-3647. PLEASE KEEP ALL PACKAGING MATERIAL FOR AT LEAST 90 DAYS IN CASE YOU NEED TO RETURN THIS PRODUCT TO YOUR PLACE OF PURCHASE OR TO MEMOREX. CONSUMER REPLACEABLE PART(S), PART...
Need help?
Do you have a question about the MMP8585 and is the answer not in the manual?
Questions and answers