Table of Contents
Advertisement
Advertisement
Table of Contents

Related Manuals for Rayco RG 1625A Super Jr


Summary of Contents for Rayco RG 1625A Super Jr
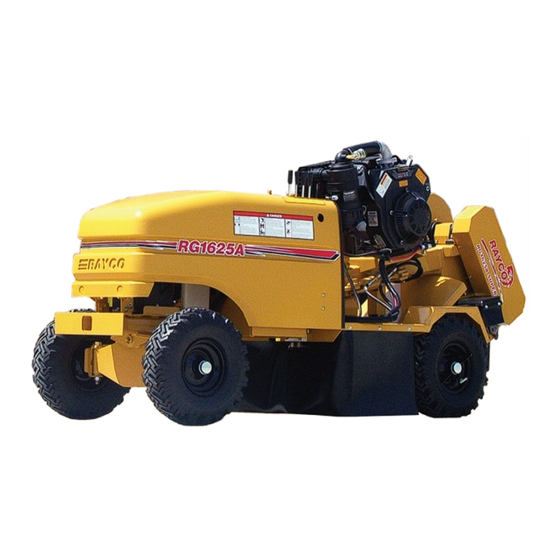
- Page 1 RG 1625A Super Jr RG 1625A Super Jr STUMP CUTTER Service Manual...
- Page 2 This manual is published by Rayco Manufacturing, Inc. for the benefit of the users of Rayco products. Rayco Manufacturing, Inc. has made every effort to ensure that this manual is correct and up to date at the time of publication. However, due to continuous improvements, Rayco Manufacturing, Inc. reserves the right to make changes in the contents, at any time, without notice or obligation.
-
Page 3: Table Of Contents
Warranty Certificate ..... . .48 Service Bulletins ......50 Copyright © 2004 Rayco - All Rights Reserved Printed in U.S.A. -
Page 4: Maintenance
Your Rayco Stump Cutter is filled at the factory with Shell Tellus T 46 Hydraulic Fluid. This oil is formulated to provide the proper operating characteristics in a wide range of climates. When refilling, always use the recommended oil. -
Page 5: Drive Belts And Chains
A belt that sufficient. is too tight can cause clutch bearing, jackshaft bearing, or engine crankshaft failure. Additional detail on burnishing can be found on the Ogura website, www.ogura-clutch.com. Copyright © 2004 Rayco - All Rights Reserved Printed in U.S.A. -
Page 6: Maintenance Intervals
Check Tension ......16 Jackshaft V-Belt - Check Tension ... . .17 Copyright © 2004 Rayco - All Rights Reserved Printed in U.S.A. - Page 7 Thus, whenever variance is found through the actual usage of this machine, the published interval should be disregarded and a more frequent interval applied. Copyright © 2004 Rayco - All Rights Reserved Printed in U.S.A.
-
Page 8: As Required
Either of the following fuel filters will function as a suitable replacement: • Rayco part no. 730039 • Kohler part no. 25-050-03 • AC part no. GF61 • WIX part no. 33032 • PRO part no. GF61M Copyright © 2004 Rayco - All Rights Reserved Printed in U.S.A. -
Page 9: Cutting Wheel - Check
5. Bolt the teeth to the cutting wheel (but not tightly until the pattern has been double-checked). 5. After setting each tooth pair, tighten the socket head bolts to 135 to 145 foot-pounds. Copyright © 2004 Rayco - All Rights Reserved Printed in U.S.A. -
Page 10: Sharpening Of Teeth
Replacement teeth are available from your Rayco dealer or direct from Rayco. Refer to the Parts manual for part numbers. Copyright © 2004 Rayco - All Rights Reserved... -
Page 11: After First 5 Service Hours
Engine Oil Level - Check Follow the directions found in the Kohler Engine Operation Manual. Fuel Tank - Fill Follow the directions given in the “As Required” section of this “Maintenance Intervals” section. Copyright © 2004 Rayco - All Rights Reserved Printed in U.S.A. -
Page 12: Hydraulic Oil - Check
2. Unscrew the filter cap and pull out the filter. 3. Fill the tank until the oil level shows 6” to 7” from the bottom of the dipstick. 4. Replace the filter and cap. Copyright © 2004 Rayco - All Rights Reserved Printed in U.S.A. -
Page 13: Cutting Wheel Check Teeth
Use extra caution “Every 250 Service Hours or 1 Year” interval in this when using a high pressure or high volume “Maintenance Intervals” section. grease gun. Copyright © 2004 Rayco - All Rights Reserved Printed in U.S.A. -
Page 14: Every 50 Service Hours
Steer Axle - Lubricate Lubricate the grease fitting on the cylinder rod pivot. Lubricate the two grease fittings on the steer axle cylinder pins. Copyright © 2004 Rayco - All Rights Reserved Printed in U.S.A. -
Page 15: Cutting Boom Bearing Housing - Lubricate
1/8" when properly tensioned. NOTICE Shoot grease in slowly, and carefully prevent damage to the bearing seals. Use extra caution when using a high pressure or high volume grease gun. Copyright © 2004 Rayco - All Rights Reserved Printed in U.S.A. -
Page 16: Cutting Wheel Polychain® - Check Tension
(Use 18-20 lbs when installing a new belt.) If the tension is acceptable, replace the guard hole plug, and ignore steps 2-7. If the tension is too low, follow steps 2-7. Copyright © 2004 Rayco - All Rights Reserved Printed in U.S.A. -
Page 17: Jackshaft V-Belt - Check Tension
5. Check the belt tension again. If it is too loose, repeat step 4 and check again until it is properly set. 6. Retighten the engine bolts and locknut. 7. Replace the belt guard cover. Copyright © 2004 Rayco - All Rights Reserved Printed in U.S.A. -
Page 18: Every 100 Service Hours
Cooling Shrouds - Clean Follow the directions found in the Kohler Engine Operation Manual. Oil Cooler Fins - Clean Follow the directions found in the Kohler Engine Operation Manual. Copyright © 2004 Rayco - All Rights Reserved Printed in U.S.A. -
Page 19: Battery - Check
4. Apply a light coat of petroleum jelly around the base of the terminal. 5. Replace the cable. 6. Repeat the same procedure for the red positive (+) cable. Copyright © 2004 Rayco - All Rights Reserved Printed in U.S.A. -
Page 20: Cross-Travel Cylinders Rods - Apply Oil
Retighten the nuts and bolts. Apply Oil Apply with SAE 30 engine oil evenly over the entire length of the chain. Copyright © 2004 Rayco - All Rights Reserved Printed in U.S.A. -
Page 21: Swing Pivot - Inspect
In the event that a bearing needs replaced or any other maintenance needs to be performed on the swing pivot, please contact your Rayco representative or the factory. Copyright © 2004 Rayco - All Rights Reserved... -
Page 22: Every 250 Service Hours Or 1 Year
Always keep the hydraulic oil clean. When readjusting the wheel bearings, tighten the castellated nut until drag is felt when the wheel is turned. Loosen the nut until the wheel spins freely. Copyright © 2004 Rayco - All Rights Reserved Printed in U.S.A. -
Page 23: Engine Air Cleaner Filters - Replace
6. Loosen the hose fittings on the cylinders, and drain as much fluid as feasible. 7. Replace and tighten fittings. Dispose of drained oil according to local environment protection regulations. Copyright © 2004 Rayco - All Rights Reserved Printed in U.S.A. -
Page 24: Start-Up Procedure
7. Check the reservoir level, and add more clean fluid if necessary. The hydraulic system is now completely ready for operation. 8. Clean up any spilled hydraulic fluid. Copyright © 2004 Rayco - All Rights Reserved Printed in U.S.A. -
Page 25: Trailer Wheel Nuts And Bolts - Tighten
6. Remove the wheel from the spindle, being careful not to allow the smaller bearing race & rollers (cone) to fall out. The larger bearing race & rollers will be retained by the seal (12). Copyright © 2004 Rayco - All Rights Reserved Printed in U.S.A. - Page 26 4. Continue this process until you have the entire small diameter end of the cup to drive out. bearing completely filled with grease. 5. Before re-installing, apply a light coat of grease on the bearing cup. Copyright © 2004 Rayco - All Rights Reserved Printed in U.S.A.
- Page 27 50 ft.- Ib. (12" wrench or pliers with full hand force). 2. Then loosen the castle nut to remove the torque. DO NOT ROTATE THE HUB. Copyright © 2004 Rayco - All Rights Reserved Printed in U.S.A.
-
Page 28: Charts & Specs
1/16” of both axial and radial movement allowed in the backing plate of the clutch/brake. Without this movement, the backing plate can cock the field bearing which would cause a Copyright © 2004 Rayco - All Rights Reserved Printed in U.S.A. -
Page 29: Using A V-Belt Tension Gauge
RAYCO ® RG 1625A SUPER JR & S HARTS PECS Copyright © 2004 Rayco - All Rights Reserved Printed in U.S.A. -
Page 30: Electrical System & Components
Continuously 1. Perform same test as step 1 above. as necessary. Charges at High Rate If voltage is more than 14.7 volts, the rectifier- regulator if faulty. Replace rectifier-regulator. Copyright © 2004 Rayco - All Rights Reserved Printed in U.S.A. - Page 31 RG 1625A SUPER JR & S HARTS PECS 15 amp Regulated Charging System Figure 1 - 15 amp Regulated Battery Charging System Figure 2 - 15 amp Stator and Rectifier-Regulator Copyright © 2004 Rayco - All Rights Reserved Printed in U.S.A.
- Page 32 All readings should be above 1.250 (compensating for temperature). If specific gravity readings varied .050 or if ALL cells read less than 1.225, replace battery. Fig. 7 - Typical 12V Wiring Diagram Copyright © 2004 Rayco - All Rights Reserved Printed in U.S.A.
- Page 33 RAYCO ® RG 1625A SUPER JR & S HARTS PECS Copyright © 2004 Rayco - All Rights Reserved Printed in U.S.A.
-
Page 34: Command Cut Installation
5) Attach hyd. Tubes (12723) from the lock valve to Command Cut valve as shown below. 6) Attach hyd. Hoses ¼” x 24” from valve bank to Command Cut valve as shown below. Copyright © 2004 Rayco - All Rights Reserved Printed in U.S.A. - Page 35 To increase the swing speed, turn out the 1/4” bolt that projects from the flow control valve. To slow the swing, turn in the adjusting bolt. Copyright © 2004 Rayco - All Rights Reserved Printed in U.S.A.
-
Page 36: Trouble-Shooting
TRAVEL SPEED HYRAULIC CONTROL MOTOR (WHEELS DRIVE) TRAVEL SPEED CONTROL HYDRAULIC VALVE BANK FORWARD RIGHT DOWN RIGHT STEER BOOM BOOM REVERSE LEFT LEFT HYRAULIC FILTER FLUID RESERVOIR HYDRAULIC SCHEMATIC Copyright © 2004 Rayco - All Rights Reserved Printed in U.S.A. -
Page 37: How Hydraulic System Works
Whenever changing fittings, the engine must be turned OFF and the internal pressures relieved, to avoid dangerous high pressure leaks at loosened fittings. Copyright © 2004 Rayco - All Rights Reserved Printed in U.S.A. - Page 38 If all of the checks result in lower than proper gauge readings, the control valve bank integral pressure relief valve may be out of adjustment or dirty. Copyright © 2004 Rayco - All Rights Reserved Printed in U.S.A.
-
Page 39: Symptom - Machine Over-Speeds When Driving Forward Down Incline
The hydraulic cylinder seals should be replaced. forward.) Hydraulic cylinder rebuild kits are available from Rayco or your Rayco dealer. 3. Retighten the lock nut. Copyright © 2004 Rayco - All Rights Reserved Printed in U.S.A. -
Page 40: Symptom - Machine Over-Speeds When Driving In Reverse Down Incline
3. Retighten the lock nut. 3. Retighten the lock nut. Copyright © 2004 Rayco - All Rights Reserved Printed in U.S.A. -
Page 41: Symptom - Machine Too Slow When Driving In Reverse
If, however, switching hoses to a valve which is known to be functioning properly results in an unsatisfactory pressure reading again, it is evident that the hydraulic motor is leaking internally due to faulty seals. Copyright © 2004 Rayco - All Rights Reserved Printed in U.S.A. -
Page 42: Symptom - Cutter Boom Drifts Down
Remove the hydraulic drive motor and check the internal seals for leakage or damage. Seal kits are Symptom - Engine Starter Does Not available from Rayco. Refer to the Parts manual. Turn Over Symptom - Cutter Boom Drifts Down Problem - Cutting Wheel rotation... -
Page 43: Hydraulic Schematic
RAYCO ® RG 1625A SUPER JR HYDRAULIC SCHEMATIC... - Page 44 RAYCO ® RG 1625A SUPER JR HYDRAULIC SCHEMATIC ITEM # PART # DESCRIPTION QTY. INCLUDED IN 760567 VALVE − 4−SPOOL 12406 760115 HYDRAULIC OIL PUMP " SWING CYLINDER − RH " SWING CYLINDER − LH " 762381 HYDRAULIC MOTOR W/BRAKE "...
-
Page 45: Service Parts - Quick Reference
761755 HYDRAULIC IN LINE FUEL FILTER 750241 RETURN FILTER 761906 INNER ENGINE KEY AIR FILTER 755553 ELEMENT 761397 OUTER AIR FILTER ELEMENT 780270 1625A MANUALS 780376 / 780377 780378 Copyright © 2004 Rayco - All Rights Reserved Printed in U.S.A. -
Page 46: Specifications
Air cleaner......................Dual element, dry type Oil filter ..........................Full flow type Automatic protective shutdown ..................Low oil pressure Fuel tank capacity ..................6-1/2 gallons (24.6 liters) Electrical system ....................12 Volt /15 amp alternator Copyright © 2004 Rayco - All Rights Reserved Printed in U.S.A. - Page 47 Drive belt tension ..................Convenient wrench access Intermediate belt ....................Banded “A” section V-belt Jackshaft bearings (2) ..............1-1/2" (3.8 cm) dia. pillow block type Cutting teeth (18) ........Rayco Supertooth™ forged, one pc., w/tungsten carbide tips Belt guards......................Metal, with access panel Chip retaining curtains ..................Fabric-impregnated rubber Cutting wheel engage/disengage ............Electromagnetic clutch w/brake...
-
Page 48: Warranty Certificate
A. General Outline Rayco Manufacturing, Inc. warrants to the first user that the products it supplies will be free from defects in material and workmanship under normal and proper usage for a period of 365 days from the date of delivery to the first user. - Page 49 Where permitted by law, the purchaser's only remedies in connection with the branch of performance on any warranty on any Rayco product are those set forth on this page. In no event will the dealer and or Rayco be liable for incidental or consequential damages, including but not limited to: loss of profits, rental of substitute equipment, or other commercial loss.
-
Page 50: Service Bulletins
July 16, 2004 SUBJECT: RG1625A, RG1631 HOSE KIT Rayco Mfg. has determined that the RG1625A and the RG1631 may show symptoms of poor wheel drive power or a hydraulic growling noise when driving the machine. It is caused by fluid restrictions in the steel lines from the valve bank to the dual counterbalance valve block. - Page 51 July 30, 2004 SUBJECT: RG1625A, RG1631 Rayco Mfg. has determined that the RG1625A and the RG1631 may experience early bearing failures on electric clutches under certain operating conditions. In order to prolong the life of the clutch bearings we are beginning to install a dust cover to prevent debris from entering the bearings.
- Page 52 At point of sale, a Warranty Registration must be filled out and signed by the purchaser to place in effect the Rayco Manufacturing Inc. new machine warranty. Failure to submit this registration will void any warranty consideration on this machine.
- Page 53 WARRANTY/SERVICE BULLETIN Bulletin#119 December 14, 2004 TO: ALL AUTHORIZED RAYCO DEALERS SUBJECT: RG1625A & RG1631 WHEEL DRIVE BRAKE TEST RG1625A SERIAL # 1R91009143W210145 AND UP RG1631 SERIAL # 1R911091X4M210001 AND UP The above-mentioned machines are required to have a daily inspection of the ground-drive brake.
- Page 54 The machine must be taken out of service until the ground-drive motor is repaired / replaced. If you have any questions please call Rayco Mfg. at 1(800) 392-2686 to speak to our service or warranty department.
- Page 55 Bulletin#121 Date December 23, 2004 TO ALL AUTHORIZED RAYCO DEALERS RG1631 STUMP CUTTER ENGINE OIL SPEC CHANGE SERIAL # 1R911091X4M21001 TO 1R91109185M210063 Vanguard Engine has recommended a change in the engine oil spec on the above mention machine. The RG1631s that fall within the serial numbers shown above were factory filled with a straight viscosity 30-weight engine oil, and are now being factory filled with 10w30 multi-viscosity oil.
- Page 56 At point of sale, a Warranty Registration must be filled out and signed by the purchaser to place in effect the Rayco Manufacturing Inc. new machine warranty. Failure to submit this registration will void any warranty consideration on this machine.
- Page 57 We care about your safety. When operating your RAYCO machinery always wear an approved helmet complete with ear muffs, face shield and the proper eyewear. Never operate under the influence of alcohol or drugs. Know your RAYCO , read and under- stand your owner’s manual from cover to cover.
Need help?
Do you have a question about the RG 1625A Super Jr and is the answer not in the manual?
Questions and answers