Table of Contents
Advertisement
Advertisement
Table of Contents

Related Manuals for Jujiang PKM-C01-300-1


Summary of Contents for Jujiang PKM-C01-300-1
- Page 1 Swing Gate Opener User Manual Model: PKM-C01-300-1 ★ Thank you for purchasing this product ★ Please read and follow all warnings, precautions and instructions before installation and using ★ Periodic checks of the opener are required to ensure safe operation...
-
Page 2: Table Of Contents
Smart Swing Gate Opener - PKM-C01-300-1 Table of Contents Safety Installation Information ································ 1-2 Single/Dual Swing Gate Opener Part List ················· 3-4 Technical Specification ············································ 5 Installation ······························································· 6 • Installation Overview ················································· 6 • Dual Gate Overview ·················································· 6 •... -
Page 3: Safety Installation Information
Smart Swing Gate Opener - PKM-C01-300-1 Safety Installation Information Caution If you use it for a single door, please connect the Motor 2 only. At the same time, the PG mode of the control panel menu needs to be set to 1 (single motor).Please reference the page 19 and 28 to do it. - Page 4 Smart Swing Gate Opener - PKM-C01-300-1 9. For an installation utilizing non-contact sensors, see the product manual on the placement of non-contact sensors (safety sensors) for each type of application. a. Care shall be exercised to reduce the risk of nuisance tripping, such as when a vehicle trips the safety sensor while the gate is still moving.
- Page 5 Smart Swing Gate Opener - PKM-C01-300-1 Single Swing Gate Opener Part List Gate Opener Control Box Control Box Screws Pack Remote Control Manual Release 1 pcs 1 pc 2 pcs Key 1 pcs Pivot Arc M10*150 Bolts, Nuts, & Washers 4 pcs...
-
Page 6: Single/Dual Swing Gate Opener Part List
Smart Swing Gate Opener - PKM-C01-300-1 Dual Swing Gate Opener Part List Gate Opener Control Box Control Box Screws Pack Remote Control Manual Release 2 pcs 1 pc 2 pcs Key 2 pcs Pivot Arc M10*150 Bolts, Nuts, & Washers 8 pcs... -
Page 7: Technical Specification
Smart Swing Gate Opener - PKM-C01-300-1 • Tools Required Technical Specification Specifications Input power 110V AC Motor voltage 24V DC Power Actuator speed 1.6 cm/s 300mm Max. Actuator travel 200KG Max single-leaf weight 1.2~4.8 meters Max single-leaf length Ambient Temperature -22°C ~ +55°C... -
Page 8: Installation
Smart Swing Gate Opener - PKM-C01-300-1 Installation Manual Release Key (E) • Installation Overview M8*70 Bolts, & Washers (M) Front Pivot Brackets (L) Pivot Arc Bracket (H) M10*150 Bolts (I) M10*150 Nuts, & Washers (I) Post Pivot Bracket (J) M8*70 Bolts (M) -
Page 9: Installation Step
Smart Swing Gate Opener - PKM-C01-300-1 • Installation Step There are two installation types for the gate opener, check for Proper Gate Installation & Direction of Gate. Your Property Your Property Pull-to-Open Option Push-to-Open Option NOTE: Ensure the gate does not open into public areas. - Page 10 Smart Swing Gate Opener - PKM-C01-300-1 Step 3. Install the Motor Fixed-End to the Gate Post-Bracket (1). Attached the Front Pivot Bracket (L) and Post Pivot Bracket (J) assembly to the opener by inserting a Clevis Pin (N). Secure the clevis pins using the Hairpin Clips (O).
- Page 11 Smart Swing Gate Opener - PKM-C01-300-1 Step 4. There are two installation types for the gate opener, check for Proper Gate Installation & Direction of Gate. Pull-To-Open Installation Mode: The installation possition of the bracket is very important. Please refer to the figure to measure according to the angle you need to open.
- Page 12 Smart Swing Gate Opener - PKM-C01-300-1 Push to Open Installation Mode The installation possition of the bracket is very important. Please refer to the figure to measure according to the angle you need to open. determine the center point of the shaft and mark it.
- Page 13 Smart Swing Gate Opener - PKM-C01-300-1 (1). According to the diagram, the post bracket plate is attached the fixed bracket with an appropriate angle. Take out the gate opener arm to install 2pcs Pivot Arc Bracket (H) and Post Pivot Bracket (J) on the gate post.
- Page 14 Smart Swing Gate Opener - PKM-C01-300-1 (2). Fully open the gate (take 90°as an example) and retract the arm of the gate opener to the shortest position (when determining the position of the gate bracket on the gate, make the gate and the wall when the rear bracket is vertical).
- Page 15 Smart Swing Gate Opener - PKM-C01-300-1 (2). Motor drainage hole angle adjustment Figure left, Power Cable And Rain Figure right, Power Cable And Rain Drainage Aperture Placed Correctly Drainage Aperture Placed Incorrectly Post Rear Fixed Bracket Lock in Power Cable...
-
Page 16: Mounting & Wiring The Control Box
Smart Swing Gate Opener - PKM-C01-300-1 Step 7. Emergency Release Function Release The schematic diagram of opening the gate body when there is no power is shown above. Please use the emergency release key to loosen the gate brecket and the arm of the gete opener. Then lift it up. -
Page 17: Connection Of Power Supply
Smart Swing Gate Opener - PKM-C01-300-1 Step 1 Flip the control box to the back, fix the 4 gaskets at the 4 corners respectively, and screw them in. Step 2 Flip the control box to the front, stick it on the wall, mark the holes at the 4 corners on the wall with a pen, drill holes, and then fixed the control box to the wall by screws. - Page 18 Smart Swing Gate Opener - PKM-C01-300-1 NOTE! If the gate opens and closes in the wrong direction or the open/close indicator LED color are wrong when you control the gate operator, please cut off the power, reverse the wires of the wrong motor and reconnect it to the Motor port, then power on again.
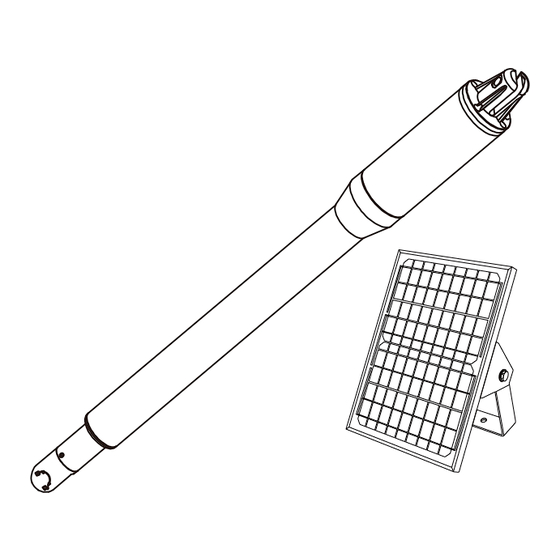
- Page 19 Smart Swing Gate Opener - PKM-C01-300-1 • Type 2: Solar Power Mode Connection (Please note the positive and negative poles) • Type 3: By AC Electricity, Solar Panels and Back-up Batteries (Please note the positive and negative poles)
- Page 20 Smart Swing Gate Opener - PKM-C01-300-1 Tips: 1. Before you using the back up batteries to provide power to the gate opener system, please fully charge the batteries first. 2. Adjust parameters setting in the solar power charger, the factory suggest that: ①...
- Page 21 Smart Swing Gate Opener - PKM-C01-300-1 1. MOTOR 1: Slave gate, close first & open last.This terminal connects 1st red wire (counted from your left-hand side to your right-hand side). 2. MOTOR 2(Main): Master gate, open first & close last.This terminal connects 2nd blue wire (counted from your left-hand side to your right-hand side).
- Page 22 Smart Swing Gate Opener - PKM-C01-300-1 • Connect of Push Button Device 10 11 12 Terminal ⑧2SIDE and ⑥COM are use to connect with push button for controlling dual gates. • Connection of Swipe Card Device 10 11 12 Terminal ⑫VCC and ⑩COM are used to supply power to swipe card device.
- Page 23 Smart Swing Gate Opener - PKM-C01-300-1 • Connection of Photocell Sensor Device 10 11 12 Jumper Terminal ⑫VCC and ⑩COM are used to supply power to safety beam sensor device. So, connect terminal ⑫VCC with the “+” of the safety beam sensor RX and TX device.
-
Page 24: How To Program Or Erase The Remote
Smart Swing Gate Opener - PKM-C01-300-1 • Connection of electric lock device - Lock + - Lamp + 13 14 15 16 Terminal ⑬LOCK- is used to connect with electric lock blue wire. Terminal ⑭LOCK+ is used to connect with electric lock red wire. -
Page 25: Function Description Of The Control Board
Smart Swing Gate Opener - PKM-C01-300-1 Erase remote control: ● Hold press the [Learn] button for about 6 seconds. If the buzzer sound with a long beep, release the button and the digital display will show 00, which means remove all remotes successfully. - Page 26 Smart Swing Gate Opener - PKM-C01-300-1 The safety beam mode can be be selected by menu PF, the default mode is 0, it is normal open mode. 1.While the gate is closing, if the infrared signal meets an obstruction, the gate Safety beam mode will rebound to open.
- Page 27 Smart Swing Gate Opener - PKM-C01-300-1 1.The system will automatically identify whether it is a 12V or 24V system every time it is powered on. If the power supply voltage is changed, power on again. 2.When the voltage of one battery is less than 13.5V±0.5 and the voltage of two batteries is less than 27V±0.5, the charging function will automatically start and the...
-
Page 28: Control Board Parameters Setting
Smart Swing Gate Opener - PKM-C01-300-1 Control Board Parameters Setting Check again for complete and correct assembly of your swing gate opener and gate. Plug the Power Grounded Cord into the nearest AC outlet or with Solar Power System. After power on, digital display will self-check from 00-99 with buzzer sound. - Page 29 Smart Swing Gate Opener - PKM-C01-300-1 Setting of 2Side terminal Please read the details from the table of Setting of 1Side “function description of the control board”. terminal Safety beam mode 1(NO) 0: NC mode, normal close. 0:NC 1: NO mode, normal open.
-
Page 30: Reset The System
Smart Swing Gate Opener - PKM-C01-300-1 Reset the system If you need to reset the system, please enter the digital display menu setting, select the Po, and press the [Inc/Smart] to increase the value to 5, then press the [Fun] to store it. The system will reset. -
Page 31: Trouble Shooting
Smart Swing Gate Opener - PKM-C01-300-1 Trouble Shooting Problems Possible Reason Solutions The gate doesn't open or 1.The power is off. 1.Switch on the power supply. close properly, and LED in the 2.Fuse is burn. 2.Check the fuse,change it if it control board doesn't light. - Page 32 Smart Swing Gate Opener - PKM-C01-300-1 Feedback & Review Your comments and suggestions are important to us as they help us provide the best possible service. Should you have any need to contact us, the info below will help you get in touch INSTALL ATION STEPS CONTACT US Kindly include your Product Model, Purchasing Date &...
Need help?
Do you have a question about the PKM-C01-300-1 and is the answer not in the manual?
Questions and answers
Hello, I am trying to install a swing gate opener model pkm-c01-300-1. I followed the instructions carefully and wired the solar panel and the battery according to the diagram. I set up the controller as instructed but the control board doesn’t switch on. I tried to disconnect the motors and the gate lock but the stil the control board does not come on. Batteries are fully charged . Can you help me?
1. Check Power Supply – Ensure the power is switched on and connected properly.
2. Verify Power Source – If using AC power, confirm the transformer is correctly connected to the POWER terminal. If using solar or backup batteries, check polarity and charge levels.
3. Inspect Wiring – Ensure all wires are securely connected and not damaged.
4. Reset the System – Try resetting the control board by cutting off power, waiting a few seconds, and reconnecting.
5. Use a Multimeter – Measure voltage at the control board to confirm power is reaching it.
6. Check for Incorrect Installation – If the open/close indicator LED is incorrect, reverse the motor wires as instructed.
7. Examine for Faulty Components – If none of the above work, inspect for damaged parts or contact support for repairs.
This answer is automatically generated
How to mount piston for push open opperation
To mount the piston for push-to-open operation on the Jujiang PKM-C01-300-1:
1. Attach the post bracket plate to the fixed bracket at the appropriate angle.
2. Fully open the gate (e.g., 90°) and retract the opener arm to its shortest position to determine the gate bracket position.
3. Install the Pivot Arc Bracket (H) and Post Pivot Bracket (J) on the gate post using diagrams ① and ② for left bracket installation or ③ and ④ for right bracket installation.
4. Adjust the position of the Rear Bracket Fixed Plate:
- Move up to increase the gate's open angle.
- Move down to decrease the gate's open angle.
- Move left to decrease the gate's closed angle.
- Move right to increase the gate's closed angle.
5. Fix the Post Bracket and Pivot Arc Bracket using M10*150 bolts (drill 4 holes of 10 mm diameter) or expansion bolts if mounting to a wall. Tighten properly.
This setup ensures correct push-to-open operation.
This answer is automatically generated
How to Install
Instructions for adding a solar panel