Table of Contents
Advertisement
Quick Links
Advertisement
Table of Contents

Related Manuals for JUNKKARI J13JL


Summary of Contents for JUNKKARI J13JL
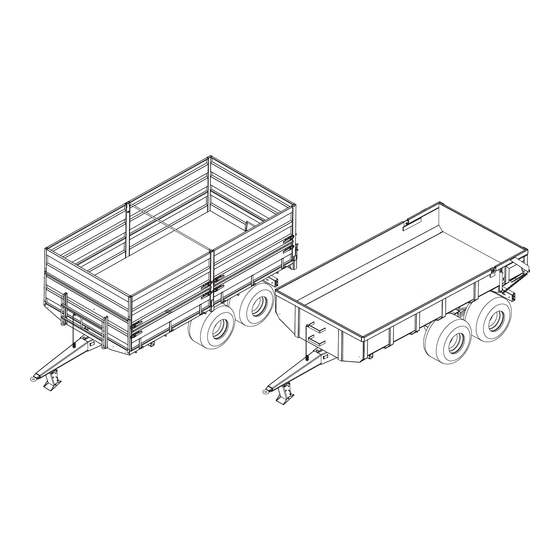
- Page 1 TRACTOR TRAILER J13JL TRACTOR TRAILER J13JL J13JLD J13JLD J13JL J13JLD USER GUIDE USER GUIDE SPARE PART LIST SPARE PART LIST Junkkari Oy 62375 YLIHÄRMÄ FINLAND TEL. +358-(0)10-4802200 +358-(0)10-4802295 e-mail: junkkari@msk.fi ENGLISH Internet: www.junkkari.fi...
-
Page 2: Table Of Contents
Table of Contents TABLE OF CONTENTS PAGE INTRODUCTION................3 TECHNICAL SPECIFICATIONS............3 SAFETY INSTRUCTIONS..............4 GENERAL SAFETY INSTRUCTIONS..........4 SPECIFIC SAFETY INSTRUCTIONS FOR TIPPER TRAILERS....4 TRANSPORT AND MOVING............5 HYDRAULICS..............5 SERVICE AND REPAIRS............6 SAFETY LABELS AND COMPONENTS AND THE TYPE PLATE......6 SAFETY MARKINGS.............. -
Page 3: Introduction
500/50-17 12700 kg 30 km/h 400/60-15.5 11250 kg 500/50-17 12700 kg 40 km/h 400/60-15.5 9840 kg 500/50-17 12700 kg CONTENTS OF THE SUPPLIES PACKAGE (J13JL): part number Inside step 1107120 Outside step 26125 Basic plates 4+1+1 Grain plates 4+1+1 Poles for grain plates... -
Page 4: Safety Instructions
Safety Instructions SAFETY INSTRUCTIONS GENERAL SAFETY INSTRUCTIONS - CLOTHING: For your own safety, wear well-fitting clothes with no loose sections. - USE: Before using the trailer, familiarize yourself with its connection, controls, and overall operation. - WARNINGS: Follow all warnings and instructions attached to the trailer. - GUARD PANELS: The trailer can be used only when all the guard panels are in place and in good condition. -
Page 5: Transport And Moving
Safety Instructions 4.3 TRANSPORTING AND MOVING Always follow traffic rules and regulations when driving on general roads. Before using the trailer, make sure that the brake system is connected and that it works properly. Inspect and install all necessary accessories needed to travel on general roads, such as lights, reflectors and slow vehicle warning sign. -
Page 6: Service And Repairs
Safety labels and components SERVICE AND REPAIRS Before doing any cleaning, lubrication, installation or adjustment work, always make sure that power take-off is disabled and that the engine is stopped. Remove the ignition key to prevent inadvertent start of the tractor or machine. The trailer must be properly supported before starting service. - Page 7 Safety labels and components Transporting people is prohibited 1 4 1 3 1 Do not go under an unsupported platform 6 2 3 2 8 Machine lifting point WARNING Do not go under the tipped platform when it is unsupported. The platform support is meant only for supporting an empty...
- Page 8 Safety labels and components HUOM ! Kiristä pultit 3 tunnin ajon jälkeen. Tyre pressure OBS ! Spänn bultarna efter 3 h körning. 400/60-15.5 14ply 350 kPa NOTE ! Tighten the bolts after 3 operating hours 500/50 -17 14ply 350 kPa 500/50R17 145D 400 kPa...
- Page 9 Safety labels and components 4-15066 6 2 3 2 8 Do not go under an unsupported platform Danger of being pressed Service support ALWAYS USE SERVICE SUPPORT WHEN WORKING UNDER A LIFTED PLATFORM NOTE! SERVICE SUPPORT IS MEAN ONLY TO SUPPORT AN EMPTY PLATFORM.
-
Page 10: Lights And Slow Vehicle Sign
5.3 BRAKES (ACCESSORY) The Junkkari J13 trailer can be equipped with brakes powered by the brake valve installed in the tractor. The quick coupling in the trailer is equipped with a connector according to ISO 5676 standard. Brakes must be used always when the national legislation so requires. -
Page 11: Type Plate
Safety labels and components 5.4 TYPE PLATE Malli Type Mfg n:o Valm.n:o Year Valm.vuosi Carr. cap Kantavuus Kok. paino Total weight Aks. paino Axle weight Max.aisapaino Max.boomload 6 2 3 7 5 Y L I H Ä R M Ä F I N L A N D... -
Page 12: Operating Environment
OPERATING ENVIRONMENT 6.1 PURPOSE OF USE Junkkari tipper trailers are meant for transporting bulk goods and parcelled goods. The trailer can be used as a tipper trailer to transport soil and other materials, taking into consideration the set carrying capacity, recommendations and safety instructions. -
Page 13: Transporting, Handling And Storing The Machine
Transporting, handling and storing the machine TRANSPORTING, HANDLING AND STORING THE MACHINE (IMPORTER, CENTRAL FIRM AND RE-SELLER) 8.1 TRANSPORTING The delivery term of the device is ex works, unless otherwise agreed. The buyer (central firm) agrees with the manufacturer regarding the time the product is ready for pick up. -
Page 14: Putting To Use
READ SAFETY INSTRUCTIONS 9.1 CONTENTS OF THE PACKAGE AND DISCARDING THE PACKAGING Grain platform trailer J13JL: The package includes a basic trailer, which makes one container. The instruction manual is attached at the front of the trailer under the platform. The side plates are in their own packaging. -
Page 15: Installation Instruction For Basic Side Plates
Putting to use 9.2.1 INSTALLATION INSTRUCTION FOR BASIC SIDE PLATES Hydraulics hose support Unpack the materials. Steps Inside step Install the basic front side plate. It can be recognised from two fastening ear which will be attached to front corners of the platform with screws. The side plate is 75cm high. -
Page 16: Installation Instruction For Grain Side Plates
9.2.2 INSTALLATION INSTRUCTION FOR GRAIN SIDE PLATES Unpack the materials. Hydraulic hose supporter Install the basic front side plate. Inside step Steps It can be recognized from two fastening ear which will be attached to front corners of the platform with screws. The side plate is 75cm high. -
Page 17: Rear Plate Locking And Sealing
9.2.3 REAR PLATE LOCKING AND SEALING Use/lock switch The rear plate is sealed tight when the locking bar has been locked. Note! The rear plate rises a little before locking, due to the hinge points. The locking bar is easy to use with the use lever on the side of the trailer. -
Page 18: Attaching To A Tractor
LARGE THAT THE CARRYING CAPACITY OF THE CHASSIS IS EXCEEDED. HYDRAULICS The J13JL trailer needs 1 single-function hydraulics output equipped with a quick coupling according to standard ISO 7241-1. Trailer J13JLD needs 1 single-function and 1 dual-function hydraulics output. INSTALLATION NOTE! DURING INSTALLATION THE PLATFORM MUST BE IN THE LOWER POSITION. - Page 19 Putting to use It is recommended that the hydraulics of the loaded trailer is not disconnected from the tractor, even if the platform is in the lower position. Pressure may remain in the system due to the trailer's structure. Pressure can be removed so that you may drive with the trailer while keeping the tipping lever in the down position.
-
Page 20: Checks
Checks 10 CHECKS Check the tyre pressures regularly. Tyre Pressure kPa 400/60-15.5L (Mitas) 500/50-17 (Mitas) Check that the oil hose connectors are compatible with the tractor. The trailer includes an Aeroquip ½" connector. Check the functioning of the lights. The rear, indicator and brake lights are connected according to a European standard. -
Page 21: Loading
Loading and use 11 LOADING Take into consideration the trailer carrying capacity and the road legislation, because then the warranty is also valid. NOTE! THE TABLE 1 IS REFERENTIAL. TABLE 1. ALLOWED HEIGHT ALLOWED HEIGHT VOLUME PP .. Kg/m VOLUME PP .. Kg/m MATERIAL OF THE LOAD OF THE LOAD... -
Page 22: Service
Service 13 SERVICE 13.1 LUBRICATION DIAGRAM SERVICE SERVICE TARGET LUBRICANT INTERVAL INTERVAL A. BOGIE SWING AXLE VASELINE 500 h HYDRAULICS section B. HYDRAULICS SAE20 WTAI 13.2 SAE 10 W Once C. SWINGING HINGE VASELINE a week Use- D. PLATFORM LOCKS CRC OR seasonally CORRESPONDING. -
Page 23: Hydraulics Maintenance
Service 13.2 HYDRAULICS MAINTENANCE Check the oil amount in the tractor after the first lifting and tipping and add oil if needed. During the first lifts, the cylinder may let out some oil to the cylinder surface; this is perfectly normal, and will disappear with time when the seals are honed to form. -
Page 24: Removing The Platform
14 REMOVING THE PLATFORM The trailer is structured so that the platform can be left supported by the legs. It is extremely important that you work in the order given in the instructions when removing the platform because the work is dangerous. - Page 25 Removing the locking pins at the upper end of the tipper. Removing the locking pins at the upper end of the tipper. When baring off the tipper plate of the upper end of the tipper, When baring off the tipper plate of the upper end of the tipper, be careful not to scratch the cylinder.
- Page 26 Removing the locking plates swing hinge. Removing the locking plates swing hinge. Lavan irrotus järjestys Ordning för lösgörande av flak Order for platform detachment 26537...
-
Page 27: Attaching The Platform
15 ATTACHING THE PLATFORM If the platform has been on its legs (e.g. over winter), you must first check that the platform is in a good position. If the platform is slanted, you must straighten it by adjusting the legs. Back the trailer base carefully under the platform standing on its legs. -
Page 28: Troubleshooting Diagram
Troubleshooting diagram 16 TROUBLESHOOTING DIAGRAM NOTES FAULT CAUSE ACTION First close the The hydraulics hoses Remove the pressure from Hydraulics system possible ball faucets do not come loose from the system pressure (J16JLD) the connectors Change the bearing when Bearing damaged, See hub adjusting- necessary. -
Page 29: Wihtdrawing The Product From Use
Withdrawing the product from use 17 WITHDRAWING THE PRODUCT FROM USE READ SAFETY INSTRUCTIONS Withdrawing the product from use is the responsibility of the end user of the product or the person or company that owns the product when it is decommissioned. There are national laws, instructions and regulations regarding decommissioning the product and handling the different waste created, and these all must be followed. -
Page 30: Terms Of Warranty
Warranty terms and responsibility areas 18 TERMS OF WARRANTY The warranty period is 12 months of agricultural use in the work that the device has been meant for. In a communal, industrial and professional contracting or corresponding use, the warranty time is 6 months. - Page 31 EY-vaatimustenmukaisuusvakuutus EY -VAATIMUSTENMUKAISUUSVAKUUTUS KONEESTA (FI) Valmistaja Junkkari Oy Osoite Pohjanmaanväylä 5, FIN-62375 YLIHÄRMÄ Vakuutamme yksinomaan omalla vastuullamme, että markkinoille saatettu kone JUNKKARI J13 valmistenumerosta alkaen on soveltuvilta osin rakennettu normatiivisien asiakirjojen ohjeiden mukaan ja noudattaa direktiivien 2006/42/EY määräyksiä EG- FÖRSÄKRAN OM ÖVERENSSTÄMMELSE FÖR MASKINELL UTRUSTNING...
- Page 32 EY-vaatimustenmukaisuusvakuutus TOEND MASINA NOUTELEVASTAVUSE KOHTA (EE) Valmistaja Junkkari Oy Aadress: Pohjanmaanväylä 5, FIN-62375 YLIHÄRMÄ Kinnitamme ainuüksi omaenda vastutus el, et turule lastud masin JUNKKARI J13 valmistusnumbrid on ehitatud normatiivsete dokumentide juhiste kohaselt ja vastab direktiivi 2006/42/EY nõustele ZAPEWNIENIE ZGODNOSCI URZADZENIA Z WYMAGANIAMI...
Need help?
Do you have a question about the J13JL and is the answer not in the manual?
Questions and answers