
Related Manuals for Asko T731WH


Summary of Contents for Asko T731WH
-
Page 1: Table Of Contents
ASKO T731 TUMBLE DRYER USE AND CARE GUIDE CONTENTS IMPORTANT SAFETY INSTRUCTIONS SAFETY FEATURES ASKO DRYER FEATURES ENERGY SAVING TIPS INSTALLATION INSTRUCTIONS PREPARING THE LAUNDRY OPERATING INSTRUCTIONS CARE AND MAINTENANCE INSTRUCTIONS TROUBLESHOOTING PRODUCT WARRANTY INDEX QUICK START INSTRUCTIONS Save these instructions for future reference... -
Page 2: Important Safety Instructions
Child-safe start. The LED will display “3” to indicate the Child-safe start is active. (If the ASKO dryers have a child-safe magnetic door catch that child-safe start has already been activated, “0” will allows the door to be easily opened from the inside. -
Page 3: Asko Dryer Features
Lint Filter cycle to reduce wrinkling. Unlike with other dryers, the Holder Cleanable Fan laundry will feel cool when you remove it from an ASKO (behind panel) dryer. No more scorched fingertips. DRYING SYSTEMS Model T731 has two drying systems: Sensidry™ and Timer-controlled. -
Page 4: Installation Instructions
NOTE: Maximum duct length of 15 feet, using two 90° elbows is allowed. Subtract 4 feet of duct for each additional elbow. ASKO dryers have a “T-style” exhaust vent CONNECTING THE EXHAUST DUCT TO that allows you to... -
Page 5: Freestanding Installation
It is essential that the machine is leveled and the locknuts are tight to eliminate vibration noise. BUILT-IN INSTALLATION ASKO dryers can be installed beneath a cabinet or worktop with a minimum height of 34” (864 mm). There must be a gap of about 1/2” (12 mm) all around the machine, including between the rear edge of the machine top panel and the back wall. -
Page 6: Electrical Connections
The supply connection screwdriver.) must be 208–240 V, 20 A. ASKO washers rated 208–240 V have two internal fuses of 15 A each. Turn the power off at the breaker/fuse box. CONNECTING A 3-WIRE POWER CORD WARNING! Remove terminal block cover. -
Page 7: Stacked Installation
STACKED INSTALLATION 5. L i f t t h e d r y e r i n t o ASKO dryers can be mounted on top of any matching position. Raising the ASKO washer. Mounts are supplied with the machine. -
Page 8: Reversing The Door Hinges
REVERSING THE DOOR HINGES The door hinges on ASKO dryers are reversible. The 12. Using a flathead screwdriver, dryers are shipped left-hinged. To reverse them, follow carefully remove the plastic plugs the steps below: in the upper and lower edge of the... -
Page 9: Preparing The Laundry
PREPARING THE LAUNDRY With proper attention to how you prepare your laundry FABRIC SOFTENER SHEETS items for washing and drying, your wardrobe and linens We recommend that you do not use fabric softener sheets will look like new for years. in the dryer. -
Page 10: Care Label Instructions
CARE LABEL INSTRUCTIONS Most clothes and other washable items have As an example, the symbols in the label illustrated below recommended care labels. Read these labels carefully! mean: wash in warm water on permanent press setting. Care label instructions and warnings should be followed Use nonchlorine bleach. -
Page 11: Operating Instructions
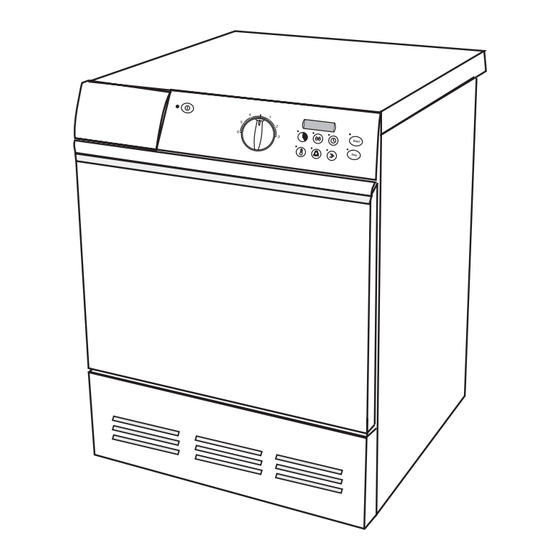
OPERATING INSTRUCTIONS THE CONTROL PANEL Power Button LED Window Power Indicator Programs Start Button Light Iron dry Extra dry Timed dry Air fluff Normal dry Stop Button Program Knob Option Buttons POWER BUTTON STOP BUTTON You can interrupt a program by pressing and holding the The Power button turns the power to the machine on Stop button until the dryer stops. -
Page 12: Changing Option Settings
The indicator light will stay lit when Low is selected. It will remain off when Normal is selecte. PROGRAMS Your ASKO dryer has our state-of-the-art Sensidry activate the humidity sensor. You should be careful when system. This means it has a humidity sensor that ensures using this option not to overdry the fabrics. -
Page 13: Care And Maintenance Instructions
CARE AND MAINTENANCE INSTRUCTIONS CLEANING THE LINT FILTER CLEANING THE FAN The wear on fabrics in a tumble dryer is insignificant. The The fan should be cleaned at least once a year. If you lint caught in the lint filter is dust and fiber residue that has have pets, you should clean it more often. -
Page 14: Troubleshooting
Refer to page 16 to determine what is and is not covered under your warranty. If you’re still not sure, contact the ASKO Advisory Center before you call a serviceman. BEFORE YOU CALL... -
Page 15: Error Messages
ERROR MESSAGES Error messages will display on the LED if a fault occurs after you have checked the possible solutions, call a while a program is in progress. The table below defines service technician. each possible error message. If the message still displays MESSAGE ERROR Call a service technician. -
Page 16: Product Warranty
For warranty service, contact the dealer from whom you purchased the unit or an authorized ASKO service agent. Service will be provided during normal business hours. Should you have a service problem that cannot be resolved locally, contact AM Appliance Group at the numbers listed below. -
Page 17: Index
INDEX Air fluff 12, 18 Magnetic Door Lock Anti-crease option 11, 18 Automatic door switch Normal dry program Built-in installation Buzzer option 12, 18 Operating instructions 11, 12, 18 Option buttons 11, 18 Options 11, 12, 18 Care and cleaning changing 11, 12 Care label symbols... - Page 18 Page 18...
- Page 19 Page 19...
-
Page 20: Quick Start Instructions
QUICK START INSTRUCTIONS NOTE: To get the best performance from your dryer, read all operating instructions before using it for the first time. THE CONTROL PANEL Power Button LED Window Power Indicator Programs Start Button Light Iron dry Extra dry Timed dry Air fluff Normal dry...
Need help?
Do you have a question about the T731WH and is the answer not in the manual?
Questions and answers