Table of Contents
Advertisement
Available languages
Available languages
Quick Links
Advertisement
Table of Contents

Related Manuals for Beko MOF 25310 B


Summary of Contents for Beko MOF 25310 B
- Page 1 Microwave Oven User Manual MOF 25310 B 01M-9211023200-5123-01...
-
Page 2: Table Of Contents
CONTENTS 1 Important safety and environmental instructions 1.1 Safety warnings .........4 1.2 Compliance with the WEEE Directive and Disposing of the Waste Product: 10 1.3 Compliance with RoHS Directive . 10 1.4 Package information ...... 10 1.5 Plug Wiring ........11 2 Your microwave oven 2.1 Overview ........... - Page 3 Please read this user manual first! Dear Valued Customer, Thank you for preferring this Beko appliance. We hope that you get the best results from your appliance which has been manufactured with high quality and state-of-the-art technology. For this reason, please...
-
Page 4: Important Safety And Environmental Instructions
Microwave oven is in- • these instructions shall void tended used freestanding. any warranty. It is not intended for in- • Beko Microwave Ovens dustrial or laboratory use. • comply with the applicable Do not attempt to start • safety standards; there-... - Page 5 Important safety and environmental instructions Do not place any object No responsibility or war- • • between the front side and ranty claim shall be as- the door of the oven. Do sumed damages not allow dirt or cleaning arising from misuse or agent remnants to build up improper handling of the on the closure surfaces.
- Page 6 Important safety and environmental instructions its intended purpose only cessible surfaces may be as described in this man- very hot when the appli- ual. ance is in use. Appliance becomes very Door and outer glass may • • hot while it is in use. Pay be very hot when the ap- attention not to touch the pliance is in use.
- Page 7 Important safety and environmental instructions the power cable by not oven due to the possibility squeezing, bending, or of ignition. rubbing it on sharp edges. Remove the wire strings • Keep the power cable and/or metal handles of away from hot surfaces paper or plastic bags be- and naked flame.
- Page 8 Important safety and environmental instructions Medical) equipment in age. which radio-frequency en- Eggs in their shell and • ergy is intentionally gen- whole hard-boiled eggs erated and/or used in the must not be heated in mi- form of electromagnetic crowave ovens since they radiation for the treatment may explode, even after of material, and spark ero-...
- Page 9 Important safety and environmental instructions Do not over-cook foods; than 8 and supervised. • otherwise, you may cause Danger of choking! Keep all • a fire. the packaging materials Do not use chemicals and away from children. • steam assisted cleaners Keep the product and its •...
-
Page 10: Compliance With The Weee Directive And Disposing Of The Waste Product
Important safety and environmental instructions The appliance shall not bears a classification symbol for waste • electrical and electronic equipment be cleaned with a steam (WEEE). cleaner. This symbol indicates that this Microwave heating of product shall not be disposed •... -
Page 11: Plug Wiring
Important safety and environmental instructions 1.5 Plug Wiring The moulded plug on this appliance in- corporates a 13 A fuse. Should the fuse need to be replaced an ASTA approved BS1362 fuse of the same rating must be used. Do not forget to refit the fuse cover. In the event of losing the fuse cover, the plug must not to be used until a replace- ment fuse cover has been fitted. -
Page 12: Your Microwave Oven
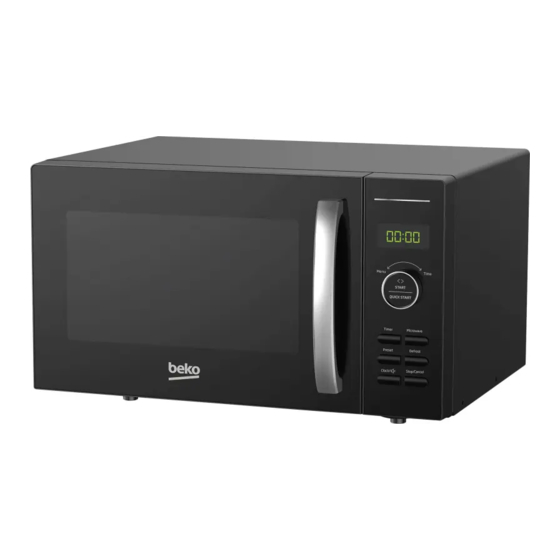
Your microwave oven 2.1 Overview Controls and parts 2.2 Technical data 1. Control panel Rated Voltage 230-240V~,50Hz 2. Roller ring Rated Input 1400W 3. Shaft Rated Output 900W 4. Glass tray Microwave frequency 2450MHz 5. Oven window Outside dimensions (H*W*D) 281*483*433 mm Glass turntable 270 mm... -
Page 13: Installing The Turntable
Your microwave oven Göbek (alt kısım) 2.3 Installing the turntable Hub (underside) • Never place the glass tray upside down. The glass tray should never be restricted. Glass tray Cam tabla • Both glass tray and turntable support must always be used during cooking. •... -
Page 14: Microwave Cooking Principles
Installation and connection 2. Reorient the receiving antenna of radio ous and may result in a fire or other ac- or television. cident causing oven damage. 3. Relocate the microwave oven with re- WARNING: Improper use of spect to the receiver. the grounding plug can result 4. - Page 15 Installation and connection 4. Round /oval dishes rather than square/ oblong ones are recommend, as food in corners tends to overcook. 5. Narrow strips of aluminum foil may be used to prevent overcooking of ex- posed areas. But be careful don’t use too much and keep a distance of 1 inch (2.54 cm) between foil and cavity.
-
Page 16: Operation
Operation 4.1 Control panel Display Time, power and indicators are dis- played. “Menu/Time” ( Dial) Turn the dial to set time. Turn the dial to select auto cooking men- Start/Quick Start (The dial) Press the dial to start cooking programs. Press the dial to set express cooking program. -
Page 17: Setting The Clock
Operation tion within 30 seconds. When the countdown ends, • During cooking, if press “Stop/Can- the buzzer will beep to re- cel” button once, the program will be mind you. You can check the paused, and then press “Start/Quick countdown time 5 seconds Start”... -
Page 18: Speed Defrost
Operation press cooking). During cooking, you can 2. Press “Preset” button once. check the cooking power lev- el by pressing “Microwave” 3. Turn “Menu/Time” dial to set minute button. digit. 4. Press “Preset” or “Start/Quick Start” 4.6 Speed defrost button to confirm. 1. -
Page 19: Mute Function
Operation minute, the oven will auto enter child lock mode and the lock indicator light will turn on. In the lock state, all buttons are disabled. To cancel: In child lock mode, open or close the oven door to cancel the program and the lock indicator light will disappear. -
Page 20: Cleaning And Care
Cleaning and care 5.1 Cleaning and care microwave oven is operated under high humidity condition. And it is nor- WARNING: Never use gaso- mal. line, solvent, abrasive clean- 9. It is occasionally necessary to remo- ing agents, metal objects or ve the glass tray for cleaning. -
Page 21: Storage
Cleaning and care 5.2 Storage 5.3 Handling and transportation • If you do not intend to use the appli- • During handling and transportation, ance for a long time, please store it carry the appliance in its original pack- carefully. aging. - Page 22 Product Guarantee 12 months breakdown and repair guarantee Guarantor: Beko plc, 1 Greenhill Crescent, Watford, Hertfordshire. WD18 8UF The guarantee does not in any way diminish your statutory or legal rights. Your microwave has the benefit of our manufacturer’s guarantee which covers the product for 12 months from the date of original purchase.
- Page 23 Arçelik A.Ş. Karaağaç Caddesi No: 2-6, 34445, Sütlüce, İstanbul, Türkiye www.beko.com...
- Page 24 التنظيف والصيانة .عليك تخزين الجهاز في مكان بارد وجاف حافظ على الجهاز بعي د ً ا عن متناول أيدي األطفال 3.5 التعامل والنقل أثناء التعامل والنقل فقم بحمل الجهاز في عبوتها األصلية. الهدف من عبوة تغليف الجهاز هو .حمايته من أي أضرار مادية ال...
- Page 25 التنظيف والصيانة 1.5 التنظيف والعناية في حالة تراكم البخار داخل أو على باب الفرن .الخارجي، فقم بتجفيفه باستخدام قطعة قماش ناعمة تحذير: ال تستخدم أب د ً ا البنزين أو وقد يحدث ذلك عند تشغيل فرن المايكروويف في ،المذيبات أو عوامل التنظيف الكاشطة .البيئات...
- Page 26 التشغيل :قوائم الطهي التلقائي مالحظة القائمة الرمز 3-1 ،القهوة (002 مل/كوب A-01 ." بالنسبة للبطاطس والقهوةG" لن تعرض الشاشة الرمز )أكواب تعتمد نتيجة الطهي التلقائي على عوامل مثل شكل الطعام وحجمه وتفضيلك الشخصي في ما يتعلق بنضج بعض األطعمة وحتى مدى جودة ترتيب الطعام )األرز...
- Page 27 التشغيل ." "البدء/البدء السريعStart/Quick Start أدخل البرنامج األول للطهي بالميكروويف. ال تضغط زر .أدخل البرنامج الثاني للطهي بالميكروويف . "البدء/البدء السريع" للبدءStart/Quick Start اضغط زر ال يمكن ضبط وظائف الطهي السريع وإذابة الثلج حسب الوزن وإذابة الثلج السريعة وقوائم .الطهي التلقائي في برنامج الطهي متعدد المراحل 01.4 قفل...
- Page 28 التشغيل "البدء/البدءStart/Quick Start اضغط زر الطاقة اضغط زر الطاقة اضغط زر .السريع" للبدء Microwave Microwave ""الميكروويف ""الميكروويف في أثناء إذابة الثلج، سيتوقف النظام مؤق ت ً ا ويصدر صو ت ً ا لتذكير المستخدم بقلب الطعام، بعد ذلك، اضغط على 7 مرات...
- Page 29 التشغيل Start/ "المؤقت" أوTimer اضغط زر / "البدءStart/Quick Start ويمكن ضغط زر البدء السريع" مر ة ً لمواصلة البرنامج. لكن سيتم . "البدء/البدء السريع" للتأكيدQuick Start Stop/Cancel إلغاء البرنامج إذا ضغط زر سيصدر الجرس صوت تنبيه لتذكيرك ."إيقاف/إلغاء" مرتين عند...
- Page 30 التشغيل 1.4 لوحة التحكم الشاشة .الوقت والطاقة والمؤشرات معروضة ) "القائمة/الوقت" (قرص التحكمMenu/Time .لف قرص التحكم لتعيين الوقت .لف قرص التحكم لتحديد قوائم الطهي التلقائي " "البِدء/ البِدء السريعStart/Quick Start )(قرص التحكم .اضغط قرص التحكم لبدء برامج الطهي .اضغط قرص التحكم لضبط برنامج الطهي السريع "...
- Page 31 التركيب والتوصيل تعد القائمة الواردة أدناه دليال عا م ًا لمساعدتك في .اختيار األواني الصحيحة الميكروويف أِدوات الطهي نعم زجاج مقاوم للحرارة ال زجاج غير مقاوم للحرارة نعم سيراميك مقاوم للحرارة نعم طبق بالستيك آمن لالستخدام في الميكروويف نعم ورق مطبخ ال...
- Page 32 التركيب والتوصيل توصيل فرن الميكروويف بمنفذ مختلف بحيث ال يمكن أن تتح م ّل الشركة المص ن ّ عة يكون فرن الميكروويف وجهاز االستقبال على أو الموزع أي مسؤولية عن األضرار .دوائر فرعية مختلفة التي تلحق بالفرن أو اإلصابة الشخصية الناتجة عن عدم مراعاة 3.3 مباِدئ...
- Page 33 فرن الميكروويف خاصتك Göbek (alt kısım) 3.2 تركيب القرص الِدوار )المحور (السفلي ال تضع الصينية الزجاجية مقلوبة أب د ً ا. يجب أال .يتم تقييد الصينية الزجاجية أب د ً ا الصينية الزجاجية Cam tabla يجب دائ م ًا استخدام كل من الصينية الزجاجية .ومجموعة...
- Page 34 فرن الميكروويف خاصتك 1.2 نظرة عامة 2.2 البيانات الفنية عناصر التحكم واألجزاء لوحة التحكم 042-032 فولت ~ / 05 هرتز الجهِد المقِدر الِدخل المقِدر حلقة األسطوانة 0041 واط 009 واط الخرج المقِدر عصا الدوران ترِدِد الميكروويف 0542 ميجا هرتز الصينية الزجاجية 182 * 384 * 334 مم...
- Page 35 تعليمات هامة للسالمة والبيئة (نفاياتWEEE 2.1 اًالمتثال لتوجيه الصمام الكهربائي يجب استبداله بصمام كهربائي بنفس الجهد. ال تنس َ إعادة ضبط غطاءBS1362 األجهزة الكهربائية واإللكترونية) والتخلص الصمام الكهربائي. وفي حالة فقد غطاء الصمام :من نفايات المنتج الكهربائي، ال يجب استخدام القابس إلى أن يتم يتوافق...
- Page 36 تعليمات هامة للسالمة والبيئة قد يؤدي عدم الحفاظ على الفرن في اللعب بالجهاز. يجب أال يقوم األطفال حالة نظيفة إلى تدهور السطح ما قد بإجراء التنظيف وصيانة المستخدم يؤثر سل ب ً ا على عمر الجهاز وربما إال إذا كانوا يبلغون من العمر أكبر .يؤدي...
- Page 37 تعليمات هامة للسالمة والبيئة تحذير ، (الصناعيةISM جميع معدات : من الخطر على أي إنسان غير والعلمية، والطبية) والتي تبث طاقة ذلك الكفء أن يقوم بتنفيذ أية مهمة ترددات راديو و/أو تستخدم في صيانة أو إصالح تتضمن خلع الغطاء صورة إشعاع إلكترومغناطيسي الموفر...
- Page 38 تعليمات هامة للسالمة والبيئة ال تسحب كابل طاقة الجهاز لفصله ،أثناء ما يكون الجهاز قيد االستخدام عن مزود الطاقة، وال تقم بلف كابل قد يكون الباب والزجاج الخارجي . ً الطاقة حول الجهاز أبد ا .ساخنين للغاية ال تغمر الجهاز أو كابل الطاقة أو تأكد...
- Page 39 تعليمات هامة للسالمة والبيئة ،قبل استخدام الجهاز للمرة األولى التجمد لألطعمة في المنزل. ال تتحمل عليك تنظيف جميع األجزاء. يرجى جهة التصنيع مسئولية األضرار اإلطالع على التفاصيل في قسم الناشئة من إساءة االستخدام. ال يجوز .”“التنظيف والصيانة .استخدامه ألغراض تجارية ال...
- Page 40 .الضمان .التالعب بها فرن المايكروويف م ُعد لغرض 1.1 السالمة العامة تسخين الطعام والمشروبات. أعمال Beko تتوافق أفران ميكروويف تجفيف األغذية أو المالبس أو تسخين ،مع معايير السالمة المعمول بها وسائد التدفئة والشباشب واالسفنج وبالتالي، في حالة حدوث أي ضرر...
- Page 41 ،عميلنا العزيز الغالي هذا. نأمل حصولك على أفضل النتائج من جهازك الذيBeko شكر ً ا لك على تفضيلك لجهاز ص ُ نع بجودة عالية وبأحدث التقنيات. ولهذا السبب، يرجى قراءة دليل ال م ُستخ د ِ م هذا بالكامل وجميع...
- Page 42 المحتويات 6 استكشاف األعطال وإصالحها 1 تعليمات هامة للسالمة والبيئة 4 ........1.1 السالمة العامة (نفايات األجهزةWEEE 2.1 االمتثال لتوجيه 9 :الكهربائية واإللكترونية) والتخلص من نفايات المنتج (الحد من الموادRoHS 3.1 االمتثال لتوجيه 9 ..........)الخطرة 9 ......4.1 معلومات التعبئة والتغليف 9 ........5.1 توصيل...
- Page 43 فرن الميكروويف دليل المستخدم MOF 25310 B 01M-9211023200-5123-01...
Need help?
Do you have a question about the MOF 25310 B and is the answer not in the manual?
Questions and answers