Table of Contents
Advertisement
Quick Links
Advertisement
Table of Contents

Related Manuals for Garmin VHF 110/210


Summary of Contents for Garmin VHF 110/210
- Page 1 VHF 110/210 MARINE RADIO Owner’s Manual...
- Page 2 © 2018 Garmin Ltd. or its subsidiaries All rights reserved. Under the copyright laws, this manual may not be copied, in whole or in part, without the written consent of Garmin. Garmin reserves the right to change or improve its products and to make changes in the content of this manual without obligation to notify any person or organization of such changes or improvements. Go to www.garmin.com...
-
Page 3: Table Of Contents
Table of Contents Viewing Your MMSI Number....11 Distress Calls.........11 Sending an Undesignated Distress Introduction........1 Call............. 11 Radio Overview........1 Sending a Designated Distress Handset Overview........2 Call............. 12 Home Screen........... 3 Waiting For and Receiving and System Status Icons......4 Acknowledgment for a Distress Call............. - Page 4 Number..........20 Automatic Identification System..20 Turning On and Off AIS......21 NMEA 0183 and NMEA 2000®..21 Additional Functionality with Other Garmin Devices........21 Communicating Over NMEA 0183 or NMEA 2000........... 21 Configuring DSC NMEA Transmissions........22 System Settings......22 Number Settings........
-
Page 5: Introduction
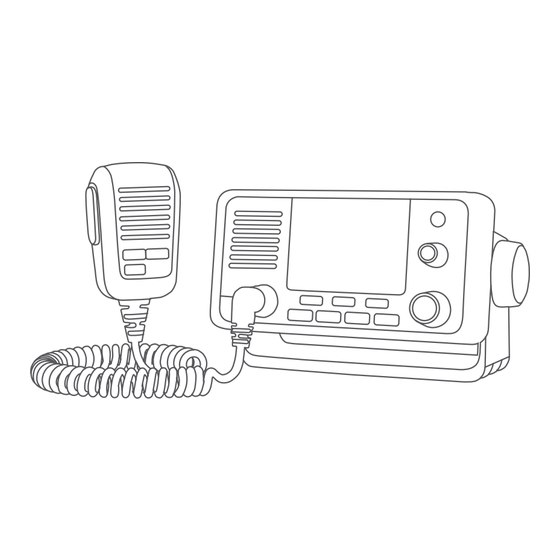
Introduction WARNING See the Important Safety and Product Information guide in the product box for product warnings and other important information. Radio Overview VHF 110/110i VHF 210/210i Introduction... -
Page 6: Handset Overview
Item Key Description Lift the door and press to send a DSC distress call with a programmed MMSI DISTRESS number (Entering Your MMSI Number, page 11). Press the dial to switch between volume or squelch. VOL/SQ Rotate the dial to adjust the volume or squelch level. Select the key that corresponds to the on-screen item to select the item. -
Page 7: Home Screen
Home Screen Radio system status, settings, and alerts International, Canadian, or USA frequency band Latitude Longitude Time Speed over ground (SOG) or course over ground (COG) Soft-key functions change depending on your current activity Working channel The latitude, longitude, and time appear when the radio has a GPS signal acquired. You can enter data manually when the radio does not have a GPS signal. The SOG and COG appear when the radio has a GPS signal acquired, and the option is enabled in the menu (Number Settings, page 22). -
Page 8: System Status Icons
System Status Icons Icon Status Receiving an incoming signal Transmitting Transmitting at 25 W Transmitting at 1 W Saved channel Local receiver mode, often used in areas with radio frequency interference (harbors) ATIS enabled Position tracking enabled Auto channel changing disabled Incoming or missed DSC call Weather alerts enabled GPS signal acquired Basic Operation... -
Page 9: Selecting The Frequency Band
Selecting the Frequency Band You can switch between the USA, International, or Canadian frequency bands (Channel Lists, page 24). NOTE: Not all frequency bands are available on all device models. 1 Select MENU > CHANNEL > FREQUENCY BAND. 2 Select a frequency band. Selecting a Channel You can select an International, Canadian, or USA channel (Selecting the Frequency Band,... -
Page 10: Scanning And Saving Channels
Scanning and Saving Channels Scanning All Channels When you scan channels, the radio searches for channels that are broadcasting. When a channel is broadcasting, the radio pauses on that channel until the broadcast stops. After four seconds of inactivity on a channel, the radio resumes scanning. -
Page 11: Multiple Channel Monitoring
Multiple Channel Monitoring Before you can monitor multiple channels, you must turn off ATIS (Automatic Transmitter Identification System, page 20). You can monitor priority channels and the currently selected channel for broadcasting activity. Channel 16 is the first-priority channel on your radio. Channel 9 is the default second-priority channel. You can program a different channel as your second-priority channel (Selecting a Different Second-Priority Channel, page 7). -
Page 12: Setting The Receiving Sensitivity
Setting the Receiving Sensitivity You can control the receiving sensitivity of the radio. When you have noise in high-traffic areas or areas with electromagnetic interference, such as near cell-phone towers, you can set the receiving sensitivity to LOC to decrease receiver sensitivity. In remote areas and on open water, you can set the receiving sensitivity to DIST to ensure that you use the maximum range of the receiver. -
Page 13: Using The Hailer
Using the Hailer Before you can use the hailer function, you must provide and install a hailer horn on your boat deck or tower (optional). For more information, see the Installation Instructions. The hailer allows you to make on-boat or ship-to-shore announcements, and allows two-way communications between connected radios. -
Page 14: Entering Text
Entering Text You may need to enter a name, a number, or other text on the radio. 1 From a number or text field, turn the SELECT dial to change the number, letter, or character. 2 Press the SELECT dial to accept the number, letter, or character and move to the next space in the sequence. 3 Repeat this process for each number, letter, or character. -
Page 15: Entering Your Mmsi Number
Entering Your MMSI Number NOTICE You can enter your MMSI number only once. If you must change your MMSI number after entering it, you must take your radio to your Garmin dealer for reprogramming. ® The Mobile Marine Safety Identity (MMSI) number is a nine-digit code that acts as a DSC self-identification number, and it is required to use the DSC capabilities of your radio. -
Page 16: Sending A Designated Distress Call
Sending a Designated Distress Call When you send a designated distress call, the nature of your emergency is transmitted to the receiving stations. 1 Lift the spring-loaded door, and press DISTRESS. 2 Turn the SELECT dial, and select the type of distress call. TIP: You can select CLEAR to exit the screen without sending a distress call. -
Page 17: Placing Calls
Placing Calls Placing Individual Calls 1 Select DSC > INDIVIDUAL. 2 Select an option: • To enter the MMSI number manually, select MANUAL, enter the MMSI number, and select ACCEPT. • To select an entry from the directory, select DIRECTORY, and select an entry. •... -
Page 18: Requesting A Vessel's Position
Position data received from stations that respond to position request calls is sent over the NMEA network. You ® can track the vessels on your Garmin chartplotter. 1 Select DSC > POS. REQUEST. 2 Select an option: • To enter the MMSI number manually, select MANUAL, enter the MMSI number, and select ACCEPT. -
Page 19: Receiving Individual Routine Calls
When you enable position tracking, the radio uses interval-based position requests to track up to three vessels. Your radio transmits received position data over the NMEA network, and you can track the vessels using your Garmin chartplotter (Configuring DSC NMEA Transmissions, page 22). -
Page 20: Selecting Vessels And Activating Position Tracking
Selecting Vessels and Activating Position Tracking Before you can use position tracking, you must have at least one vessel saved in the directory (Directory, page 18). 1 Select DSC > POS. TRACKING > ADD ENTRY. 2 Select the vessels you want to track. You can track the position of up to three vessels at one time. -
Page 21: Call Log
Call Log When the radio receives a DSC call, it records the date and time, calling station, and type of call in the call log. The radio also records the latitude and longitude of the calling station if that data is transmitted with the call. DSC calls are logged as distress, position, or other calls. -
Page 22: Saving A Vessel Or Station To The Directory From The Call Log
Saving a Vessel or Station to the Directory from the Call Log 1 Select DSC > CALL LOG. 2 Select a call-log category. 3 Select the MMSI number you want to save. 4 Select SAVE. 5 Enter or edit the name for the saved vessel or station (optional) (Entering Text, page 10). -
Page 23: Editing A Group
Editing a Group 1 Select DSC > GROUP > EDIT ENTRY. 2 Select a group. 3 Edit the group MMSI number, the name, or both (Entering Text, page 10). 4 Select ACCEPT. Deleting a Group 1 Select DSC > GROUP > DELETE. 2 Select a group. -
Page 24: Automatic Transmitter Identification System
Garmin dealer for reprogramming. NOTE: You can access the ATIS settings on the radio after the ATIS feature is activated by your Garmin dealer. 1 Select MENU > ATIS > MY ATIS ID. -
Page 25: Turning On And Off Ais
When you connect the radio to the same NMEA 2000 network as a Garmin chartplotter, you can use the chartplotter to set up an individual routine call. -
Page 26: Configuring Dsc Nmea Transmissions
Configuring DSC NMEA Transmissions You can filter the types of DSC-call data the radio sends to a connected NMEA 0183 device or over a NMEA 2000 network. 1 Select MENU > COMMUNICATIONS > DSC OUTPUT. 2 Select an option: • To send NMEA data when you receive a DSC call from any MMSI number, select ALL VESSELS, and proceed to the last step. -
Page 27: Units Settings
Units Settings You can set the unit of measure used for values shown on the radio. Select MENU > SYSTEM > UNITS. SPEED: Sets the unit of measure shown for speed-related fields, such as speed-over-ground. TIME > FORMAT: Sets the time format. HEADING: Sets the radio to show all heading calculations, such as Course Over Ground (COG), using true or magnetic north. -
Page 28: Appendix
Appendix Alarms and Messages BATTERY ALRM: Sounds when the battery reaches a specified low or high voltage. Check the battery wiring. WX: Sounds when you set a weather alarm and the radio detects an incoming weather alert (NOAA Weather ® Broadcasts and Alerts, page 10). -
Page 29: Specifications
Hailer output power 20 W at 4 ohms Hailer horn impedance 4 ohms NMEA 2000 LEN @ 9.0 Vdc 1 (50 mA) The device withstands incidental exposure to water of up to 1 m for up to 30 min. For more information, go to www.garmin.com/waterrating. Appendix... -
Page 30: Nmea
NMEA NMEA 2000 PGN Information Transmit Description 059392 ISO acknowledgment 060928 ISO address claim 061184 Single-frame proprietary 126208 NMEA request group function 126464 PGN's group function 126720 Fast-packet proprietary 126993 Heartbeat 126996 Product information 126998 Configuration information 129799 Radio frequency/mode/power 129808 DSC call information Receive... -
Page 31: Nmea 0183 Information
Transmit (AIS models only) Description 129038 AIS class A position report 129039 AIS class B position report 129040 AIS class B extended position report 129041 AIS Aids to Navigation (AtoN) report 129794 AIS class A static and voyage related data 129798 AIS SAR aircraft position report 129802... - Page 32 September 2024 GUID-B7A0C5D8-4F64-4F06-BA16-2206EFCAF537 v6...
Need help?
Do you have a question about the VHF 110/210 and is the answer not in the manual?
Questions and answers