Table of Contents
Advertisement
Quick Links
Advertisement
Table of Contents

Related Manuals for Electrolux EWI722W86W


Summary of Contents for Electrolux EWI722W86W
- Page 1 EN User Manual | Washer Dryer EWI722W86W...
-
Page 2: Table Of Contents
Welcome to Electrolux! Thank you for choosing our appliance. Get usage advice, brochures, trouble shooter, service and repair information: www.electrolux.com/support Subject to change without notice. CONTENTS 1. SAFETY INFORMATION................2 2. SAFETY INSTRUCTIONS................5 3. PRODUCT DESCRIPTION................7 4. TECHNICAL DATA..................9 5. -
Page 3: General Safety
• This appliance can be used by children aged from 8 years and above and persons with reduced physical, sensory or mental capabilities or lack of experience and knowledge if they have been given supervision or instruction concerning the use of the appliance in a safe way and understand the hazards involved. - Page 4 • The appliance shall be installed as a freestanding product or below the kitchen worktop if space margins permit. • Do not install the appliance behind a lockable door, a sliding door or a door with a hinge on the opposite side, that would prevent the appliance door from being fully open.
-
Page 5: Safety Instructions
• Items that have been soiled with substances such as vegetable or mineral oil, acetone, alcohol, petrol, kerosene, spot removers, turpentine, waxes and wax removers should be washed separately with an extra amount of detergent before being dried in the washer dryer. •... -
Page 6: Electrical Connection
• Make sure that there is air circulation • Ensure that there are no visible water between the appliance and the floor. leaks during and after the first use of the • Remove all the packaging and the transit appliance. bolts. -
Page 7: Product Description
Refresh steam programme, offers the and the type of fabric without consuming perfect solution for refreshing even the more time, energy and water than most delicate garments without washing. necessary. Use the delicate fragrance exclusively developed by Electrolux to add a ENGLISH... -
Page 8: Appliance Overview
Access your appliance details, documentation and articles on how to use the best features (User Manual also available at electrolux.com/manuals ) • Get usage advice, troubleshooting, service and repair information (also available at electrolux.com/ support ) • Buy accessories, Consumable and Original Spare parts for you appliance (also available at electrolux.com/shop ) -
Page 9: Technical Data
4. TECHNICAL DATA Dimension Width/ Height/ Total depth 59.7 cm /84.7 cm /65.8 cm Electrical connection Voltage 230 V Overall power 2100 W Fuse 10 A Frequency 50 Hz Level of protection against ingress of solid particles and moisture IPX4 ensured by the protective cover, except where the low voltage equipment has no protection against moisture Cold water... -
Page 10: Information For Installation
Adjust the appliance correctly to prevent vibration, noise and movement of the appliance when it operates. 1. Install the appliance on a flat hard floor. The appliance must be levelled and stable. Make sure that the appliance does not touch the wall or other units and there is air circulation below the appliance. - Page 11 the hose because of its natural ageing. 5. Connect the other end of the COLD water The sector in the window shows this fault inlet hose to the cold water tap with 3/4" A. If this occurs, close the water tap and thread.
-
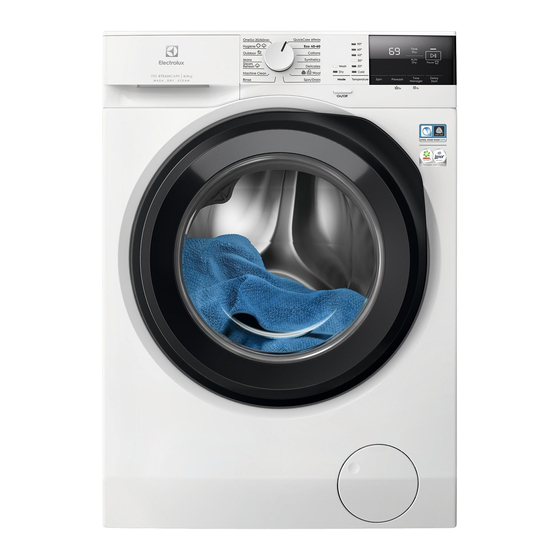
Page 12: Control Panel
The drain hose can be bent into U shape and ratings. Make sure that they are compatible put around the plastic guide. On the edge of a with the mains power supply. sink - Fasten the guide to the water tap or to Check that your domestic electrical the wall. - Page 13 The options are not selectable with all washing programmes. Check the compatibility between options and washing programmes in the "Options compatibility with programmes" paragraph in the "Programmes" chapter. An option can exclude another one, in this case the appliance doesn't allow you to set the incompatible options together. Make sure the screen and touch buttons are always clean and dry.
-
Page 14: Dial And Buttons
The spin area: Spin speed indicator No Spin indicator. Spin phase is off. Rinse Hold indicator. Auto Dry indicator: Iron dry Cupboard dry Extra dry Child safety lock indicator. Time Dry programme indicator. 6.3 Multilingual badges Adhesive badges in different languages are supplied with the appliance. -
Page 15: Permanent Extra Rinse
7.5 Temperature The corresponding indicator above the touch button illuminates. When you select a washing programme, the Use this option to add a pre-wash phase at appliance automatically proposes a default 30 °C before the washing phase. temperature. This option is recommended for heavily soiled Tap on this button to change the water laundry, especially if containing sand, dust, temperature. -
Page 16: Delay Start
7.11 Delay Start the shortest cycle to freshen up a small amount of laundry. With this option you can delay the start of a programme to a more convenient time. The Time Manager is available only with the programmes in the table. Touch the button repeatedly to set the required delay. -
Page 17: Settings
icon means that you can pause the cycle and add or remove garments. Read the 'Opening the door - Adding garments' section for more details. 8. SETTINGS 8.1 Introduction the first switching on. This value will count operating time of the cycles (does not include pauses, delayed start time). -
Page 18: Before First Use
9. BEFORE FIRST USE 3. Pour 2 litres of water into the detergent compartment marked by During installation or before first use you This action activates the drain system. may observe some water in the 4. Pour a small quantity of detergent into the appliance. - Page 19 Programme Reference Maxi‐ Programme description Default tempera‐ spin speed (Type of load and level of soiling) ture Spin speed load Temperature range range 1200 rpm 4.0 kg Synthetic items or mixed fabric items. Normally soiled (1200 - 400 items. Synthetics rpm) 30 °C 60 °C - Cold...
- Page 20 Items with label "Dry clean only". FreshScent System Electrolux fragrance. If you use this special gentle fragrance, your laundry will scent as just washed. Read care‐ fully the instructions supplied with the fragrance. Reduce the fragrance dosage when treating smaller load. By means of the Time Manager button, you can reduce the programme duration when treating items labeled to be washed at low temperature.
- Page 21 Programme Reference Maxi‐ Programme description Default tempera‐ spin speed (Type of load and level of soiling) ture Spin speed load Temperature range range 1600 rpm 8.0 kg White cotton items. This high-performance wash programme 1600 rpm - combined with steam vapour, removes more than 99,99% of Hygiene 400 rpm bacteria and viruses...
- Page 22 Programme options compatibility Programme ■ ■ ■ ■ ▲ ■ ■ QuickCare 69min ■ ■ ■ ■ ■ Eco 40-60 ■ ■ ■ ■ ■ ■ ■ ■ ■ Cottons ■ ■ ■ ■ ■ ■ ▲ ■ ■ Synthetics ■...
-
Page 23: Automatic Drying
Suitable detergents for each programme Programme Universal Liquid Univer‐ Liquid for col‐ Delicates Special oureds woollens powder 1) QuickCare ▲ ▲ ▲ 69min Eco 40-60 ▲ ▲ ▲ Cottons ▲ ▲ ▲ Synthetics ▲ ▲ ▲ Delicates ▲ ▲ Wool ▲... -
Page 24: Timed Drying
Dryness Level Type of fabric Load Cottons and Linen up to 6 kg (bathrobes, bath towels, etc) Extra Dry For towelling materials Denim garments up to 4 kg Cottons and Linen up to 6 kg (bathrobes, bath towels, etc) Cupboard Dry For items to be stored Synthetics and mixed fabrics up to 4 kg... -
Page 25: Daily Use - Washing Only
Dryness Level Type of fabric Load Spin Suggested du‐ (kg) speed ration (mins) (rpm) Synthetics and mixed fabrics 1200 135 - 145 (jumpers, blouses, underwear, household and bed linen) 1200 40 - 50 Delicates 1200 140 - 160 (acrylics, viscose and delicate mixed fabrics) 1200 70 - 80 Wool... -
Page 26: Filling The Detergent And Additives
11.4 Check the position of the detergent flap Washing heavily oiled, greasy stains 1. Pull out the detergent dispenser until it could cause damage to rubber parts of stops. the washing machine. 11.3 Filling the detergent and additives 2. Press the lever down to remove the dispenser. -
Page 27: Setting A Programme
• Do not set the delay start function. indicator appears to indicate that it is still 5. Measure out the detergent and the fabric possible to stop the cycle and add garments. conditioner. 6. Carefully close the detergent dispenser. The drain pump can operate shortly before the appliance fills water. -
Page 28: Interrupting A Programme And Changing The Options
11.8 The SensiCare System load 3. Touch the Start/Pause button again. detection The washing programme continues. 11.10 Cancelling a running programme The programme duration in the display is referred to a medium/high load. 1. Press the On/Off button to cancel the programme and to deactivate the After touching the Start/Pause button the... -
Page 29: End Of The Programme
• You must drain the water to open the door and touch the Start/Pause door: button. The programme or the delay start continues. 1. If necessary, touch the Spin button to decrease the spin speed proposed by the 11.12 End of the programme appliance. -
Page 30: Daily Use - Washing & Drying
12. DAILY USE - WASHING & DRYING Extra dry: for cotton items. WARNING! The time value on the display is the Refer to Safety chapters. duration of both cycles washing and drying, calculated on a default load size. This appliance is an automatic washer To have a good drying by using less dryer. -
Page 31: Daily Use - Drying Only
• Press the On/Off button for some seconds 1. Remove the laundry from the appliance. to deactivate the appliance. 2. Make sure that the drum is empty. After some minutes from the end of After drying phase, clean the drum, the the programme, the energy saving seal and the inside of the door with a wet function deactivates the appliance... -
Page 32: Fluff In The Fabrics
2. Make sure that the drum is empty. After some minutes from the end of the programme, the energy saving After drying phase, clean the drum, the function deactivates the appliance seal and the inside of the door with a wet automatically. -
Page 33: Stubborn Stains
15.3 Detergent type and quantity shoelaces, ribbons and any other loose elements. The choice of detergent and use of correct • Do not wash laundry without hems or with quantities not only affects your wash cuts. Use a washing bag to wash small performance, but also helps to avoid waste and/or delicate items (e.g. -
Page 34: Drying Cycle Duration
15.4 Savings tips 15.7 Items not suitable for drying To save water, energy and detergent we Do not set a drying programme for this recommend that you follow these tips: laundry: • Synthetic curtains. • Normally soiled laundry may be washed •... -
Page 35: Care And Cleaning
To avoid the static charge at the end of the 4. Do not dry rough and smooth textiles drying cycle: together, to avoid scorching on smooth garments. 1. Use fabric conditioner in the washing 5. Remove all objects from garment cycle. -
Page 36: Maintenance Wash
16.4 Descaling If the water in your area is hard or medium hard, we recommend that you use a water softener for washing machines. The water is hard or medium hard when the hardness exceeds 8dH. Regularly examine the drum to check for Clean it when needed, using ammonia cream limescale. -
Page 37: Cleaning The Detergent Dispenser
16.8 Cleaning the detergent 3. Flush the detergent drawer out under dispenser running warm water to remove any traces of accumulated detergent. After cleaning, To prevent possible deposits of dried replace the top part in its position. detergent or clotted fabric softener and/or 4. - Page 38 7. Turn the filter anti-clockwise to remove it. 2. Place a suitable bowl below the drain pump access to collect the water that 8. If it is necessary, remove fluff and objects flows out. from the filter recess. 3. Open the chute downwards. Always keep 9.
-
Page 39: Cleaning The Inlet Hose And The Valve Filter
12. Close the pump cover. 2. Remove the inlet hose from the appliance by loosening the ring nut. When you drain the water with the emergency drain procedure, you must 3. Clean the valve filter on the back of the activate the drain system again: appliance with a toothbrush. -
Page 40: Frost Precautions
16.12 Frost precautions If the appliance is installed in an area where the temperature can reach the values around 0° C or drop below, remove the remaining water from the inlet hose and the drain pump. 1. Disconnect the mains plug from the mains socket. - Page 41 With some problems, the display shows an alarm code and the Start/ Pause button may flash continuously: If the appliance is overloaded, remove some items from the drum and/or keep pressed the door while touching the Start/Pause button until the indicator stops flashing (see the picture below).
- Page 42 If the display shows other alarm codes, deactivate and activate the appliance. If the problem continues, contact the Authorised Service Centre. In case of different problem with the appliance check the table below for possible solutions. Problem Possible solution • Make sure that the mains plug is connected to the mains socket.
-
Page 43: Emergency Door Opening
Problem Possible solution • Reduce the quantity of detergent or the number of tablets or single-dose deter‐ Too much foam in the drum during the washing cycle. gents. • Make sure that the flap is in the correct position (UP for powder detergent - After the washing cycle, DOWN for liquid detergent). -
Page 44: Consumption Values
5. Take out the laundry and then close the appliance door. 6. Close the filter flap. 18. CONSUMPTION VALUES 18.1 Introduction The QR code on the energy label supplied with the appliance provides a web link to the information related to the performance of the appliance in the EU EPREL database. - Page 45 18.3 According to Commission Regulation Eu 2019/2023 Washing only Eco 40-60 pro‐ rpm 1) Litres hh:mm °C gramme Full load 0.705 52.0 03:35 52.00 34.0 1551 Half load 0.455 40.0 02:40 52.00 30.0 1551 Quarter load 0.230 34.0 02:40 54.00 25.0 1551 Maximum spin speed.
-
Page 46: Environmental Concerns
Programme rpm 1) Litres hh:mm °C Delicates 0.400 60.0 01:05 35.00 30.0 1200 30°C Wool 0.300 65.0 01:05 30.00 30.0 1200 30°C Reference indicator of the spin speed. Suitable for washing heavily soiled textiles. Suitable for washing lightly soiled cottons, synthetic and mixed fabrics. It also performs as quick washing cycle for lightly soiled laundry. - Page 48 157084620-A-112024...
Need help?
Do you have a question about the EWI722W86W and is the answer not in the manual?
Questions and answers