Advertisement
Quick Links
Advertisement

Related Manuals for Landmann Great Outdoors Smoky Mountain Series


Summary of Contents for Landmann Great Outdoors Smoky Mountain Series
- Page 1 All manuals and user guides at all-guides.com...
- Page 2 All manuals and user guides at all-guides.com 1-800-321-3473...
- Page 3 All manuals and user guides at all-guides.com...
- Page 4 All manuals and user guides at all-guides.com 2 4 ” M i n [ 6 1 0 m m ]...
- Page 5 All manuals and user guides at all-guides.com...
-
Page 6: Part Description
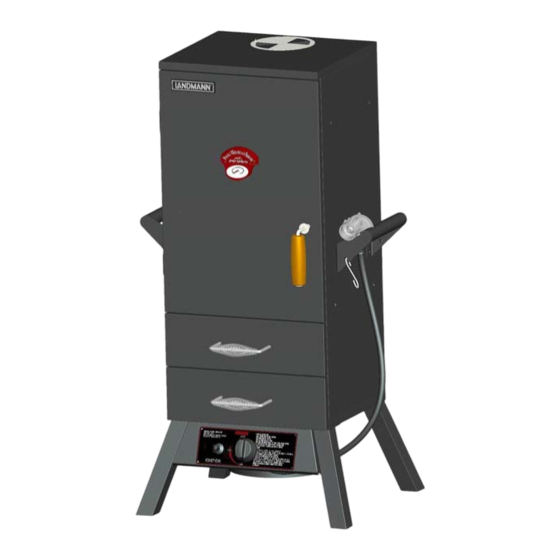
All manuals and user guides at all-guides.com PART DESCRIPTION SMOKER BASE DOOR LEGS SIDE HANDLE CONTROL PANEL GAS BURNER DRAWERS MEAT HANGER DOOR HANDLE ASSEMBLY THERMOMETER TOP VENT STARTER BUTTON COOKING GRIDS WATER PAN CHIP BOX w/VENT DRAWER HANDLES w/nuts 10#-24x 1/2”... - Page 7 All manuals and user guides at all-guides.com to the cabinet.The back legs bolts should be inserted and secured tight. For the front legs, insert and adjust 3 bolts per leg (as shown) 1/2 way.
- Page 8 All manuals and user guides at all-guides.com 10#-24x 1/2” Bolts at 1/2 way.DO NOT tighten them until next step has been finished. 10#-24x 1/2” Bolts and...
- Page 9 All manuals and user guides at all-guides.com 4. Tighten all front leg bolts. IMPORTANT: lOOSE IGNITOR WIRE...
- Page 10 All manuals and user guides at all-guides.com 1. Turn the smoker upright.Ideally it needs 2 people to lift it up. Carefully tilts the cabinet on the side legs, grasps the empty hole for the adjusting vent, and pulls up gently until the smoker is uprighted to all four legs. TOP HINGER...
- Page 11 All manuals and user guides at all-guides.com 1/4-20 Lock Washers...
- Page 12 All manuals and user guides at all-guides.com...
- Page 13 All manuals and user guides at all-guides.com Three cooking grids rack position as shown.Repeat the step to slide the wood chip drawer into the lastest bottom rack position as shown. pan onto the drawer as shown.Make sure seated properly.
- Page 14 All manuals and user guides at all-guides.com...
- Page 15 All manuals and user guides at all-guides.com No tools are required for this step. 1. Insert the name plate mounts and heat indicator prong through the mounting holes in the front of the door panel. 2. From the inside of the door panel, securely attach the push nuts to the name plate mounts.
- Page 16 All manuals and user guides at all-guides.com Insert the R-Hook into the pre-threaded mount on the front legs as shown.And firmly tighten it.
- Page 17 All manuals and user guides at all-guides.com IMPORTANT: Any fuel supply cylinder used must be constructed and marked in accordance with specifications for propane cylinders of the U.S. Department of Transportation (DOT) CFR 49, or CAN/CSA B339. The appliance is to be used only with the 20 pound, vertical standing vapor withdrawal type tank.
- Page 18 All manuals and user guides at all-guides.com Valve/pressure regulators are factory set to the correct Storage of the appliance indoors is only permissible if the operating pressures. No attempts should be made to adjust cylinder is disconnected and removed from the appliance. these settings! Cylinder must be stored outdoors out of the reach of children and must not be stored in a building, garage or any other...
- Page 19 All manuals and user guides at all-guides.com...
- Page 20 All manuals and user guides at all-guides.com...
- Page 21 All manuals and user guides at all-guides.com 1.Read all instructions before lighting. 2.Open door during lighting. 3.Open cylinder/main gas valve. 4.Push and turn burner valve to HIGH ,push igniter button. 5.If ignition does not occur within 5 seconds,turn valves to off, wait 5 munutes,and repeat lighting procedure.
-
Page 22: Damper Adjustments
All manuals and user guides at all-guides.com Damper Adjustments Smoking for 2 to 3 hours at the ideal constant cooking · Temperature maintenance is best controlled by different temperature of 225° to 250° F (110° to 120° C) will get the damper adjustments. - Page 23 All manuals and user guides at all-guides.com...
- Page 24 All manuals and user guides at all-guides.com...
- Page 25 All manuals and user guides at all-guides.com...
- Page 26 All manuals and user guides at all-guides.com 1-800-321-3473- Monday to Friday 9:00am to 5:00pm Eastern Standard Time...
- Page 27 All manuals and user guides at all-guides.com Part number: 3405GLA Revision A: March 2010...
Need help?
Do you have a question about the Great Outdoors Smoky Mountain Series and is the answer not in the manual?
Questions and answers