Table of Contents
Advertisement
Available languages
Available languages
Quick Links
Advertisement
Table of Contents

Subscribe to Our Youtube Channel
Related Manuals for LaserLine 211B


Summary of Contents for LaserLine 211B
- Page 1 Sistema di allarme con radiocomando rolling code per veicoli a 12 V.DC Alarm system with rolling code remote control for 12 V.DC vehicles 211B / 211 Con sirena a filo with wired siren Manuale installazione pag.2 Installation manual pag.16...
-
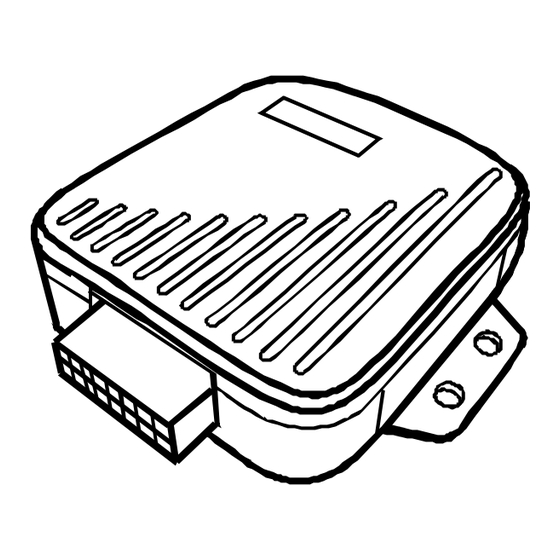
Page 2: Contenuto Del Kit
Centrale 919 - 909 TF d'allarme Presa elettronica con LED 2 x Radiocmando T116 (solo art. 211B) modulo ultrasuono per 211B e 211 Chiave elettronica (solo art. 211B ) Sensori ultrasuono e supporti plastici Avvertenze per l’installazione - Non allungare o accorciare il cavo dell'antenna, i cavi schermati dei sensori ultrasuoni e della presa elettronica . - Page 3 Indicatori di direzione BLU-MARRONE Sirena 909TF KIT 211 AZZURRO Ingresso negativo o positivo porte / baule BLU-MARRONE vedi pag.11 funzione16 Sirena 919 KIT 211B GRIGIO Ingresso negativo o positivo cofano GIALLO VERDE RELÈ vedi pag.11 funzione15 Relé NA INTERNO Max 10A...
- Page 4 Collegamento accessori e funzionamento relè MODULO SENSORI ULTRASUON O: CONNETTORE A 3 VIE PROVENIENTE DALL’UNITA’ PRINCIPALE Inserire il connettore ROSSO proveniente dalla capsula al connettore T del modulo, e il connettore BIANCO al connettore R. Inserire il connettore bianco a 3 poli p r ov en i en t e da l l’...
- Page 5 Schemi di collegamento chiusure centralizzate IMPULSI NEGATIVI schema «A» VERDE NERO GRIGIO NERO CHIUSURA BLU NERO CENTRALE D’ALLARME GIALLO NERO MARRONE NERO APERTURA ROSSO NERO FUSIBILE 5A MASSA IMPULSI POSITIVI schema «B» + 12Vdc FUSIBILE 5A VERDE NERO GRIGIO NERO CHIUSURA BLU NERO CENTRALE...
- Page 6 Schemi di collegamento chiusure centralizzate AZIONATORE SERRATURA schema «C» + 12Vdc FUSIBILE 10A VERDE NERO GRIGIO NERO BLU NERO CENTRALE D’ALLARME GIALLO NERO ROSSO MARRONE NERO ROSSO NERO AZIONATORE SERRATURA AZIONATORE ELETTROPNEUMATICO schema «D» + 12V / +24V FUSIBILE 10A PORTA VERDE NERO GRIGIO NERO...
- Page 7 Abbinamento sensori wireless / radiocomandi / chiavi elettroniche Nel caso di camper e motorhome è possibile estendere la protezione del veicolo abbinando al sistema sensori wireless: - Sensori magnetici per monitorare l’apertura di finestre, porte e gavoni. - Sensori infrarosso per monitorare l’interno della cellula abitativa. PROCEDURA DI AUTOAPPRENDIMENTO Per eseguire la procedura di autoapprendimento occorre essere in possesso di almeno un radiocomando o chiave elettronica...
- Page 8 Collaudo allarme INSERIMENTO DEL SISTEMA ALLARME Premendo il pulsante 1 , le serrature centralizzate si chiuderanno così come i cristalli ed il tettuccio elettrico (se la vettura è predisposta), gli indicatori di direzione segnaleranno con 2 lampeggi e 2 segnalazioni acustiche. Il di stato si accenderà...
- Page 9 Collaudo allarme TEST APERTURA VANI PERIMETRICI : - Chiudere tutti i vani protetti: cofano motore, porte, baule, finestre e gavoni; - Inserire l'allarme tramite radiocomando ed attendere 5 secondi; - Durante il periodo di pre-inserimento ( di stato acceso fisso) aprire uno alla volta il cofano, il baule, i vani protetti da sensore wireless e infine le porte (una alla volta) .
- Page 10 Memoria allarmi (auto-diagnosi) Se durante la vostra assenza si è verificata una condizione d'allarme o un malfunzionamento dei sensori, al disinserimento del sistema d'allarme, il lampeggio degli indicatori di direzione e la segnalazione acustica saranno più brevi. Tramite il LED di stato potete conoscere quali sensori hanno provocato le ultime 5 condizioni d'allarme premendo, a sistema disinserito, contemporaneamente i tasti 1 e 2 del radiocomando:...
- Page 11 Funzioni programmabili In base alle caratteristiche del veicolo e alle esigenze del cliente, è possibile personalizzare il sistema modificando alcune funzioni. Qui di seguito le funzioni programmabili disponibili 1- SEGNALAZIONI ACUSTICHE Questa funzione permette di abilitare o disabilitare le segnalazioni acustiche sia durante l'inserimento e il disinserimento durante il test ingressi e sensori...
- Page 12 17- COMANDO SIRENA SPEAKER O CODIFICATA Consente di selezionare il corretto protocollo della sirena abbinata all’allarme. - 909 per KIT 211 - 908 per KIT 211B 18- USCITA ALLARME/ USCITA LUCI-BAULE Definisce come utilizzare l’uscita negativa connessa al filo BIANCO MARRONE:...
- Page 13 Funzioni programmabili 24- PILOTAGGIO DEL PULSANTE 4 FRECCE . Permette il collegamento del filo GIALLO direttamente al pulsante HAZARD della vettura. In questo caso le frecce lampeggeranno solo in caso di allarme e non durante l'inserimento e il disinserimento. ATTENZIONE: per pilotare a comando negativo il pulsante Hazzard, occorre utilizzare un relè di inversione SCHEMA RELE DI INVERSIO NE ALLARME...
-
Page 14: Funzioni Programmabili
OUT DURANTE RELE INTERNO - USCITA DURANTE L'ALLARME RELE INTERNO ALLARME INGRESSO PER PULSANTE COFANO POSITIVO NEGATIVO (Solo per 211B e 211) INGRESSO PER PULSANTI PORTA POSITIVO NEGATIVO COMANDO SIRENA, SPEAKER O CODIFICATA 909 (KIT 211) 908 (KIT 211B) COMANDO IN... -
Page 15: Caratteristiche Tecniche
Caratteristiche tecniche Alimentazione .......................9-15 V nsumo ad allarme inserito (con US) ..............<12 mA Consumo ad allarme disinserito (con US) ..............<4 mA Consumo in allarme ....................<1,5 A Livello sonoro sirene (a 1 metro ................113db Tempo di pre allarme / Pre-alarm time..............30 sec. Portata uscita filo BIANCO/MARRONE ..............max 1 A Portata fili indicatori direzione .................7+7 A Portata rele interno ....................10 A... -
Page 16: Kit Contents
Sirena Unit 919 - 909 TF Electronic key receiver / LED 2 x Remote control T116 (only 211B) Ultrasonic module for 211B e 211 Electronic key Ultrasonic sensor (solo art. 211B ) and plastic holder Warning for installation - Do not lengthen or shorten the antenna cable, the shielded cables of the ultrasonic sensors and the electronic socket . - Page 17 BLUE-BROWN Siren 909TF KIT 211 LIGHT BLUE Negative or positive input ors / bonnet BLUE-BROWN see pag.26 function16 Siren 919 KIT 211B GREY Negative or positive input Trunk YELLOW-GREEN BUILT-IN see pag.26 function15 Relé NO RELE Max 10A Max 1A GREEN 3°...
-
Page 18: Connections Diagram
Accessories connections and relè operation mode ULTRASONIC SENSOR MODULE: 3-WAY CONNECTOR FROM MAIN UNIT Insert the RED connector coming from the capsule to the T connector of the module and the WHITE connector to the R connector. Insert the 3-pin white connector coming from the alarm directly into the module. - Page 19 Central locking connection diagrams NEGATIVE PULSE gram «A» GREEN-BLACK GREY-BLACK CLOSURE BLUE-BLACK ALARM UNIT YELLOW-BLACK BROWN-BLACK OPENING RED-BLACK FUSE 5A POSITIVE PULSE diagram «B» + 12Vdc FUSE 5A GREEN-BLACK GREY-BLACK CLOSURE BLUE-BLACK ALARM UNIT YELLOW-BLACK BROWN-BLACK OPENING RED-BLACK Pag.19...
- Page 20 Central locking connection diagrams ACTUATOR LOCK diagram «C» + 12Vdc FUSE 10A GREEN-BLACK GREY-BLACK BLUE-BLACK CENTRALE BLUE D’ALLARME YELLOW-BLACK BROWN-BLACK RED-BLACK LOCK ELECTROPNEUMATIC ACTUATOR diagram «D» + 12Vdc FUSE 10A DOOR GREEN-BLACK GREY-BLACK BLUE-BLACK ALARM UNIT YELLOW-BLACK BROWN-BLACK RED-BLACK COMPRESSOR Pag.20...
- Page 21 Pairing wireless sensors/radicommands/electronic keys In the case of campers and motorhomes it is' possible to extend the protection adding to the system wireless sensors: - Magnetic sensors to monitor the opening of windows, doors and external lockers. - Infrared sensors to monitor the interior of the living cell. SELF-LEARNING PROCEDURE To perform the self-learning procedure, you must have at least one working remote control or electronic key then proceed in the...
- Page 22 Alarm TEST ARMING THE ALARM SYSTEM When button 1 is pressed, the centralised closure , the windows and electric sunroof if ) will close. The direction indicators will signal with 2 flashes and, 2 beep are emitted. The status LED will stay steadily on for 30 seconds (pre- alarm time), after which it will begin flashing to confirm...
- Page 23 Alarm TEST PERIMETER COMPARTMENT OPENING TEST: Close all protected compartments: bonnet, doors boot , windows and lockers Insert the alarm by remote control and wait 5 seconds; During the pre-arming time (status LED on) open one by one , bonnet, trunk and all protected compartment by wireless sensor, and at the end the doors.
-
Page 24: Clearing Alarm Memory
Alarm memories (self-diagnosis) If an alarm condition or sensor malfunction has occurred during your absence, when the alarm will be disarmed the flashing indicator lights and the acustic signal, will be shorter. Through the status LED you can know sensors have caused the last 5 alarm conditions: At any time with the system disarmed, press buttons 1 and 2 of the remote control simultaneously. -
Page 25: Button Function
Programmable functions Depending on the characteristics of the vehicle and the customer's needs, it is possible to customize the system by modifying certain functions. Below are the programmable functions available. 1- ARM AND DISARM TONES This function allows to enable "arm/disarm"... - Page 26 17- SYREN PEAKER OR CODED Allow to choose the right syren’s protcol: - 909 for KIT 211 - 908 for KIT 211B OUTPU ALARM OUTPUT LIGHT BOOT Allow to choose how work the output WHITE-BROWN wire: - ALARM TRIGGERED / CAR FINDER: Negative output during the alarm cycle, usefull to connect an external GPS locator and receive the alarm.
-
Page 27: Programmable Functions
Programmable functions 24- HAZARD BUTTON COMMAND. Allows you to connect the YELLOW wire directly to the car's HAZARD button. In this case, the arrows will flash only in the event of an alarm and not during arming and disarming. CAUTION: To drive Hazzard's control by the negative signal, a reversing relay must be used. - Page 28 SAFETY LOCK OUTPUT DURING INTERNAL RELAY - OUTPUT DURING ALARM INTERNAL RELAY ALARM BONNET CONTACT INPUT POSITIVE NEGATIVE (only for 211B and 211) DOOR CONTACT INPUT POSITIVE NEGATIVE 908 (KIT 211B) SIREN COMMAND (SPEAKER/CODED) 909 (KIT 211) 908RF (KIT 211B-RF)
- Page 29 Technical data Power supply......................9-15 V Consumption when alarm is armed (with US) ...........<12 mA Consumption when alarm is disarmed (with US) ..........<4 mA Consumption in alarm ..................<1,5 A sirens sound level (at 1 meter)................113db Pre-alarm time.....................30 sec. WHITE/BROWN wire utput rating ..............max 1 A Indicator light wire rating..................7+7 A Internal relay rating....................10 A Central locking relay contacts rating..............10+10 A...
- Page 31 Certificato di installazione - Installation certificate Il sottoscritto - The undersigned, ..................certifica di aver eseguito personalmente l’installazione del sistema di sicurezza descritto qui di seguito, conformemente alle istruzioni del fabbricante. Certifies that has personally performed the installation of the safety system described below in accordance with the manufacturer's instructions.
- Page 32 Laserline Safety and Security Systems srl Via Rio Vallone, 5 20883 Mezzago (MB) tel. +39039682561 fax. +3903968256248 e-mail info@laserline.it web: www.laserline.it IS211B rev.05 Data: 24/10/2024...
Need help?
Do you have a question about the 211B and is the answer not in the manual?
Questions and answers