Table of Contents
Advertisement
Quick Links
Advertisement
Table of Contents

Summary of Contents for Visionix VX22NP
- Page 1 VX22NP-VX22LP-VX22CP User Manual 8240-9922-01 – rev 02 – 26/02/2020...
-
Page 2: Table Of Contents
Setting the projector mode ........................23 4.7. Duochrome calibration ........................... 24 Red adjustment ................................24 Green adjustment ............................... 24 4.8. Setting the language ..........................25 4.9. Setting mirror mode ..........................25 4.10. Setting the info footer ..........................26 VX22NP-VX22LP-VX22CP User Manual... - Page 3 How do I use the fixation points? ......................41 Call the simple fixation point ............................41 Call the child fixation point (Clown)..........................41 Call the light fixation point ............................41 Invert the background color (white/black) ......................... 41 Call the hardware fixation light ..........................41 VX22NP-VX22LP-VX22CP User Manual...
- Page 4 Electromagnetic emissions ............................51 Electromagnetic immunity ............................52 Manufacturer ................................54 Waste Electrical and Electronic Equipment (WEEE) Directive ..................54 8.3. Explanation of visual acuity units ......................55 Distance-independent conventions ..........................55 Distance-dependent conventions ..........................55 8.4. Contact ..............................56 VX22NP-VX22LP-VX22CP User Manual...
-
Page 5: Introduction
1. Introduction VX22NP-VX22LP-VX22CP User Manual... - Page 6 It consists of a chart display unit and a radio remote control. 3 models are available: VX22NP without polarization, VX22LP with linear polarization and VX22CP with circular polarization. The display unit includes a PC-type unit and a 23,6" high-resolution LCD screen.
-
Page 7: Safety
2. Safety VX22NP-VX22LP-VX22CP User Manual... -
Page 8: General
Do not subject the VX22 to strong vibrations. Shocks or violent movements can cause malfunctions. Transport conditions: temperature: -40°C to +70°C humidity: 10 % to 95% atmospheric pressure: 500hPa to 1060 hPa Storage conditions: temperature: -10°C to +55°C humidity: 10% to 95% atmospheric pressure: 700hPa to 1060 hPa VX22NP-VX22LP-VX22CP User Manual... -
Page 9: Precautions During Use
2.5. Symbols Important: consult the User guide supplied with the equipment Manufacturer Manufacturing date Serial Number Compliance to Medical Device Directive 93/42/EEC Class 1 The equipment must be disposed of separately according to WEEE Directive. VX22NP-VX22LP-VX22CP User Manual... -
Page 10: Equipment And Installation
3. Equipment and Installation VX22NP-VX22LP-VX22CP User Manual... -
Page 11: List Of Equipment Supplied
The package you receive should contain the following items: Chart Display Radio remote control Power supply (cable and + Dungle usb transformer) + Batteries for remote control Matching sheets for child Red/green frame Polarized frame tests Wall mounting kit (plates, screws, wall plugs) VX22NP-VX22LP-VX22CP User Manual... -
Page 12: Equipment Parts
2) VX22-NP none polarized screen, 3) VX22-LP circular polarized screen) 3 Led light source 4 Infrared receiver 5 Power indicator 6 External USB and AUDIO ports 7 Power supply 8 Power switch 9 Fixing points (VESA 100) 10 Base (optional) VX22NP-VX22LP-VX22CP User Manual... -
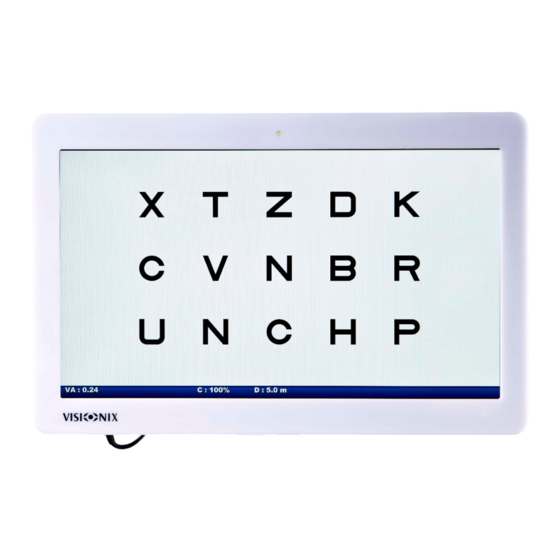
Page 13: Display
Display Information bar Visual acuity Contrast Usage distance VX22NP-VX22LP-VX22CP User Manual... -
Page 14: Use Of Us-Radio Remote Control
Call the Worth test Call the Shoeber test Call the different optotypes Call the Child test Call the Ishihara test FIX (call fixation targets) Call the Paskal3D test Call the media / didactic images / default test / informations VX22NP-VX22LP-VX22CP User Manual... -
Page 15: Use Of Eu-Radio Remote Control
Call the Worth test Call the Shoeber test Call the different optotypes Call the Child test Call the Ishihara test FIX (call fixation targets) Call the Paskal3D test Call the media / didactic images / default test / informations VX22NP-VX22LP-VX22CP User Manual... -
Page 16: Usb-Dongle For Us/Eu Radio Remote Control
➢ There is a USB dongle provided with every radio remote ➢ Plug this USB dongle into the chart display ➢ The USB dongle is recognized by you chart display automatically ➢ Once it’s done, you can use your remote control VX22NP-VX22LP-VX22CP User Manual... -
Page 17: Installation Procedure
➢ Start with fixing the first part of the wall mounting kit to the back of the screen thanks to use the smallest screws provided. ➢ Verify that there are adequate threads to secure the brackets to the monitor. If you encounter resistance, stop immediately. VX22NP-VX22LP-VX22CP User Manual... - Page 18 ➢ Fix the second part of the wall mounting kit directly to the wall thanks to the plugs and screws provided. ➢ Attach the two parts. Fixing on the table support (option) ➢ Fix the display on the table support using the screws provided. VX22NP-VX22LP-VX22CP User Manual...
-
Page 19: Electrical Connection
3.7. Starting and stopping the equipment Starting ➢ Press the Start button. ➢ Wait until the software starts. Stopping ➢ There are 2 ways of switching the equipment off: Press the Start button. • Select "Switch Off" in the VX22 menu. • VX22NP-VX22LP-VX22CP User Manual... -
Page 20: Configuring The Vx22
4. Configuring the VX22 VX22NP-VX22LP-VX22CP User Manual... -
Page 21: Menu
To select a function ➢ Press the Yes button. To exit a function ➢ Press the Yes button to confirm changes, ➢ Or press the No button to abandon changes. To exit the menu ➢ Press the No button. VX22NP-VX22LP-VX22CP User Manual... -
Page 22: Setting The Acuity Unit
➢ Select '"Unit" in the menu. ➢ Select the required unit. 4.3. Setting the usage distance ➢ Select "Distance" in the menu. ➢ Measure the distance between the patient and the VX22. ➢ Set the distance using the left/right arrows. VX22NP-VX22LP-VX22CP User Manual... -
Page 23: Setting Optotype Scales
➢ Select the required optotype type: Sander-Zanlonghi Pigassou Osterberg 4.6. Setting the projector mode Projector mode can be activated to have a unique distribution of optotypes. ➢ Select "Proj. Mode" in the menu. ➢ Select the required mode. VX22NP-VX22LP-VX22CP User Manual... -
Page 24: Duochrome Calibration
➢ Watch the vertical green lines (on the right) through the red filter to be used by the patient. ➢ Adjust the green intensity and green base (and possibly the background intensity) to obtain the best filtering. VX22NP-VX22LP-VX22CP User Manual... -
Page 25: Setting The Language
➢ Select the required language. 4.9. Setting mirror mode Activating mirror mode inverts the display when a mirror is used between the patient and the VX22. ➢ Select "Mirror" in the menu. ➢ Select the required mode. VX22NP-VX22LP-VX22CP User Manual... -
Page 26: Setting The Info Footer
➢ Select "info footer" in the menu. ➢ Select the disable/enable to hide or not the info bar. 4.11. Setting chart or box id ➢ Select "Network" in the menu. ➢ Select the network mode and configure the required chart or box id. VX22NP-VX22LP-VX22CP User Manual... -
Page 27: Setting The Test Call Butons
➢ Select the test to be personalized using the up/down arrows. ➢ Press the Change button (the selection color changes). ➢ Move the test to the required position using the up/down arrows. ➢ Press the Change button (the selection color returns to normal). VX22NP-VX22LP-VX22CP User Manual... -
Page 28: Available Tests
Available tests Letter Digit Landolt Snellen Child Geometric sheridan ETDRS Clock Dot Chart Jackson Cross Ishihara Red/Green Balance Polarized Binocular balance Binocular balance on polarized red/green background VX22NP-VX22LP-VX22CP User Manual... - Page 29 MKH 01 Cross MKH 02 Indicator MKH 03 Double indicator MKH 04Coincidence test MKH 05 Stereo test with triangle MKH 06 Reduced stereo test MKH 07 Stereo balance test MKH 08 Reduced Stereo with triangle balance test VX22NP-VX22LP-VX22CP User Manual...
- Page 30 MKH 09b Test Differentiated MKH 12 Test Cowen Test Stereo test Amsler Movie Binopola Paskal3D (need paskal Dazzle halo (need glare license) testing) Dazzle recup (need glare Dazzle driver (need glare BalanceBino testing) testing) Balance Bino 3D VX22NP-VX22LP-VX22CP User Manual...
-
Page 31: Setting The Standby Timeout
4.13. Setting the standby timeout This setting defines the inactivity period after which the VX22 will automatically switch to standby mode. ➢ Select "Standby" in the menu. ➢ Select the required delay. VX22NP-VX22LP-VX22CP User Manual... -
Page 32: How Do I
5. How do I...? VX22NP-VX22LP-VX22CP User Manual... -
Page 33: How Do I Measure Visual Acuity
Change the optotype masks Display a column of optotypes ➢ Press the vertical mask button. Display a line of optotypes ➢ Press the horizontal mask button. Display a single optotype ➢ Press the single letter mask button VX22NP-VX22LP-VX22CP User Manual... -
Page 34: Display Optotypes On A Red /Green Background
Focus on an optotype/ Use cursor mode The cursor mode adds bars above and under the optotype which indicates which optotype to read. Activate / desactivate cursor mode ➢ Press the “Single letter” button. Change the pointed optotype ➢ Use the left/right/up/down arrows VX22NP-VX22LP-VX22CP User Manual... -
Page 35: How Do I Use The Special Tests
➢ Press the button of the group to which the test belongs (1,2 or 3) until the test appears. Change a special test presentation Worth Press down arrow Press left arrow Press right arrow Initial Display Press B/W Schober Initial display Press B/W VX22NP-VX22LP-VX22CP User Manual... -
Page 36: How Do I Use Etdrs Mode
5.4. How do I return to the previous test? ➢ Press the"Return to the Previous Test" button. Note: use of this button is valid in terms of test type (e.g. letter, digit, Worth, etc.), but not in terms of acuity, mask or background. VX22NP-VX22LP-VX22CP User Manual... -
Page 37: How Do I Use Contrast Tests
The orientation of the waves is always the same Step Orientation of the top of the waves Step Orientation of the top of he waves Left Vertical Vertical Left Left Right Right Vertical Vertical Right Left Left Vertical Right Left Vertical Right Vertical Vertical Left VX22NP-VX22LP-VX22CP User Manual... - Page 38 Log10(S) answers values Red curve: superior curve of the normal answers Blue curve : inferior curve of the normal answers Green curve : curve of the answers Saving the result Insert a USB key in the VX22 VX22NP-VX22LP-VX22CP User Manual...
-
Page 39: How Do I Use Pelli Robson Test
D S N 0,30 C K R 0,45 Z V R 0,60 N D C 0,75 O S K 0,90 O Z K 1,05 9,5% V H Z 1,20 8,3% N H O 1,35 7,4% N R D VX22NP-VX22LP-VX22CP User Manual... -
Page 40: How Do I Use The Ishihara Tests
Change the color range ➢ Press the up or down arrow. Change the palette within the same color range ➢ Press the left or right arrow. Return to the initial Ishihara test ➢ Press the ‘Change’ button. VX22NP-VX22LP-VX22CP User Manual... -
Page 41: How Do I Use The Fixation Points
➢ Press the "B/W" button. Call the hardware fixation light you have to go on this test: Press Yes on the remote control to enables it. To disable the hardware fixation light press No or change the test. VX22NP-VX22LP-VX22CP User Manual... -
Page 42: Show Learning Pictures Of The Eye
➢ Select "Load Media" in the menu (this option appears only when a USB key is present) . A loading progress window appears. ➢ Exit the menu when the loading is complete. ➢ Remote the USB key. VX22NP-VX22LP-VX22CP User Manual... -
Page 43: Play A Media File
Choose the default test from the menu ➢ Display the required test. ➢ Select ‘Save’ in the menu. ➢ Exit the menu. Choose the default test with the MEMO button ➢ Display the required test. ➢ Press the “MEMO” button. VX22NP-VX22LP-VX22CP User Manual... -
Page 44: What Should I Do If
6. What should I do if...? VX22NP-VX22LP-VX22CP User Manual... -
Page 45: The Vx22 Does Not Start
➢ Replace the remote-control batteries. If the problem persists, ➢ Contact the Ater Sales Service. 6.3. The change button does not change the optotypes distribution ➢ Check that projector mode is not activated. Otherwise, ➢ Contact the After Sales Service. VX22NP-VX22LP-VX22CP User Manual... -
Page 46: The Vx22 Screen Is Black
➢ Check that the equipment is not in standby by pressing any button on the remote control. If it was not in standby, ➢ Restart the VX22. If the problem persists, ➢ Contact the After Sales Service. 6.5. Lines or dashes appear on the VX22 screen ➢ Contact the After Sales Service. VX22NP-VX22LP-VX22CP User Manual... -
Page 47: Maintenance
7. Maintenance VX22NP-VX22LP-VX22CP User Manual... -
Page 48: Cleaning The Vx22 Casing
Clean the screen gently to avoid scratching. ➢ Clean the screen using a soft cloth. ➢ Never use solvents. If water is projected on the screen, ➢ Dry immediately using a soft cloth because contact wit water can dammage the surface. VX22NP-VX22LP-VX22CP User Manual... -
Page 49: Appendices
8. Appendices VX22NP-VX22LP-VX22CP User Manual... -
Page 50: Technical Specifications
LR03 AAA 1,5V batteries (x2) Dimensions 185 (length) x 47 (width) x 20 mm (height) Weight 80 g (Without batteries) Operating conditions Temperature +10°C to 35°C Hygrometry 30 to 90% Atmospheric Pressure 800 hPa to 1060 hPa VX22NP-VX22LP-VX22CP User Manual... -
Page 51: Conformity To International Standards
The VX22 is suitable for use in all establishments, CISPR 11 including domestic establishments and those Class A directly connected to the public low-voltage power Harmonic Emissions supply network that supplies buildings used for CEI 61000-3-2 purpose. Voltage fluctuations / flicker Complies emissions CEI 61000-3-3 VX22NP-VX22LP-VX22CP User Manual... -
Page 52: Electromagnetic Immunity
1 A/m (50/60 hertz) magnetic be at levels characteristic of a field typical location in a typical commercial or hospital IEC 61000-4-8 environment. NOTE: U is the a.c. mains voltage prior to application of the test level. VX22NP-VX22LP-VX22CP User Manual... - Page 53 RF compliance level above, the VX22 should be observed to verify normal operation. If abnormal performance is observed, additional measures may be necessary, such as reorienting or relocating the VX22. Over the frequency range 150 kHz à 80 MHz, field strengths should be less than 3 V/m. VX22NP-VX22LP-VX22CP User Manual...
-
Page 54: Manufacturer
WEEE Directive for EU member countries and in local regulations for other countries. For further information on disposal of this product, please contact your local dealer or the manufacturer. VX22NP-VX22LP-VX22CP User Manual... -
Page 55: Explanation Of Visual Acuity Units
Monoyer Monoyer scale Distance-dependent conventions Snellen 300 Snellen at 3m Snellen 400 Snellen ar 4m Snellen at 5m Snellen 500 Snellen at 6m Snellen 600 Snellen at 10 feet Snellen 10 Snellen at 20 feet Snellen 20 VX22NP-VX22LP-VX22CP User Manual... -
Page 56: Contact
Tél.: (+39)2 55 41 32 51 Fax: (+39)2 55 41 32 43 Portugal Luneau Technology Portugal Av. Eng. Duarte Pacheco. Emp. Amoreiras. Torre II.13A. 1099-042 LISBOA Tel.: (+35) 1 214 170 225 Fax: (+35)1 214 170 227 Linha Verde: 800 205 142 VX22NP-VX22LP-VX22CP User Manual... - Page 57 Luneau Technology USA Inc. 224 W James St Bensenville, IL 60106 Tel : +1 800 729 1959 contact.us@luneautech.com Export Technical Support Tél.: (+33) 977556335 techsupport@luneautech.com VX22NP-VX22LP-VX22CP User Manual...
Need help?
Do you have a question about the VX22NP and is the answer not in the manual?
Questions and answers