Advertisement
Quick Links
Advertisement

Related Manuals for Lockly Zeno VISION PGK798HK

Summary of Contents for Lockly Zeno VISION PGK798HK
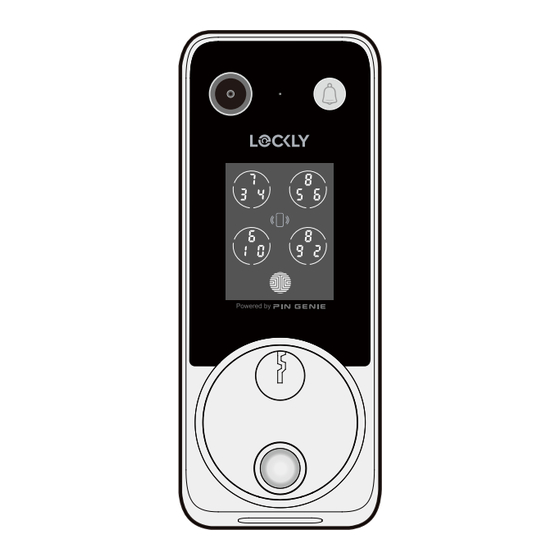
- Page 1 PGK798HK VIDEO DOORBELL VISION SMART LOCK Zeno Series INSTALLATION GUIDE...
- Page 2 Strike Plate Keys Exterior Activation Card Strike Spacer Dust Box New-Gen Vision Connect Hub Power Adaptor Activation Card 1 2 3 4 (Optional) LOCK SERIAL 5 6 7 8 PGK7SK01234567XX ACTIVATION CODE 824057XX Need help? Email: help@Lockly.com | Support: +1(669) 500-8835...
- Page 3 Phillips Screwdriver Flathead Screwdriver Tape measure or ruler Before installing and setting up Lockly Vision, it is important to charge the lithium battery for a full 12 hours. A sufficiently charged battery is necessary to establish connection between the lock and the app.
- Page 4 Step 1 ADJUST DEADBOLT AND INSTALL The deadbolt defaults to 2-3/8"(60mm) backset which is measured from the centre of the door hole to the door edge. If the deadbolt slot is aligned to the centre of the door hole, skip this step of adjusting deadbolt 2-3/4"...
- Page 5 Observe the correct position of the cable to ensure it is according to your door opening orientation (Left / Right Swing) and Backset size (60mm/70mm). During installation, DO NOT hammer the deadbolt and/or its metal plate to avoid damaging the built-in sensor. Interior Interior Door edge side view...
- Page 6 Step 3 INSTALLING INTERIOR ASSEMBLY (C) Align and secure mounting plate. Guide connection cables through the hole and secure to the lower left notched hole. Select D1/D2/D3 screws based on the door thickness, insert and tighten 2x D screws on the left and right sides of the blade by hand. Check the alignment and insert screws through the circular holes on both sides of the deadbolt torque blade, aligning them with the screw holes on the exterior assembly.
- Page 7 Step 4 INSTALLING INTERIOR ASSEMBLY (E) Plug the larger cable coming through mounting plate into the interior assembly as shown. Plug cable heads as shown. Plug into , match the grey side of the plug as shown. Peel off protective film from the adhesive strips, and then press the magnetic control socket onto the double-sided adhesive as...
- Page 8 Align torque blade with thumbturn shaft, make sure both are in the vertical position. Insert the connec- tor and excess wire into door hole. Place the interior assembly against Before placing the interior the mounting plate and make sure assembly onto the mounting the torque blade is inserted to the plate, ensure the thumbturn thumbturn shaft.
- Page 9 INSTALLING BATTERY Step 5 With door open and deadbolt fully extended, insert lithium battery. Make sure to hook the battery securely on the provided slot of the interior assembly. 5.2 After the battery is secured, HOLD the program button for 4 seconds. The lock will automatical- ly start self-check (release program button once self-check starts).
- Page 10 Step 6 INSTALLING STRIKE PLATE Use the included door strike plate which has the built-in door sensor magnet. If your door gap is larger than 5mm, it is recommended to install Strike Spacer lessen the gap to ensure the normal operation of the door sensor. (4X) USE THE INCLUDED DOOR STRIKE PLATE WITH INTEGRATED DOOR SENSOR.
- Page 11 Step 7 NEW-GEN VISION CONNECT HUB SETUP NEW-GEN VISION CONNECT HUB STATUS LED INDICATORS STATUS Blue white lights blinking Pairing Green lights slow blinking Gateway working Purple lights blinking Resetting Blue lights blinking Update in progress Red lights blinking Network NOT connected Reset TF card (included)
- Page 12 DOWNLOAD LOCKLY APP Step 8 Download the Lockly app on your smartphone. It is required to finish setup and to establish the connection between the lock, hub and the app. Additionally, you'll need the Activation Card with unique pre-paired QR code to your lock.
- Page 13 Ensure your iOS or Android device has both Bluetooth® and Wi-Fi enabled. Launch the Lockly App and select "Add a new device", then select Vision. You will be prompted to scan the QR code from the Activation Card or New-Gen Vision Connect Hub (located at the bottom).
- Page 14 The Bluetooth® word mark and logos are registered trademarks owned by the Bluetooth SIG, Inc. , and any use of such marks by Lockly is under license. Other trademarks and trade names are those of their respective owners. Google, Android, Google Play and Google Home are trademarks of Google LLC. , Amazon, Alexa and all related logos are trademarks of Amazon.com, Inc., or its affiliates.
Need help?
Do you have a question about the Zeno VISION PGK798HK and is the answer not in the manual?
Questions and answers