Table of Contents
Advertisement
Quick Links
Conductivity measuring
instrument
Original operating manual
Version
BA-2019.07.01 EN
Print-No.
302 309
TR MA DE Rev 001
Series
LTM 100
R / C4 / MD
STÜBBE GmbH & Co. KG
Hollwieser Straße 5
32602 Vlotho
Germany
Phone: +49 (0) 5733-799-0
Fax: +49 (0) 5733-799-5000
E-mail:
contact@stuebbe.com
Internet:
www.stuebbe.com
Subject to technical modifications.
Read carefully before use.
Save for future use.
Advertisement
Table of Contents
Troubleshooting

Related Manuals for Stübbe LTM 100 R Series


Summary of Contents for Stübbe LTM 100 R Series
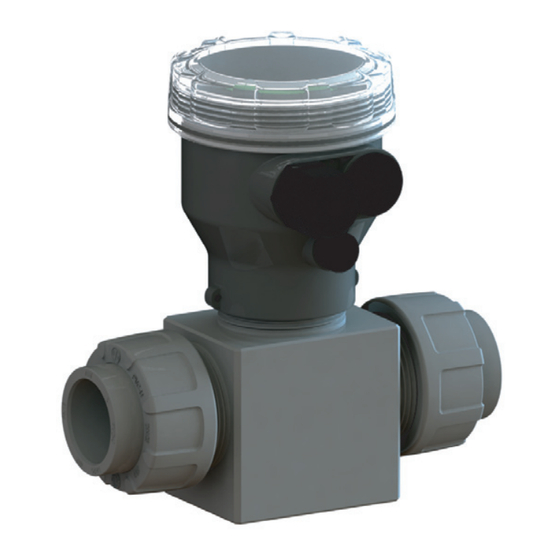
- Page 1 Conductivity measuring instrument Original operating manual Series LTM 100 R / C4 / MD Version BA-2019.07.01 EN STÜBBE GmbH & Co. KG Print-No. 302 309 Hollwieser Straße 5 32602 Vlotho TR MA DE Rev 001 Germany Phone: +49 (0) 5733-799-0 Fax: +49 (0) 5733-799-5000 E-mail: contact@stuebbe.com...
-
Page 2: Table Of Contents
Table of contents Table of contents About this document ....... Output menu . -
Page 3: List Of Figures
Table of contents List of figures List of tables Fig. 1 Name plate (example) ..... . . Tab. 1 Other application documents, purpose and where found . -
Page 4: About This Document
About this document About this document Other applicable documents This manual • is part of the equipment To download: Resistance Guide • applies to all series referred to Chemical resistance of the materials • describes safe and proper operation during all operating used phases www.stuebbe.com/pdf_resistance/300051.pdf... -
Page 5: General Safety Instructions
General safety instructions General safety instructions 2.2.2 Obligations of personnel Only complete work on the device if the following requirements are met: The manufacturer accepts no liability for damages caused • System is empty by disregarding any of the documentation. •... -
Page 6: Layout And Function
Layout and Function Layout and Function The UNI display (optional) shows measured value. It can be used for all measuring instruments of the UNI display device platform PTM, HFT, HFB, USF, UFM, RFM and LTM. The UNI display offers the following additional functions: Name plate •... -
Page 7: Assembly
Layout and Function Assembly 3.3.3 Measured value display 3.3.1 10.0 % 10.0 µS/cm nLF 25° C/77° F 24.5° C Fig. 4 Display of measured values Percent of the full-range value Relay status display Normal display = contact open Inverted display = contact closed Input status display Normal display = switch on input open Inverted display = switch on input closed... -
Page 8: Transport, Storage And Disposal
Transport, Storage and Disposal Transport, Storage and Disposal Disposal Plastic parts can be contaminated by poisonous or radioac- tive media to such an extent that cleaning will not be suffi- cient. Unpacking and inspection on delivery WARNING 1. Unpack the device when received and inspect it for trans- port damage and completeness. -
Page 9: Installation And Connection
Installation and connection Installation and connection Electrical connection of device Device is installed. Check operating conditions Power supply is switched off and secured against being switched back on again. 1. Ensure the design of the fitting is consistent with the pur- Cable without shielding can be used to connect the device. -
Page 10: Operation
Operation Operation 6.1.2 Parameterizing Button Functions • Cancels input and switches to the NOTE higher-level menu. Changing parameters affects the switching outputs imme- • Changes will not be saved. diately. ▲ • Increases parameter value. Make sure that changing a parameter does not trigger a •... -
Page 11: Initial Start-Up
Operation Initial start-up Managing several devices Relay version: the UNI display is used for start-up. Using the UNI display and microSD card, parameter sets can be transferred between devices or archived on a PC. Current version, 4-wire: start-up can be completed with- out the UNI display. -
Page 12: Updating Firmware
Operation Updating firmware The latest sensor firmware or UNI display firmware is avail- able on the Internet (→ www.stuebbe.com/en/service/download/). event that updating interrupted (→ 9.1.1 Fixingsoftware loading errors, Page 20). 1. Download the latest version of the device firmware (LTM_Vxxx.HEX) display firmware (UNI_Vxxx.HEX) from the Internet and save on the... -
Page 13: Menus And Functions
Menus and functions Menus and functions Submenu Function values 0 ... 6000 ms An average is calculated and Measured value display displayed using the measurement interval. This removes the effect of The display shows the measured value. short-term fluctuations. A long integration time delays Button Function the response to a change in the... -
Page 14: Output Menu
Menus and functions Output menu Submenu Function values 7.4.1 Menu output (relay and Modbus version) Selecting relay output Modbus settings The relay output is set first, and then the switch type. Interface Setting baud rate. The switch behavior can then the be set depending on the ▲▼... -
Page 15: Output Menu (Current)
Menus and functions Display menu Submenu Function values Opener/Closer Submenu Function values Sets switch function: • NO – closer Conductivity value Selection of the temperature correction and the reference • NC – opener temperature of 20°C or 25°C. The relay outputs do not assume Conductivity no temperature correction the switch function set here until... -
Page 16: Diagnostics Menu
Menus and functions Diagnostics menu The data logger functions requires a microSD card. The data logger function saves the data in CSV format on the microSD card. After the adjustable recording duration (per file) has expired, a new file is written until the microSD card is full or the data logger function is deactivated. -
Page 17: Service Menu
Menus and functions Service menu The UNI display supports all microSD or microSDHC cards with FAT32 formatting. Relevant file must be maintained in the master directory. If transmission errors occur when loading a parameter set, then the UNI display will restore its factory settings. The UNI display only displays files in 8.3 format. -
Page 18: Maintenance
Maintenance Maintenance Maintenance 8.2.1 Removing the device System is empty. DANGER System has been flushed. Risk of electrocution! System is depressurized. All electrical work must be carried out by qualified electri- System has cooled down. cians only. System is secured against being switched back on again. 1. -
Page 19: Troubleshooting
Troubleshooting Troubleshooting WARNING Risk of injury and poisoning due to hazardous media liq- uids! Use personal protective equipment when carrying out any work on the device. Error Possible cause Corrective action Medium leaking from the union nut Preload of seal too small Retighten union nut. -
Page 20: Troubleshooting
Troubleshooting Troubleshooting 9.1.1 Fixingsoftware loading errors If an error occurs when updating the sensor firmware or the UNI display firmware (e.g. power failure), it may not be possible to call up the “Update firmware” menu. The latest sensor firmware or UNI display firmware is avail- able on the Internet (→... -
Page 21: Appendix
Appendix 10 Appendix 10.1 Technical specifications 10.3.2 Current connection diagram Technical data (→ Data sheet). 10.2 Accessories OUT1 OUT2 Description Ident. number UNI display 144153 set min. set max. • Display and control unit • with PA transparent cover for the connector head •... -
Page 22: Modbus Rtu Connection Plan
Appendix 10.3.3 Modbus RTU connection plan Fig. 9 Modbus RTU connection plan Bus termination Terminal allocation Termi- Termi- Connection nal strip RS485 A RS485 B +24 V Modus power supply Power supply earth RS485 A RS485 B +24 V Modus power supply Power supply earth Relay 1 switch output closer Relay 1 switch output opener... -
Page 23: Modbus Rtu Termination
Appendix 10.3.4 Modbus RTU termination The Modbus RS485 must be terminated for devices which are at the end of the bus cable. Termination for one device Plug the jumper on to the left and center pin (Position ON). Master device/PWR Termination for several devices Plug the jumper on to the center and right pin (Position OFF). -
Page 24: Modbus Functions
Appendix 10.3.5 Modbus functions Func- Name Address Data type Comment tion Code Read Coil 0x00 → RELAY1 Read relay status. Status 0x01 → RELAY2 Read Input 0x00 → INPUT1 Read input status. Status 0x01 → INPUT2 A “TRUE” logic level on the inputs are extended to minimum 5 seconds. -
Page 25: Modbus Rtu Message Formats
Appendix 10.3.6 Modbus RTU message formats Formats Data Coding System 8 bit binary Number of data bits per character Parity Even or No Bit transfer rate 2400, 4800, 9600, 19200, 38400 Selectable Duplex Half duplex Transceiver with Failsafe Error checking CRC (cyclic redundancy check) Polynomial (CRC-16 10100000000001)
Need help?
Do you have a question about the LTM 100 R Series and is the answer not in the manual?
Questions and answers