
Related Manuals for STEYR MOTORS Marine SE Series


Summary of Contents for STEYR MOTORS Marine SE Series
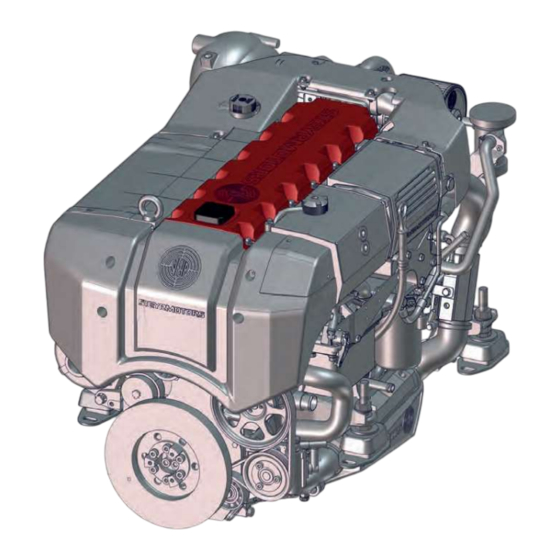
- Page 1 Installation Manual MARINE SE 4 Cylinder / 6 Cylinder Edition Order number 707519 Language Date May 2021...
- Page 3 PREFACE Steyr Motors Betriebs GmbH develops high-performance diesel engines with modulated high pressure direct injection, especially for marine. Steyr Motors engines are designed to be adapted to various propulsion systems. This INSTALLATION MANUAL is published with the main intention -...
- Page 4 To provide information in the form of technical data and installation „know - how“ built up from our marine diesel engine experience. To enable 6 cylinder Steyr Motors marine SE engines to be installed in a manner which will ensure safety, reliability and ease of servicing.
- Page 5 Preface TABLE OF CONTENTS SAFETY GENERAL GENERAL INFORMATION ON INSTALLATION WEIGTH-DISTRIBUTION BALANCE SPECIFICATIONS TRANSPORT AND STORAGE QUALITY DIRECTIVES FOR ASSEMBLY VARIANTS ENGINE - PROPULSION ENGINE INSTALLATION COOLING SYSTEM FUEL SYSTEM EXHAUST SYSTEM AIR INTAKE AND VENTILATION EXTERNAL CONSUMERS SAFETY COVERS BILGE PUMPS CABIN HEATING NOISE ATTENUATION...
- Page 6 Preface VERSIONS OF MANUAL Version Date 01.2021 New edition 05.2021 Update...
- Page 7 Table of Contents Table of Contents General Regulations A 1.1 Limited application ....................15 A 1.2 Emission-related installation instructions .............. 15 Responsibilities of boat owners Safety S.0.1 Additional notices....................18 Safety precautions S 1.1 Introduction ......................19 S 1.2 General information on safety................22 Customer’s responsibility Intended (appropriate) use Personnel requirements...
-
Page 8: Table Of Contents
Table of Contents S 16.2 Sticker overview 6 cylinder engine ................ 42 S 16.3 Sticker overview 4 cylinder engine ................ 43 1.1.1 Serial number 6 cylinder engine ................45 1.1.2 Serial number 4 cylinder engine ................46 1.1.3 Serial number gear box ..................46 1.3.1 Technical data 6 cylinder engine (from year of manufacture 2021) ....... - Page 9 Table of Contents Transport and storage 4.2.1 Concerning packing ....................79 4.2.2 Handling packing materials..................79 4.4.1 Storage conditions ....................82 4.4.2 Start-up after storage..................... 83 4.5.1 Preservation......................85 4.5.1.1 1 Preservation procedure..................85 4.5.2 Preservation ..................... 91 4.5.3 De-preservation ..................... 92 4.5.3.1 De-preservation .....................
- Page 10 Table of Contents 5.8.1 General directions for use of anaerobic sealing materials........107 Variants engine propulsion 6.1.1 Bobtail - Version....................109 6.1.2 Down angle......................109 6.1.3 Lifeboat engine ....................110 6.1.4 Jet drive ........................111 6.1.6 Stern drive ......................112 6.2.1 Bobtail - Version....................
- Page 11 7.15.8 Space between propeller and boat ..............137 7.15.9 Sediments......................137 7.15.10 Choice of propeller....................137 7.15.11 Cavitation......................139 Cooling system 8.6.1 Standard gear box cooling from Steyr Motors ............. 145 8.10.1 Keel cooling dimensioning ................... 150 Fuel system Exhaust system...
- Page 12 Table of Contents 10.4.1 Exhaust for inboard engines above water line............. 162 10.4.2 Exhaust for inboard engines below water line ............. 163 10.4.3 Exhaust for stern drive engines ................165 10.5.1 Wet exhaust pipe ....................166 10.5.2 Measuring of back pressure ................169 Air intake and ventilation External consumers Safety instructions...
- Page 13 Table of Contents 17.6.1 Scheme for instrument panel and SCC2 ............. 197 17.6.2 Scheme for instrument panel and SCC2 with GPS ..........198 17.7.1 Cut out drawing for instrument panel (standard) / instrument panel SOLAS..199 17.7.2 Cut out drawing for SCC key ignition panel/push button ignition panel (SOLAS) 201 17.7.3 Cut out drawing for SCC2..................
- Page 14 Table of Contents...
- Page 15 Note that each country has its own safety regulations regarding installation. Therefore, it is beginning works. Ship-owners or boat builders installing a Steyr Motors marine engine in a vessel which will be used in ECA (Emission Control Areas) and which are not excluded from IMO Tier III in accordance with Annex VI regulation 13.1.2, must contact the EPA and the US Coast...
- Page 16 The manner and circumstances of the application, installation and use of the engine is not under the direct control of Steyr Motors and Steyr Motors cannot be held liable for any loss or damage where the installer or user has not followed advice given by the manufac-...
- Page 17 This manual contains certain information related to the personal safety of you as the op- erator, your passengers, bystanders and other persons. Steyr Motors Betriebs GmbH is concerned about your safety and the condition of your engine. The safety instructions will alert you to potential hazards associated with installing Steyr Motors engines.
- Page 18 Safety NOTICE NOTICE indicates a potentially hazardous situa- tion, if not avoided, could result in damage to the engine. How to avoid damages. Information Indicates an information which compliance use of the engine. Environment Indicates a note which compliance results in a proper handling of environmentally hazardous substances.
- Page 19 Safety Safety precautions Read the book carefully before operating or servicing the engine. Incorrect operation or servicing of the engine could result in personal injury or material damage as well as dam- aging the engine itself. If you do not understand or are uncertain on any operation in this book, contact your dealer who can explain or demonstrate the procedure for you.
- Page 20 Safety Only start the engine in a well-ventilated area. If operating the engine in an enclosed area ensure that there is exhaust ventilation leading out of the engine compartment or workshop area to remove exhaust gases and crankcase ventila- tion emissions. Always use protective glasses or goggles when carrying out work where there is a risk of splinters, grinding sparks, acid splashes or where other chemicals are used.
- Page 21 Safety Rags soaked in oil can spontaneously ignite under certain circumstances. Used an approved site for destruction together with used lubricating oil, contaminated fuel, paint remnants, solvent, degreasing agents and waste from washing parts. when mixed with air can form an explosive gas -oxyhydrogen. This gas is easily ignited and highly volatile.
- Page 22 Safety Guidelines for damage prevention This section does not include the scope of general knowledge and the training of mate- rial maintenance personnel as well as the “general rules of safety technics” and machine safety regulations - MSV. Inappropriate behaviour and the ignorance of material maintenance may result in consider- able material damages.
- Page 23 This manual must be kept in the immediate vicinity of the engine and must be acces- sible at any time to all persons working on and with the engine. In the case of doubt, always contact Steyr Motors Betriebs GmbH before starting the engine.
- Page 24 While maintaining maintenance intervals Any other use is considered to be improper. Steyr Motors Betriebs GmbH accepts no liability for any dangers and damage resulting from this. The risk is born solely by the user. The installation must be made so that all applicable safety regulations for the operation of diesel engines are complied with.
- Page 25 Service personnel are persons who on the basis of their professional training by Steyr Motors Betriebs GmbH, experience and knowledge of the relevant conditions can perform the work as- signed to them using the operating, service and repair instructions and can recognise and avoid possible dangers themselves.
- Page 26 Steyr Motors dealer. Familiarize yourself with the operation of the engine and the controls. If you do not understand parts of this manual and need help, please contact your Steyr Motors dealer. Always stop engine before refuelling engine. Fill fuel tank outdoors.
- Page 27 Safety Rotating cooling system fans can cause serious injury. Stop engine and be sure fan is stopped be- fore making adjustments or connections, or cleaning near the front of the engine. nozzles can penetrate the skin causing serious injury. Avoid the hazard by relieving pressure before disconnecting lines.
- Page 28 Safety Use only approved tools Faulty or broken tools can result in serious injury. Makeshift tools and procedures can create safety hazards. Avoid bodily injury caused by slipping wrenches. When constructing tools, use proper quality materials and good workmanship. For loosening and tightening hardware, use the correct size tools.
- Page 29 Safety Personal protective equipment The personal protective equipment must comply with the national employee protection regulations. The operator must make the appropriate personal protective equipment available for any person who performs work on the engine and instruct them to wear it. Wearing of personal protective equipment is required when working to minimize the health hazards.
- Page 30 Safety Protective gloves to protect the hands against friction, graze, punctures or deep cuts as well as contact with hot surfaces. Safety goggles Fine dust mask to protect the airways against harmful dust.
- Page 31 Safety Noise Noise can lead to an increased risk of accidents if a perception of acoustic signals, warn- sure level of 85 dB(A). Safe operation of the vessel requires the driver’s full attention. No headphones for listening to radio or music during operation. Noise protection Prolonged exposure to loud noise can cause impairment or loss of hearing.
-
Page 32: Exhaust Gas
Safety Exhaust gas Risk due to exhaust gases! Engine exhaust fumes can result in sickness or death! sure adequate ventilation. Follow the law applicable to the site regulations! Only carry out welding or grinding work on the engine, if it is expressly authorized. There is... - Page 33 Safety Operating and auxiliary material Operating materials are Engine oil Fuel Coolant Auxiliary materials are those substances which are required for maintenance and repair work (e.g., glue, paste, etc.) Fuels (carcinogenic) and lubricants contain substances harmful to health and can result in severe poisoning and skin rashes or allergies.
- Page 34 Safety S 10 Electrical energy ance with electrotechnical regulations. Check cable (hoses) and screw connections regularly for leaks and externally visible dam- ages. Repair damages immediately. In addition to the general safety instructions, local safety instructions and guidelines must be observed and respected.
- Page 35 Safety S 11 Maintenance Service engine safely Loose clothing (e.g. necktie, scarf) or jewellery (e.g. necklace) can cause serious injury if these items were to get caught by moving parts. Tie long hair behind your head. Do not wear a necktie, scarf, loose clothing or necklace.
- Page 36 Safety S 12 Behaviour in case of danger and accidents Prepare for emergencies Preventive measures: Keep emergency numbers for doctors, ambu- near your telephone. Familiarise personnel with accident reporting, Keep access routes clear for rescue vehicles. Actions in case of accidents Operate the EMERGENCY STOP button on the engine (if present) immediately.
- Page 37 Safety S 13 Cleanliness at the workplace Keep workplace and Before starting a job: Clean work area and engine. Make sure you have all necessary tools to do your job. Have the right parts on hand. Read all instructions thoroughly; do not at- tempt shortcuts.
- Page 38 Safety S 14 Environmental protection Environment ticularly from incorrect disposal, if environmentally hazardous operating materials are mishandled. Observe the safety data sheet from the manu- facturer. Dispose of waste properly. Take immediate action if environmentally hazardous materials reach the environment. Inform the responsible local authorities about the damage in the case of doubt.
- Page 39 The system shows the corresponding fault messages on the display. If there are safety-relevant changes in the engine, deactivate it immediately and carry out appropriate inspections, servicing, or repair work. If safe operation is not assured, inform the Steyr Motors or an authorized Steyr Motors service partner immediately.
- Page 40 Safety eration and result in serious or fatal injuries. Maintain the engine in accordance with the maintenance schedule. For further information, refer to the operation, maintenance & warranty manual. Immediately remove any possible causes of damage, for example remove coarse con- taminants or tighten up loose screws.
- Page 41 Safety S 16 Sticker overview Description Symbol Quantity Warning sticker 700897 Hot surface Warning sticker 700898 Electricity Warning sticker 701831 Counter rotating rollers Sticker 703685 Fire, open light Sticker 701586 Common ground Sticker 705204 Engine lifting point...
-
Page 42: S 16.2 Sticker Overview 6 Cylinder Engine
Safety Fig. 1 Fig. 2... -
Page 43: S 16.3 Sticker Overview 4 Cylinder Engine
Safety Fig. 3 Fig. 4... - Page 44 Safety...
-
Page 45: General Information On Installation
General Information on Installation General information on installation Model and serial numbers The primary model and serial number is located on the engine as illustrated. Serial number 6 cylinder engine Fig. 5... -
Page 46: Serial Number 4 Cylinder Engine
General Information on Installation Serial number 4 cylinder engine Fig. 6 Serial number gear box The model and serial number of the marine gear- box is located on the marine gearbox housing as illustrated. NOTICE To obtain instructions regarding marine gear- box operation, refer to marine gearbox owners manual. - Page 47 P/N 500247 Spare parts catalogue SE164E40 P/N 500167 Optional equipment: SCC2 P/N 500156 Tool catalogue for Steyr Motors engines P/N Z001002-1 Information Further detailed service information is perma- nently available for authorized SMB-Service- Partners via log-in to the SMB extranet.
-
Page 48: Technical Data And Overview
General Information on Installation Technical data and overview Technical data 6 cylinder engine (from year of manufacture 2021) Item Unit Type SE126E32 SE156E34 SE186E38 Displacement 3200 Cylinder bore Stroke Rated power Aspiration Manifold absolute pressure at rated power mbar 2100 2445 2640 Number of cylinders... -
Page 49: Technical Data 6 Cylinder Engine
General Information on Installation Technical data 6 cylinder engine Item Unit Specification Type SE236E40 SE236S36 SE266E40 Displacement 3200 Cylinder bore Stroke Rated power Aspiration Manifold absolute pressure at rated power mbar 2825 2590 2895 Number of cylinders Numbering of cylinders at timing belt side Firing order 1 - 5 - 3 - 6 - 2 - 4... - Page 50 General Information on Installation Item Unit Specification Type SE266S36 SE286E40 SE306J38 Displacement 3200 Cylinder bore Stroke Rated power Aspiration Manifold absolute pressure at rated power mbar 2810 3080 3175 Number of cylinders Numbering of cylinders at timing belt side Firing order 1 - 5 - 3 - 6 - 2 - 4 Sense of rotation Clockwise...
-
Page 51: Overview 6 Cylinder Engine
General Information on Installation Overview 6 cylinder engine Fig. 8 Description Description Starter motor Fuses (Circuit breakers) Diagnostic outlet Thermostat housing Inversion switch Inter cooler Engine control unit (ECU) / relais Oil separator Model and serial number Connector instrument panel Turbo charger Heat exchanger Exhaust elbow... - Page 52 General Information on Installation Fig. 9 Description Description Hydraulic pump Camshaft housing cover Raw water pump Oil cooler Engine lifting eye Cooler cap Alternator Poly-v belt tensioner Engine mount Cover timing belt Oil dipstick Vibration damper...
- Page 53 General Information on Installation Fig. 10 Description Description Fuel cooler Coolant expansion tank Injection timing position sensor Hydraulic oil tank Flywheel housing Potentiometer accelerator Oil pressure sensor Zinc anode Zinc anode Raw water drain plug Charge air temperature sensor Hydraulic oil cooler Manifold absolute pressure sensor Fuel supply pressure sensor Rack position sensor...
-
Page 54: Dimensions 6 Cylinder Engine
General Information on Installation Dimensions 6 cylinder engine Fig. 11 Metric system Imperial unit Item Description [mm] [inch] Length 1090 42.9 Height 29.6 Width 25.6 Information wiring harness, etc.) are not considered. -
Page 55: Technical Data 4 Cylinder Engine (From Year Of Manufacture 2021)
General Information on Installation Technical data 4 cylinder engine (from year of manufacture 2021) Item Unit Specification Type SE144E38 SE164E40 Displacement 2133 Cylinder bore Stroke Rated power Aspiration Manifold absolute pressure at rated power mbar 2575 2815 Number of cylinders Numbering of cylinders at timing belt side Firing order... -
Page 56: Overview 4 Cylinder Engine
General Information on Installation Overview 4 cylinder engine Fig. 12 Description Description Starter motor Inversion switch Diagnostic outlet Model and serial number Engine control unit (ECU) / relais Intercooler Thermostat housing Heat exchanger Turbo charger Connector instrument panel Exhaust elbow Fuses (Circuit breakers) - Page 57 General Information on Installation Fig. 13 Description Description Hydraulic pump Cooler cap Raw water pump Engine mount Engine lifting eye Alternator Oil dipstick Poly-v belt tensioner Tandem cooler, fuel - hydraulic oil Cover timing belt Camshaft housing cover Vibration damper...
- Page 58 General Information on Installation Fig. 14 Description Description Fuel supply pressure sensor Manifold absolute pressure sensor Injection timing position sensor Rack position sensor Flywheel Intercooler Oil pressure sensor Engine coolant drain plug Zinc anode Tandem cooler, fuel - hydraulic oil Coolant expansion tank Fuel temperature sensor (as of 2021)
-
Page 59: Dimensions 4 Cylinder Engine
General Information on Installation Dimensions 4 cylinder engine Fig. 15 Metric system Imperial unit Item Description [mm] [inch] Length 31.42 Height 29.80 Width 27.68 Information wiring harness, etc.) are not considered. -
Page 60: Sensors And Actuators Overview
General Information on Installation Sensors and actuators overview Fig. 16 Item Item Item M1CU3 Lima Hybrid Rack MET/FDS Trim gear Solas VTG/SCI KL50 Panel DIAG Intake manifold Pedal Fuel supply pump FT (as of 2021) -
Page 61: Weight-Distribution Balance
General Information on Installation Weight-distribution balance It is important that the heavy components, such as fuel tanks, water tanks and batteries are installed in such a way that the best possible planing position of the boat will be kept. weight-distribution balance should always be the aim. WARNING the fuel tanks, batteries and engines are to be placed in well ventilated compartments separat-... - Page 62 General Information on Installation Overview Fig. 18...
-
Page 63: Displacement Of Water
General Information on Installation Displacement of water In order to determine the displacement of water of a boat, the weight of the boat should if possible be measured. If this is not possible and if there is also no model of the hull from the boat-builder, a computation is to be made. - Page 64 List of operating materials Mounted parts from a third party, which are not in the standard scope of delivery from Steyr Motors, have to be designed properly in dimensions and protected accordingly in order to prevent accidents. Further maintenance and inspection through authorized technicians should be secured.
- Page 65 General Information on Installation Environment All operating materials for the engine are subject to the Special Waste Act for disposal. The "Spe- cial Waste Catalogue" ÖNORM S 2100 refers to the required disposal in Austria. Respective legal local regulations are to be fol- lowed.
- Page 66 General Information on Installation SI - system The following measuring units are used: Linear Pressure and stress kilometre metre pascal millimetre kilopascal " inch N/mm newton per square millimetre Area Energy square metre joule square centimetre kilowatt hour Volume Power cubic metre kilowatt cubic centimetre...
-
Page 67: Conversion Table Si - Us
General Information on Installation Conversion table SI - US Volume Power / Energy 1 cm 0.061 1 kN 224.81 lbf 35.31 1 kW 1.36 PS/hp 1 ml 0.034 1 PS/hp 0.74 0.26 US gal Torque 1 l/min 0.26 US gal/min 1 Nm 0.74 ft.lbs. - Page 68 Master unit ill. Illustration Injection Timing Device MAssy Main Assembly max. Maximum min. Minimum Machine safety regulation (ger.: Maschinen Sicherheitsverordnung) Newton meter Top Dead Center (Power Take O Steyr Motors Betriebs GmbH Top Dead Centre Water column Wrench Size (Head width)
- Page 69 General Information on Installation Notes on safety Certain symbols or combinations of symbols may appear on your Steyr Motors marine engine or on its accessories. It is very important that you understand their meaning or pur- pose. If any symbol is not clearly understood, see your dealer.
-
Page 70: General Notes On Safety
General Information on Installation General notes on safety The general knowledge and training of the personnel and the contents of the “general regulations of safety technology” and machine safety regulations (Maschinen-Sicherheits- verordnung - MSV) are not subject of this chapter. cause injury to persons. -
Page 71: Safety In The Use Of Operating Material
General Information on Installation Safety in the use of operating material Dangerous operating material, in the sense of accident prevention, are all operating mate- corrosive. The following materials especially belong to this group: Engine oil Fuel Coolant Spirit Mineral oils Battery acid Anti-freeze agent Varnishes and diluents... - Page 72 General Information on Installation Measures in case of accidents First Aid Products Skin Eyes Swallowing Diesel fuel DO NOT VOMIT and mineral oils The biggest danger af- ter an accidental intake Lubricants is the fact that liquid Rinse thoroughly Remove clothes and could get into lungs by with water for at Anti-freeze agents...
-
Page 73: How To Select Fuel
The Steyr Motors marine engines are designed for maximum fuel economy. To maintain optimum performance use diesel fuel according to EN 590 or equivalent to meet this speci- low temperature operation. Fuel quality is an important factor in obtaining satisfactory engine performance, long en- gine life, and acceptable exhaust emission levels. - Page 74 To obtain the best engine performance and engine life, Steyr Motors turbo diesel engine vice codes and SAE viscosity numbers. If Steyr Motors high performance turbo diesel engine oil SAE 10W-40 is not available, it is required to use a reputable brand of engine oil CAUTION listed in table below.
- Page 75 Some engine oils have several ACEA / API qual- ity ratings. must be among these quality ratings. Steyr Motors Betriebs GmbH has no values regarding the oil- & fuel- consumption when an untested engine oil is in use. Fig. 23 Oil sticker...
- Page 76 Steyr Motors Betriebs GmbH only, see table below. CAUTION table below. Observe the material safety data sheet. Item 6 cylinder engine 4 cylinder engine 15.5 l 10.7 l Water/coolant ratio 50:50 %, deionised water to be used Recommended coolant SMB no. 500831, ready mixed The coolant level has to be maintained between the minimum and maximum mark on the coolant expansion reservoir.
-
Page 77: Transport And Storage
Transport and Storage Transport and storage CAUTION persons can occur in the case of improper trans- port. Proceed carefully when unloading the pack- ages and on delivery and internal transport and observe the signs and notices on the packing. Only use the attachment points provided. Do not remove packing until just before the installation. - Page 78 Transport and Storage Check the delivery immediately on receipt for completeness and transport damage. If externally detectable transport damage is found, proceed as follows: Do not accept the delivery, or only with reservation. Record the extent of transport damage in the transport documents or on the delivery note of the forwarding agent.
-
Page 79: Concerning Packing
Transport and Storage NOTICE Material damage due to incorrect transport Using an incorrect transport packaging can cause material damage at the engine. Use the original transport packaging. The individual packages have been packed to match the transport conditions that can be expected. - Page 80 Transport and Storage WARNING Improper loading can cause accidents with seri- ous injuries or death. There must be no persons in the danger zone. When lifting the engine make sure that nobody is on the engine or steps under the suspended load.
- Page 81 Parts of the engine can corrode and become nonfunctional in the case of too high relative hu- midity or air containing salt. In the case of storage for longer than 6 months, contact the nearest Steyr Motors service partner in order to ensure suitable precautions.
-
Page 82: Storage Conditions
Transport and Storage NOTICE Observe storage instructions. eration in the long term. Consult an authorized Steyr Motors Betriebs GmbH service partner to get professional 4. Check coolant (closed circuit). 5. Drain engine’s raw water system. NOTICE f the raw water is not com- pletely removed from the engine, expensive Drain engine’s raw water system completely. -
Page 83: Start-Up After Storage
Transport and Storage the long term. Your Steyr Motors Betriebs GmbH service partner will be glad to advise you or provide expert services. 1. Check condition of hoses and hose clamps. 2. Clean battery terminals. NOTICE Incorrect connection of battery terminals can... -
Page 84: Preservation
Performing the 2 Preservation delays start of warranty by a further 12 months. Steyr Motors engines can be preserved from the factory for a maximum of 36 months from date of dispatch from factory, (initial - 12 months / 1... -
Page 85: St Preservation Procedure
Transport and Storage Consumables / parts required: NOTICE For the most up to date information on con- sumables approved by SMB please refer to our website www.steyr-motors.com. Protection wax (external corrosion protec- tion) - quantity: 400 ml Anti-corrosive oil (internal corrosion protec- tion) - quantity: 300 ml Fuel additive... - Page 86 Transport and Storage 5. For storage longer than 6 months, it is recom- mended to remove raw water pump. 6. Remove raw water pump impeller. 7. Store raw water pump impeller in airtight package. Fig. 27 Remove camshaft housing cover 8.
- Page 87 Transport and Storage NOTICE Check ease of movement of the control gear rod (1) for each cylinder. Fig. 31 Mount camshaft housing cover 12. Put camshaft housing cover onto camshaft housing. 13. Tighten with 14 hexagon screws (WS 10) with a torque of Fig.
- Page 88 Transport and Storage (2) … Fig. 35 18. … to separate small fuel canister (3). Fig. 36 19. Run engine at idle or maximum 1500 rpm (without load) until an operating temperature NOTICE steps. 20. Remove fuel return line and fuel supply line. Fig.
- Page 89 Transport and Storage 23. Spray anti-corrosive oil into air intake and exhaust side to preserve the turbo charger. Fig. 38 24. Close (seal) all openings [oil separator (as shown), intake, exhaust, fuel lines, turbo charger] with protection caps. 25. Coat unpainted parts of engine assembly with protection wax.
- Page 90 Transport and Storage 28. The engine is now preserved for one more year. This procedure is repeatable up to a maxi- mum of two times, giving a shelf life of up to three years. Fig. 41 NOTICE When commissioning or running an engine that has been preserved as stated above the engine utes.
-
Page 91: Nd Preservation
Transport and Storage Preservation described in service manual. fresh coolant. Fig. 43 Follow the steps 1st Preservation procedure, refer to “4.5.1.1 1st Preservation procedure”. -
Page 92: Preservation
Transport and Storage NOTICE See maintenance and service parts list for model http://www.steyr-motors.com/download Steyr Motors engine oil Sticker NOTICE Register preservation with commissioning e-mail commissioning@steyr-motors.com Fig. 44 NOTICE See maintenance and service parts list for model http://www.steyr-motors.com/download Steyr Motors engine oil... -
Page 93: Preservation Procedure
Transport and Storage Install engine as per instructions in installation 1. Connect instrument panel. 2. Remove protection caps. NOTICE 4. Fuel system connected and primed with fresh clean diesel. 5. Connect battery cable. 6. Reinstall raw water pump impeller in raw water pump. - Page 94 Transport and Storage 9. Reinstall poly-v belt. Fig. 47 10. Connect fuel return line to separate small fuel canister. 11. Turn ignition “On” 10 seconds three times. Al- 12. Reconnect fuel return line to fuel tank return. 13. Run engine at idle or maximum 1500 rpm to obtain operating temperature.
-
Page 95: Quality Directives For Assembly
Your Steyr Motors diesel engine with direct fuel injection has been designed for high output. Only use genuine - Steyr Motors therefore, should insist on the known quality of genuine - Steyr Motors spare parts and should never use parts of unknown quality. - Page 96 Quality Directives for Assembly Irrespective of the individual repair steps and legal regulations, the workshop should meet the following requirements: Clean, dry and dust-free ambience / no metal debree Lifting device (crane) with a carrying capacity of at least 5 000 N Cleaning accommodation (washbasin) for contaminated components Tools pertaining to commercial customs Proper testing and measuring appliances...
-
Page 97: Plug Connections For Steel Tube
Quality Directives for Assembly For tubes with an outside diameter up to 10 mm it is recommended to screw the relevant sockets of the plug connections into the respective devices, and to carry out assembly of the piping on the installation site. The prepared end of tube with union nut and cutting ring is plugged directly into the threaded socket and the union nut is done up by hand to... -
Page 98: Plug Connection For Plastic Tube
Quality Directives for Assembly For tubes with an outside diameter up to 10 mm it is recommended to screw the relevant sockets of the plug connections into the respective devices, and to carry out assembly of the piping on the installation site. The end of tube with socket and union nut is done up by hand to the tangible stop on the cutting ring. -
Page 99: Sealing Of Screwed Pipe Joints
Quality Directives for Assembly Before assembly of the plug connections, thinly coat the outer side of the cutting ring with a "seal- ing agent for screwings" (1). For screwed pipe joints of hydraulic piping, coat the point of contact tube: screwed pipe joint with "standard grease"... -
Page 100: Pipe Relaying
Quality Directives for Assembly Clamping ring connections for plastic tubes: Tube Torque 30 - 50 Nm Fig. 55 Screwed pipe-joints in aluminium housings: Thread Torque M10 x 1 20 Nm M12 x 1.5 26 Nm M14 x 1.5 28 Nm M16 x 1.5 35 Nm M18 x 1.5... - Page 101 Quality Directives for Assembly Indication for correctly connected mating connectors is an audible click! Fig. 57...
- Page 102 Quality Directives for Assembly Fig. 58...
- Page 103 Quality Directives for Assembly Fig. 59...
-
Page 104: Tightening Torques For Electrical Connections
Quality Directives for Assembly Thread Torque 6 Nm 8 Nm 11 Nm 16 Nm... - Page 105 Quality Directives for Assembly The values in this table refer to industrial standards and are to be applied in case of no For studs, the tightening torques are to be reduced by 50 %. µ total *) µ total µ total *) µ...
- Page 106 Quality Directives for Assembly To detect and locate surface cracks, nondestructive testing based on the colour penetra- tion testing process is recommended. In this case, the work piece is sprayed or coated with a penetrating agent, and after drying a developer is sprayed on. After a development period of approx. 10 min., defects on the work piece appear as points or lines.
-
Page 107: General Directions For Use Of Anaerobic Sealing Materials
Quality Directives for Assembly Silicon sealing materials From the tube or cartridge, the product is applied in a straight line on the cleaned surface. Residues of sealing material are removed by means of cleaning agent. Anaerobic sealing materials synthetic built up by molecular chains, begins through exclusion of atmospheric oxygen and through metal contact. - Page 108 Quality Directives for Assembly Designation: BM Fixing medium tight Designation: BF Fixing tight Application: Joint connections, sleeves, gear wheels, pulleys, bearings etc. Joining procedure For joining connections, both joining parts are to be wetted. Wetting should completely ing. No strength may be exerted to the connection until sturdiness is reached (for duration see table 1).
-
Page 109: Variants Engine Propulsion
Variants Engine - Propulsion Variants engine propulsion Equipment with side mounted raw water pump with side mounted raw water pump, power steering pump and front mounted auxiliary drive-PTO Fig. 60 Fig. 61 Fig. 62 707519_1.1_IM... -
Page 110: Lifeboat Engine
Variants Engine - Propulsion Transmission Fig. 63 Equipment Bobtail “B” Fig. 64 Direct gearbox Fig. 65 .707519_1.1_IM... -
Page 111: Jet Drive
Variants Engine - Propulsion A-down angle gear box Fig. 66 Fig. 67 Fig. 68 707519_1.1_IM... -
Page 112: Stern Drive
Variants Engine - Propulsion TYPE Alamarin Hamilton Castoldi Fig. 69 Fig. 70 TYPE Mercury Bravo II & III Volvo DP 290 Stern Power Drive Volvo DP 290 ZF Hydraulic Pump Volvo SX - Drive King Cobra Drive Fig. 71 .707519_1.1_IM... -
Page 113: Bobtail - Version
Variants Engine - Propulsion Equipment with side mounted raw water pump with side mounted raw water pump, power steering pump and front mounted auxiliary drive-PTO Fig. 72 Fig. 73 Fig. 74 707519_1.1_IM... -
Page 114: Lifeboat Engine
Variants Engine - Propulsion Transmission Fig. 75 Equipment Bobtail “B” Fig. 76 Direct gearbox Fig. 77 .707519_1.1_IM... -
Page 115: Jet Drive
Variants Engine - Propulsion A-down angle gear box Fig. 78 Fig. 79 Fig. 80 707519_1.1_IM... -
Page 116: Stern Drive
Variants Engine - Propulsion TYPE Alamarin Hamilton Castoldi Fig. 81 Fig. 82 TYPE Mercury Bravo II & III Volvo DP 290 Stern Power Drive Volvo DP 290 ZF Hydraulic Pump Volvo SX - Drive King Cobra Drive Fig. 83 .707519_1.1_IM... - Page 117 Variants Engine - Propulsion Following parts are exhaust gas relevant components The part numbers can be found in the respective spare parts catalogue. Cylinder block Camshaft Intercooler Turbocharger Piston Unit injector Exhaust manifold Fuel supply pump Engine speed / timing sensor Coolant temperature sensor Intake pressure sensor Intake Manifold temperature sensor...
- Page 118 Variants Engine - Propulsion .707519_1.1_IM...
-
Page 119: Engine Installation
Engine Installation Engine installation After pre-planning, assembly of the engine usually begins with the engine base. Then the stem bearings, if available, the step- or thrust bearing and the propeller shaft are mounted. After that, the fuel tanks, the water tanks with control device and the battery box are in- stalled. -
Page 120: Coupling
Engine Installation For power transmission from the engine to the gear we recommend a turn-elastic coupling. In all other cases of engine and gear suspension, a turn and radial elastic or an articu- lated coupling with torsion spring plate is required between engine and gear. Coupling size depends on the maximum engine torque to be transmitted, the torque peaks due to the degree of irregularity of the engine, and the alternating moments of torsional vibration at critical speeds of the boat. -
Page 121: Universal Joint Shafts
Engine Installation Principles: A universal joint produces a more or less strong irregularity on the driving axle, depending joint, under the following conditions: The two forks of the intermediate part must be coplanar. one; both joints must be coplanar. Fig. 84 Description Description Forks of intermediate shaft... -
Page 122: Additional Cooling Circuit On Engine
Engine Installation Slight deviations from these requirements are admissible under certain conditions; to what shaft will be more or less accelerated or retarded with every rotation. This causes a stimu- lation of oscillation which is to be considered for the location of the universal-joint shaft as e.g. - Page 123 Engine Installation The engine compartment is to be designed in such a way that maintenance work will not be impaired by bottom plates or other equipment. Compare these requirements to the maintenance chart in the operating manual. Also take care that there is enough space for lifting and lowering the engine.
- Page 124 Engine Installation angle A, see table. The engine must not be inclined downward in direction of the heat exchanger, since such Such an installation with inverted engine occurs with a miter gear. During course, A Maximum engine inclination for assembly: SE-Series in °...
- Page 125 Engine Installation 6 cylinder engine Description Lifting eyes Eyebolt can be removed after installing the engine. Fig. 89 4 cylinder engine Description Lifting eyes Fig. 90 NOTICE The oil pan and other parts could be damaged. Jack up the engine on the engine bearers so that its lower part is trailing, or keep the engine in the transport box until it is lifted into the boat.
- Page 126 Engine Installation When preparing the engine base, make sure that the upper contact surfaces of the bearers are parallel to the centre line of the propeller shafts and are not swung. For assistance during assembly and checking of the engine base, a short traversing slide with the same (1/12"...
- Page 127 Engine Installation Max. admissible radial stop: 0.05 mm Fig. 92 the same conicity as for the propeller. Thus the shaft will be equal on both ends and can, therefore, be turned in case of being worn out in the stem bearing.
- Page 128 Engine Installation thus reducing the noise conveyed to the hull. This engine suspension may also absorb the thrust and shearing forces of the propeller. Description Position of adjustment nut (~ 5 mm) Adjustment space (± 5 mm) Spacer plate (if required) Fig.
- Page 129 Engine Installation The settings of the left and right height adjusters should be equal. Between the front and beginning the alignment, the engine should rest on the mounts for about 48 hours. Proper setting of the engine mounts can be done as follows: Roughly align the engine with the propeller shaft on the mounts by means of adjusting 1.
- Page 130 Engine Installation If the distance between the supports (A in Fig. 95 Fig. 96) exceeds 6 ½ ft (2 m), a step bearing is to be mounted. The correct distance between the step bearing and the engine is of utmost importance, which requires a computation of vibrations. Examples: Elastic engine suspension, elastic stem tube and 1.
- Page 131 Engine Installation preparation works done, the engine and the reversing gear can be mounted. actly aligned to the propeller shaft. Then the couplings are mounted, and the engines are aligned towards the reversing gear. First adjustment of the engine on the boat can be done either on land or on the seas. Be- When mounting a marine reversing gear, it is recommended to check the parallelism of the and be well supported so that the clearance in the stem tube is uniformly distributed (ex- Fig.
- Page 132 Engine Installation versing gear bearers and the engine rests. Measure the distances and prepare steel disks to be ground to the dimensions measured. Make all bores for the bearers, and screw on the engine and the reversing gear. Take care that all setscrews for the high position are unscrewed so that the bearers do not rest on the screws but on the supporting disks.
- Page 133 Engine Installation To choose the right engine, reversing gear, and propeller components with regard to the respective load ratio, follow the power and speed recommendations of the engine. The recommendations for various engines are found in the product information "marine en- permit a dismantling of the reversing gear or the coupling, a sternward displacement of the propeller shaft of at least 8"...
-
Page 134: Dimensions
Engine Installation responsible for transformation of engine energy into movement. Sizing and selection of the propeller have a major impact in determining drive quality and fuel consumption. Voluminous books have been written about right sizing and computation of a propeller. For this reason, the following information shall serve for better understanding of the complexity and impart basic knowledge. -
Page 135: Propeller Pitch
Engine Installation The pitch is the theoretical distance the boat runs at one rotation of the propeller, which is being determined by the speed of the boat and assuming no propeller slip. Every propeller rotating in water will have a slip. Thus the advance of the boat will be approx. 60 to 75 % per rotation of the propeller. -
Page 136: Number Of Blades
Engine Installation The number of blades is determined by the speed of the boat, the number of rotations of matter of experience. In general, for standard boats up to a length of approx. 70 ft (20 m), with an engine speed of more than 800 rpm., propellers with more than three blades are being used. -
Page 137: Space Between Propeller And Boat
Engine Installation The maximum propeller diameter results from the but even for a glider the conditions are similar. The most important size A, the space between propeller and hull, should be at least 2 " (50 mm) resp. 10 % of the propeller diameter (noise, mali- cious vibrations). - Page 138 Engine Installation 3-blade propeller for commercial use Fig. 102 3-blade propeller to be applied in regions with strong alga and algae vegetation Fig. 103 2-blade propeller to be applied on sailing boats Fig. 104 2-blade folding propeller to be applied on sailing boats Fig.
-
Page 139: Cavitation
Engine Installation Propellers which have not been computed correctly (e.g. a propeller with a too large pitch) may cause cavitation (formation of steam bubbles). Cavitation may damage the propeller and occurs as the reduction of pressure on the suction side of the propeller is too great. to account for the traction and shearing forces of the propeller shafts. - Page 140 Engine Installation...
-
Page 141: Cooling System
Cooling System Cooling system Steyr Motors marine engines are equipped with a dual cooling circuit. The most important advantage of this system is that the engine block is not in contact with raw water. The heat is transferred to the raw water by heat exchangers. - Page 142 Cooling System Information On motor boat installation the grid of the water pick up must be aligned to the front (driving di- rection), therewith on increasing boat speed the water will be pressed into the external cooling system. On sailing boat installation the grid of the water pick up must be aligned to the rear (aft), there- with water can´t be pressed into the external cooling system when the boat is under sailing...
- Page 143 Cooling System During coasting trade, on the pier etc., it cannot be avoided that small particles of mud, sand and other dirt enter into the water inlet. a bulkhead. In case of severe contaminations, it may be nec- 160 l/min. Fig.
- Page 144 Cooling System All Steyr Motors marine engines are equipped with a water cooled exhaust gas elbow, as pipe for cooling of the exhaust gases. When designing the exhaust elbow particular importance was given to a relatively high exhaust duct in order to avoid the entering of back wash. In the adjoining exhaust pipe a (boat loaded) a high riser exhaust elbow (optional) is to be installed.
-
Page 145: Standard Gear Box Cooling From Steyr Motors
Installation of a tandem-/triple-cooler (see schematic raw water circuit 2181159-0) on a Steyr Motors engine is capable of providing up to a 3 % gain in engine power. Steyr Motors provides oil cooling connections for corresponding gear box models as men- tioned in the spare parts catalogue of the selected engine model. - Page 146 Cooling System Fig. 111...
- Page 147 Cooling System Fig. 112 If raw water is picked up by jet drive, the engine´s raw water pump is not required. Mount raw water supply over jet to raw water circuit of engine. If raw water pump additionally used: Ensure impeller is dismounted. Keep recommended raw water supply (>140 l/min) due to power loss over raw water pump.
- Page 148 Cooling System Steyr Motors marine engines can also be used with a keel cooling system (Keel cooler and external parts are not included). A set with the required parts (e. g. 6 cylinder SMB no. MS1111050) related to the engine can be ordered from Steyr Motors.
- Page 149 Cooling System Fig. 113 Description Description Pipe engine coolant 50-8 Pipe engine coolant 32-8 Pipe engine coolant 32-16 Bracket, keel cooling outlet Bracket, keel cooling inlet Moulded hose, heat exchanger pipe Suction line HT-circuit Ø 16 mm Suction line LT-circuit Ø 16 mm High temperature circuit Low temperature circuit...
-
Page 150: Keel Cooling Dimensioning
Cooling System For dimensioning of the keel coolers the following table can be used. This information can also be sent to the keel cooler supplier. For further information please contact a Steyr Mo- tors service agent. NOTE: For maintenance and mounting position for keel coolers, consider the manufacturer`s instructions. -
Page 151: Fuel System
When planning the assembly, always try to store the tanks in a separate area in order to tion. Steyr Motors system before the fuel supply pump, as drops of water in the fuel are ideal transporters of dirt and rust through narrow pipes. One drop of water may cause a locking of the fuel sup- ply pump, thus cutting the fuel supply. - Page 152 Fuel System below. 6 cylinder engine 4 cylinder engine Flow rate 330 l/h 93 % (according to ISO 4020, 10 % ( according to ISO TR13353:1994 Max. suction pressure 0.5 bar 50 mbar 200 mbar Overview Fig. 114 Description Description Feed line Fuel supply pump Fuel return...
- Page 153 Fuel System If possible, arrange the fuel tanks at engine level or higher. In case of a lower arrangement, max. suction height of the feed pump is to be considered, which is 19.7 " (0.5 m) for all kinds of engines. Please consider that the suction head is calculated from the lower end of the suction pipe, i.e.
- Page 154 Fuel System Fig. 115 Description Description Fuel stop cock Brit. gal/h (> 330 l/h) * see chapter Fuel pipe, inside diameter 0.63 " Inspection cover (16 mm) for a length of 20 ft (6 m) Filler socket cover Lead-in sleeve made of fuel-resist- ant rubber, with drain possibility Air-vent pipe, diameter at least Guide bulkhead...
- Page 155 Fuel System below may be chosen. Connect the tanks on top and on bottom with pipe lines equipped with stop cocks. A minimum inside diameter of the lower connecting pipe should be ¾ " (19 mm) in order to other. The fuel pipe from the engine has to depart from the lower connecting pipe of the tank installed before the feed pump on the injection pump.
- Page 156 The maximum permissible suction pressure of 250 – 300 mbar should be not exceeded at the connection of the fuel supply pump! The amount of suction pressure depends on Steyr Motors recommends following pipe or hose dimensions on the suction side: Inner diameter of the fuel suction pipe...
- Page 157 Fuel System Fuel pipe with brazed tapered piece Fig. 117 Flanged fuel pipe Fig. 118 Fasten the fuel pipes to planks or rigid supports to avoid vibrations or pipe fracture.
- Page 158 Fuel System...
-
Page 159: Exhaust System
Exhaust System Exhaust system Install the exhaust system using as few bends as possible. Maximize the curve radius of sure within admissible values. Dry exhaust pipe, insulated The dry exhaust pipe releases large amounts of heat into the engine compartment thus requiring good insulation. - Page 160 Exhaust System Scheme of a dry exhaust pipe for 2 engines Fig. 119...
- Page 161 Exhaust System All rubber hoses are to be connected at each end by 2 corrosion-resistant hose clamps. Fig. 120 Description Description Wet exhaust elbow Exhaust rubber hose Exhaust pipe, bend over water line Board lead-in with rubber ex- Bore diameter in boat transom pansion piece sealing the bore 5"...
-
Page 162: Exhaust For Inboard Engines Above Water Line
Exhaust System CAUTION When laying the exhaust pipe through bulkheads and similar, make sure that the pipe does not touch material which transmits vibrations onto the hull, thus causing resonance noise. In the case of lead-in pipes, take special care that the exhaust pipe will not cause a combustible heat- ing of the surrounding material. -
Page 163: Exhaust For Inboard Engines Below Water Line
Exhaust System Fig. 122 Description Description Air vent Exhaust between water lock / muf- has to compensate water amount of hose between exhaust elbow and air vent. to compensate water - amount from party. party. above waterline or lower Installation of air vent and exhaust system must be designed by the installing party so stop. - Page 164 Water drain party. party. - amount from water separator to Exhaust hose between water lock / Steyr Motors exhaust party. elbow has to compensate water amount of hose between exhaust elbow and air vent. above waterline or lower...
-
Page 165: Exhaust For Stern Drive Engines
Exhaust System Precondition for a correct installation is compliance with the min. height (A) of 14 " required, launch the boat with its real load resp. load distribution (weight of drive unit plus working load) in order to determine the water line. Fig. -
Page 166: Wet Exhaust Pipe
Exhaust System Overview Fig. 125 Flanges A (SMB no. 2179007-1) Engine SE126E32 SE156E34 SE186E38 SE236E40 Fig. 126 Exhaust pipe inner & outer diameter by conven- tional wet exhaust elbow Engine SE126E32 SE156E34 SE186E38 SE236E40 Fig. 127... - Page 167 Exhaust System Flanges B (SMB no. 2179007-2) Engine SE236S36 SE266E40 SE266S36 SE286E40 SE306J38 SE144E38 SE164E40 Fig. 128 Exhaust pipe inner & outer diameter by conven- tional wet exhaust elbow Engine SE236S36 SE266E40 SE266S36 SE286E40 SE306J38 SE144E38 SE164E40 Fig. 129...
- Page 168 Engine SE236S36 SE266E40 SE266S36 SE286E40 SE306J38 Fig. 131 inch Wet exhaust pipe (industrial rubber hose)* 3.5" Outside diameter 4.0" * Outside diameter valid for all exhaust elbows and high riser ex- haust elbows supplied from Steyr Motors.
-
Page 169: Measuring Of Back Pressure
Measuring is then to be done with nominal capacity of the engine. The max. admissible exhaust back pressure for Steyr Motors marine engines is 1000 mm Exhaust back pressure:... - Page 170 Exhaust System...
-
Page 171: Air Intake And Ventilation
Air intake and Ventilation Air intake and ventilation ones are air pressure, air temperature and exhaust gas counterpressure. In case of large deviations from the standard values the diesel engine lose power. To guarantee proper function and full power of the engine, it is vital that the the engine com- functionality. - Page 172 Air intake and Ventilation It is of great advantage to consider the supply- and exhaust air ducts during construction and to include them in the hull or superstructure, thus avoiding exposed pipes. ume from wherever possible. If the dimensions of the engine compartment inlet and/or outlet air ducts are too small, the engine will draw in both the fresh supply air as well as the hot engine compartment exhaust air.
- Page 173 Air intake and Ventilation Min. requirement for proper ventilation and air supply for "pleasure" boats are 4 pipes: Two pipes for engine supply air One pipe for ventilation of engine compartment exhaust air of engine compartment. Air quantity The engine needs a certain quantity of air for the combustion process, which requires a This area may be calculated with the following formula: For example: Cross section...
- Page 174 Air intake and Ventilation Ventilation The supply and exhaust air pipe should be of the same size, to achieve a low velocity of Pipe cross section for supply and exhaust air is computed with the following formula: For example: Fan-Blast tures low, a suction fan is to be installed in the exhaust air duct.
- Page 175 Air intake and Ventilation Example for air inlet and ventilation of engine on sport boats and similar applications. Fig. 132 Description Description Air pipes (dimensions: see chart) surface: see chart) Sound absorber (see section "insu- Sound-absorbing engine com- lation"). In the sound absorber no partment (see section "insula- restriction may occur.
- Page 176 Air intake and Ventilation...
-
Page 177: External Consumers
External Consumers External consumers Steyr Motors marine engines optionally may be equipped with an auxiliary propulsion at Max. decline of output of the auxiliary propulsion is limited however (see chart). Outside diameter of belt Engine Propulsion, max. output pulley on crankshaft 6 cylinder engine 6.5"... - Page 178 External Consumers...
-
Page 179: Safety Instructions
Safety Instructions Safety instructions All rotating shafts and belt drives being exposed are to be provided with safety covers. Their construction and size must prevent accidents, e.g. if somebody slips and, in falling, comes close to a source of danger. To permit an inspection of the engine control, its protection is to be constructed as net or grate. - Page 180 Safety Instructions...
-
Page 181: Bilge Pumps
Bilge Pumps Bilge pumps To achieve max. Lenz power, pumps and piping are to be chosen as follows. Length of boat Hand bilge Power-driven Nominal width of bilge pipes pumps volume bilge pumps main bilge/branch bilge pipe (mm) < 8 <... - Page 182 Bilge Pumps...
-
Page 183: Cabin Heating
Cabin Heating Cabin heating Heating for the ship's cabin or for passenger rooms may be connected to a separate gen- erating set run by petroleum, diesel, liquid gas etc. For large heating installations, separate heating is preferred to prevent the operating tem- perature of the engine from running too low. - Page 184 Cabin Heating When the heating demand is too great and/or heating is initiated before the engine reach- es operating temperature, severe damage to the engine may result. It is recommended to install, in the feed line to the radiator, a thermostat with the same or also be required.
-
Page 185: Noise Attenuation
Noise Attenuation Noise attenuation In most cases a low noise level is required, which implies an insulation of the machine unit. The disturbing engine noise is transmitted through the hull (i.e. engine base and body) and by the air. reversing gear are to be provided with elastic suspensions and an elastic propeller shaft coupling (see chapter 3) which results in a reduction of the hull-latent noise. - Page 186 Noise Attenuation Equip the unit with noise insulation to keep the sound level as low as possible. Provide noise catchers in the engine compartment. Various type are available. If a water drain is not possible, the air tubes may be bent like a gooseneck (Fig.
- Page 187 Noise Attenuation Fig. 142 ent types and thicknesses. dismantling.
- Page 188 Noise Attenuation On small commodity boats and normally on all sport boats, the engine and reversing gear are provided with an elastic suspension (see chapter 7, Engine installation). However, in the case of an elastic stem tube or stem tube bushing, no elastic shaft coupling may be mounted.
-
Page 189: Control Station
Control Station Control station The design of the control station should enable a functional placement of operating ele- ments, boat control, instruments, navigation equipment and alarm system. That applies for both single and twin control stations. Fig. 143 Description Description Instruments - top control station Steering - top control station Control lever - top control station... - Page 190 Control Station Control stations should also provide a good air circulation to the rear of the instruments as shown. Negative example – no air circulation at the rear of the instruments. Item Description Solid door No air circulation Console prime for fogging Fig.
-
Page 191: Mechanical Control
Control Station For Steyr Motors marine engines, a mechanically operated control is provided. However, other control systems may be used as well. With mechanical control, movement of the lever is transmitted through a steel cable in a plastic sleeve to the engine and reversing gear. This ca- ble is called a pressure and tension cable. -
Page 192: Electronic Control
Control Station With electronic control, movements of the control lever are converted into electric signals. In this case, the microprocessor unit plays a central role. It is attached as close as pos- sible to the engine and controls via short tension and pressure cables the engine and the reversing gear. - Page 193 Control Station Scheme of an installation with one engine and one control station: (1) One single-lever control (2) Microprocessor unit (3) Tension and pressure cable accelerator (4) Tension and pressure cable reversing gear Fig. 148 Scheme of an installation with one engine and two control stations: (1) Two single-lever controls (2) Microprocessor unit...
-
Page 194: Kinds Of Control Levers
Control Station Speed and control levers should be of good quality to ensure a reliable control of the boat. For hydraulic reversing gears we recommend the combined lever control for single and twin engines. This control is designed in such a way that control of engine speed and hy- draulically actuated reversing gear can be done by one single lever. - Page 195 Control Station Cables provided for the control devices described are designed for function in two operat- not be shortened or extended respectively connected piece by piece. to be considered and/or measured exactly when planning the cable run. The cables must be laid unrestricted and only be clipped at the spots provided.
- Page 196 Control Station done via an electrically controlled servo unit or a mechanical shift unit. Manoeuvring and control apparatus are installed twice. Conversion of the control levers between the individ- ual control stations may be done automatically if an omnibus implement is provided. The speed cables of the two controls are connected to the actuator solenoid unit.
-
Page 197: Scheme For Instrument Panel And Scc2
Control Station Fig. 154 Description Description Standard equipment instrument panel SCC2 with cable 7 m NOTICE Oil pressure sender for twin installation must be changed. -
Page 198: Scheme For Instrument Panel And Scc2 With Gps
Control Station Fig. 155 Description Description Standard equipment instrument panel SCC2 with cable 7 m... -
Page 199: Cut Out Drawing For Instrument Panel (Standard) / Instrument Panel Solas
Control Station CAUTION These electronic mounting templates are pro- vided for reference purposes only. Every Steyr Motors panel and SCC includes a full-scale cutting template in the box. When using electronic templates for planning, be certain to compare the printed measurements on the template against an actual ruler or other measuring device. - Page 200 Control Station Fig. 156...
- Page 201 Control Station (SOLAS) Fig. 157...
-
Page 202: Cut Out Drawing For Scc Key Ignition Panel/Push Button Ignition Panel (Solas) 201 17.7.3 Cut Out Drawing For Scc2
Control Station Fig. 158... -
Page 203: Electrical Equipment
Electrical Equipment Electrical equipment Cable laying is to be planned and carried out precisely and carefully. Cables must be ap- proved for marine operation. Pull the cables through appropriate protective sleeves to be must not be exposed to mechanical wear and mechanical abrasion. If necessary, pull the cables through protection tubes. - Page 204 Electrical Equipment Fig. 159 Description Description Air tube, at least 25 mm (1 "), Cover, same material as box conducted outwards Studs battery by securing the nuts Box made of steel plate (min. Clamps with tightening screws 3 mm) acid-proof (use pole grease) Rubber sleeves for cable passage 6 cylinder engine...
- Page 205 Electrical Equipment Determine the length of the positive cable from the positive pole (+) of the battery to con- nection no. 30 at the starter. Example (4 cylinder engine): Positive cable 3.0 m Ground cable 2.0 m Total length For ground connection, determine corresponding cross-sections as per chart. For 6 cylinder engines only Starter motor: 3 kW - 12 V Battery size: 112 AH...
- Page 206 Electrical Equipment Before connecting an additional current utilization device, such as lighting, radio, echo- Example: When using a 50 A dynamo you may connect current utilization devices consum- ing all together 50 A simultaneously. In case of a too small capacity of the dynamo a larger or an additional dynamo may be installed.
- Page 207 Electrical Equipment Example: A current-utilization device (24 V) of 300 Watt is to be installed. In this case dis- tance from the current utilization device to the battery is four meters. Required cable length is 8 meters, since cable length back and forth is to considered. In the table a straight line is drawn from 8 in the length (m) column sloping downwards to 300 in the power column.
- Page 208 Electrical Equipment...
-
Page 209: Commissioning Of Installation
To enable a boat builder or installer to perform the necessary propeller selection test, Steyr Motors permits operating a new engine for a limited time of 5 to 10 min- utes during the mentioned engine break-in procedure to the maximum power at... - Page 210 Commissioning of Installation...
-
Page 211: Appendix
Appendix Appendix For drill templates see http://www.steyr-motors.com In case of a missing template please e-mail to technical@steyr-motors.com. - Page 212 Appendix Fig. 162 Manufacturer of boat: ...................... Boat type: ...................... Own weight: W min ........ Total weight: W max ........ Over-all length: ........ Length of boat, over water line: ........ Load centre of gravity, endwise (from transom): ........ Over-all width of boat: B max ........
-
Page 213: Engine Base Must
Appendix Engine base must Engine mounts Distribute the engine weight, (B) Position of adjustment nut (~ 5 mm) (C) Adjustment space (± 5 mm) (D) Spacer plate (if required) Fig. 163 Fig. 164 Refer to the installation instructions Let engine sit for 48 hours then check for mounting distances alignment, tighten center nut to 120 Nm Engine mounts... -
Page 214: Lifting Points
Appendix Lifting points 6 cylinder engine Never put the engine directly on the Fig. 166 4 cylinder engine Never put the engine directly on the Fig. 167 Space for maintenance Fig. 168 min. 200 mm min. 150 mm min. 20 mm min. -
Page 215: Engine Angle
Appendix Engine angle Fig. 169 The engine room must have enough venti- lation with inlet and outlet vents; Pipe cross section (for supply & exhaust Example: 164.6 mm diameter Inlet and outlet must be at front of engine to allow correct circulation of air over to alter- nator and in engine room box! Fig. -
Page 216: Raw Water
Appendix Raw water Fig. 171 Fig. 172 Full mark system or glass top and a Clean fuel Fuel supply line: Fuel return line: < 6 m Minimum 12 mm inside diameter Minimum 8 mm inside diameter > 6 m Minimum 16 mm inside diameter (1) Feed line (6) Water separator (3) Fuel supply pump... -
Page 217: Exhaust System
(1) Exhaust gas elbow (2) Connecting piece Fig. 175 Fig. 176 Back pressure: Steyr Motors Exhaust elbow outside diameter The allowed back pressure is 90 mm 102 mm 150 mbar + 0 / - 50 mbar 3.5"... -
Page 218: Inboard Installation
Appendix Inboard installation The exhaust outlet in the hull should be The highest part of the exhaust system Fig. 177 Fig. 178... -
Page 219: Stern Drive Installation
Appendix Fig. 179 Stern drive installation The highest part of the exhaust system Fig. 180... -
Page 220: Propeller Selection
Appendix Propeller selection (W) Output power Propped speed range “B” (X) Full load Engine model Rated Range (Y) Speed range of tolerance (Z) RPM SE126E32 3200 rpm +50 / -650 rpm SE156E34 3400 rpm +150 / -600 rpm SE186E38 3800 rpm +50 / -500 rpm SE236E40 4000 rpm +100 / -100 rpm SE236S36 3600 rpm... -
Page 221: Operating And Auxiliary Materials
Operating and auxiliary materials Operating and auxiliary materials Order Short text SMO item Alternative item number 10084 Hot bearing grease Staburags NBU4 11104 Engine oil Mobil Delvac 1350 12222 Copper grease Staloc® copper paste 12385 Ultra Clean Ultra Clean Techn. quick detergent 50475 Preservation oil TITAN EM 2020 DEUTZ... - Page 222 Operating and auxiliary materials THIS PAGE IS INTENTIONALLY BLANK...
- Page 224 Steyr Motors Betriebs GmbH Im Stadtgut B1 | A-4407 Steyr-Gleink | Austria www.steyr-motors.com...
Need help?
Do you have a question about the Marine SE Series and is the answer not in the manual?
Questions and answers