Grand master clock support using external gnss receiver (31 pages)
Summary of Contents for Juniper geode GNS3M
Page 2
Microsoft Corporation in the United States and/or other countries. The Bluetooth® word mark is owned by the Bluetooth SIG, Inc. Any use of such marks by Juniper Systems, Inc. is under license. Disclaimer The names of other companies and products mentioned herein may be the trademarks of their respective owners.
2.3.4 Update Interval Rate..............21 2.4 Operating Systems ................21 2.5 Geode Connect..................22 2.6 Third-Party Applications ..............22 2.7 Juniper Rugged™................. 23 2.8 Bluetooth® Wireless Technology..........23 2.9 Antennas..................... 23 2.10 
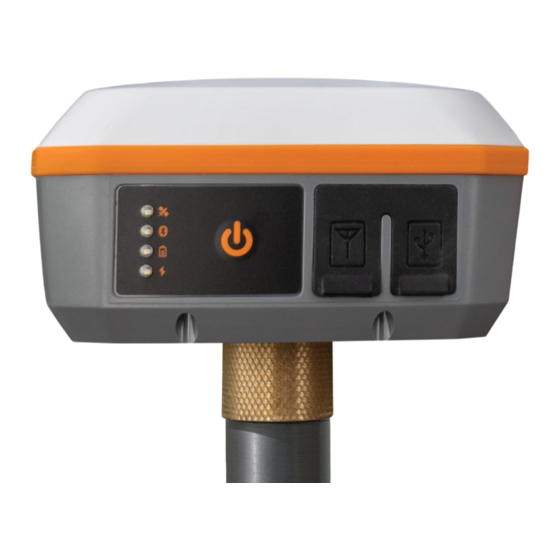
LED Status Indicators............... 23 2.11 Power Supply and Battery ............. 24 2.12 Connector Ports ...................
Page 4
5.5.7 About ....................85 6 Set Up Geode Connect for Android 6.1 Download and Install ................. 88 6.1.1 Google Play..................88 6.1.2 Juniper Systems Website ............. 88 6.2 Connect with the Geode..............88 7 Learn Geode Connect for Android 7.1 Home ......................92 7.2 Skyplot ......................
Page 5
8 Set Up Geode Connect for Windows 8.1 Download and Install ............... 148 8.2 Connect with the Geode............... 148 8.2.1 Pair via Bluetooth..............148 9 Learn Geode Connect for Windows 9.1 Home ......................156 9.2 Skyplot ......................158 9.3 Map ....................... 160 9.3.1 Capture, View, and Compare Waypoints....
Page 6
12.2.1 FCC: United States ..............224 12.2.2 Industry Canada ..............225 12.2.3 Radio Frequency Safety ............ 225 12.2.4 CE Marking (European Union) ........225 12.2.5 Declaration of Conformity ..........225 13 Appendix D: GNS3 Specifications ..........227...
Introduction The Juniper Systems Geode GNS3 GNSS Receiver is a precision GNSS receiver. With the Geode, you can collect real-time, cen timeter, decimeter, sub-foot, or sub-meter, GNSS data. It works with a wide range of iPhone®, iPad®, Android®, and Windows®...
Features that are specific to the Geode GNS3 are identified throughout this manual. For information about the Geode and Geode GNS2, see the Geode Owner’s Manual. Juniper Systems offers two GNS3 models: GNS3M and GNS3S. GNS3M includes a multi-frequency antenna (L1, L2, L5) and ▪...
Geode Features The Geode is a real-time, precision GNSS receiver. This means the Geode, depending on the corrections used, has sub-meter to centimeter accuracy. This is the cutting edge of geospatial technology. Historically, this level of precision and accuracy was only available via post-processing software or expensive survey- grade equipment. ...
Page 12
For the Geode in ideal conditions, 95–98% of the points on a scatter plot will fall within a sub-meter radius of the true point. GPS manufacturers quote their accuracies in different ways. They use different statistical descriptions of probability. A GPS receiver may be sub-meter.
These claims largely depend on the statistical method used to calculate accuracy. One manufacturer might use circular error probable (CEP), a calculation that qualifies the data as sub-me ter only 50% of the time. Another could use root mean square (RMS), denoting the data is only truly sub-meter around 65% of the time.
Page 14
the planet. The US government has stated that it is committed to maintaining the availability of at least 27 GPS satellites 95% of the time. The standard configuration for the Geode is that of a GPS receiv er. This means that it receives positioning data from the US government’s GPS constellation of satellites.
Page 15
curate position, the Geode (or any GPS receiver) needs a direct line of sight with at least four satellites. Without that fourth satellite, the receiver has to estimate altitude which can affect horizontal accuracy by hundreds of meters. This is not likely to be a problem if you are collecting data in an open, flat land...
Page 16
With the Multi-GNSS configuration, the number of satellites available at any given moment is multiplied. This greatly increas es the likelihood that your Geode will be able to get a fix on mul tiple satellites simultaneously, even under thick canopy or in the middle of a densely populated city block.
available to the Geode, total data sets in challenging environ ments are consistently higher quality. The Multi-GNSS configuration of the GNS3 makes the Geode’s ability to deliver precision GNSS more reliable under what used to be considered “less-than-ideal” circumstances. Note: GNSS accuracy is subject to observation conditions, multi path environment, number of satellites in view, satellite geome...
2.3.1 SBAS Differential Correction The Geode receives Satellite Based Augmentation System (SBAS) data. SBAS includes regional networks of ground and satellite technologies that work together to boost the accuracy and dependability of GNSS/GPS data. SBAS uses stationary land- based GNSS/GPS monitors to calculate GNSS position errors caused by ionospheric disturbances.
Page 19
NTRIP makes it possible to create networks of localized base sta tions that increase both availability and precision of RTK correc tions. Since distance from a base station strongly affects posi tioning precision and accuracy, NTRIP-enabled RTK networks are able to calculate the user’s closest base station or use algo rithms and modeling to create a virtual base station very close to the user’s receiver.
75° north and south of the equator. The Geode GNS3M includes an option to subscribe monthly or annually to Atlas to receive extra corrections. The three options provided are Atlas Basic, H30, and H10.
When Atlas is enabled, the satellite icon color in the top right corner of Geode connect will indicate the signal quality. Blue—Bit Error Rate (BER) between 0 and 20; Excellent ▪ signal Green—BER between 21 and 150; Good signal ▪ Orange—BER between 151 and 250;...
Ge ode. Geode Connect is free for download from the Juniper Systems website and various app stores. For more information about downloading and using Geode Connect with your specific oper...
Juniper Rugged™ Like other Juniper Systems products, the Geode is built ultra- rugged—waterproof, dustproof, and drop proof. It is designed to withstand harsh environments. It features IP68-rated protection, meets or exceeds MIL-STD 810G (drop, vibration, temperature, ingress protection), and operates in extreme temperatures, pro...
Amber LED: Blinks when a 3D GPS fix is made (four or more satellites) and turns solid when a DGPS fix is made (a correction source is being applied to the so lution). Blue LED: Solid when the Geode unit is connected via Bluetooth wireless technology in Geode Con...
CAUTION: The Geode needs to be charged at least once a month. If the battery drains completely, it may not recover, and your Geode will need to be sent in to Juniper Systems for a battery replacement. 2.12...
For a complete list of carrying options, visit the Geode page on the Juniper Systems website or go to the blog at blog.junipersys.com and search for Geode. 2.13.1 Camera Tripod Mount The Geode can be attached to a camera tripod using the 1/4 in.–...
Getting Started The Geode GNSS Receiver is ready to use right out of the box. Simply charge the battery and pair the Geode with a Blue tooth® wireless technology-enabled handheld device. The Ge ode may be used with most mapping apps that use industry standard NMEA 0183 protocol.
Perform Initial Tasks When you receive your Geode, perform the tasks outlined in this section before first use. 3.1.1 Review Documentation This user manual and other documents are available on the Ju niper Systems website at http://www.junipersys.com/products/ geode. View, download, and print documents as desired. 3.1.2 Charge the Battery The Geode has an internal, non-removable battery that can pro...
Connect the Geode to a Mobile Device The best way to connect your mobile device to the Geode re ceiver is via Juniper Systems’ Geode Connect app for Apple iOS, Android, or Windows. For more information about downloading and using Geode Connect with your specific operating system, refer to: ...
Page 32
capture and mapping demonstration features, it is not intended to replace your mapping, navigational, or data-collection app. Depending on what other mapping or data-collection software you are using, Geode Connect may be required. For example, you may need Geode Connect to serve as an NTRIP client for an other app, or you may need it to act as the mock location provider on your Android device.
Download and Install Geode Connect is available for download in the App Store and on the Juniper Systems website. 4.1.1 The App Store Search for Geode Connect in the App Store. Install according to the device instructions. ...
On the Geode Connect Device screen, tap Discover Near by Devices. Tap OK. In the Select An Accessory dialog box, select the serial number of your Geode. Note: The serial number can be found on the bottom of the Geode. When the Geode is paired with your iOS device, a green “Pairing Successful”...
Learn Geode Connect for iPad and iPhone Geode Connect is a utility app that allows you to customize and fine-tune the Geode to your specific project or application. Each screen in Geode Connect serves one of three primary functions: configuration of the Geode, validation of Geode accuracy, or changing Geode Connect settings.
Page 38
From the toolbar on the bottom of the screen, you can access the Skyplot, Points, Terminal, and Settings screens. Tap More in the bottom right corner to configure the connected receiver. Tap the orange Geode icon in the top left corner to disconnect or change your receiver.
abled, the satellite icon color changes relative to the signal quali ty. For more information, see Atlas Correction Service. Skyplot The Skyplot screen shows which satellites are being used in the positioning solution and where they are in the sky. It also shows satellites that are being tracked by the Geode. ...
Page 40
Satellite symbols outlined in red indicate that the satellites are being tracked, but they are not yet a part of the positioning solu tion. Satellite symbols outlined in blue indicate that a correction is being applied to the signal. Multi-GNSS Geode models support the Galileo, BeiDou, GPS, QZSS, SBAS, and GLONASS constellations. ...
Points The Points screen allows you to capture points and export cap tured data as CSV, KML, or KMZ files. This feature allows you to validate the accuracy of the Geode without requiring the use of a third-party app. Learn Geode Connect for iPad and iPhone...
5.3.1 Capture Waypoints To capture a waypoint, With the Geode in the position you would like to capture, tap the waypoint icon A waypoint with your location will be added to your list. Learn Geode Connect for iPad and iPhone...
5.3.2 Organize and Edit Waypoints Organize waypoints by tapping in the upper left corner beneath the Geode symbol. The app will cycle through the following or ganizational methods: oldest, newest, A to Z, Z to A, and proximi ty. To edit the name of a waypoint, Tap on the waypoint you want to rename.
To delete the selected waypoints, tap the trash icon and confirm deletion. To export the selected waypoints, tap the share icon . Name the export file. Select the file format (CSV, KML, or KMZ). Tap Export. Export or share according to the instructions for your iPad or iPhone. ...
Page 45
At the bottom of the Terminal page, you can send commands to the Geode. This gives you flexibility to configure the Geode and customize data output. Tap Send Command. Tap Show/Hide logging to show or hide the NMEA strings in the terminal. Learn Geode Connect for iPad and iPhone...
Tap Send custom to enter a custom command. Tap JSHOW to show the current receiver configurations. Tap Clear to clear the terminal screen. For a comprehensive list of commands and messages that can be used to configure the Geode, please refer to tech nical documentation provided by Hemisphere GNSS.
Page 47
Tap the plus icon in the lower right corner to display the menu. Learn Geode Connect for iPad and iPhone...
Page 48
Tap the play icon to begin recording your data. To stop recording, Tap the red recording icon. The string of NMEA sentences will be saved. Tap the folder icon to view the saved recordings. From this screen you can organize, share, or delete the NMEA Learn Geode Connect for iPad and iPhone...
recordings. Settings (More) The Settings screen provides options for the configuration of the Geode receiver and Geode Connect settings. The following sec tions describe each of these options. 5.5.1 Preferences The Preferences screen allows you to customize your prefer ences for how information is displayed in Geode Connect. Learn Geode Connect for iPad and iPhone...
You can specify application units (feet or metric), position for mat, and whether the app will show the hemisphere. To save your changes, tap Save before you leave the screen. 5.5.2 Connect Device The Connect Device screen allows you to connect your iPad or iPhone to the Geode.
5.5.3 Receiver Configuration Note: The Receiver Configuration options are only available if you are actively connected to a Geode receiver. Changes saved on these screens are changes made to the Geode receiver, not Geode Connect. This means that these changes apply to all navi gation and data collection apps using the Geode receiver.
Page 52
Detailed descriptions of the options display below each setting. Note: Changes must be saved before leaving the screen. To save changes, tap Save in the upper right corner. Learn Geode Connect for iPad and iPhone...
Page 53
Profiles New feature coming in August 2024. Port Connection Geode Connect remembers the settings assigned to each con figuration port and automatically applies the settings when you physically connect with that port. This allows you to quickly switch between use cases. Sample use cases for the same Geode: Use Case 1—Mounted on a pole for data collection on foot ▪...
Page 54
NMEA Sentences You can choose which NMEA sentences you want the Geode to receive. In most instances, the default NMEA sentences are suffi cient for your project or application. Learn Geode Connect for iPad and iPhone...
Page 55
Note: iPhone and iPad require the GGA and RMC messages to be enabled in order to provide a position to the operating sys tem for other apps to use. The following list explains the available NMEA sentences: RD1—Correction diagnostic message output ▪...
Page 56
GBS—Satellite fault detection used for RAIM ▪ GGA—Detailed GPS position information ▪ GLL—Latitude and longitude data ▪ GNS—Fix data for a single or combined satellite navigation ▪ system GRS—GNSS range residuals ▪ GSA—GPS DOP and active satellite information ▪ GST—GNSS pseudorange error statistics ▪...
Page 57
messages. Advanced The Advanced screen allows you to configure the following ad vanced settings for the Geode. Learn Geode Connect for iPad and iPhone...
Page 58
NMEA Precision ▪ Mask Angle ▪ Correction Source ▪ SBAS ▪ Receiver Mode ▪ Battery Status Sentence ▪ Learn Geode Connect for iPad and iPhone...
Page 59
Receiver Reset ▪ Note: Changes saved on this screen are changes made to the Geode receiver, not Geode Connect. This means that these changes crossover and are effective in other navigational and data-collecting apps. NMEA Precision This specifies the number of decimal places to output in the GGA, GLL, and GNS messages.
Page 60
Mask Angle This specifies the elevation mask angle cutoff for the receiver. Any satellites below this angle will be ignored, even if they are available. Learn Geode Connect for iPad and iPhone...
Page 61
Correction Source This specifies whether the Geode should automatically choose its correction source or accept only SBAS, NTRIP, or Atlas correc tions. When the correction source is set to Auto, the Geode is programmed to choose a source according to accuracy level in the order of Atlas, SBAS, then NTRIP.
Page 62
If it fails to reconnect (usually after about two minutes), it de faults to an SBAS corrected solution. Note: If this happens in the middle of collecting data, it may cre ate significant error between positions because different correc tion sources use different reference datum. Learn Geode Connect for iPad and iPhone...
Page 63
Manually selecting a correction source overrides the Geode’s de fault settings. If NTRIP is selected, the Geode will use NTRIP, but if it loses the NTRIP signal, it will default to an autonomous (un corrected) solution. If the Geode is accepting SBAS corrections and it loses its signal, it will always default to an autonomous solution.
Page 64
For example, if you are collecting corrected GPS positions in the Northeastern United States, the Geode may be receiving SBAS corrections from WAAS or EGNOS. If the receiver is set to Auto, it may even jump back and forth between the two. The two services use different reference datum or models.
Page 65
In areas of overlap, the best practice is to select a specific SBAS service the Geode should accept corrections data from. Auto—Sets the appropriate SBAS PRNs based on the au ▪ tonomous GPS position. EGNOS—European Geostationary Navigation Overlay Ser ▪ vice (Europe SBAS) PRN 120, 124, 126 GAGAN—GPS Aided GEO Augmented Navigation (India ▪...
Page 66
These options affect how the Geode collects and processes posi tioning information, as well as how it outputs certain types of data. GPS Only—Enabling this option tells the receiver to only ▪ accept signals from GPS satellites. It stops receiving all GNSS signals as long as this box is checked.
Page 67
Mixed—Enabling this option (default) tells the receiver to ▪ use all GNSS satellite signals available to calculate the po sition solution. This includes non-GPS satellites, which do not have DGPS or SBAS corrections. Certain NTRIP ser vices do provide corrections for non-GPS satellites. For most applications, Mixed is the best choice, particularly if there is a lot of interference. ...
Page 68
The message is sent out from the Geode as a custom message along with the NMEA sentences. The message is visible in the terminal screen, as are all other NMEA messages and com mands. In Geode Connect, the battery status sentence looks like this: ...
Page 69
This sentence may not be recognized by some navigation or da ta-collection apps. If it causes problems in an app, disable it. Receiver Reset Reset Options allows you to select if you would like to perform a soft reset or a receiver reset. Learn Geode Connect for iPad and iPhone...
Page 70
A soft reset reconfigures the Geode to all its default settings. A receiver reset does the same, but it also clears all ephemeris, al manac, and clock data. The Geode will re-download the data the next time it connects with a positioning satellite. This will in crease the time to first fix by about 4–6 minutes the first time you turn the Geode on outside after a receiver reset.
Page 71
The two Almanac messages from the GPS satellites alternate every 12.5 minutes. After a receiver reset, the best practice is to turn on the Geode and wait 25 minutes to ensure a complete Al manac has been stored. CAUTION: Resetting the receiver cannot be undone. Manage Subscriptions GNS3M devices offer a subscription to Atlas.
Page 72
Tap View Available Features to apply upgrades to the Geode. For more information, see Upgrade Geode. Learn Geode Connect for iPad and iPhone...
Page 73
Learn Geode Connect for iPad and iPhone...
Page 74
NTRIP Configuration Use this screen to enter the information supplied by your NTRIP service provider, including the caster IP address, port, username, and password. Note: NTRIP settings are stored in the Geode Connect app, not in the Geode receiver. Learn Geode Connect for iPad and iPhone...
Page 75
NTRIP is a useful protocol for precise correction of real-time po sitioning solutions. (See NTRIP and RTK.) The Geode is able to calculate an RTK Fix/Float position with sub-meter to centimeter-level accuracy. NTRIP services do re quire an internet or cell data connection (via your mobile device) and usually involve either a free or paid subscription to the ser...
If NTRIP appears on the home page with an open orange plug, the Geode is still trying to establish a connection to the NTRIP service. The connection might take a while. If the Geode has trouble connecting, try selecting a different mount point. To turn off NTRIP, tap the NTRIP icon in the upper right corner to go to the NTRIP Configuration screen.
Page 77
You can apply upgrades via activations or subscriptions. Activations include a one-time upgrade to apply a new ▪ feature to the product. The available activations include increased output rates, multi-frequency, and Atlas basic L- band corrections. Subscriptions include time-based purchases of an H10 or ▪...
Page 78
Note: If you have a single-frequency Geode, the only acti vations available are 10 Hz and 20 Hz. Enter your contact information. Learn Geode Connect for iPad and iPhone...
Page 79
Tap Next. Learn Geode Connect for iPad and iPhone...
Page 80
On the Quote Summary screen, verify your information is correct and then select Send Now. An email requesting your quote will be sent to Juniper Systems and a representative will contact you. When the request email is sent, you will receive a Quote Refer...
Page 81
Activate Upgrade If you have already purchased an activation or subscription you will need to activate it in Geode Connect. Verify your device is connected to the GNS3 and the inter net. Learn Geode Connect for iPad and iPhone...
Page 82
In the activations list, tap the yellow activate option next to the upgrade you would like to activate. Extend a Subscription To extend your current subscription, Select the check box next to your subscription. It will be marked with a yellow “Extend.” Learn Geode Connect for iPad and iPhone...
GNS3 on this screen as well. 5.5.6 Request Help and Send Feedback This feature links directly with the email account configured to the iPhone or iPad and opens an email addressed to Juniper Systems Support. Learn Geode Connect for iPad and iPhone...
Page 84
The email includes detailed configuration commands from the Geode. This allows Juniper Systems Support to diagnose and solve the problem more efficiently. This info is also used when purchasing a feature upgrade for the Geode. You can enter additional information into the email to provide a further explanation about your issue.
6.1.2 Juniper Systems Website If your device cannot access Google Play, the app is also avail able on the Juniper Systems website. Go to www.junipersys.com/support/geode/downloads. Select Geode Connect for Android. Download the APK file and follow the instructions on your device to install the app. ...
Page 89
For devices using Android 12 and below, make sure that Location is enabled. Open Geode Connect. Tap the Geode icon with a slash through it in the top left corner. Tapping this icon will allow you to connect, discon nect, or change your device. If the Android device was paired to the Geode previously, it will connect automatically.
Page 90
The app will display a list of local Bluetooth wireless de vices. Identify your Geode via the serial number printed on its bottom panel. Tap the name of the Geode you wish to pair with. Note: If your Geode doesn’t show up in the list of devices, check to make sure it is turned on and not paired with an...
Learn Geode Connect for Android Geode Connect is a utility app that allows you to customize and fine-tune the Geode to your specific project or application. Each screen in Geode Connect serves one of three primary functions: configuration of the Geode, validation of Geode accuracy, or changing Geode Connect settings.
Page 93
From the toolbar at the bottom of the screen, you can access the Skyplot, Location, Terminal, and Settings screens. Open the menu to view preferences and open additional screens. For more information on these options, see Settings. Tapping the orange Geode icon in the top left corner to discon nect or change your GNSS receiver.
Next to the icon is the battery charge indicator, the name of the Geode to which you are connected, and the active correction type (SBAS, NTRIP, or Atlas). The satellite icon in the top right corner will tell you which correction service you are using, and it will turn green when you are connected.
Under Active GNSS Constellations, select Multi-GNSS. Under NMEA Sentences, select GSV. Tap the save icon . Location The Location screen includes the waypoint capture screen, which allows you to demonstrate point capture and share cap tured data as CSV, KML, or KMZ files. This feature allows you to validate the accuracy of the Geode without requiring the use of a third-party app.
With the Geode in the position you would like to capture, tap the waypoint icon . Type a description or name for the waypoint (optional). Tap OK. 7.3.2 Delete Waypoints To delete waypoints, Learn Geode Connect for Android...
Page 97
In the upper right corner, tap Select Multiple. Learn Geode Connect for Android...
Select the waypoint(s) you want to delete. Tap the trash icon . Tap Delete. 7.3.3 Share Waypoints To share waypoints, Learn Geode Connect for Android...
Page 99
In the upper right corner, tap Select Multiple. Learn Geode Connect for Android...
Page 100
Select the Waypoint(s) you want to share. Tap the share icon . Name the waypoint file. Learn Geode Connect for Android...
Page 101
Choose the file type: CSV, KML, or KMZ. Tap OK. Geode Connect will package the waypoints in the file type chosen and prompt you to use your device to share the file. Choose the app you would like to use to share the file. Follow the instructions on your device to finish the file share. ...
Terminal The Terminal screen displays the NMEA sentences the Geode is receiving. It provides the options to show timestamps (top cen ter), pause the stream (top right), or capture and save the data (bottom right). Learn Geode Connect for Android...
Page 103
This screen also gives you flexibility to configure the Geode and customize data output. Tap the plus icon to reveal the following options: To capture data received by the Geode, tap the play icon ▪ Tap it again to stop logging data. To view saved data logging files, tap the folder icon ...
To send a command to the Geode, tap the command icon ▪ . The dialog box will offer Show/Hide Log as the default command. For a comprehensive list of commands and messages that can be used to configure the Geode, please refer to technical docu mentation provided by Hemisphere GNSS.
Page 105
tion format, specify whether the app will show the hemisphere, or enable mock locations. Note: Changes must be saved in order for them to remain from screen to screen. If the save icon in the lower right corner of the screen is orange, this means there has been a change that needs to be saved.
Page 106
the Geode and trust the app will rely on the Geode. If the app provides no option for choosing an external receiver, it is most likely relying on the Android operating system for its data. You will need to activate Geode Connect as a mock location provider in order for the app to collect data via the Geode.
Page 107
To set up the mock location, In Geode Connect, go to Menu > Preferences. Select the box for Enable Mock Location Provider. Geode Connect will prompt you to open Developer Op tions. Tap OK. Geode Connect will open Developer Options so that you can set the mock location provider. ...
Page 108
ask you for a specific app.) Tap Geode Connect in the list of possible apps. Tap the Android back button to return to Geode Connect. Test Mock Location Provider After configuring Geode Connect as your mock location provider, test to make sure your app is now getting its data from the Geode. ...
Page 109
Leave Geode Connect open. Place the Geode in one stationary position. Do not move it. Open your mapping or data-collection app. Holding your phone or tablet, walk five to ten paces out and then walk in a circle around the Geode. If the position in the data-collection app does not change signifi...
7.5.2 Connect Device The Connect Device screen allows you to connect your Android device to the Geode. For more information, see Connect with the Geode. 7.5.3 Receiver Configuration Note: The following screens and options are only available if you are actively connected to a Geode receiver. Changes saved on these screens are changes made to the Geode receiver, not Ge...
Page 111
tion. Tap Help to view detailed descriptions of the settings. Profiles A profile is a set of predefined GNS3 receiver settings that meets the needs of a specific project or application. You can have mul tiple profiles to fit different use cases. Under Profiles, view the active profile.
Page 112
files. Add a Profile To add a profile, Tap the new icon under Profiles. In the Profile Name dialog box, enter the profile name and tap OK. Select the appropriate settings. Learn Geode Connect for Android...
Page 113
Expand an area to view additional settings for correction source, SBAS, subscriptions, and NTRIP configuration. Tap the save icon Edit a Profile To edit a profile, Under Profiles, ensure the profile you want to edit is dis played. Make the desired changes to the settings, and tap the save icon Learn Geode Connect for Android...
Page 114
Manage Profiles To manage the profiles, tap the gear icon to open the Pro files screen. Port Connection Geode Connect remembers the settings assigned to each con figuration port, including the applied profile, and automatically applies the settings when you physically connect with that port. This allows you to quickly switch between use cases.
Page 115
Tap Configuring Port at the bottom of the screen. Tap the drop-down arrow and select the port you want to configure. Then, tap Save. Select a receiver profile and/or modify the settings as de sired. Tap the save icon Geode Connect automatically applies these settings each time you connect with that configuration port. ...
Page 116
Active GNSS Constellations You can choose which GNSS constellations to use in your solu tion: GPS and/or Multi-GNSS. NMEA Sentences You can choose which NMEA sentences you want the Geode to receive. In most instances, the default NMEA sentences will be sufficient for your project or application. ...
Page 117
saved. To save your changes, tap the save icon The following list explains the available NMEA sentences: RD1—Correction diagnostic message output ▪ DTM—Datum reference ▪ GBS—Satellite fault detection used for RAIM ▪ GGA—Detailed GPS position information ▪ GLL—Latitude and longitude data ▪...
Page 118
GRS—GNSS range residuals ▪ GSA—GPS DOP and active satellite information ▪ GST—GNSS pseudorange error statistics ▪ GSV—GNSS satellites in view ▪ RMC—Recommended minimum specific GNSS data ▪ RRE—Range residual message ▪ VTG—Course over ground and ground speed ▪ ZDA—UTC time and date information ▪...
Page 119
To upgrade the update rate, see Upgrade Geode. Advanced The Advanced screen allows you to configure the following ad vanced settings for the Geode. NMEA Precision ▪ Mask Angle ▪ Correction Source ▪ SBAS ▪ Receiver Mode ▪ Learn Geode Connect for Android...
Page 120
Battery Status Sentence ▪ Receiver Reset ▪ Note: Changes saved on this screen are changes made to the Geode receiver, not Geode Connect. This means that these changes crossover and are effective in other navigational and data-collecting apps. Learn Geode Connect for Android...
Page 121
NMEA Precision Specify the number of decimal places to output in the GGA, GLL, and GNS messages. Learn Geode Connect for Android...
Page 122
Mask Angle Specifies the elevation mask angle cutoff for the receiver. Any satellites below this angle will be ignored, even if available. Correction Source This specifies whether the Geode should automatically choose its correction source or accept only SBAS, NTRIP, or Atlas correc tions.
Page 123
the order of Atlas, SBAS, then NTRIP. If it fails to reconnect (usually after about two minutes), it will de fault to the next available correction. Note: If this happens in the middle of collecting data, it may cre ate significant error between positions because different correc tion sources use different reference datum.
Page 124
If the Geode is accepting SBAS corrections, and it loses its signal, it will always default to an autonomous solution. If Atlas is selected, the Geode will use Atlas correction, and if it loses the signal it will default to an autonomous solution. When the Geode is configured to use an NTRIP service, Geode Connect does not automatically select NTRIP as the only correc...
Page 125
If the receiver is set to Auto, it may even jump back and forth be tween the two. The two services use different reference datum models. Switching between them can cause significant error be tween different points of data. In areas of overlap, the best practice is to select a specific SBAS service the Geode should accept corrections data from.
Page 126
Auto—Sets the appropriate SBAS PRNs based on the au ▪ tonomous GPS position. EGNOS—European Geostationary Navigation Overlay Ser ▪ vice (Europe SBAS) PRN 120, 124, 126 GAGAN—GPS Aided GEO Augmented Navigation (India ▪ SBAS) PRN 127 MSAS—MTSAT Satellite Augmentation System (Japan ▪...
Page 127
GPS Only—Enabling this option tells the receiver to only ▪ accept signals from GPS satellites. It stops receiving all GNSS signals as long as this box is checked. This may be a useful option in open areas with little interference, particu larly if the user is trying to preserve battery life. ...
Page 128
most applications, Mixed is the best choice, particularly if there is a lot of interference. NULL NMEA—This option is available because different ▪ navigational apps interpret NULL messages differently. As a default, when the Geode loses its position (cannot get a fix), it sends out a NULL NMEA message.
Page 129
In Geode Connect, the battery status sentence looks like this: Learn Geode Connect for Android...
Page 130
This sentence may not be recognized by some navigation or da ta-collection apps. If it causes problems in an app, disable it. Receiver Reset Reset Options allows you to select and perform a soft reset or a receiver reset. A soft reset reconfigures the Geode to all its default settings. A receiver reset does the same, but it also clears all ephemeris, al...
Page 131
The two Almanac messages from GPS satellites alternately re peat every 12.5 minutes. After a receiver reset, the best practice is to turn on the Geode and wait 25 minutes to ensure a com plete Almanac has been stored. CAUTION: Resetting the receiver cannot be undone. Manage Subscriptions GNS3M devices offer subscriptions for Atlas.
Page 132
codes, and view the subscriptions that are available for activa tion. Tap View Available Features to apply upgrades to the Geode. For more information about activating upgrades, see Upgrade Geode. Learn Geode Connect for Android...
Page 133
NTRIP Configuration On the NTRIP Configuration screen you can set up NTRIP with your Geode. Enter the information supplied by your NTRIP ser vice provider, including the caster IP address, port, username, Learn Geode Connect for Android...
Page 134
and password. Note: NTRIP settings are stored in the Geode Connect app, not in the Geode receiver. NTRIP is a useful protocol for precise correction of real-time po sitioning solutions. (See NTRIP and RTK.) The Geode is able to calculate an RTK Fix/Float position. NTRIP services do require an internet or cell data connection (via your mobile device) and usually involve either a free or paid subscription to the service. ...
Page 135
Note: Changes must be saved in order for them to remain from screen to screen. If the save icon in the lower right corner of the screen is orange, this means there has been a change that needs to be saved. Tap the save icon to save changes . ...
Tap the line underneath the Download Mount Points but ton. This will open a list of mount points in the network close to the Geode’s position. Choose the appropriate mount point. Tap the save icon to save the changes . Tap Start NTRIP.
Page 137
You can apply upgrades via activations or subscriptions. Activations include a one-time upgrade to apply a new ▪ feature to the product. The available activations include increased output rates, multi-frequency, and Atlas basic L- band corrections. Subscriptions include time-based purchases of an H10 or ▪...
Page 138
Note: If you have a single-frequency Geode, the only acti vations available are 10 Hz and 20 Hz. Enter your contact information. Learn Geode Connect for Android...
Page 139
On the Quote Summary screen, verify your information is correct and then select Send Now. An email requesting your quote will be sent to Juniper Systems and a representative will contact you. When the request email is sent, you will receive a Quote Refer...
Page 140
Activate Upgrade If you have already purchased an activation or subscription, you can activate it in Geode Connect. Verify your device is connected to the GNS3 and the inter net. Learn Geode Connect for Android...
Page 141
In the activations list, tap the yellow activate option next to the upgrade you would like to activate. Extend a Subscription To extend your current subscription, Select the check box next to your subscription. It will be marked with a yellow “Extend.” Learn Geode Connect for Android...
Select Next. Request a quote for the subscription by following the process listed in the Request a Quote section above. If you purchased the subscription previously, you can activate the subscription for your GNS3 on this screen as well. 7.5.5 Profiles A profile is an easy way to save and apply the configuration set...
Page 143
ceiver. Add a Profile To add a profile, Tap Add In the Profile Name dialog box, enter the profile name and tap OK. The new profile uses the current GNS3 receiver settings. To modify the settings, see Edit a Profile. Delete a Profile To delete a profile, Tap the delete icon ...
On the Settings screen, tap Help/Feedback. This feature links directly with the email account configured to the device and opens an email addressed to Juniper Systems Support. The email includes detailed configuration commands from the Geode. This allows Juniper Systems Support to diag...
nose and solve the problem more efficiently. This info is also used when purchasing a feature upgrade for the Geode. You can enter additional information into the email to provide further explanation about your issue. 7.5.7 About The About screen shows the Geode Connect version currently in use.
Geode with the Windows operating system and third-party apps. Download and Install Geode Connect is available for download on the Juniper Sys tems webpage. To download and install Geode Connect, Go to www.junipersys.com/support/geode/downloads.
Page 149
If the device has connected to a Geode previously, tap the Geode name at the top of the screen. The app will ask you what you would like to do. Note: If the device has not previously connected to a Ge ode, the app opens the Device Setup screen.
Page 150
with. Note: If your Geode doesn’t show up in the list of devices, check to make sure it is turned on and not paired with an other device. Then, tap the refresh icon . Follow the prompts to finish pairing the Geode with your device. ...
Page 151
Troubleshooting a Windows PC Bluetooth Connection Sometimes when a Geode has been paired with a Windows PC device and then is paired with several other devices, the Geode may have trouble re-pairing with the original Windows PC de vice. If this happens, the following prompt appears. Select Retry. ...
Page 152
Bluetooth connection again. Connect via USB The Geode can connect with a Windows PC or handheld tablet —such as the Juniper Systems Mesa tablets—using the supplied USB cable. To connect via USB, Ensure your Windows PC or tablet is in Desktop mode, not Tablet mode. ...
Page 153
Geode Connect displays a list of local wireless and con nected devices. It may list the same Geode twice, once as a Bluetooth wireless device and once as a physically con nected device. The Geode connected via USB will have a plug icon next to it.
Page 154
The app will ask you what you would like to do. Note: If the device has not previously connected to a Ge ode, the app will immediately open the Device Setup screen when you open the app. Tap Change Device. This opens the Device Setup screen. The app will display a list of local wireless and connected devices.
Learn Geode Connect for Windows Geode Connect is a utility app that allows you to customize and fine-tune the Geode to your specific project or application. Each screen in Geode Connect serves one of three primary functions: configuration of the Geode, validation of Geode accuracy, or changing Geode Connect settings.
Page 157
The Home screen for Geode Connect serves as a dashboard for the Geode receiver. On this page, you can view connection sta tus, correction mode, and positioning data. It displays latitude, longitude, altitude, estimated horizontal error, fix info (GPS, DG PS, RTK, and so on), speed, heading, number of satellites in fix, PDOP, and correction signal.
Connect settings. For more information on these options, see Settings. Skyplot The Skyplot screen shows which satellites are being used in the positioning solution and where they are in the sky. It also shows satellites that are being tracked by the Geode. On the Skyplot screen, each satellite is identified by a space ve...
Page 159
Satellite symbols outlined in red indicate that the satellites are being tracked, but they are not yet a part of the positioning solu tion. Satellite symbols outlined in blue indicate that a correction is being applied to the signal. The Skyplot screen is meant to be used as a guide. It shows the relative visibility of satellites in the sky, but it is not an absolute reference for satellites used in the positioning solution.
On the Map screen, you can capture, compare, and navigate to waypoints. 9.3.1 Capture, View, and Compare Waypoints To capture waypoints, place the Geode in the position you would like to capture, and tap the waypoint icon . View way point information by selecting a specific waypoint on the map.
Page 162
Geode Connect will show you the waypoint’s distance and bear ing compared to your current position. It will also display the lat itude, longitude, and altitude of the waypoint. To delete the waypoint, tap Remove. To compare the waypoint to another waypoint, Tap From here to.
Select the waypoint to which you want to compare your current position. The blue shaded area represents the cross track error between where you are now and what you need to do to get back on the direct path between the two waypoints. Terminal The Terminal screen displays the NMEA sentences the Geode is receiving.
Page 164
At the bottom of the Terminal screen, there is a command line. This gives you flexibility to configure the Geode and customize the data output. Tap the down arrow next to the command line to reveal the Show Log and Hide Log commands. For a comprehensive list of commands and messages that can be used to configure the Geode, refer to the technical documen...
Go to https://hemispheregnss.com/ > Resources & Sup port > Technical Documentation. Select Technical Reference Manual (it may include a ver sion number). CAUTION: Use at your own risk. It is possible to cause com munication or other errors in the Geode that may require technical assistance to repair.
Page 166
To stop recording, tap the timer that replaced the Capture but ton. The string of NMEA sentences will be saved. Tap Files to view the saved recordings. From this screen you can organize, share, or delete the NMEA recordings. Learn Geode Connect for Windows PC...
Settings Menu The Settings menu provides options for the configuration of the Geode receiver and Geode Connect settings. The following sec tions describe each of these options. 9.5.1 Preferences The Preferences page allows you to customize your preferences for how information is displayed in Geode Connect. Learn Geode Connect for Windows PC...
Page 168
You can specify application units (feet or metric), position for mat, and whether or not the app will show the hemisphere. Learn Geode Connect for Windows PC...
Note: Changes must be saved in order for them to remain from screen to screen. If the save icon in the lower right corner of the screen is orange, this means there has been a change that needs to be saved. Tap the save icon to save changes. ...
For more information, see Connect with the Geode. 9.5.3 Receiver Configuration Note: The following screens and options are only available if you are actively connected to a Geode receiver. Changes saved on these screens are made to the Geode receiver, not Geode Con nect.
Page 171
From the Receiver Configuration screen, configure the Geode to meet the specific needs of your project or application. You can also reach this screen by tapping the orange gear icon Below most settings, you can tap Description to view a detailed information about the setting(s). ...
Page 172
Profiles A profile is a set of predefined GNS3 receiver settings that meets the needs of a specific project or application. You can have mul tiple profiles to fit different use cases. Under Profiles, view the active profile. If no profile is selected, “Profile Not Selected”...
Page 173
In the Profile Name dialog box, enter the profile name and tap OK. Select the appropriate settings. Learn Geode Connect for Windows PC...
Page 174
Expand an area to view additional settings for correction source, SBAS, subscriptions, and NTRIP configuration. Tap the save icon Edit a Profile To edit a profile, Under Profiles, ensure the profile you want to edit is dis played. Make the desired changes to the settings, and tap the save icon Manage Profiles To manage the profiles, tap the gear icon...
Page 175
Port Connection Geode Connect remembers the settings assigned to each con figuration port, including the applied profile, and automatically applies the settings when you physically connect with that port. This allows you to quickly switch between use cases. Sample use cases for the same Geode: Use Case 1—Mounted on a pole for data collection on foot ▪...
Page 176
Select the port type in Configuring Port. Select the configuration settings and/or apply the appro priate profile. Tap the save icon . Geode Connect automatically ap plies these settings each time you connect with that con figuration port. Active GNSS Constellations You can choose which GNSS constellations to use in your solu...
Page 177
NMEA Sentences You can choose which NMEA sentences you want the Geode to receive. In most instances, the default NMEA sentences will be sufficient for your project or application. Learn Geode Connect for Windows PC...
Page 178
The following list explains the available NMEA sentences: RD1—Correction diagnostic message output ▪ DTM—Datum reference ▪ GBS—Satellite fault detection used for RAIM ▪ GGA—Detailed GPS position information ▪ GLL—Latitude and longitude data ▪ GNS—Fix data for a single or combined satellite navigation ▪...
Page 179
VTG—Course over ground and ground speed ▪ ZDA—UTC time and date information ▪ Update Rate The update rate sets the message output rate through the ac tive port. Note: Changes must be saved in order for them to remain from screen to screen.
Page 180
NMEA Precision ▪ Mask Angle ▪ Correction Source ▪ SBAS ▪ Receiver Mode ▪ Battery Status Sentence ▪ Receiver Reset ▪ NMEA Precision Specify the number of decimal places to output in the GGA, GLL, and GNS messages. Learn Geode Connect for Windows PC...
Page 181
Mask Angle Specifies the elevation mask angle cutoff for the receiver. Any satellites below this angle will be ignored, even if available. Learn Geode Connect for Windows PC...
Page 182
Correction Source This specifies whether the Geode should automatically choose its correction source or accept only SBAS, NTRIP, or Atlas correc tions. When the correction source is set to Auto, the Geode is programmed to choose a source according to accuracy level in the order of Atlas, SBAS, then NTRIP.
Page 183
If it fails to reconnect (usually after about two minutes), it will de fault to an SBAS corrected solution. Note: If this happens in the middle of collecting data, it may cre ate significant error between positions because different correc tion sources use different reference datum. ...
Page 184
If Atlas is selected, the Geode will use Atlas correction, and if it loses the signal it will default to an autonomous solution. When the Geode is configured to use an NTRIP service, Geode Connect does not automatically select NTRIP as the only correc tion source.
Page 185
For example, if you are collecting corrected GPS positions in the Northeastern United States, the Geode may be receiving SBAS corrections from WAAS or EGNOS. If the receiver is set to Auto, it may even jump back and forth between the two. The two ser vices use different reference datum or models.
Page 186
SouthPAN—Southern Positioning Augmentation Network ▪ (Australia and New Zealand SBAS) PRN 122 WAAS—Wide Area Augmentation System (North America ▪ SBAS) PRN 133, 135, 138 None—SBAS corrections disabled ▪ Receiver Mode These options affect how the Geode collects and processes posi tioning information, as well as how it outputs certain types of data.
Page 187
GNSS signals as long as this box is checked. This may be a useful option in open areas with little interference, particu larly if the user is trying to preserve battery life. Mixed—Enabling this option (default) tells the receiver to ▪...
Page 188
The message is used by Geode Connect and other applications to display the battery capacity status. The default setting is Ten Seconds. The message is sent out from the Geode as a custom message along with the NMEA strings. The message is visible in the ter minal screen, as are all other NMEA messages and commands.
Page 189
Receiver Reset Reset Options allows you to select if you would like to perform a soft reset or a receiver reset. A soft reset reconfigures the Geode to all its default settings. A receiver reset does the same, but it also clears all ephemeris, al manac, and clock data.
Page 190
The two Almanac messages from GPS satellites alternately re peat every 12.5 minutes. After a receiver reset, the best practice is to turn on the Geode and wait 25 minutes to ensure a com plete Almanac has been stored. CAUTION: Resetting the receiver cannot be undone. Manage Subscriptions GNS3M devices offer a subscription to Atlas.
Page 191
Tap View Available Features to apply upgrades to the Geode. For more information about activating upgrades, see Upgrade Geode. Configure NTRIP This page is where you can enter the information supplied by your NTRIP service provider, including the caster IP address, port, username, and password. ...
Page 192
The Geode is able to calculate an RTK Fix/Float position with sub-meter to centimeter level accuracy. NTRIP services do re quire an internet or cell data connection (via your mobile device) and usually involve either a free or paid subscription to the ser vice.
Page 193
If an open orange plug appears, the Geode is still trying to estab lish a connection to the NTRIP service. Sometimes it may take a little longer to connect. If the Geode has trouble connecting, try selecting a different mount point. Tap on the icon to open the NTRIP screen.
Page 194
Third-Party Apps and NTRIP When using the Geode with Windows PC devices, some third- party mapping and data-collection apps may need some help connecting to an NTRIP service. If the third-party app has built-in NTRIP capabilities, do not use Geode Connect. Simply connect to the Geode and configure NTRIP in the third-party app. ...
Once the Geode is connected to both apps, configure NTRIP ser vices in Geode Connect. Leave Geode Connect open while using the third-party app. 9.5.4 Upgrade Geode From the Upgrade Geode screen, you can request a quote for upgrades, activate your upgrades, or extend a subscription. Learn Geode Connect for Windows PC...
Page 196
This screen can also be accessed from under Receiver Configu rations > Manage Subscriptions. See Manage Subscriptions on page 51 for more information. You can apply upgrades via activations or subscriptions. Activations include a one-time upgrade to apply a new ▪...
Page 197
Enter your contact information. Tap Next. Learn Geode Connect for Windows PC...
Page 198
On the Quote Summary screen, verify your information is correct then select Send Now. An email requesting your quote will be sent to Juniper Systems, and a representative will contact you. When the request email is sent, you will receive a Quote Refer...
Page 199
Activate Upgrade If you have already purchased an activation or subscription, you will need to activate it in Geode Connect. Learn Geode Connect for Windows PC...
Page 200
Verify your device is connected to the GNS3 and the inter net. In the activations list, tap the yellow activate option next to the upgrade you would like to activate. Extend a Subscription To extend your current subscription, Learn Geode Connect for Windows PC...
Select the check box next to your subscription. It will be marked with a yellow “Extend.” Select Next. Request a quote for the subscription following the process listed in the Request a Quote section above. If you purchased the subscription previously, you can activate the subscription for your GNS3 on this screen as well.
Page 202
The active profile is shown in orange. Tap a profile to apply it. Learn Geode Connect for Windows PC...
Page 203
Note: You can also change the active profile from the Receiver Configuration screen. Add a Profile To add a profile, Tap Add Profile. In the Profile Name dialog box, enter the profile name and tap OK. The new profile is added to the list, using the current GNS3 re ceiver settings.
Delete a Profile To delete a profile, Tap delete next to the profile you want to delete Tap Delete to confirm the profile deletion. Export a Profile You can export a profile as a .JSON file and use it on other GNS3 receivers.
Page 205
If you are using the Geode, it is because your project demands precision GNSS. However, if your app is depending on the oper ating system, it may be collecting data via the consumer-grade receiver in your PC or tablet—not the Geode. The best way to figure out where your app is getting its position...
Page 206
ta. You will need to enable Windows Location Reporting in Ge ode Connect. Windows Location Reporting allows the Windows OS to use the Geode for its Location Services. Select On to turn on Windows Location Services. Once the ser vices are enabled, it is no longer necessary to keep Geode Con nect open.
Page 207
One-Person Test Connect the Geode to your Windows PC or tablet via Blue tooth in the third-party app or the OS. (Geode Connect is not necessary once Windows Location Reporting is en abled.) Place the Geode in one stationary position. Do not move it. ...
9.5.7 Configure Virtual Port Settings Geode Connect for Windows PC has a Virtual COM Port Driver. You can use this driver to configure virtual COM ports as write able. Once writeable, these ports can be used for two-way com munication between the Geode and third-party apps, allowing the apps to both receive and send information to the Geode. ...
Page 209
This configuration allows the Geode to use NTRIP data from Ge ode Connect to correct its position and then send that corrected position to the third-party app. Note: The first time you select Virtual Ports, Geode Connect may prompt you to install the Virtual Port Driver. Go ahead and in stall it.
Request Help and Send Feedback This feature links directly with the email account configured to the PC and opens an email addressed to Juniper Systems Sup port. The email includes detailed configuration commands from the Geode. This allows Juniper Systems Support to diagnose and solve the problem more efficiently.
Page 211
You can enter additional information into the email to provide further explanation about your issue. Learn Geode Connect for Windows PC...
Appendix A: Serial Port Configuration The Geode has a 9-pin RS-232C serial port. This allows the Geode to be mounted to a piece of equipment such as a tractor or a precision planter. This type of configuration maintains a con stant connection for data and power to the Geode.
Page 216
Maximum: 15 W Ideal: 12 @ 1.25 A (such as, consumer vehicle battery) Possible: 5 V @ 3 A (such as, USB-C charging cable) *Requires a USB-C cable with 5.1 K pull-down resistor on either of the CC lines. You can remotely power on and off the Geode through pin 9 of the serial connection.
Limited Product Warranty 11.1.1 Two Year Warranty Juniper Systems, Inc. (“JS”) warrants that the Geode Receiver shall be free from defects in materials and workmanship, under normal intended use, for a period of 24 months from the date of shipment. ...
This warranty is exclusive, and JS will not assume and hereby ex pressly disclaims any further warranties, whether express or im plied, including, without limitation, any warranty as to mer chantability, fitness for a particular purpose, non-infringement or any warranties arising from the course of performance, deal ing, or usage of trade.
11.1.6 Governing Law This warranty is governed by the laws of Utah, U.S.A. and ex cludes the United Nations Convention on Contracts for the In ternational Sale of Goods. The courts of Utah shall have exclusive personal jurisdiction in case of any disputes arising out of or in connection with this warranty.
11.2 Repairs, Upgrades, and Evaluations CAUTION: Do not attempt to repair the Geode Receiver yourself. This action voids the warranty. There are no user serviceable parts inside the Geode. Information about repairs, upgrades, and evaluations is located on our website at www.junipersys.com/support/my-product. You can locate a repair center, submit a repair order, check re...
Appendix C: Warnings, Licensing, and Regulations 12.1 Product Warnings Follow the warnings listed below to use the Geode and acces sories safely. 12.1.1 Battery Warnings WARNING! This device comes with a lithium-ion recharge able battery pack. To reduce the risk of fire or burns, do not disassemble, crush, puncture, short external contacts, or ex...
12.2 Certifications and Standards 12.2.1 FCC: United States In compliance with the FCC rules 47 CFR 15.19(a)(3), the state ments that follow must appear on the device or in the user doc umentation. This device complies with Part 15 of the FCC Rules. Operation of this equipment is subject to the following two conditions: The device may not cause harmful interference.
Only approved accessories may be used with this equipment. In general, all cables must be high quality, shielded, correctly ter minated, and normally restricted to two meters in length. Wall chargers approved for this product employ special provisions to avoid radio interference and should not be altered or substitut When used with a 9-pin serial cable, a ferrite is required on the cable near the end of the cable that connects to the Geode.
Page 228
Bluetooth® 5.1 SPP, iAP2, EAP ▪ Bluetooth Range: Class 1 Long Range ▪ Communica tions Ports: USB Type-C, Serial RS-232C DB-9 ▪ Serial Baud Rates: 4800–115200 ▪ Data I/O Protocol: NMEA 0183, Crescent ▪ Raw Binary (proprietary) Correction I/O Protocol: Hemisphere ▪...
Page 229
Operating Temp: -20° C to +60° C ▪ Storage Temp: -30° C to +60° C ▪ Juniper Meets or exceeds MIL-STD 810G (Drop, Vi ▪ Rugged™ bration, Temperature, Ingress Protection) Enclosure Rating: IP68 (1.4 meters for 30 ▪ min) 10 Hz Data Rate ▪...
Page 230
Geode Connect™ software provides con ▪ figuration, communications setup, and re ceiver settings. Windows® ▪ Android™ 7 and above ▪ iPad and iPhone. Full list of compatible ▪ Apple™ devices: iPhone 13 Pro Max, iPhone 13 Pro, ▪ iPhone 13, iPhone 13 mini, iPhone 12 Pro Max, iPhone 12 Pro, iPhone 12, iPhone 12 mini, iPhone 11 Pro Max, iPhone 11 Pro, iPhone 11,...
Need help?
Do you have a question about the geode GNS3M and is the answer not in the manual?
Questions and answers