Table of Contents
Advertisement
E
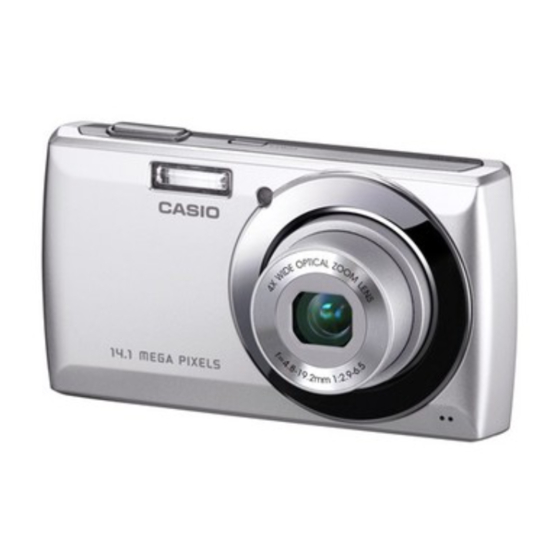
Digital Camera
User's Guide
Thank you for purchasing this CASIO product.
• Before using it, be sure to read the precautions contained in this User's Guide.
• Keep the User's Guide in a safe place for future reference.
• For the most up-to-date information about this product, visit the official EXILIM
Website at http://www.exilim.com/
Advertisement
Table of Contents

Subscribe to Our Youtube Channel
Related Manuals for Casio QV-R100


Summary of Contents for Casio QV-R100
-
Page 1: Digital Camera
Digital Camera User’s Guide Thank you for purchasing this CASIO product. • Before using it, be sure to read the precautions contained in this User’s Guide. • Keep the User’s Guide in a safe place for future reference. • For the most up-to-date information about this product, visit the official EXILIM... -
Page 2: Unpacking
Unpacking As you unpack your camera, check to make sure that all items shown below are included. If anything is missing, contact your original retailer. Rechargeable lithium ion USB-AC adaptor Digital camera battery (NP-80) (AD-C53U) The shape of the power cord plug varies according to country or geographic area. -
Page 3: Read This First
CASIO COMPUTER CO., LTD. is forbidden under copyright laws. • CASIO COMPUTER CO., LTD. shall not be held liable for any damages or lost profits suffered by you or any third party due to the use or malfunction of this product. -
Page 4: Table Of Contents
Contents Unpacking ........... . . 2 Read this first! . - Page 5 Using the Setup Menu Setting Sounds ..........62 Setting Power Save .
-
Page 6: Using This Menu
Using this Menu Symbols used in this manual are explained below. NOTE • This indicates useful information when using your camera. IMPORTANT! • This indicates important message that should be read before using the function. System Requirements In order to get the most out of your camera, your computer must meet the following system requirements. -
Page 7: Camera Views
Camera Views Front View Flash Self-timer LED/ AF Assist Lamp Lens Microphone Back View LCD monitor Zoom button Menu button FUNC/Delete button LED indicator OK button/4-way navigation control (8, 2, 4, 6) Mode Switch Photo mode Movie mode Playback mode Top View POWER button Shutter button... -
Page 8: Camera Buttons
Bottom View Battery/Memory card compartment USB port Tripod screw hole Speaker Left Right View Strap ring Camera Buttons Your camera is equipped with different buttons for ease of use Button Description POWER Press the POWER button to turn the power on/off. Shutter Press to capture an image or start/stop recording video clip. -
Page 9: Navigation Control
Navigation Control The 4-way Navigation Control and the OK button allow you to access the various menus available from the On Screen Display (OSD). You can configure a wide range of settings to ensure maximum results from your images and videos. Further functions of these buttons are as follows. -
Page 10: Camera Memory
Button Description 1)In Photo mode, press to turn the face tracking function on and off. 2)Playing Video file, press to Pause/Start video playback. Up/Face Tracking/ 3)In Playback photo mode, press to rotate the image right 90 degrees by each press of the button. This feature is applicable Rotate for still images only. -
Page 11: Getting Started
Note that the battery of a newly purchased camera is not charged. Perform the steps below to load the battery into the camera and charge it. • Your camera requires a special CASIO rechargeable lithium ion battery (NP-80) for power. Never try to use any other type of battery. -
Page 12: Charge The Battery
Close and lock the battery/memory card compartment. Charge the Battery You can use either of the two following methods to charge the camera’s battery. • USB-AC adaptor • USB connection to a computer . To charge with the USB-AC adaptor Turn off the camera. - Page 13 Connect the USB cable to the camera. The LED indicator USB-AC adaptor should flash green, indicating that charging has started. The LED indicator will go out when charging is USB port complete. It takes about 150 minutes to achieve a full charge. Charging Small may take longer USB cable...
- Page 14 . To charge using a USB connection to a computer The battery loaded in the camera is charged whenever the camera is connected directly to a computer with the USB cable. • Depending on the setup of your computer, you may not be able to charge the camera’s battery over a USB connection.
- Page 15 LED indicator Operation LED indicator Indicator Status Description Flashing green Charging Flashing green, fast Charging problem (page 78) Charging complete After charging is complete, disconnect the USB cable from the camera and then from the computer. NOTE • Even if you turn on the camera, the battery will continue to charge if there is a USB connection with a computer.
-
Page 16: Inserting An Sd/Sdhc/Sdxc Memory Card
Other Charging Precautions • With the two charging methods described above, you can charge the camera’s battery (NP-80) without removing it from the camera. Never use any other type of charger device. Attempting to use a different charger can result in unexpected accident. -
Page 17: Turning The Power On And Off
To remove the SD/SDHC/SDXC card Unlock and open the battery/memory card compartment. Gently push the card until it pops out. Pull out the card carefully. NOTE • Windows XP does not support SDXC cards (exFAT format). However, with Windows XP (Service Pack 2 or 3), you can download an exFAT patch update to enable support for SDXC cards. -
Page 18: Modes
Setting the Date & Time Press the 4 or 6 keys to move through the selection. Press the 8 or 2 keys to change the value for the date and time. Press the OK button to apply. If necessary, press the Menu button to close the menu. Now, you are ready to start taking images and videos. -
Page 19: Using The Lcd Monitor
Using the LCD monitor The LCD monitor shows all important information regarding camera settings as well as the visual image of your image or video. The display on the LCD monitor is called the On Screen Display or OSD. LCD Monitor Layout . -
Page 20: Movie Mode Screen Layout
Item Description Exposure Displays exposure settings. Face tracking Indicates face tracking is enabled. White balance Displays white balance settings. Metering Displays metering settings. Sharpness Displays sharpness settings. Quality Displays quality settings. Photo size Displays photo size settings. AF lamp Indicates AF lamp is enabled. . -
Page 21: Playback Mode Screen Layout
Item Description Recorded time Displays recorded time. Recording status Indicates recording status. Pre-record Indicates pre-record is enable. NOTE • The Pre-Record icon appears on the screen in red color as the same position as zoom indicator. . Playback Mode Screen Layout The Playback mode display varies depending on the type of image being viewed. - Page 22 Playback mode of videos: Item Description Playback mode Indicates Playback mode. Protect Indicates file is protected. Video clip Indicates the file is a video. Indicates the button to press on the camera to play a Button intro video file. Indicates the file number over the total number of File no./Total no.
-
Page 23: Changing The Lcd Monitor Display
Changing the LCD Monitor Display The type of information displayed on the LCD monitor can be changed using the key. Press the key repeatedly to change the LCD display from one type to another. In Photo/Movie mode, the LCD display can be changed into any of the following. •... -
Page 24: Recording Images And Videos
Recording Images and Videos Taking Images Now that you are familiar with your camera, you are now ready to take your images. Taking images with your camera is very simple. Turn on the camera by pressing the POWER button. Slide the Mode switch to Photo mode [r]. Frame the shot using the focus bracket on the LCD monitor. -
Page 25: Setting The Zoom Control
Setting the Zoom Control Using a combination of 4 times optical zoom and 5 times digital zoom permits zoom photography at up to 20 times magnification. While the digital zoom can be a useful feature, the more an image is enlarged (zoomed), the more pixelated (grainier) the image will appear. -
Page 26: Using Flash
Using Flash When taking pictures in difficult lighting conditions, use the Flash/Right button to get correct exposure. This function cannot be activated in recording videos or continuous shooting. To activate Flash: • Press the Flash/Right button on your camera repeatedly until your desired Flash mode is displayed on the LCD monitor. -
Page 27: Setting The Focus Mode
Setting the Focus Mode This function allows users to define the type focus when recording a still image or a video clip. To set the Focus mode • Press the Macro/Left button repeatedly until the desired Focus mode icon is displayed on the lower left corner of the LCD monitor. -
Page 28: Using The Function Menu
Using the Function Menu The Function Menu is used to adjust capture settings in Photo mode. It contains My Mode, Photo Size, Quality, EV Compensation, White Balance, ISO, Metering, and Color Mode. Press the FUNC/Delete button of your camera to launch the Function Menu. Press the FUNC/Delete button again to close the menu. - Page 29 The table below shows the Photo Size values for still images. Printing Size Printing Size Icon Pixel Size Icon Pixel Size Suggestion Suggestion 4320 3240 A2 Size 2048 1536 4" 6" Standard print 4320 2880 1920 1080 HDTV paper 3264 2448 A3 Size E-mail 2592...
-
Page 30: White Balance
White Balance This sets the white balance for a variety of lighting conditions and permits images to be captured that approach the conditions that are seen by the human eye. • As you move through the selection, you can see the preview on the LCD monitor synchronously. - Page 31 This sets the sensitivity for capturing images. When the sensitivity is raised (and the ISO figure is increased), photography will become possible even in dark locations, but the more pixelated (grainier) the image will appear. • Use a higher ISO setting in dim conditions and a lower ISO setting in brighter conditions.
-
Page 32: Color Mode
Color Mode The Color mode function applies different colors or tones for a more artistic effect on the still images or videos. • As you move through the selection, the preview on the LCD monitor changes synchronously. Icon Item Description Normal The camera records normally. -
Page 33: Using The Record Menu
Using the Record Menu If you are in Photo mode, you can access the Record menu simply by pressing the Menu button on your camera. When the menu is displayed, use the 4-way navigation control and the OK button to move through menu selections and apply your desired settings. -
Page 34: Setting The Scene Mode
Setting the Scene Mode By simply selecting one of the following 5 modes, you can capture the image with the most appropriate settings. From the Record Menu, press to select Scene Mode. Use the navigation controls to move through the selection. Press the OK button to save and activate the selected Scene mode. -
Page 35: Using Aperture Priority Mode
Using Aperture Priority Mode In this mode the user selects the aperture value and the camera selects the proper shutter speed. The aperture value affects Depth of Field (DOF). • Choose larger aperture, only one subject in focus but the background nice and blurred (Shallow DOF). - Page 36 Using Manual Exposure When the camera is in the Manual exposure mode, you can change either aperture or shutter speed, or both. To activate Manual Exposure Select from the Scene mode submenu. Press the OK button to enter the adjust mode. Displays the aperture and shutter speed Use the 4 or 6 keys to select the shutter speed.
-
Page 37: Setting The Drive Mode
Setting the Drive Mode Your camera features a Self-timer and Burst which can be set in the Drive mode function in the Record menu. The Self-timer allows you to take images after a pre- defined delay. While burst lets you take consecutive shots. This function is only available in recording still images. -
Page 38: Setting The Aeb
Setting the AEB AEB stands for Automatic Exposure Bracketing. It permits 3 consecutive images in the order of standard exposure, under exposure and overexposure compensation. • AEB function is used only in Program mode (page 34). To set AEB From the Record menu, select AEB. Use the 2 or 8 keys to go through the selection. -
Page 39: Setting The Af Lamp
Setting the AF Lamp The AF Lamp function allows you to record images even in low light conditions. If AF Lamp is set to Auto, the AF lamp located in the front of the camera, see “Front View” on page 7, emits an red light by half pressing the Shutter button allowing the camera to focus easily. -
Page 40: Setting Saturation
Setting Saturation The Saturation function lets you adjust the color saturation in your images. Use a higher saturation setting for rich colors and a lower saturation setting for more natural tones. To set Saturation From the Record menu, select Saturation. Use the 8 or 2 keys to go through the selection. -
Page 41: Setting Contrast
Setting Contrast This function allows you to adjust the contrast of your images. To set Contrast From the Record menu, select Contrast. Use the 8 or 2 keys to go through the selection. Press the OK button to save and apply changes. Icon Item Description... -
Page 42: Setting The Date Stamp
The table below shows the available Digital Zoom settings. Icon Item Description Intelligent Enlarges the image digitally with almost no distortion. Zoom This feature is available for still images only. Standard Enlarges all image sizes up to a maximum of 5x in Zoom preview, but the image quality deteriorates. -
Page 43: Setting Auto Review
Setting Auto Review The Auto Review function lets you view the captured image right after shooting it. If Auto Review is On, the camera will display the captured image for 1 second on the LCD monitor. To set Auto Review From the Record menu, select Auto Review. -
Page 44: Recording Videos
Recording Videos You can record videos with the camera, the available recording time depends on the capacity of the memory card. Videos can be recorded until the maximum memory capacity has been reached. However, the length of a single video may be limited. Slide the Mode switch to Movie mode [ Focus your camera on the subject that you want to take. -
Page 45: Movie Size
Movie Size The Movie size function appears only in Movie mode. Use this function to adjust the resolution and quality of movie clips. The table below shows the available size and corresponding image quality settings. Icon Item Description High Quality Normal For Internet, see “Internet Mode”... - Page 46 White Balance, Metering, Color Mode To set above settings, please refer to “Using the Function Menu” on page 28. Pre-Record You can catch the first three seconds of action you would have potentially missed. Once enabled, this function starts recording video automatically before the Shutter button is pressed.
-
Page 47: Playback
Playback You can playback the still image and video clips on the LCD monitor. Viewing in Single Navigation The Single navigation mode displays the images one by one on the LCD monitor. To view image/video clips, follow the steps below. Slide the Mode switch to Playback mode p. - Page 48 Scroll bar If scroll bars appear, it indicates that the screen can be scrolled. Thumbnail view To set calendar mode Set the camera to Playback mode p. Press the Zoom button left twice to view thumbnails in calendar mode. Use the navigation controls to move through the items.
-
Page 49: Zooming Images
Zooming Images The zoom view function works with still images only. • In normal view, press the Zoom button right repeatedly until the desired zoom view. • The 4 arrows on the LCD monitor indicate that the image is zoomed in. •... - Page 50 To capture a screenshot image from a video clip During playback of video, press the 8 key to pause playback on your desired video frame to capture. Press the Shutter button to capture a screenshot. The camera stops playback. The LCD monitor displays the captured image in Single navigation mode.
-
Page 51: Deleting An Image/Video
Deleting an Image/Video There are two ways to delete an image/video. • Using the FUNC/Delete button. • Using Playback menu Delete settings. See “Delete” on page 52. Using the FUNC/Delete Button Use the FUNC/Delete button on your camera to delete an image/video clip. Set the camera to Playback mode p. -
Page 52: Playback Menu
Playback Menu The Playback menu allows you to edit images and setup playback settings. To go to Playback Menu: Slide the Mode switch to Playback mode p. Playback Menu Press the Menu button to launch the Playback menu. Use the 8 or 2 keys to move through the menu selections. - Page 53 The next image is displayed on the LCD monitor. To delete another file, use the 4 or 6 keys to scroll through the image/video clips. Repeat steps 3 to 4. To close the Delete function and go back Playback menu, select Cancel. To delete multiple files: Select Multi in the Delete submenu, the images are displayed in thumbnail view on the LCD...
-
Page 54: Slide Show
Slide Show The slide show function enables you to playback your still images automatically in order one image at a time. To view slide show: From the Playback menu, select Slide Show. The slide show menu appears. Set the slide show settings. Select Start, then press the OK button to start the slide show. - Page 55 Protect Set the data to read-only to prevent images from being erased by mistake. A protected file has a lock icon when viewed on Playback mode. To protect files: From the Playback menu, select Protect. The Protect submenu is displayed on the LCD monitor. Select an available setting.
- Page 56 To protect/unprotect multiple files: Select Multi in the Protect submenu, the images are displayed in thumbnail view on the LCD monitor. Use the navigation control to move through the files. When the desired file is highlighted, press the OK button to mark/unmark the file clip for protection.
- Page 57 Color Mode The Color mode function lets you edit still images to apply different colors or tones for a more artistic effect. Edited images in this function are saved as a new file. To activate Color Mode: Set the camera to Playback mode p. Press the 4 or 6 keys to scroll and select an image to edit.
- Page 58 Trim The Trim function allows you to trim an image to another image size. This function is only available for still images. To trim an image: Set the camera to Playback mode p. Use the 4 or 6 keys to scroll and select an image to trim. Press the Menu button to launch the Playback menu.
- Page 59 Resize Resizes a previously saved image and only resizing to a smaller size is available. To resize an image: Set the camera to Playback mode p. Use the 4 or 6 keys to scroll and select an image to resize. Press the Menu button to launch the Playback menu.
-
Page 60: Startup Image
Startup Image You can specify the startup image from the captured images for camera. Press the Menu button to launch the Playback menu. Select Startup Image. The menu selection appears. Select an available setting. • System: Use camera default image. •... -
Page 61: Radial Blur
To set DPOF on a single image/all images: Select Single or All on the DPOF submenu. For single image, use the 4 or 6 keys to scroll and select an image to mark for printing. Specify the number of copies. Use the 2 or 8 keys to increase/decrease number. -
Page 62: Using The Setup Menu
Using the Setup Menu You can access the Setup menu whether you are in Record or Playback mode. The Setup menu allows you to configure general camera settings. To go to Setup menu: Press the Menu button to launch the Record/ Playback menu. -
Page 63: Setting Power Save
Setting Power Save The Power Save function allows you to set an idle time after which the camera automatically sets to sleep mode to save power. After a minute of being in sleep mode, the camera eventually turns off power. This function is not available in the following instances: •... -
Page 64: Setting File Numbering
Setting File Numbering This function allows you to select a method to assign file numbers to images. Available settings are: • Series: Assigns numbers to files in sequence even if the folder is changed. • Reset: The file numbering will start from 0001 each time a folder is changed or the memory is formatted. -
Page 65: Reset All
Reset All Use this function to reset the camera to its factory settings. However, the following settings are exceptions and not affected by Reset. • Date & Time • Language • TV Out • Custom White Balance data Using the Setup Menu... -
Page 66: Making Connections
Making Connections You can connect your camera to: TV or computer. Connecting the Camera to a TV You can play back your images on a TV screen. Before connecting to any video devices, make sure to select NTSC/PAL to match the broadcast standard of the video equipment you are going to connect to the camera. -
Page 67: Connecting The Camera To A Computer
Connecting the Camera to a Computer You can transfer images and videos to your computer. Connect one end of the USB cable to an available USB port on your USB cable computer. (included with camera) Connect the other end of the USB cable to the USB port on the bottom of your camera. - Page 68 . Saving the Files to Your Computer • Windows Windows 7, Windows Vista users: Click “Start” and then “Computer”. Windows XP users: Click “Start” and then “My Computer”. Double-click “Removable Disk”. • Your computer recognizes the memory card loaded in the camera (or built-in memory if there is no card) as a removable disk.
- Page 69 • Macintosh Double-click the camera’s drive icon. Drag the “DCIM” folder to the folder to which you want to copy it. After the copy operation is complete, drag the drive icon to Trash. On the camera, press the POWER button to turn off the camera. Then, disconnect the camera from the computer .
- Page 70 Double-click the image file you want to view. • For information about file names, see “Memory Folder Structure” on page 81. • An image that was rotated on the camera will be displayed on your Macintosh screen in its original (unrotated) orientation. Never use your computer to modify, delete, move, or rename any image files that are in the camera’s built-in memory or on its memory card.
-
Page 71: Appendix
Appendix Precautions during Use . Avoid Use While In Motion • Never use the camera to record or play back images while operating an automobile or other vehicle, or while walking. Looking at the monitor while in motion creates the risk of serious accident. . - Page 72 • Never try to take the camera apart or modify it in any way. Doing so creates the risk of electric shock, burn injury, and other personal injury. Be sure to leave all internal inspection, maintenance, and repair up to your dealer or nearest CASIO authorized service center.
- Page 73 • The battery is intended for use with a CASIO Digital Camera only. Use with any other device creates the risk of the battery damage, or deterioration of battery performance and service life.
-
Page 74: Battery Life
• If battery charging does not end normally within the specified charging time, stop charging anyway and contact your local CASIO authorized service center. Continued charging creates the risk of battery overheating, fire, and explosion. -
Page 75: Data Error Precautions
. Data Error Precautions Your digital camera is manufactured using precision digital components. Any of the following creates the risk of corruption of data in camera memory. – Removing the battery or memory card while the camera is performing some operation –... -
Page 76: Caring For Your Camera
Doing so creates the risk of fire, malfunction, and electric shock. 0 Should the power cord ever become damaged (to the point that internal wires are exposed or cut), immediately contact your original retailer or a CASIO authorized service center to request repair. Continued use of a damaged power cord creates the risk of fire, malfunction, and electric shock. - Page 77 Note that CASIO COMPUTER CO., LTD. shall not be held liable for use of this product in any way that infringes on the copyrights of others or that violates copyright laws.
-
Page 78: Battery Precautions
USB connection. If problems continue to occur after you perform the above steps, it could mean that the battery is faulty. Contact your nearest CASIO authorized service center. Battery Precautions . Precautions during Use •... -
Page 79: Using The Camera In Another Country
Using the Camera in another Country . Precautions during Use • The bundled USB-AC adaptor is designed for operation with any power supply in the range of 100V to 240V AC, 50/60Hz. Note, however, that the shape of the power cord plug depends on each country or geographic area. Before taking the camera and USB-AC adaptor along on a trip, check with travel agent about the power supply requirements in your destination(s). -
Page 80: About Folder And File Names
• Reset the file number. See “Setting File Numbering” on page 64. . About DCF The following operations are supported for DCF-compliant images. Note, however, that CASIO makes no performance guarantees concerning these operations. • Transferring this camera’s DCF-compliant images to another manufacturer’s camera and view them. -
Page 81: Memory Folder Structure
. Memory Folder Structure DCIM Folder DCIM Recording Folder 101CASIO Image File CIMG0001.JPG Movie File CIMG0002.AVI Recording Folder 102CASIO Recording Folder 103CASIO DPOF File Folder MISC DPOF File AUTPRINT.MRK . Supported Image Files • Image files shot with this camera •... -
Page 82: Troubleshooting
Troubleshooting Problem Cause and/or Action The battery may be exhausted. Charge or replace Camera does not turn on. the battery. Camera turns off Press the POWER button to turn on the camera. automatically. Press any button except the POWER button to turn LCD turns dark. -
Page 83: Number Of Snapshots/Movie Recording Time
Number of Snapshots/Movie Recording Time Snapshot Built-in Memory SD Memory Card Image Size Approximate (Approx. 10.9MB) (1GB) Snapshot Image Quality (Pixels) Image File Size Snapshot Recording Recording Capacity Capacity Superfine 5.18 MB (4320 3240) Fine 3.14 MB Normal 2.16 MB Superfine 4.85 MB (4320... - Page 84 Movies Built-in Memory SD Memory Card Image Approximate File Size of Maximum (Approx. 10.9MB) (1GB) Movie Quality Data Rate 1-minute File Size Movie Recording Recording (pixels) (Frame Rate) Movie Capacity Capacity 8Mbps 16 minutes 9 seconds 58.7MB Maximum (30 Frame) 25 seconds Movie Size: 4Mbps...
-
Page 85: Specifications
Specifications File Format Snapshots: JPEG (Exif Version 2.2); DPOF compliant Movies: Motion JPEG AVI, IMA-ADPCM audio (monaural) Recording Media Built-in Memory (Image Storage Area: 10.9MB) SD/SDHC/SDXC Recorded Image Sizes Snapshot: 14M (4320 3240), 3:2 (4320 2880), 8M (3264 2448), 5M (2592 1944), 3M (2048 1536), 16:9 (1920 1080),... - Page 86 Aperture Value F2.9 (W) to F9.9 (W) (When used with ND filter) White Balance Auto, Daylight, Cloudy, Tungsten, Fluorescent 1, Fluorescent 2, Custom Sensitivity (Standard Snapshots: Output Sensitivity) Auto, ISO 100, ISO 200, ISO 400, ISO 800, ISO 1600 Movies: Auto Self-timer Approximate Trigger Times: 10 seconds, 2 seconds, 10 seconds...
- Page 87 Approximate Battery Life All of the values provided below represent the approximate amount of time under normal temperature (23°C (73°F)) before the camera turns off. These values are not guaranteed. Low temperatures shorten battery life. Number of Shots (CIPA) (Operating Time) 180 shots Continuous Playback (Snapshots) 4 hours...
- Page 88 . Rechargeable lithium ion battery (NP-80) Rated Voltage 3.7 V Rated Capacitance 700 mAh Operating Temperature 0 to 40°C (32 to 104°F) Requirements Dimensions 31.4 (W) 39.5 (H) 5.9 (D) mm (1.24" (W) 1.56" (H) 0.23" (D)) Weight Approximately 19g (0.67 oz) .
- Page 89 CASIO COMPUTER CO.,LTD. 6-2, Hon-machi 1-chome Shibuya-ku, Tokyo 151-8543, Japan MA1107-B...
Need help?
Do you have a question about the QV-R100 and is the answer not in the manual?
Questions and answers