Table of Contents
Advertisement
Quick Links
Advertisement
Table of Contents

Related Manuals for Baxi 400 Combi 2.1


Summary of Contents for Baxi 400 Combi 2.1
- Page 1 United Kingdom Installation and Service Manual & Boiler Fiche High-efficiency wall-hung condensing gas boiler 400 Combi 2.1 600 Combi 2 800 Combi 2 Assure 500 Combi 2 These instructions include the Benchmark Commissioning Checklist and should be left with the user for safe keeping.
-
Page 2: Table Of Contents
Contents 1 Safety......................................1.1 General safety instructions..............................1.2 Recommendations................................1.3 Handling....................................1.4 Liabilities....................................1.4.1 Manufacturer’s liabilities............................. 1.4.2 Installer’s liabilities..............................2 Items supplied..................................2.1 Contents of the package..............................2.2 Accessories and options..............................3 Technical specification................................3.1 Technical data..................................3.1.1 Safety, performance & quality............................ 3.1.2 Certifications................................ - Page 3 7 Initial commissioning................................7.1 Benchmark..................................7.1.1 Building Regulations and the Benchmark Commissioning Checklist................. 7.1.2 The Benchmark Scheme............................7.1.3 The Benchmark Checklist............................7.1.4 Installer Notification Guidelines..........................7.1.5 Control panel description............................7.1.6 Procedure for first start-up............................7.1.7 Commissioning procedure............................7.2 Gas settings..................................7.2.1 Checking the working gas inlet pressure and gas rate....................
- Page 4 11.6.10 Pump..................................11.6.11 Expansion vessel..............................11.6.12 PCB..................................11.6.13 Setting an uncalibrated gas valve........................... 12 Decommissioning................................... 12.1 Disassembly..................................12.2 Recommissioning................................13 Disposal....................................12.1 Disposal and recycling............................... Benchmark....................................Product fiche....................................Package fiche....................................Combi 2/2.1 7875578-02...
-
Page 5: Safety
1 Safety General safety instructions Danger This boiler can be used by children aged 8 years and above and by persons with reduced physical, sensory or mental capabilities or lack of experience and knowledge when they have been given supervision or instruction concerning the safe use of the device and understand the resulting risks. -
Page 6: Liabilities
Literature pack containing: Installation & Service Manual User “Quick Start Guide” Template Warranty documents ErP product & package labels Accessories and options www.baxi.co.uk Go to: for full details. baxi.co.uk/FlueGuide For flue accessories go to or scan the QR code below. Combi 2/2.1... -
Page 7: Technical Specification
3 Technical specifications Technical data 3.1.1 Safety, Performance & Quality This boiler has been assessed by an appropriate Notified Body and shown to meet the requirements of all Directives and Regulations as applicable. These Directives and Regulations lay down requirements for the safety and efficiency of the appliance, together with its design, construction and use of materials. -
Page 8: Technical Information
In IE the following Codes of Practice apply Standard Scope IS 813 Domestic Gas Installations. The following standards give valuable additional information: BS 5546 Installation of hot water supplies for domestic purposes. BS EN 12828 Heating systems in buildings. BS EN 12831 Heating systems in buildings —... - Page 9 Technical data 24 Combi 30 Combi 36 Combi Cogeneration space heater Combination heater Rated heat output Prated Useful heat output at rated heat output 20.0 25.0 25.0 and high temp. setting Useful heat output at 30% of heat output and low temp. setting Seasonal space heating energy efficiency ƞs Useful efficiency at rated heat output and...
- Page 10 Characteristics of the heating circuit 24 Combi 30 Combi 36 Combi Maximum pressure Minimum pressure Temperature range for CH circuit 25-80 25-80 25-80 ºC Water capacity of expansion vessel Characteristics of the domestic hot water circuit 24 Combi 30 Combi 36 Combi Maximum pressure Minimum pressure...
-
Page 11: Dimensions And Connections
Temperature sensor outdoor sensor (NTC1000 Beta 3688 1 kOhm@25 º) Temperature [ºC] Resistance [Ω] 7578 6166 5046 4152 3435 2857 2387 2004 1690 1433 1217 1040 Temperature flow/heating circuit return sensor (NTC10K Beta 3977 10 kOhm@25 º) Temperature [ºC] Resistance [Ω] 32505 19854 12483 9999 8060... -
Page 12: Description Of The Product
4 Description of the product Main components Fig. 2 Functional diagram Flue adaptor Expansion vessel valve Expansion vessel Air-gas collector Gas valve DHW plate to plate heat exchanger DHW flow sensor Pump Control panel/facia/PCB’s Cable glands Safety pressure relief valve & drain Condensate trap 3 way valve motor Electrode... -
Page 13: Before Installation
5 Before installation Installation standards and rules Warning Installation and maintenance of the boiler must be carried out by a competent installer with relevant qualifications and in accordance with local and national regula tions. This document is intended for use by competent installers. Installation must be carried out in accordance with the prevailing regula tions, the codes of practice and the recommendations in these instructions. -
Page 14: Hard Water Area
Important Any wiring to the boiler, from either the mains or an external control, MUST be cable of the following specification:- 0.75 mm 3183/4/5Y (depending on installation) multi strand flexible cable conforming to BS 50525-2-11. Cable of the above specification is sufficiently flexible to with- stand normal regular opening and closing of the facia/control box as expected during routine servicing and other maintenance work. -
Page 15: Choice Of The Location
Choice of the location 5.3.1 Location of the boiler and filter Boiler The boiler may be fitted to any suitable wall with the flue passing through an outside wall or roof and discharging to atmosphere in a position permit ting satisfactory removal of combustion products and providing an ade quate air supply. -
Page 16: Ventilation
5.3.3 Ventilation Where the appliance is installed in a cupboard or compartment, no air vents are required. BS 5440: Part 2 refers to room sealed appliances in stalled in compartments. The appliance will run sufficiently cool without ventilation. 5.3.4 Condensate drain The condensate drain must be in accordance with BS 6798 and document H1 of the Building Regulations. - Page 17 Important Failure to install the condensate discharge pipework correctly will Fig. 6 Methods of termination cont. affect the reliable operation of the boiler. Careful consideration must be given to the possibility of the pipework being subject to freezing conditions and appropriate measures taken to prevent blockage.
-
Page 18: Clearances
5.3.5 Clearances A flat vertical area is required for the installation of the boiler and it should be capable of bearing the weight of the boiler when full of water. These dimensions include the necessary clearances around the boiler for case removal, spanner access and air movement. Additional clearances may be required for the passage of pipes around local obstructions such as joists running parallel to the front face of the boiler. - Page 19 If the terminal discharges onto a pathway or passageway, check that com bustion products will not cause a nuisance and that the terminal will not obstruct the passageway. If a terminal is less than 2 metres above a balcony, above ground or above a flat roof to which people have access, then a suitable terminal guard must be provided.
- Page 20 It is preferable that only the flue terminal protrudes from the wall. However, where circumstances dictate, it is permissible for the air duct (white tube) to be visible outside the property up to a maximum distance of 100 mm (Fig. 10), providing the flue is adequately supported and conforms to the appropriate sections of B.S.5440:1, the boiler Installation Manual, flue guide and guidance below.
-
Page 21: Connecting The Flue/Chimney
5.3.7 Connecting the flue/chimney When installing internal fit telescopic flue & elbow kits 7778296 & 7778299 refer to the instructions supplied with them. The internal fit kits allow installation of the flue without the need to ‘make good’ externally. They also reduce the overall height of the boiler and elbow by 16 mm. -
Page 22: Data Plate And Boiler Service Label
Fig. 17 Attaching the flue 12. If necessary fit a terminal guard. Important For details of all flue accessories go to baxi.co.uk/FlueGuide or scan the QR code below. 5.3.8 Data plate and boiler service label The data plate is located above the boiler controls. -
Page 23: Unpacking And Initial Preparation
5.3.9 Unpacking and initial preparation Caution RISK ASSESSMENT - Before commencing the installation it is recommended that the “Five Steps to Risk Assessment” document published by the HSE is consulted, and an assessment Fig. 21 Template per formed as described. GAS SUPPLY - The gas supply, gas type DRILL CORRECT FLUE CENTRE and pressure must be checked for suitability before connection. -
Page 24: Domestic Hot Water Circuit
5.4.2 Domestic hot water circuit Boiler Expansion vessel Check valve Pressure reducer Stop tap To hot tap Other tap outlets All DHW circuits, connections, fittings, etc. should be fully in accordance with relevant standards and water supply regulations. Your attention is drawn to: In GB: Guidance G17 to G24 and recommendation R17 to R24 of the Fig. -
Page 25: Installation
6 Installation General Installation must be carried out in accordance with the prevailing Fig. 24 Mounting the boiler regulations, codes of practice and the recommendations in this manual. Danger If the boiler is installed in a compartment do not use it for storage purposes. -
Page 26: Electrical
Electrical 6.3.1 Boiler wiring diagram T/OUT T/DHW Connection CB7 CB6 board return Electrode To Gas Valve flow O’heat limit 3-way valve motor Flue flow bl br To Pump Pressure switch Pump From X8 br gr y From X3 Gas valve Power supply: CAN connection L: Live 230 V –... -
Page 27: Connection - General
6.3.2 Connection - general The electrical safety of the equipment is only ensured when it is correctly connected to an effective earthing system in accordance with the prevailing safety standards for installations. The boiler must be connected to a suitable power supply as described in section 5.2.2. -
Page 28: Filling The Installation
It is important to check the inhibitor concentration after installation, system modification and at every service in accordance with the inhibitor manufacturer. (Test kits are available from inhibitor stockists.) For information or advice regarding any of the above contact Baxi Customer Support 0344 871 1545. 6.4.2... -
Page 29: Draining The Installation
Draining the installation The boiler can be drained via the pressure relief valve which incorporates a drain valve. Check routing is suitable for draining primary system water. Fig. 33 Draining 1. Remove the front panel and lower the controls. 2. Slowly open the drain anti-clockwise by hand. Do not use tools. 3. -
Page 30: Initial Commissioning
7 Initial commissioning Benchmark 7.1.1 Building Regulations and the Benchmark Commissioning Checklist Building Regulations (England & Wales) require notification of the installation of a heating appliance to the relevant Local Authority Building Control Department. This can be achieved via a Competent Persons Self Certification Scheme as an option to notifying the Local Authority directly. -
Page 31: Installer Notification Guidelines
Baxi Works Members Scheme Members only Register for free through Call ‘Gas Safe Register’ on: Complete the Baxi Works using the app 0800 408 5577 Benchmark Checklist or online or log onto: baxi.works.co.uk www.gassaferegister.co.uk within 10 days... -
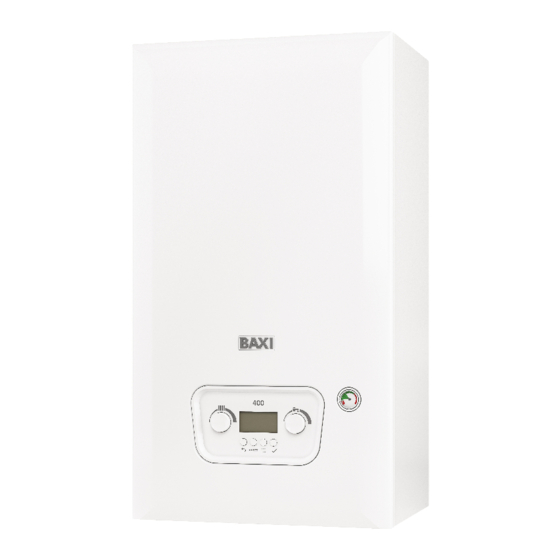
Page 32: Control Panel Description
7.1.5 Control panel description Knobs Fig. 34 Control panel HEATING: Using this knob you can modify the flow temperature for the heating installation (heating setpoint 25-80 °C). • Turn the knob anti-clockwise to reduce the temperature or to scroll through the menus. With an outside sensor connected it is possible to limit the setpoint value. -
Page 33: Commissioning Procedure
7.1.7 Commissioning procedure Proceed as described below to commission the boiler: Open the main gas cock. Open the gas cock on the boiler. Open the front panel as described in the chapter entitled “Accessing the boiler electrical connection board”. Check the gas supply pressure at the pressure point at the inlet of the appliance. -
Page 34: Combustion Parameters
7.2.2 Combustion parameters The boiler has two dedicated sockets in order to measure the Fig. 39 Flue gas measuring points combustion efficiency and cleanliness of the combustion exhaust gases during operation. One socket is connected to the flue gas exhaust circuit (A) which is used to detect the cleanliness of the combustion exhaust gases and the combustion efficiency. -
Page 35: Activating The Chimney Sweep Mode
Fig. 40 Minimum power 7.2.3 Activating the chimney sweep mode 1. Press the two F1 + F2 keys until the function activates. When the letter L appears on the display (followed by the flow temperature) the boiler is working at minimum power. F1 F2 F3 F4 Fig. -
Page 36: Lpg Conversion Procedure
% nominal & range % nominal & range of tolerance of tolerance A Trading Division of Baxi WARNING: THIS APPLIANCE MUST BE EARTHED Heating UK Ltd, Brooks House, Coventry Road, This appliance is only intended for installation on a governed supply, and on central heating systems with sealed expansion vessels. -
Page 37: Commissioning Procedure
7.2.5 Commissioning procedure Fig. 45 Procedure at commissioning Set Boiler to Maximum Rate Allow the combustion to stabilise. Do not insert probe to avoid ‘flooding’ the analyser. Perform Flue Integrity Combustion Check Insert the analyser probe into Verify Flue Integrity the air inlet test point, allowing Indication that products of Check CO &... -
Page 38: Adjusting The Gas Valve
7.2.6 Adjusting the gas valve Important Always adjust the maximum CO before making any alteration to the minimum value. Fig. 46 Gas valve adjustment V Gas flow rate setting screw - 4 mm Allen key K OFFSET setting screw - Torx 40 (T40) Remove the boiler door to take measurements or make adjustments. -
Page 39: Final Instructions
Final instructions 7.3.1 Handover Carefully read and complete all sections of the Benchmark Fig. 47 Handover Commissioning Checklist at the rear of this publication or the online electronic version that are relevant to the boiler and installation. These details will be required in the event of any warranty work. Important The warranty will be invalidated if the Benchmark section is incomplete. -
Page 40: Operation
8 Operation Use of the control panel 8.1.1 Browsing the menus Fig. 48 Accessing the menus 1. To activate the control unit, press any button. 2. To access the settings available from the menu, press the F3 key. Available menu options: Information menu User menu Installer menu... -
Page 41: Changing Temperature
Changing temperature 8.2.1 Changing the heating flow temperature Fig. 50 Scrolling through the menus & settings 1. Use the knob to adjust the flow temperature in heating mode. • Turn the knob anti-clockwise to reduce the temperature value. • Turn the knob clockwise to increase the temperature value. •... -
Page 42: Shutdown
Shutdown 8.3.1 Switching off the heating and domestic hot water Heating mode can also be disabled by turning the knob anti-clockwise until the word OFF appears on the display. Important When heating mode is re-enabled check, by turning the knob, that the comfort temperature is that requested. -
Page 43: Settings
9 Settings Accessing the settings Fig. 52 Accessing settings To display/change the list of SERVICE settings, proceed as follows: Press the F3 key - the • symbol on the menu bar will start to flash • Turn the knob until the symbol is reached to access user settings •... -
Page 44: Setting The Parameters
Setting the parameters 9.3.1 Setting the heating curve Fig. 54 Outdoor sensor connection Connect the outside sensor to terminal CB6 and connect the “On/Off” type room thermostat or the “OpenTherm” type room unit to terminal CB7 of the connection board after having removed the jumper. T/OUT T/DHW Important... -
Page 45: Maintenance
10 Maintenance 10.1 General Warning When changing components ensure that both the gas and electri cal supplies to the boiler are isolated before any work is started. When the component has been changed recommission the boiler. Always examine any seals or gaskets, replacing where necessary. -
Page 46: Annual Servicing
10.2 Annual servicing 10.2.1 Basic safety and general appliance checks Caution Always examine any seals or gaskets, replacing where necessary. Where a seal or gasket is supplied with a spare part it should be used, irrespective of the condition of the original. Use only original spare parts that are intended for use with this type of boiler. -
Page 47: Checking The Burner And Cleaning The Heat Exchanger
10.2.8 Checking the burner and cleaning the heat exchanger Fig. 58 Heat exchanger cleaning Warning Dust released from the front insulation panel and the rear insulation panel can harm your health. Proceed as described below for cleaning: 1. Isolate the unit from the power supply (disconnect the boiler from the main power supply). -
Page 48: Water Unit
10.2.9 Water unit Caution Do not use tools to remove components from inside the water unit (e.g. filter). For certain user areas, where domestic water hardness values exceed 20 Fig. 61 Water unit °F (200 mg of calcium carbonate per litre of water) it is recommended to install a polyphosphate batcher or equivalent system complying with the prevailing standards. -
Page 49: Troubleshooting
11 Troubleshooting 11.1 Temporary and permanent faults The codes on the display indicate two types of fault: temporary and permanent. The first item shown on the display is a letter followed by a two-digit number. The letter indicates the type of fault: temporary (H) or permanent (E). - Page 50 List of temporary faults Boiler display Cause - Check/Solution Description Group Specific An installer is required for most checks and solutions code code Solar temperature sensor is either removed or Check the solar temperature sensor wiring. Replace the sensor if necessary. In A.00 measures a temperature below range case of removal of the solar tank, set the parameter DP150=1.
- Page 51 Boiler display Cause - Check/Solution Description Group Specific An installer is required for most checks and solutions code code INSUFFICIENT CIRCULATION H.01 Maximum flow or return temperature value reached. Check the boiler/installation circulation Activate a manual venting cycle INSUFFICIENT CIRCULATION Check the installation pressure Activate a manual venting cycle Check the operation of the pump...
- Page 52 List of permanent faults (boiler stoppage, reset required) Boiler display Cause - Check/Solution Description Group Specific An installer is required for most checks and solutions code code SENSOR/CONNECTION PROBLEM E.00 Return temperature sensor disconnected Check the operation of the temperature sensor Check the sensor/PCB connection SENSOR/CONNECTION PROBLEM E.00...
- Page 53 Fault in gas valve control circuit Replace the gas valve or PCB Important When connecting a non-Baxi Room Unit the code “254” may be shown in the event of a fault. Read the fault code shown on the boiler display.
-
Page 54: Reading Out Measured Values
11.3 Reading out measured values Fig. 63 INFO menu access Proceed as described below to access the info menu: Press the F3 key; symbol flashes on the display; Press the F4 key to access the INFO menu; Turn the knob to view the settings; Press the F1 key to exit. -
Page 55: Statuses And Sub-Statuses
11.4 Statuses and sub-statuses • The STATUS is the operating phase of the boiler at the moment of display. To view the status, select the parameter AM012. • The SUB-STATUS is the instantaneous operation the boiler is performing at the moment of display. To view the sub-status, select the parameter AM014. -
Page 56: Reading Counters
11.5 Reading counters Fig. 64 Counter menu access Proceed as described below to access the counter menu: Press the F3 key; symbol flashes on the display; Turn the knob to view until the symbol is displayed then press the F4 key to confirm; Turn the knob to view until the required counter is displayed then press the F4 key to confirm;... -
Page 57: Changing Components
11.6 Changing components 11.6.1 Detection/ignition electrode Fig. 65 Electrode replacement Replace the detection//ignition electrode in the following cases: 1. Ionisation current <4 μA. To do this, activate the “chimney sweep function” (“Combustion settings” section) and set the boiler to minimum power. -
Page 58: Way Valve
11.6.6 3 way valve Fig. 69 3 way valve replacement 1. Disconnect the power and gas supplies to the boiler. 2. Close the heating system flow and return cocks. 3. Drain the boiler primary circuit using the pressure relief drain. 4. -
Page 59: Pump
11.6.10 Pump Warning Fig. 73 Pump replacement Take precautions to protect other components from water damage when removing the pump and auto air vent. 1. Disconnect the power and gas supplies to the boiler. 2. Close the heating system flow and return cocks. 3. -
Page 60: Setting An Uncalibrated Gas Valve
11.6.13 Setting an uncalibrated gas valve Fig. 76 Gas valve adjustement Caution If it is necessary to adjust the gas valve, always remove the Allen key while waiting for the CO2 /O2 values to stabilize. Important The gas flow adjustment Only qualified installers can carry out the commissioning of the screw (V) requires a product and, if necessary, the gas change. -
Page 61: Decommissioning
12 Decommissioning 12.1 Disassembly Warning Only qualified professionals are authorised to work on the boiler and the heating system. If the boiler was in operation, wait for the water contained in the heating installation to cool down. Moving the boiler is a job for two people. 12.2 Recommissioning Warning... -
Page 62: Benchmark
Benchmark Commissioning & Warranty Validation Service Record It is a requirement that the boiler is installed and commissioned to the manufacturers’ instructions and the data fields on the commissioning checklist completed in full. To instigate the boiler warranty the boiler needs to be registered with the manufacturer within one month of the installation. - Page 63 GAS BOILER SYSTEM COMMISSIONING CHECKLIST & WARRANTY VALIDATION RECORD Address: Boiler make and model: Boiler serial number: Commissioned by (PRINT NAME): Gas Safe registration number: Company name: Telephone number: Company email: Company address: Commissioning date: Heating and hot water system complies with the appropriate Building Regulations? Time, temperature control and boiler interlock provided for central heating and hot water Boiler Plus requirements (tick the appropriate box(s)) Weather compensation...
- Page 64 SERVICE & INTERIM BOILER WORK RECORD It is recommended that your boiler and heating system are regularly serviced and maintained, in line with manufacturers’ instructions, and that the appropriate service / interim work record is completed. Service provider When completing a service record (as below), please ensure you have carried out the service as described in the manufacturers’ instructions. Always use the SERVICE/INTERIM WORK ON BOILER SERVICE/INTERIM WORK ON BOILER Date:...
- Page 65 SERVICE & INTERIM BOILER WORK RECORD It is recommended that your boiler and heating system are regularly serviced and maintained, in line with manufacturers’ instructions, and that the appropriate service / interim work record is completed. Service provider When completing a service record (as below), please ensure you have carried out the service as described in the manufacturers’ instructions. Always use the SERVICE/INTERIM WORK ON BOILER SERVICE/INTERIM WORK ON BOILER Date:...
-
Page 66: Product Fiche
Product fiche for combination boilers Baxi 400 Combi 2.1 Space heating - Temperature application Medium Medium Medium Water heating - Declared load profile Seasonal space heating energy efficiency class Water heating energy efficiency class Rated heat output (Prated or Psup) -
Page 67: Package Fiche
Package fiche for boilers indicating the space heating energy efficiency of the package fi f ‘I’ I I I Class IV = 2%, Class V = 3%, Class VI = 4%, c fi Class VII = 3.5%, Class VIII = 5% c fi... - Page 68 1.00 (1) The intermediate values are calculated by linear interpolation between the two adjacent values. (2) Prated is related to the preferential space heater or combination heater. Package efficiency Baxi Combi 2/2.1 Temperature control X Temperature control Y Combi 2/2.1...
- Page 69 Package fiche for combination heaters (boilers or heat pumps) indicating the water heating energy efficiency of the package fi f ‘I’ l fi a i l y t i c fi (1.1 x ‘I’ - 10%) x ‘II’ - ‘III’ - ‘I’...
- Page 70 Combi 2/2.1 7875578-02...
- Page 71 7875578-02 Combi 2/2.1...
- Page 72 For the warranty to be maintained, please make sure... Benchmark checklist is completed Warranty is registered within 30 days The boiler has an annual service For full terms and conditions, visit www.baxi.co.uk/terms. Failure to adhere to terms and conditions will void your manufacturer’s warranty. Baxi Brooks House,...
Need help?
Do you have a question about the 400 Combi 2.1 and is the answer not in the manual?
Questions and answers