Table of Contents
Advertisement
Quick Links
Advertisement
Table of Contents

Subscribe to Our Youtube Channel
Related Manuals for Focus MX-4

Summary of Contents for Focus MX-4
- Page 1 MX-4 User Guide...
-
Page 2: Fcc Statement
FOCUS Enhancements MX-4 User Guide, © 2004. No part of this book may be reproduced in hard copy, electronically, or by any other means without the expressed, written permission of FOCUS... -
Page 3: Table Of Contents
Cables and Adapters • 22 B&W • 63 Installation Examples • 24 B&W Neg • 63 Correlating Input Sources to MX-4 Jacks • 24 Posterize • 63 Using Headphones • 25 Flip Horizontal • 63 VCR Selector Switches • 25 Mosaic •... - Page 4 Connecting with Ethernet • 121 OMPOSE IP Setup for a Computer or Laptop • 122 Basic Composition Steps • 88 Transferring Files TO or FROM the MX-4 • 128 Backgrounds • 88 Updating System Software • 129 Foreground Tiles • 89 Information About FTP Clients •...
-
Page 5: Introduction
• How to contact FOCUS Enhancements • An inventory of package contents • Description of the contents of this User Guide Please take a few moments to read the material so you can take full advantage of all MX-4 benefits. -
Page 6: Disclaimer
MX-4 contains features found on most video mixers. In addition, it contains the special features described in this section. Superb Video Quality — To ensure the highest video quality, the MX-4 uses 10-bit (4:2:2) video technology for Y/C applications, and 8-bit 4:2:2 for composite applications. - Page 7 Still Frame Jpeg Images — For the ultimate in creative expression, let the MX-4 allow you to trigger a stand-alone jpeg clip for background, input, or foreground use in your live video produc- tion.
-
Page 8: Common Uses For Mx-4
Multiple-Source Video Production — In a video production setup, you can connect one or more video sources (VCRs, camcorders, video disc players, cameras, title generators, computer graphics systems, and so forth) to MX-4’s four input channels. The Program output can then be sent to a VCR or directly to a monitor. -
Page 9: Package Contents
MX-4 P NTRODUCTION ACKAGE ONTENTS MX-4 P ACKAGE ONTENTS The MX-4 package contains the items shown below. Check your package against the illustration. MX-4 Unit UIDE Product registration card and other information OWER DAPTER AND If your package doesn’t contain all of the items... -
Page 10: About This User Guide
Chapter 1 Basic overview of MX-4 features, description of pack- Introduction age contents, description of manual. Chapter 2 Brief steps to setting up MX-4 with your equipment. Quick Start Provided for people quite familiar with connecting video equipment. Chapter 3... - Page 11 A Source is a physical device, such as a VCR, that provides a video and/or audio signal. A Channel is an internal MX-4 video signal path. The video and/or audio signal originating from a source travels along one of the channels.
- Page 12 MX-4 U UIDE HAPTER An Output displays or records a mixed signal (such as the video on one channel, a transition, and the video on another channel) on an output device. The output device might be a recording VCR or...
-
Page 13: Quick Start
MXPro Users, for helpful information in setting up your MX-4. Skim the instructions in this chapter. If you have any questions about any of the steps, turn to Chapter 3, Installing the MX-4, and follow the detailed instructions for setting up your equipment. -
Page 14: Quick Start Steps
Connect a second Input Source to the MX-4’s S-Video IN 2 jack. The MX-4 is set up, by default, to expect S-Video (Y/C) devices to be connected to the IN 1, IN 2, IN 3, and IN 4 input jacks. If you connect Composite devices to any of your jacks, you must tell the MX-4 this fact. -
Page 15: The Preview Screen
Connect the MX-4’s power cord to a suitable outlet. • Turn on all devices (the MX-4 power switch is located on the right end of the unit) and let the tapes roll. For more detailed information about setting up your equipment, refer to Chapter 3, Installing the MX-4. -
Page 16: Running The Demo
Then repeat the preceding step. • Press ROUTE again to exit from the Route screen. Running the Demo The demo gives you a quick look at some of the MX-4’s important features and assortment of tran- sitions. • Press buttons at the same time. -
Page 17: Cutting Between Sources
Borders and Solid Color Backgrounds • Press BACKGROUND The MX-4 highlights the speaker, headphone, or color block above the channel indicator, but does not show the channel letter. The Output monitor shows a solid color screen. • To change the color, press... -
Page 18: Running Transitions
2 then to select the transition by num- ARROWS ber. Selected Transition The MX-4 transitions between the two sources using the horizontal wipe transition with the Output screen showing the results. Running Transitions You can run transitions automatically or manually. Automatic •... -
Page 19: Choosing Transitions
USER category to your specific needs and preferences. You’ll learn more about this in later chapters. Other Features Refer to the rest of this User Guide to learn about the many additional MX-4 features, including: • Using the button to change the content of the Preview screen. - Page 20 MX-4 U UIDE HAPTER • Freeze the picture, and compress it. • Separately control the sound. • Apply input effects, such as mosaic, paint (posterization), negative, and more. • Use chromakey to combine parts of one picture with parts of another.
-
Page 21: Installing The
CHAPTER 3 MX-4 NSTALLING THE This chapter explains how to install (or, set up) MX-4 to use with other equipment. Major topics include: • Understanding Sources and Output • Understanding Preview and Program monitors • Understanding the MX-4 connectors •... -
Page 22: Sources And Output
Output — An output is a device on which you record and/or broadcast a signal. The signal might contain video, audio, or both. This signal is often a mix of signals coming into MX-4 from one or more sources. The output device might be a VCR with an optional monitor attached, or it might be a live broadcast. -
Page 23: Preview Monitor
Composite, or S-Video device. Number of Monitors You can operate the MX-4 with only one monitor connected to the Preview out. However, to greatly simplify your work you should have at least two monitors — one Preview and one Pro-... -
Page 24: Understanding Mx-4 Connectors
Refer to “Cables and Adapters” on page 22. Remove the MX-4 from its package and set it so you can see the rear panel. Refer to the panel and the illustration on the next page while reading this section. - Page 25 MX-4 MX-4 C NSTALLING THE NDERSTANDING ONNECTORS...
-
Page 26: Power Connector
To connect video devices to the MX-4 you need specific types of cables. You might also need one or more adapters, depending on your equipment. Look closely at the jacks on the MX-4 rear panel and note that they accept RCA Composite or S- Video cables. - Page 27 Audio Connectors To connect a stereophonic audio device to the MX-4, you need two separate audio cables — one for the left channel and one for the right.
-
Page 28: Installation Examples
As stated above, the MX-4 designates your input sources as A, B, C, and D. However, if you exam- ine the jacks on the MX-4 rear panel, you’ll see they are labeled 1, 2, 3, and 4. Initially, there is a direct correlation between the letter and the number designations: jack 1 corresponds to source A, jack 2 corresponds to source B, jack 3 corresponds to source C, and jack 4 to source D. -
Page 29: Using Headphones
LINE position. Some VCRs have more than one VIDEO IN jack (for example, one might be Composite and the other S-Video). Set the switch to match the jack you are using as the connector to the MX-4. General Notes When connecting video and audio outputs from source devices, most of the time you’ll probably connect to corresponding jacks on the MX-4 rear panel. -
Page 30: Post Production Configuration
This configuration is useful in a Post-Production environment—where you mix two or more pro- grams together. Connect the VIDEO OUT from a VTR 1 to VIDEO IN 1 on the MX-4 rear panel. Connect the AUDIO OUTs from a VTR 1 to AUDIO IN 1 on the MX-4 rear panel. - Page 31 MX-4 NSTALLING THE RODUCTION ONFIGURATION...
-
Page 32: Live Broadcast Configuration
This configuration is useful in a Live Broadcast environment. Connect the VIDEO OUT from Camera 1 to VIDEO IN 1 (Y/C) on the MX-4 rear panel. Con- nect the AUDIO OUTs from Camera 1 to AUDIO IN 1 on the rear panel. - Page 33 MX-4 NSTALLING THE ROADCAST ONFIGURATION...
-
Page 34: Using A Microphone With Mx-4
Attach the RCA “Y” adapter to the 1/4-inch-to-RCA cable. Plug the two male ends of the RCA “Y” Adapter into the R and L audio inputs on the MX-4 rear panel. You can plug the microphone into any audio input and route it like any other... -
Page 35: Basic Operations
CHAPTER 4 ASIC PERATIONS This chapter describes several basic MX-4 operations, including: • Starting and stopping the MX-4 • Using the MX-4 keyboard • Using the Preview screen • Using CURRENT and NEXT sources • Selecting Sources • Using the VIDEO/AUDIO selector •... -
Page 36: Starting And Stopping The Mx-4
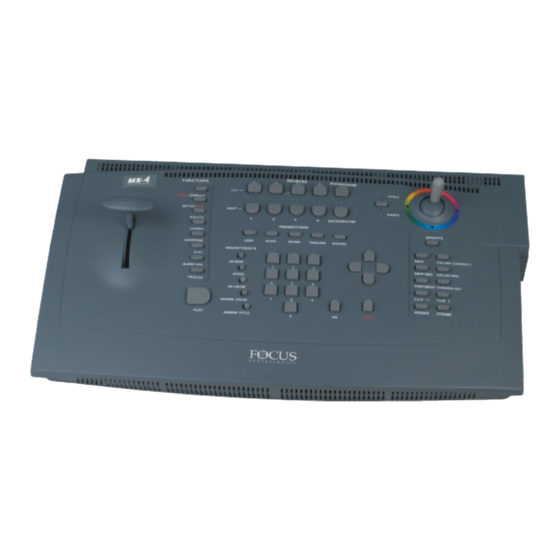
HAPTER MX-4 TARTING AND TOPPING THE Press the Power switch to start or stop the MX-4. The switch, located on the right-end of the unit, is a rocker-type switch. NDERSTANDING THE EYBOARD Use the MX-4 keyboard to control how the unit operates. - Page 37 ASIC PERATIONS NDERSTANDING THE EYBOARD...
- Page 38 11 OK Button — Generally used to indicate to the MX-4 that you have completed some opera- tion and want the unit to prepare for or perform it accordingly.
-
Page 39: Using The Preview Screen
REVIEW CREEN The Preview Screen is your control center for the MX-4 operations. This section describes individ- ual items on the Preview screen. The Preview screen appears on the monitor attached to the MX-4 PREVIEW OUT jack. REVIEW ONITOR AND... -
Page 40: Input Source Previews
Active Source Highlights You can have up to four input sources. The MX-4 labels the sources A, B, C, and D. (There is also a fifth, built-in source — the mixer’s own background color generator.) All transitions start with one source, called the CURRENT source, and end with another, called the NEXT source. -
Page 41: Color Selector
ARROW Selected Transition When you select a transition in the menu, the MX-4 highlights it in blue. It also shows the current speed and direction for the transition. In this example, speed is 5 and the direction is forward (as indicated by the arrow). -
Page 42: Using Current And Next Sources
UIDE HAPTER Using CURRENT and NEXT Sources The concept of CURRENT and NEXT sources is fundamental to MX-4 operations. As you go about creating productions, you always have a CURRENT and NEXT source. Example… Suppose you want to create a sequence of transitions from Kong’s thoughtful gaze to footage of a fighter plane contemplating take off and, finally, a shot of Stonehenge for a mystic closing. -
Page 43: Selecting Sources
OURCES Now that you understand the distinction between the CURRENT and NEXT source, you need to know how to select sources for each. Use the buttons on the MX-4 keyboard to NEXT select sources. Use to change the CURRENT source... -
Page 44: Swapping Sources
To do this type of mixing: Connect the VCR to one of the MX-4 inputs on the rear panel, such as set number one. Connect the audio tape deck to a different set of inputs, such as set number two. -
Page 45: Working With Colors
Gray Light Blue Purple Yellow Medium Blue-Green a. You cannot modify Black (color code 0). The maximum number of colors in the MX-4 palette is ten. You can change nine of the ten colors. You cannot change color 0 (black). -
Page 46: Identifying Colors
MX-4 U UIDE HAPTER Identifying Colors Background Color The Color Selector appears in the upper-right corner of the Preview screen. It indicates colors selected for the back- ground and borders as well as border style. Border Style The inner-most rectangle shows a sample of color assigned to the background as well as the color number. -
Page 47: Creating Custom Colors
You cannot add more colors, but you can change the existing ones. Once you create a cus- tom color, it stays permanently in the MX-4 unit until and unless you change it again. share the color palette. Therefore, changing any color affects both... -
Page 48: Changing Border Styles
MX-4 U UIDE HAPTER You can also use borders to frame images in a picture-in-picture (PIP) image, and so forth. What- ever purpose you use a border for, you can specify the color and style for the border. To specify border color: •... - Page 49 ASIC PERATIONS HANGING ORDER TYLES The MX-4 automatically stores the border style so that it is available until and unless you change it again. Table 4: Keys for Changing Border Attributes UNCTION OMBINATION Toggle through Soft Edges, Color Border, LEARN...
- Page 50 NOTES...
-
Page 51: Transitions
Transitions artistically switch from one scene to the next in a production. The MX-4 transi- tions range from simple cuts, dissolves, and wipes to sophisticated zooms, fly-ins, and flips. -
Page 52: Basic Transition Concepts
These letter indicators have no relationship to the A, B, C, and D letters used to differentiate between the MX-4 channels. The following basic steps explain how to run a transition with the MX-4. Each step is described in more detail later in this chapter. - Page 53 RANSITIONS ASIC RANSITION ONCEPTS You can select the CURRENT source, the NEXT source, and the transition in any order, and change them as many times as necessary before actually running the transition. At the completion of the transition, the CURRENT and NEXT sources swap places — that is, CURRENT becomes NEXT, and NEXT becomes CURRENT.
-
Page 54: Transition Categories And Menus
HAPTER RANSITION ATEGORIES AND ENUS To help manage the 700+ transitions, the MX-4 separates them into five logical categories — User, Basic, Edges, Shapes, and Misc. Use the Transition Category buttons to access the different cate- gories. Transition Category Buttons When you press a Transition Category button, MX-4 displays the transitions available in that cate- gory in the Transitions Menu. -
Page 55: Basic Transitions Category
It’s unlikely you’ll use all of the available transitions — but it is likely that you’ll have a limited set you use most of the time. With this in mind, the MX-4 makes it easy for you to access your favorite transitions by creating your own personal menu —... -
Page 56: Changing User Transitions Menu
If necessary, press to set the Preview screen to Standard or Two Channel mode. DISPLAY In the other Preview modes (Full, Current, or Next), the MX-4 does not display the Transitions Menu. Refer to “Display” beginning on page 73. Press the Transition Category button to display the menu on the Preview screen. -
Page 57: Selecting Transition Sources
OURCES An important step in setting up a transition is to identify the CURRENT and NEXT sources. Use CUT and NEXT to choose the two sources. The MX-4 provides feedback in a couple of different ways to confirm your choices. -
Page 58: Selecting Transitions
Use the keys to select from the Transitions Menu on the Preview screen; or, ARROW • Enter the transition’s assigned number on the MX-4 numeric keypad, then press keys to select a ARROW transition from the Transition Menu on the Preview Screen…... -
Page 59: Using Transition Numbers
RANSITIONS SING RANSITION UMBERS Using Transition Numbers Every transition has a number assigned for reference and identification. The number appears in the Transitions Menu just below each transition icon. The transition number… in this example, number 14 To select a transition using transition numbers: Enter the transition number on the keyboard. -
Page 60: Adjusting Transitions
SPEED speed by one unit. The MX-4 changes the Transition Speed indicator below the transition icon to the currently selected value. You can change the speed any time either prior to running the transition, or while it runs (which allows you to make adjustments “on the fly.”) - Page 61 To invoke the Auto-Reverse feature: • Enter SHIFT REVERSE With Auto-Reverse activated, the MX-4 displays a distinct arrow below the transition’s icon in the Transitions Menu. To manually reverse the current direction even with Auto-Reverse activated, press at any time. REVERSE...
-
Page 62: Running Transitions
NOTE If you apply the strobe effect to a source, the MX-4 automatically turns it off while the transition runs (refer to “Strobe” on page 69). Running a Trailing-type transition to either the Background channel or a channel with no video source executes a simple dissolve (transition 160). - Page 63 CHAPTER 6 NPUT FFECTS This chapter describes MX-4 Input Effects, that are available in the following button group on the MX-4 keyboard. Use Input Effects in the following ways: • Apply input effects to any source. • Combine many different input effects to create entirely new effects.
-
Page 64: Input Effects
— & NOTE The menu does not contain an icon or settings for the chromakey option. When you press the button, the MX-4 takes you directly to the chromakey screen. Refer to Chapter 10, CHROMAKEY Chromakey, for details. -
Page 65: Special Key Combinations
SHIFT EFFECTS sent to Program out. Refer to the following paragraph. When the Effects LED light is lit, Input Effects are enabled. The MX-4 applies the effects accord- ing to the parameter values for each effect. When you use the... -
Page 66: Using Input Effects
You can view all adjustments on the Preview screen. The MX-4 stores the most recent set of input effects. Therefore, when you turn the unit off, then turn it back on again, the most recent selection of input effects is still active. -
Page 67: B&W
B&W NPUT FFECTS B&W Changes the input picture to black and white. Removes all color from the image. Parameter Values — Zero or one. 0 = Off: 1 = On B&W N Reverses all black and white values in the image. If applied to a color image, reverses all black and white values but does not change any color values in the image. -
Page 68: Mosaic
Parameter Values — Zero or one. 0 = Off: 1 = On CAUTION Apply color correction BEFORE going live or rolling tape. Because of the way the MX-4 implements color correction, the program output might be affected temporarily. To use Color Correct:... -
Page 69: Video Adjustment
Allows you to access the Brightness, Color Saturation, Contrast, and Hue adjustment menu. Use the keys to select this option, then press . The MX-4 then ARROW guides you to the video adjustment menu. Parameter valuers are 0 (zero) or 1 (one). - Page 70 NOTES...
-
Page 71: Functions
CHAPTER 7 UNCTIONS This chapter describes the Function buttons, that give you access to the MX-4’s built-in functions. The function button group contains eight buttons, but gives you access to more than eight functions. -
Page 72: Demo
MX-4 U UIDE HAPTER Press to run a demonstration of several MX-4 transitions and other effects. SHIFT DEMO DISPLAY Demo works in conjunction with the CURRENT and NEXT sources. (If you have one source selected as CURRENT and NEXT, the demo works with that source only.) The demo shows many of the effects you can produce with the MX-4. -
Page 73: Display
UNCTIONS ISPLAY ISPLAY To control what appears on the Preview monitor, use the function. Press DISPLAY DEMO DISPLAY to cycle through the different display configurations. Refer to samples of these configurations on the next page. The illustrations show the key combination you can use to directly access any display configuration. - Page 74 MX-4 U UIDE HAPTER DISPLAY C ONFIGURATIONS Standard – SHIFT+1 Two Channel – SHIFT+2 Flashing white border indicates CURRENT source, unless that Full – SHIFT+3 source is the COLOR channel. Next – SHIFT+4 Current – SHIFT+5 For all examples on this page,...
-
Page 75: Setup
UNCTIONS ETUP ETUP The Setup functions control various aspects of the way the MX-4 operates, including Force Field Freeze, GPI Out Mode, Comb Filter, Dual Monitor Mode and 7.5 IRE Pedestal. To access the Setup functions, press SETUP Force Field 7.5 IRE... -
Page 76: Force Field Freeze
MX-4. Set the value to 0 (zero) to use the MX-4 with an edit controller. Set the value to 1 to enable GPI output to trigger a character generator, such as the Videonics TitleMaker. -
Page 77: Ftp
Route menu. ROUTE The MX-4 has four internal channels: A, B, C and D. The route menu lets you select which of the eight inputs are connected to each of the four channels. Audio sources can be routed to the same four channels (A, B, C and D) and in addition, can be routed to the color channel or the background audio channel (BKGD). - Page 78 MX-4 U UIDE HAPTER Select the channel (A,B,C or D) you want to change by pressing NEXT NEXT NEXT , or (for Background Audio). Once NEXT NEXT BACKGROUND SHIFT NEXT BACKGROUND selected, the channel is highlighted. Select the video source you want to display for this channel. Use the...
-
Page 79: Example: Changing The Routing
You can select a foreground or background graphic. Once you select this feature, press the MX-4 will guide you into either the foreground or background graphics menu to select the imported graphic of your choice. When you make the selection, press... -
Page 80: Sub-Route Menus
Ethernet port on the back of the unit and by using the standard FTP software. Refer to “Transfer- ring Files TO or FROM the MX-4” on page 128 for complete details. NOTE The MX-4 comes with the following twelve inch design background and foreground jpeg images: Background_00.jpeg through Background_49.jpeg Foreground_00.jpeg through Foreground_49.jpeg... -
Page 81: Learn
Learned Script. In a Learned Script you teach the MX-4 about a series of transitions and edits you want to include in a production. This is similar to using an Edit Decision List (EDL), though not as flexible or... -
Page 82: Compose
This section describes the types of freeze effects you can produce with MX-4 and how to use Freeze with transitions. You can also use the Freeze effect with the MX-4 PIP and Compose features. Refer to Chapter 8, PIPs, and Chapter 9, Compose, for further information. -
Page 83: Major Freeze Functions
Use Frame Freeze when working with still images, such as photographs. Using Frame Freeze with images in motion normally produces jitter in the movie. The MX-4 captures using Frame Freeze, by default. Refer to “Force Field Freeze” on page 72 to learn how to change the default setting. - Page 84 MX-4 U UIDE HAPTER Creating Still You can use the Freeze function to transition between a series of still images to create a “still mon- Montages tage.” You can use from one to four sources. To create a still montage: Route a video source to Channel A.
-
Page 85: Pips
CHAPTER 8 With the MX-4 you can easily produce single and multiple Picture-in-Picture displays. Single PIP Multi-PIP PIP (Picture-In-Picture) provides a way to combine images on the same screen. For exam- ple, one image appears inside a small rectangle, and the other image fills the remainder of the screen as shown by Single PIP, above. -
Page 86: Single Pip
MX-4 U UIDE HAPTER INGLE In a single PIP configuration, one tile fills the background while another tile and its mask float atop the background. The CURRENT source always serves as the background tile; the NEXT source always serves as the PIP image. - Page 87 OREGROUND Manipulating the This section explains how to change the position, size, shape, and so forth of the foreground tile. In Foreground Tile each case, do the steps after pressing , as described in the preceding steps. You can do any of PIPS these steps while the PIP plays on the Output.
-
Page 88: Using Other Effects With Single Pips
MX-4 U UIDE HAPTER You can apply the following shapes to PIP tiles. To select a shape, press the numeric key (0 through 9) that corresponds to the shape you want, as indicated below. Additional shapes can be selected for PIP mode using the button. -
Page 89: Multi-Pip
-PIP ULTI -PIP ULTI In Multi-PIP, as many as 4 separate images can share the screen at the same time. Each image appears inside a separate tile. You can use any of the four input sources to provide the images that appear in the tiles. You can choose from 9 different multi-PIP configurations by pressing the number keys shown in the following table. -
Page 90: Using Freeze Effect With Multi-Pips
Press the number on the keyboard that corresponds to the PIP configuration you want to use. (Refer to Table 11, “Multi-PIP Screen Configurations,” on page 85, at the beginning of this section.) MX-4 displays the configuration on the Preview screen. Use the... -
Page 91: Compose
If you move on to other functions without recording or displaying the composed screen, it is lost and cannot be recovered. The MX-4 provides a limited set of “drawing tools” in compose mode to help you create backgrounds and tiles. -
Page 92: Basic Composition Steps
MX-4 U UIDE HAPTER ASIC OMPOSITION TEPS This sequence shows how the composition at the beginning of this chapter was produced. More detailed descriptions of the steps follow. Select the background. This example uses a still image of a mountain range. You can use imported still jpeg images, gradients, solid color backgrounds, or color bars. -
Page 93: Foreground Tiles
Creating Moving Video Tiles A tile can contain video originating from any of the MX-4 input sources. The tile can be a rectangle of any size. The MX-4 scales the incoming video to fit within the tile, it does not crop the image. -
Page 94: Sizing Tiles
MX-4 U UIDE HAPTER Sizing Tiles You can make foreground tiles any size you want, from covering the entire screen to a thin hori- zontal or vertical line. Always establish the size of the tile before filling it with a solid color, moving video, gradient, or jpeg image. -
Page 95: Creating A Composed Image
OMPOSE REATING A OMPOSED MAGE REATING A OMPOSED MAGE To create a composition: Create or choose the background, foreground, gradient, or still frame jpeg image on the Route screen. Do this before entering Compose mode because the CURRENT source at the time you enter compose mode automatically becomes the background for the composition. -
Page 96: Playing The Composition
MX-4 U UIDE HAPTER Repeat steps 3 through 5 until your composition is complete. Use the button or to send your composition to the program output. PLAY LAYING THE OMPOSITION To play a composition on the output device: • Press... -
Page 97: Chromakey
CHAPTER 10 HROMAKEY Using Chromakey you can combine two completely separate images to create a composite image that might be impossible to create any other way. You’ve probably seen the chromakey effect used in television weather reports. The weather person stands in front of a “blue screen” (a solid blue background) and the weather map then keys onto the background from some other source. -
Page 98: Preparing The Background Footage
The color of the background must be evenly distributed. Glare from camera lights and shad- ows of the subject can alter the background color. MX-4’s chromakey circuitry might not be able to handle the different values, thereby spoiling the illusion. -
Page 99: Preparing The Keyed Footage
(the traffic sequence) and source C is the keyed footage (the flying hero). To prepare the chromakey footage: If necessary, turn on the MX-4 and all sources. Start both sources (A and C) rolling. Select the background footage as the CURRENT source — that is, press . - Page 100 Once you activate the Chroma Key, it stays in effect until you specifically deactivate it (which you’ll learn to do later in this procedure).To change the selected color or colors for the Chroma Key, press . This instructs the MX-4 to discard the current set of colors so SHIFT CHROMAKEY you can specify different ones.
-
Page 101: Performing The Chroma Key
CHROMAKEY • To apply any of the other Input Effects, apply them to the CURRENT source before pressing The MX-4 ignores effects applied to the NEXT source during chromakey. CHROMAKEY Fine-Tuning Key Colors You can fine-tune the chroma key effect so that more or less of the keyed footage gets keyed. You can separately adjust the range of colors and video brightness that gets keyed. - Page 102 NOTES...
-
Page 103: Learn Mode
CHAPTER 11 EARN In Learn Mode, the MX-4 “remembers” most of what you do, such as which transitions you used and how you used them. You can subsequently instruct the MX-4 to replay those steps, at which time the MX-4 creates the production on the output device. -
Page 104: Learned Environments
EARNED NVIRONMENTS A Learned Environment can be thought of as a “snapshot” of your current the MX-4 configuration, including input effects, functions, styles, and so forth, that are in effect when you create the Learned Environment. You can subsequently recall a Learned Environment whenever you want to use it. -
Page 105: Learned Scripts
Learned Environment using the current settings. Learned Scripts can have 25 actions (or, steps). If you attempt to exceed this number, the MX-4 just stops recording steps when it reaches capacity. You can replay all steps learned up to that point. -
Page 106: Using Learn Mode
, you can manually control any transition in the Learned Script. The MX-4 begins replaying the Learned Script and displays and/or records the results to the output device. (If the MX-4 Preview screen is not currently visible on the Preview monitor, press DISPLAY until it appears.) -
Page 107: Other Useful Information
SEFUL NFORMATION THER SEFUL NFORMATION When the MX-4 comes to the end of a Learned Script, it stops. You can re-initiate the same or any other Learned Script by entering +< #> for the script you want to SHIFT LEARN LEARNED SCRIPT run. - Page 108 NOTES...
-
Page 109: Orking With Udio
Before using audio sources, make sure they are properly connected to the MX-4. Refer to Chapter 3, Installing the MX-4, for instructions. You might also have to visit the Route menu to set up the audio devices correctly. Refer to “Route” beginning on page 73 for more infor-... -
Page 110: Audio Devices You Can Use
You can: • Use dedicated audio input sources, such as audio cassette players, compact disc players, and even live microphones. (Refer to “Using a Microphone with MX-4” on page 30 for installation instructions.) • Use the audio signal coming from combined input sources, such as the audio track contained on a video tape. -
Page 111: Selecting Audio Sources
The speaker icon inside the highlight indicates that the current audio is on channel A. The MX-4 highlights the NEXT video source in green (below the window). The speaker icon in this location means after you run the next transition, channel C’s audio plays through. -
Page 112: Continuous Audio
VIDEO AUDIO VIDEO This tells the MX-4 that when the transition runs, only the video changes. For example, press to cut to the video of the audience. The audio continues to come from channel A. Continue pressing (or using other transitions) to switch back and forth between the stage... -
Page 113: Using The Audio Mixer
Phone Slider Background Mix Slider Gain Slider — Control the audio on the four standard MX-4 selected channels — A, B, C, D, Background, and Background Music. Background Mix Slider — Controls the mix between the Background Music channel and the cur- rent channel audio. -
Page 114: Audio Mixer Controls
MX-4 U UIDE HAPTER Audio Mixer Controls The following tables explain how to operate the Audio Mixer controls from the MX-4 keyboard. Table 12: Selecting Mixer Channels … … SE THESE KEYS Select consecutive sliders LEFT ARROW RIGHT ARROW Select a specific channel... -
Page 115: Using Headphones
This lets you use the external mixer when you need flexibility, or use the MX-4 when you want control of the audio. The latter gives you the ability to perform more activities, like fading audio automatically when video transitions run. -
Page 116: Selecting Manual Levels
MX-4 U UIDE HAPTER Selecting Manual Levels To make manual adjustments to the input audio level for your analog sources: Use the keys to select the audio source (IN1, IN2, IN3, or IN4). LEFT ARROW RIGHT ARROW Make sure you’re on a gain slider. -
Page 117: Advanced Operations
Using Titles with the MX-4 • Using Color Bars • Performing Roll Edits • Operating in Live Environments • Security Monitoring • Using a GPI Device • Resetting the MX-4 to Factory Defaults • Connecting the MX-4 to a network using Ethernet... -
Page 118: Using Titles
Because the MX-4’s TBC (Time Base Corrector) creates a stable time base, TitleMaker can lock to it securely to produce an excellent picture. SING OLOR The MX-4 provides a set of standard color bars built into the unit. You can display the color bars on the Preview monitor. To display the built-in color bars: Press .The MX-4 enters Compose mode, and a flashing rectangle appears. -
Page 119: Performing Roll Edits
MX-4. A/A rolls can be accomplished with relative ease. As you’ll learn later in this section, you can also do A/B roll editing with the MX-4, although it does require good preparation and manual control of the devices. -
Page 120: A/B Roll Edits
MX-4 U UIDE HAPTER A/B Roll Edits A/B roll editing involves editing scenes from multiple sources. When doing A/B roll edits, you must manually synchronize the sources so that they are timed correctly. Normally, you record a countdown before each scene so you know when it starts, then back-time the transition accordingly. -
Page 121: Transitions To Modified Sources
In most live environments you need the ability to quickly and easily switch between the various live feeds. The MX-4 serves this need well because you can view the four input sources on the Pre- view screen and easily run transitions from the CURRENT to the NEXT feed simply by pressing... -
Page 122: Using Agpi Device
Doing so can damage the equipment and void your warranty. You can use a remote push-button device to trigger events on the MX-4. If you already have a GPI device you want to use, refer to “Live Broadcast Configuration” on page 38 to learn how to con- nect the device. -
Page 123: Instructions For Building A Gpi Trigger
GPI T DVANCED PERATIONS NSTRUCTIONS FOR UILDING A RIGGER GPI T NSTRUCTIONS FOR UILDING A RIGGER This section contains a diagram of the GPI Trigger Button you can build and all associated instruc- tions. Required Tools Soldering Iron and Solder and Parts Wire Cutters Electric Drill... -
Page 124: Using A Gpi Trigger Device
When you first power up the MX-4, it operates using settings defined by FOCUS Enhancements. As you go about using the MX-4 and changing its various settings, the unit stores your settings in its memory (called NVRAM). You can reset all settings to their factory defaults. -
Page 125: Connecting With Ethernet
ONNECTING WITH THERNET You can network your MX-4 to a PC or a Macintosh using an Ethernet (10Base-T) connector for a Macintosh or the included crossover cable for PCs. You can copy to and from the MX-4 the fol- lowing: •... -
Page 126: Ip Setup For A Computer Or Laptop
To set up your PC to communicate with the MX-4 (Static IP address): Win98SE/Win2000/XP Pro/WinT40/WinT40 Server Plug in the crossover cable (R5) to the MX-4 Ethernet port and your computer’s Ethernet port. NOTE A straight cable has the same wire configuration colors on each end. - Page 127 IP S DVANCED PERATIONS ETUP FOR A OMPUTER OR APTOP Select TCP/IP and click Properties. On the Internet Protocol (TCP/IP) Properties screen or identified as the Network screen for Windows 95/98, switch the default selection from Obtain an IP Address Automatically to Use the Following IP Address and type in the following IP address: 192.168.1.2.
- Page 128 IP Address Screen. In the “IP” section, enter SHIFT SETUP the following IP address: 192.168.1.3. Click Reboot the MX-4 (power off and on). After the MX-4 has rebooted, press to enter the IP Address Screen. The new IP SHIFT SETUP address (192.168.1.3) is displayed in...
- Page 129 BACK (background), FORE (foreground), and MISC. Now you are ready to import new, updated software or jpeg images to and from your MX-4. Details about how to transfer files are described in further detail in “Transferring Files TO or...
- Page 130 To set up your Macintosh computer to communicate with the MX-4 (Static IP address): Macintosh OS 10.2.8/OS 10.3.6 Plug in the straight cable (R5) to the MX-4 Ethernet port and your computer’s Ethernet port. NOTE A straight cable has the same wire configuration colors on each end.
- Page 131 OMPUTER OR APTOP Now you are ready to import new, updated software or jpeg images to and from your MX-4. Details about how to transfer files are described in further detail in “Transferring Files TO or FROM the MX-4” on page 128.
-
Page 132: Transferring Files To Or From The Mx-4
UIDE HAPTER Additions DHCP If your MX-4 is connected to a network and the IP address is automatically assigned to your com- Tips puter, perform the following procedure: Hook up a standard straight network cable between the router or hub and the MX-4 unit. -
Page 133: Updating System Software
FOCUS Enhancements to a networked PC. This same PC can be used to access your MX-4 to install the software file. Older copies of the operating software, as well as a library of background, foreground, and still frame jpeg images can be kept on your PC. -
Page 134: Information About Ftp Clients
HAPTER Click Tools and select Disconnect. Upon exiting this FTP program, the software will transfer to the MX-4. You can also select File and select Upload and go to the directory of desktop and select the previously saved software. To activate the new software, recycle the power on the MX-4 (power off and power on). - Page 135 LIENTS NOTE An example of an FTP program to upgrade the MX-4’s software and the transfer of files is FTP Explorer. It can be found at the following site: http://www.ftpx.com/download.html for Windows. Use Fetch 3.0 for the Macintosh. The instructions in this chapter are for the FTP Explorer, so they...
- Page 136 MX-4 U UIDE HAPTER...
-
Page 137: A Transitions List
APPENDIX A RANSITIONS This appendix shows the icons assigned to each MX-4 transition, and identifies them by number. Some transition descriptions use special terms and abbreviations to describe how the transi- tions work. (A) — The CURRENT source: the one on the screen before the transition begins. -
Page 138: Basic Transitions
MX-4 U UIDE PPENDIX ASIC RANSITIONS... - Page 139 RANSITIONS ASIC RANSITIONS Basic Transitions (continued) The Basic Transitions category contains transitions numbered from 0 through 299. The category contains a wide assortment of effects. Transitions 0 through 29 serve as the default assortment in the Transitions Menu. When you turn the unit on for the first time, these transitions appear in the menu.
- Page 140 MX-4 U UIDE PPENDIX Table 1: Descriptions of Basic Transitions ESCRIPTION ESCRIPTION Default Transition Assortment H Comp. (A) alongside (B) in motion; Exp. (B) Dissolve Comp. (A) to 1/2; roll R to (B); Exp H Wipe Slide in slice (B) from L at T; Wipe slice to full V Wipe V Comp.
- Page 141 RANSITIONS ASIC RANSITIONS Table 1: Descriptions of Basic Transitions (continued) ESCRIPTION ESCRIPTION H Exp. (B) from L Ctr/Comp. (A) to R Ctr H Exp. (B) from L Ctr/Slide (A) to R Diagonal Wipe (B) from BRC H Wipe (B) from R Ctr Diagonal Exp.
- Page 142 MX-4 U UIDE PPENDIX Table 1: Descriptions of Basic Transitions (continued) ESCRIPTION ESCRIPTION V Comp. (A)/Wipe (B) Ctr Wipe (B) with Slide from B L V Slide (A)/Wipe (B) Ctr Wipe (B) with Slide from B R V Wipe (A)/Exp. (B) Ctr Wipe (B) with Slide from T L V Comp.
- Page 143 RANSITIONS ASIC RANSITIONS Table 1: Descriptions of Basic Transitions (continued) ESCRIPTION ESCRIPTION V Wipe 1/2 slice (B); H Wipe 1/2 slice (B); Comp. (A) to R; CW spiral out to R V wipe (B) to B V Comp. (A) T to 1/2 screen slice; Slide Comp.
- Page 144 MX-4 U UIDE PPENDIX Table 1: Descriptions of Basic Transitions (continued) ESCRIPTION ESCRIPTION Diag. Slide (B) from TLC/Comp. (A) to H stripe-wipe Diagonal Comp. & Dissolve (A) to TLC V stripe-wipe Diagonal Slide & Dissolve (A) to TLC Checkerboard w/middle dissolve...
- Page 145 RANSITIONS ASIC RANSITIONS Table 1: Descriptions of Basic Transitions (continued) ESCRIPTION ESCRIPTION H slide in (A) to BRC; CCW Exp Spiral into Comp slide (A) from B to T; Comp slide from T to Ctrt. B with H flip. Ctr Exp (A); Slide from T to B with Exp to Comp h flip (CA) from Crt to B;...
-
Page 146: Edge Transitions
MX-4 U UIDE PPENDIX RANSITIONS Edge transitions move a border across the screen between the outgoing and incoming images. Edge transitions group into sets of six. For example, transitions 300 through 305 perform the same type of effect, but using six different edges: transitions 306 through 311 perform the same type of effect, but using the same six edges as the preceding group: and so forth. -
Page 147: Misc. Transitions
RANSITIONS RANSITIONS RANSITIONS Table 3: Misc. Transitions ESCRIPTION ESCRIPTION Rectangle bounces off A circles in from TLC bottom of screen B bounces off bottom of A circles in from TRC screen Rectangle bounces off A circles in from BRC bottom of screen B bounces off bottom of A twirls in from edges screen... -
Page 148: Shape Transitions
MX-4 U UIDE PPENDIX HAPE RANSITIONS Shape transitions use various geometric and custom shapes (stars, hearts, and so forth) to transition from one image to the next. Table 4: Shape Transitions Slide in slice (B) from R Ctr; Wipe slice to full Slide in Ctr slice (B) from T;... - Page 149 RANSITIONS HAPE RANSITIONS Table 4: Shape Transitions (continued) Ctr Wipe Ctr Wipe (B) with Horizontal Slide from T Bounce off edges/Wipe Ctr Wipe (A) to 1/16 screen; CCW spiral reveal * Random Sizes Flips (B); fills screen at end Random Wipes (B); Ctr wipe to full screen (A) wanders out...
- Page 150 MX-4 U UIDE PPENDIX Table 4: Shape Transitions (continued) Horizontal Curtain Expand (B) from Ctr to full Horizontal Compress (A) to Ctr line; Expand (B) from line Horizontal Compress (A) L to 1/2 screen slice; Slide slice R * Horizontal Compress (A) L to 1/2 screen slice; Slide to R; slide under Ctr line * Horizontal Compress (A) R to 1/2 screen slice;...
- Page 151 RANSITIONS HAPE RANSITIONS Table 4: Shape Transitions (continued) Horizontal Wipe (A)/Expand (B) Horizontal Compress (A) to L edge; Expand (B) from edge Slide in Slice (B) for R Ctr: Wipe slice to full Slide to Ctr slice (B) from T; Wipe slice to full Diagonal Slide Dissolve (A) to TRC Diagonal Wipe (B) from BLC Ctr Expand Dissolve (B)
- Page 152 MX-4 U UIDE PPENDIX Table 4: Shape Transitions (continued) Bounce off edges/Wipe Ctr Wipe (A) to 1/16 screen; CCW spiral reveal Random Sizes Flips (B): fills screen at end Random Wipes (B): Ctr wipe to full screen (A) wanders out Horizontal Curtain Expand (B) from Ctr to full Horizontal Compress (A) to Ctr line;...
-
Page 153: Default User Transitions
RANSITIONS EFAULT RANSITIONS Table 4: Shape Transitions (continued) Horizontal Compress (A)/Wipe (B) Horizontal Wipe (A)/Expand (B) Horizontal Compress (A) to L edge; Expand (B) from edge EFAULT RANSITIONS The User Transitions category contains a default set of transitions compiled from the other catego- ries. - Page 154 NOTES...
-
Page 155: B Time Base Corrector
This improves video signal quality significantly. TBC M You can use the MX-4 TBC as a dedicated, two-channel device to induce time base correc- tion on two separate channels. Set up your equipment as follows: Set up the video devices normally —... -
Page 156: Tbc Technical Information
NFORMATION The following information might be useful to video technicians. • The MX-4’s TBC has no control options. The MX-4 always applies TBC to the entire signal, including the horizontal and vertical intervals. • The MX-4 provides a frame-based TBC to correct four sources at a time. -
Page 157: C Video Quality
APPENDIX C IDEO UALITY The MX-4 meets the highest video quality standards. However, video artifacts can appear in video productions, especially when you use sophisticated effects and transitions. This appendix describes some of the video artifacts that can occur. NOTE The situations and artifacts discussed in this appendix normally apply to advanced video concepts. -
Page 158: Video Scaling Artifacts
UALITY You can set the MX-4 to freeze either a frame or a field (refer to “Force Field Freeze” on page 72). Freeze Field captures one field (half a video frame) and duplicates it to make the two fields that comprise a frame. -
Page 159: D Technical Specifications
APPENDIX D ECHNICAL PECIFICATIONS The MX-4 is a four-input video production switcher, mixer, frame synchronizer/TBC (Time Base Corrector), Manual Color Corrector, and special effects generator. Table 1: MX-4 Technical Specifications GENERAL Power Supply External in-line; 110VAC@60Hz/240VAC@50 Hz universal CE/FCC/UL/CSA Approved... - Page 160 MX-4 U APPENDIX D UIDE PPENDIX Table 1: MX-4 Technical Specifications (continued) Input Effects Strobe, Mosaic, Flips, Posterize, Brightness, Black and White, Black and White Negative, Color Negative, Contrast, Color Saturation and Hue Special Effects Chroma Key and Compose (see partial list under features)
-
Page 161: E Help For Mxp Ro
ELP FOR SERS This appendix helps Videonics MXPro users make an easy transition to the MX-4. It high- lights key operational commands from the MXPro that have changed with the MX-4. The MX-4 offers may new features and expands the capability of some MXPro operations. - Page 162 The MX-4 provides a set of hot keys that directly correspond to the MXPro Effect buttons. Using the hot keys (refer to Table 6, “MX-1 Compatibility Hot Keys,” on page 51) causes the MX-4 Pre- view screen cursor to appear at the beginning of each section within the Basic (MX-4) category.
-
Page 163: Glossary
A term originating in the film world. Normally describes roll- tenth minute. ing a single source into an effects device, such as the FOCUS Enhancements MX-4, and creating transitions between the Flying Erase Heads individual scenes. - Page 164 GLOSSARY Phase Alternating Lines. The dominant color television Video Tape Recorder. Similar to VCR (see above) except format in Western Europe, Australia, most of Asia, and that VTR’s are normally used in the professional video parts of South America and Africa. PAL is characterized field and contain enhanced features.
- Page 165 I N D E X canceling selections selecting source 38, 53 cursor source adapters ending transition arrow keys fine-tune CURRENT preview audio 13, 38, 39, 40, 42 perform accompanies video 107, 108 preparation AUDIO MIX adjust sliders background buttons continuous final footage CHROMA KEY control...
-
Page 166: Index
SPEED single LEARN create transition keyed footage tile 52, 54, 69 STANDARD preview 32, 39, 40, 42 PLAY starting MX-4 AUDIO MIX Static IP. setup CHROMA KEY 32, 99 LEARN stereophonic audio COMPOSE abort stopping MX-4 LEARN basic steps... - Page 167 INDEX system software, updating video quality VIDEO/AUDIO AUDIO MIX 32, 40, 42 T-BAR 39, 106, 108 selector AUDIO MIX CHROMA KEY color correction 91, 92 COMPOSE Y-Adapter cable LEARN transition tile background foreground change Time Base Corrector titler transferring files transformer transition adjust...
- Page 168 NOTES...
Need help?
Do you have a question about the MX-4 and is the answer not in the manual?
Questions and answers