Table of Contents
Advertisement
Available languages
Available languages
Quick Links
Owner's Instruction and Operation Manual
Model Number:
DVP08
Report Number: F23-147
Certified to ANSI STD Z21.86-2016-R-2021,
Certified to CSA STD 2.32-2016-R-2021, and
Certified to CSA 2.17-2017
* All Pictures In This Manual Are For Illustrative Purposes Only. Actual Product May Vary.
Save These Instructions In A Safe Place For Future Reference.
WARNING: If the information in these instructions is not followed exactly, a fire or explosion may result
- Do not store or use gasoline or other flammable vapors and liquids in the vicinity of this or any other
appliance.
- WHAT TO DO IF YOU SMELL GAS:
•
Do not try to light any appliance.
•
Do not touch any electrical switch; do not use any phone in your building.
•
Immediately call your gas supplier from a neighbor's phone. Follow the gas supplier's instructions.
•
If you cannot reach your gas supplier, call the fire department.
- Installation and service must be performed by a qualified installer, service agency or the gas supplier.
* Installation and service must be performed by a qualified installer, service agency or the gas supplier *
Please read this manual BEFORE
installing and operating this unit.
INSTALLER: Leave this manual with the appliance.
CONSUMER: Retain this manual for future reference.
THIS MANUAL IS SUBJECT TO CHANGE WITHOUT NOTICE.
World Marketing of America, Inc, 12256 William Penn Hwy, Mill Creek, PA 17060
• DVN08
R
causing property damage, personal injury or loss of life.
PH: 1-800-776-9425 Email: info@worldmkting.com
CALIFORNIA PROPOSITION 65 WARNING:
This product can expose you to chemicals including carbon
monoxide, which is known to the State of California to cause
cancer, birth defects, and/or other reproductive harm. For
more information, go to
854103B-2306N
www.P65warnings.ca.gov
Advertisement
Table of Contents

Subscribe to Our Youtube Channel
Related Manuals for Comfort Glow DVP08


Summary of Contents for Comfort Glow DVP08
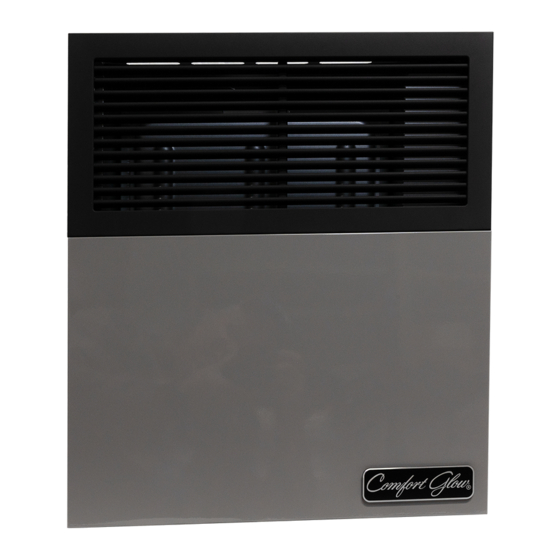
- Page 1 Owner’s Instruction and Operation Manual Model Number: DVP08 • DVN08 Report Number: F23-147 Certified to ANSI STD Z21.86-2016-R-2021, Certified to CSA STD 2.32-2016-R-2021, and Certified to CSA 2.17-2017 * All Pictures In This Manual Are For Illustrative Purposes Only. Actual Product May Vary.
-
Page 2: Product Features
(127mm) 8,000 BTU/HR- 14 inches W.C 10 inches W.C. 10 inches W.C. Chant K-890SL- DVP08 (2.34 kW/HR) (356mm) (254mm) (254mm) **NOTE: Minimum Gas Inlet Pressure for purpose of input adjustment. The efficiency rating of the appliance is a product thermal efficiency rating determined under continuous operating conditions and was determined independently of any installed system. -
Page 3: Installation Checklist
INSTALLATION CHECKLIST Your Gas Stove should be installed by a qualified installer only. An NFI qualified Installer can be found at www.nficertified.org/public/find-an-nfi-pro/ INSTALLER CHECK LIST This Checklist is to be completed in full by the qualified person who installs this unit. Keep this page for future reference. - Page 4 MASSACHUSETTS RESIDENTS REQUIREMENTS FOR THE SIGNAGE COMMONWEALTH OF A metal or plastic identification plate shall be MASSACHUSETTS permanently mounted to the exterior of the building at a minimum of eight (8) feet above The following requirements reference various grade directly in line with the exhaust vent terminal Massachusetts and national codes not contained for the horizontally vented gas fueled heating the in this manual.
-
Page 5: Product Identification
MASSACHUSETTS RESIDENTS referenced “special venting systems” A copy of all installation instructions for all Product instructions shall be included with the appliance or Approved side wall horizontally vented gas fueled equipment installation instructions and; equipment, all venting instructions, all parts lists for venting instructions, and/or all venting design The “special venting systems”... -
Page 6: Installation Items
INSTALLATION INSTALLATION ITEMS Minimum Clearance From Combustible Before installing heater, make sure you have the Construction items listed below. Rear 0.25 inches (with supplied spacers) • Piping (check local codes) Sides 6 inches • Sealant (resistant to propane gas) 36 inches •... - Page 7 INSTALLATION IN S ID T A IL E R D E C O R N F IX E D C L O S A B LE O P E R F IX E D C L O S A B LE O P E R VENT TERMINAL AIR SUPPLY INLET...
-
Page 8: Installing The Appliance
INSTALLATION INSTALLING THE APPLIANCE IMPORTANT: Separate the hanging bracket from the appliance INSTALLATION REPAIR SHOULD by removing two screws on the top and two nuts at DONE BY A QUALIFIED SERVICE PERSON. the bottom. THE APPLIANCE SHOULD BE INSPECTED BEFORE USE AND AT LEAST ANNUALLY INSTALLING THE HANGING BRACKET BY A QUALIFIED SERVICE PERSON. - Page 9 INSTALLATION INSTALLING THE HANGING BRACKET Figure 3a ON A COMBUSTIBLE WALL (I.E, DRYWALL/WOODEN WALL) Remove the required heat shield from the box and fold it as indicated in the illustration (fold along the perforated lines and break off when installing in a 2 X 4 wall). Align the holes on the heat shield with the holes on the mounting bracket and attach using the six provided small screws (vi).
- Page 10 INSTALLATION 2. Taking into account the minimum clearances 5. Insert the two provided rubber grommets (v) mentioned in table two, locate the closest wall into the lower bracket as shown. stud (which will serve to hold the appliance) and mark the square hole center at a distance “A”, (if wall stud is at the right), or “B”, (if the stud is at the left) (see table 2 and Figures 7 and 8).
-
Page 11: Installing The Venting System
INSTALLATION ATTENTION: THE ATTACHED SET OF THREE MARKING PLATES (RATING PLATE, OPERATION INSTRUCTIONS, AND SAFETY PLATE) MUST NOT BE REMOVED FROM THE APPLIANCE AT ANY TIME. MOUNTING THE HEATER ON HANGING BRACKET Place the heater on the hanging bracket and secure with two small screws (vi). - Page 12 INSTALLATION Minimum of IMPORTANT: 4-1/2” (115 mm) THE APPLIANCE’S VENTING SYSTEM SHOULD Wall Thickness BE INSPECTED AT LEAST ONCE A YEAR AND IMMEDIATELY CLEANED IF NECESSARY. Maximum of CAUTION: 10” (254 mm) Wall Thickness ALL JOINTS MUST BE AIR-TIGHT. The venting system consists of: Figure 7 Vent Cap Vent Pipe...
-
Page 13: Gas Connection
INSTALLATION 11. Hand-bend the rain shield (J) into a semi-circle and align it with the mounting holes located Rod (D) in the outdoor mounting plate (F). Secure the rain shield (J) to the outdoor mounting plate (F) using three (3) small screws (vi) included in the Vent-Air hardware packet. -
Page 14: High Altitude Installations
INSTALLATION PRESSURE TESTING SUPPLY LINE ATTENTION: This appliance and its appliance main APPLIANCE GAS INLET gas valve must be disconnected from the gas 3/8” NPT PIPE NIPPLE supply piping system during any pressure testing GROUND JOINT OPEN of that system at test pressures in excess of 1/2 psi MANUAL SHUTOFF UNION (3,5 kPa). -
Page 15: Operation
OPERATION WARNING: IF YOU DO NOT FOLLOW THESE INSTRUCTIONS EXACTLY, A FIRE EXPLOSION MAY RESULT CAUSING PROPERTY DAMAGE, PERSONAL INJURY OR LOSS OF LIFE. LIGHTING INSTRUCTIONS 1. STOP! Read the safety information on the POSITION INDICATOR attached plate. 2. Slightly push in the gas control knob and turn it clockwise to the "OFF"... -
Page 16: For Your Safety Read Before Lighting
OPERATION FOR YOUR SAFETY READ BEFORE 3. Slightly push down the gas control knob and turn it clockwise to the “OFF” position. Do not LIGHTING force. NOTE: The knob cannot be turned from “PILOT” to “OFF” unless it is pushed in slightly WARNING: downward. -
Page 17: Cleaning And Maintenance
OPERATION IMPORTANT: • DO NOT DRY CLOTHES OVER THE HEATER. • DO NOT SPRAY ANY AEROSOL NEAR THE HEATER WHEN FUNCTIONING. DO NOT STORE THESE ELEMENTS NEAR THE APPLIANCE. • DO NOT TOUCH GRILL TO AVOID BURNS. • AVOID BLOCKING AIR INLET AND HOT AIR OUTLET. •... - Page 18 OPERATION CLEANING THE MAIN BURNER ORIFICE SECONDARY FLAME PRIMARY FLAME & MAIN BURNER Turn OFF gas supply to the heater. 2. Remove casing assembly. 3. Disconnect burner tubing and remove orifice holder. THERMOCOUPLE 4. Apply compressed air to the orifice holder assembly to remove dust, lint or spider webs.
-
Page 19: Troubleshooting
TROUBLESHOOTING WARNING: TURN OFF HEATER AND LET COOL BEFORE SERVICING. ONLY A QUALIFIED SERVICE PERSON SHOULD SERVICE AND REPAIR HEATER. PROBLEM POSSIBLE CAUSE REMEDY Ignitor electrode broken. Replace ignitor electrode. Ignitor electrode not connected to When ignitor Reconnect ignitor cable. ignitor cable. - Page 20 TROUBLESHOOTING PROBLEM POSSIBLE CAUSE REMEDY Heater produces a clicking/ticking Metal expanding while heating or This is common with most heaters. If noise is noise just after contracting while cooling. excessive, contact qualified service person. burner is lit or shut off. Low line pressure.
-
Page 21: Replacement Parts
REPLACEMENT PARTS... - Page 22 REPLACEMENT PARTS Part # Description Vent Pipe Kit (Includes inner/ 893984 outer pipe, vent cap, hardware) 894008 Rain Shield 88370 Silicone Seal 893978 Outdoor Mounting Plate 28994 Shield 893952 Wall Bracket 893999 Control Knob 81367 Burner Tube Connection 81368 Regulator Connection Tube 81307 Gas Regulator (NAT) 81308...
-
Page 23: Service Record
SERVICE RECORD It is recommended that your heating system is serviced regularly and that the appropriate Service Interval Record is completed. SERVICE PROVIDER Before completing the appropriate Service Record below, please ensure you have carried out the service as described in the manufacturer’s instructions. Always use the manufacturer's specified spare part when replacement is necessary. - Page 24 NOTES...
- Page 25 Manuel d'instruction et d'utilisation destiné au propriétaire Numéro de modèle : DVP08 • DVN08 Numéro de rapport : F23-147 Certifié selon ANSI STD Z21.86-2016-R-2021, Certifié selon CSA STD 2.32-2016-R-2021 et Certifié selon CSA 2.17-2017 * Toutes les images contenues dans le présent manuel ne sont fournies qu’à titre d’illustration.
-
Page 26: Caractéristiques Du Produit
8 000 BTU/h - Chant K-890SL- colonne d’eau colonne d’eau (CE) colonne d’eau (CE) DVP08 (2,34 kW/h) (CE) (356 mm) (254 mm) (254 mm) **REMARQUE : Pression minimale d’entrée de gaz pour l’ajustement de l’entrée. La côte d’efficacité de cet appareil est une côte d’efficacité... -
Page 27: Liste De Vérification De L'installation
LISTE DE VÉRIFICATION DE L'INSTALLATION Votre poêle à gaz ne devrait être installé que par un(e) installateur(trice) qualifié(e). Vous trouverez un(e) installateur(trice) qualifié(e) NFI à l'adresse www.nficertified.org/public/find-an-nfi-pro/ LISTE DE CONTRÔLE DE L'INSTALLATEUR Cette liste de vérification doit être remplie intégralement par la personne qualifiée qui installe cet appareil. Conservez cette page pour consultation ultérieure. - Page 28 RÉSIDENTS DU MASSACHUSETTS EXIGENCES POUR LE COMMONWEALTH DU de chauffage. La plaque doit comporter l'inscription MASSACHUSETTS suivante en caractères d'au moins un demi-pouce (1/2 po) : « ÉVACUATION DE GAZ JUSTE EN DESSOUS. NE PAS Les exigences ci-après font référence aux différents OBSTRUER ».
-
Page 29: Identification Du Produit
RÉSIDENTS DU MASSACHUSETTS Une copie de toutes les instructions d’installation liste de toutes les pièces requises pour les instructions de de l’appareil au gaz à évacuation horizontale murale l’évacuation et/ou toutes les instructions sur la conception homologué « Produit approuvé », toutes du système d’évacuation, doivent être conservées avec instructions pour le système d’évacuation, ainsi qu’une... -
Page 30: Installation
INSTALLATION PIÈCES ET OUTILS POUR L’INSTALLATION Espaces de dégagement minimums aux matériaux Avant d’installer le radiateur, assurez d’avoir les pièces et combustibles les outils suivants. 0,635 cm (0,25) pouces (avec les Arrière • tuyauterie (vérifiez les codes locaux) entretoises fournies) •... - Page 31 INSTALLATION Si les codes locaux ne l’interdisent pas, l’appareil peut IMPORTANT : être installé dans une maison préfabriquée (États-Unis • LES LIEUX OÙ SE TROUVE L’APPAREIL DOIVENT seulement) ou mobile provenant du marché secondaire ÊTRE EXEMPTS DE MATÉRIAUX COMBUSTIBLES, et installée de manière permanente. Cet appareil n’est D’ESSENCE ET AUTRES LIQUIDES OU VAPEURS compatible qu’avec le type de gaz indiqué...
-
Page 32: Installation De L'appareil
INSTALLATION INSTALLATION DE L’APPAREIL IMPORTANT : Séparez les supports d’accrochage de l’appareil en L'INSTALLATION ET LA RÉPARATION DEVRAIENT dévissant les deux vis situées au-dessus et les deux ÊTRE EFFECTUÉES PAR UN(E) TECHNICIEN(NE) écrous situés en dessous. QUALIFIÉ(E). L’APPAREIL DOIT ÊTRE INSPECTÉ PAR UN PERSONNEL QUALIFIÉ... - Page 33 INSTALLATION INSTALLATION DU SUPPORT DE Figure 3a SUSPENSION SUR UN MUR COMBUSTIBLE (C.-À-D. CLOISON SÈCHE/MUR EN BOIS) Retirez le bouclier thermique requis de la boîte et pliez-le comme indiqué sur l'illustration (pliez-le le long des lignes perforées et cassez-le si vous l'installez dans un mur de 2 X 4).
- Page 34 INSTALLATION En tenant compte des espaces de dégagement Insérez les deux œillets en caoutchouc fournis (v) minimaux indiqués au tableau 2, localisez le poteau dans le support inférieur comme indiqué. mural le plus près (qui servira à tenir l’appareil) et marquez le centre du trou carré...
-
Page 35: Installation Du Système De Ventilation
INSTALLATION ATTENTION : L'ENSEMBLE DE TROIS PLAQUES D'IDENTIFICATION (PLAQUE SIGNALÉTIQUE, MODE D'EMPLOI PLAQUE DE SÉCURITÉ) NE DOIT EN AUCUN CAS ÊTRE RETIRÉ DE L'APPAREIL. INSTALLATION DU RADIATEUR SUR LE SUPPORT D’ACCROCHAGE Placez le radiateur sur le support de suspension et fixez-le à l'aide de deux petites vis (vi). INSTALLATION DU SYSTÈME DE VENTILATION Ces modèles d’appareil de chauffage mural sont conçus... - Page 36 INSTALLATION * Épaisseur IMPORTANT : minimale du LE SYSTÈME DE VENTILATION DE L’APPAREIL DOIT mur de 115 mm ÊTRE INSPECTÉ AU MOINS UNE FOIS PAR ANNÉE (4-1/2 po) ET NETTOYÉ IMMÉDIATEMENT SI NÉCESSAIRE. Épaisseur AVERTISSEMENT : maximale du TOUS LES JOINTS DOIVENT ÊTRE ÉTANCHES À mur de 254 mm L’AIR.
- Page 37 INSTALLATION Pliez à la main le pare-pluie (J) en demi-cercle et alignez-le avec les trous de montage situés dans la La Tringle (D) plaque de montage extérieure (F). Fixez le pare-pluie (J) à la plaque de montage extérieure (F) à l’aide de trois (3) petites vis (vi) incluses dans le paquet de matériel.
- Page 38 INSTALLATION AVERTISSEMENT : ENTRÉE DE GAZ N’UTILISEZ JAMAIS DE FLAMME OUVERTE POUR DE L’APPAREIL MAMELON NPT DE 3/8 po VÉRIFIER LES FUITES RACCORD-UNION OUVERT TEST DE PRESSION DE LA CONDUITE VANNE D’ARRÊT MANUEL FERMÉ D’ALIMENTATION RACCORD EN TÉ ATTENTION : Cet appareil et la vanne de gaz principale TARAUD DE CONNEXION POUR CONNEXION NPT...
- Page 39 UTILISATION AVERTISSEMENT : SI VOUS NE RESPECTEZ PAS SCRUPULEUSEMENT CES INSTRUCTIONS, UNE EXPLOSION POURRAIT CAUSER DES DOMMAGES À LA PROPRIÉTÉ, DES BLESSURES ET MÊME LA MORT. INSTRUCTIONS D'ALLUMAGE 1. ARRÊTEZ ! Lisez les informations de sécurité sur INDICATEUR DE POSITION la plaque ci-jointe.
-
Page 40: Instructions D'allumage
UTILISATION POUR VOTRE SÉCURITÉ, LISEZ AVANT pas. REMARQUE : Vous ne pouvez pas faire passer ALLUMAGE le bouton « PILOT » (VEILLEUSE) à « OFF » (ARRÊT) à moins d’appuyer légèrement sur ce dernier. Ne le forcez pas. AVERTISSEMENT : Attendez cinq (5) minutes afin de dissiper tout gaz. - Page 41 UTILISATION IMPORTANT : • NE FAITES PAS SÉCHER DE VÊTEMENTS SUR LE RADIATEUR. • NE PULVÉRISEZ PAS D’AÉROSOL PRÈS DU RADIATEUR LORSQUE CELUI-CI EST EN MARCHE. NE STOCKEZ PAS CES ÉLÉMENTS PRÈS DE L’APPAREIL. • AFIN D’ÉVITER LES BRÛLURES, NE TOUCHEZ PAS LA GRILLE. •...
- Page 42 UTILISATION Déconnectez le tubage du brûleur et retirez le FLAMME SECONDAIRE FLAMME PRIMAIRE support de l’orifice. Poussez l’air comprimé dans support de l’orifice pour enlever la poussière, les peluches ou les toiles d’araignées. Poussez de l’air comprimé dans les trous du mur de THERMOCOUPLE la chambre de combustion où...
-
Page 43: Dépannage
DÉPANNAGE AVERTISSEMENT : ÉTEINDRE LE RADIATEUR ET LE LAISSER REFROIDIR AVANT L’ENTRETIEN. SEUL UN TECHNICIEN QUALIFIÉ DEVRAIT ENTRETENIR ET RÉPARER LE RADIATEUR. PROBLÈME CAUSE POSSIBLE SOLUTION L’électrode de l’amorceur est brisée. Remplacer l’électrode de l’amorceur. L’électrode de l’amorceur n’est pas Reconnecter le câble de l’amorceur. - Page 44 DÉPANNAGE PROBLÈME CAUSE POSSIBLE SOLUTION Il est normal que la nouvelle fournaise murale dégage une certaine odeur la première Léger dégagement fois qu’elle est allumée. Cela est dû au de fumée ou d’odeur durcissement de la peinture et à toute huile Résidus du processus de fabrication.
-
Page 45: Pièces De Remplacement
PIÈCES DE REMPLACEMENT... - Page 46 PIÈCES DE REMPLACEMENT Nº de Clé Description Qté pièce Kit de tuyau d'évent (comprend 893984 le tuyau intérieur/extérieur, le capuchon d'évent et la quincaillerie) Bouclier de protection contre la 894008 pluie 88370 Joint en silicone 893978 Plaque de montage d’extérieur 28994 Bouclier 893952...
- Page 47 FICHE D’ENTRETIEN Il est recommandé que votre système de chauffage est desservi régulièrement et que le Service Interval enregistrement approprié est terminée. FOURNISSEUR DE SERVICES Avant de terminer l’enregistrement de service approprié ci-dessous, s’il vous plaît vous assurer que vous avez effectué le service tel que décrit dans le les instructions du fabricant.
- Page 48 REMARQUES...
Need help?
Do you have a question about the DVP08 and is the answer not in the manual?
Questions and answers