Advertisement
Quick Links
Advertisement

Subscribe to Our Youtube Channel
Related Manuals for Bambu Lab Electric Water Gun Toy-UZI(7.4V)

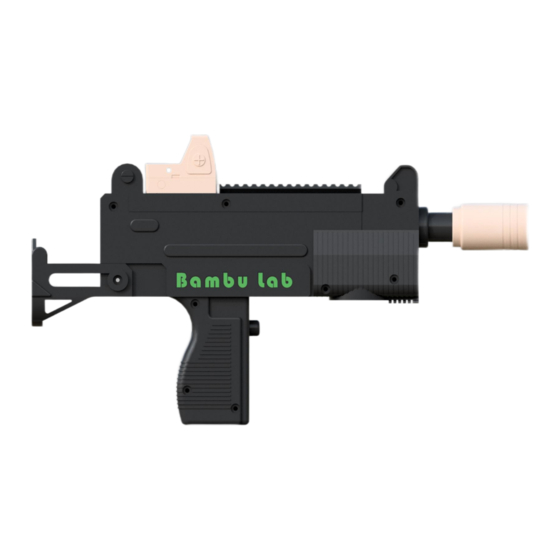
Summary of Contents for Bambu Lab Electric Water Gun Toy-UZI(7.4V)
- Page 1 Electric Water Gun UZI(7.4V) Installation steps(安装步 骤)
- Page 2 Water storage tank(储水瓶)
- Page 3 Detachable 14500 battery compartment (可拆卸14500电池仓)...
- Page 4 motor-driven (电动波箱) Installation steps(安装步骤) Step 1 Installation of motor-driven(电 动波箱安装): Insert the motor-driven into it according to the position shown in the diagram(将电动波箱按照图示 位置嵌入其中)...
- Page 5 Installation 14500 battery box(14500*2 steps(安装步骤) 电池盒) Step 2 Installation of battery box Waterproof and waterproof switch(电 switch(防水 池盒及防水开关安装): 开关) Install the battery box and waterproof switch in the corresponding position(将 电池盒及防水开关安装至相 应位置)...
- Page 6 Installation steps(安装步骤) Step 2’ motor-driven (电动波箱) Refer to the actual internal structure diagram(参见内部 构造实图) 14500 *2 battery box (14500*2电 池盒) Firing device Water pipes (击发器) (水管) Waterproof switch(防水 开关)...
- Page 7 Installation steps(安装步骤) Step 2 ’ ’ Refer to the actual internal structure diagram(参见内部 构造实图)...
- Page 8 Installation steps(安装步骤) Step 3 Assemble(组装):Merge the other half and assemble the corresponding screws according to the diagram(将另 一半合并,并按照图示装配相应的螺丝)...
- Page 9 Installation steps(安装步骤) Step 4 Assemble(组装):Merge the other half and assemble the corresponding screws according to the diagram(将另 一半合并,并按照图示装配相应的螺丝)...
- Page 10 Installation of gun barrel and silencer(枪管及 消音器安装) Installation steps(安装步骤) Step 5 Assemble(组装):The barrel, silencer, and main body are connected through 3D printed threads (枪管,消音器及主 体是通过3D打印的螺纹相连接)...
- Page 11 Installation steps(安装步骤) Step 6 Assemble(组装): Glue the sight up and down and push it into the main body (瞄准镜上下胶接,并推入主体) Push in the main body in this direction (沿此方向推入主体) GLUE( 胶接)
- Page 12 Installation steps(安装步骤) Step 7 Assemble(组装): Assembly of water storage tank(组装储水瓶), Please install the 14500 *2battery (请安装14500*2电池), The assembly is now complete(至此组装完成), Have fun playing(愉快的玩 耍吧)。...
Need help?
Do you have a question about the Electric Water Gun Toy-UZI(7.4V) and is the answer not in the manual?
Questions and answers