Table of Contents
Advertisement
Quick Links
Advertisement
Table of Contents

Related Manuals for Hattrick-Pro COASTER

Summary of Contents for Hattrick-Pro COASTER
- Page 1 COASTER USER MANUAL...
-
Page 2: Table Of Contents
TABLE OF CONTENTS Safety Instructions for Assembly and Usage How to Use the Coaster® Exercise Instructions Adjusting the Seat Adjusting the Hand Grip Resistance Training Moving and Storing the Coaster® Exploded Diagram Parts List Assembly Overview Step-By-Step Assembly Warnings... -
Page 3: Safety Instructions For Assembly And Usage
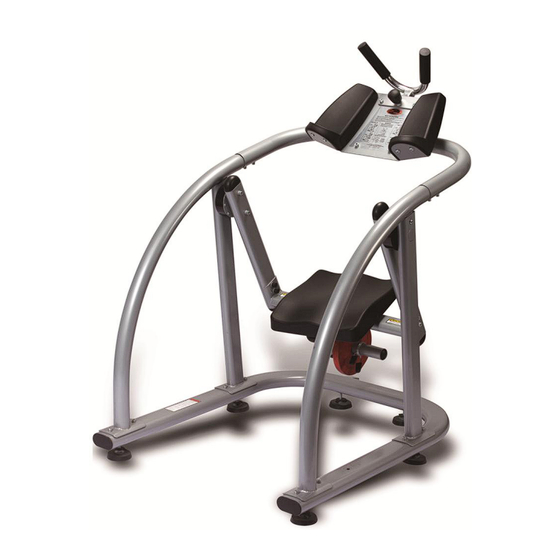
SAFETY INSTRUCTIONS FOR ASSEMBLY AND USAGE Safety comes first. Please read this instruction guide completely before assembling and using the Coaster®. Please keep this guide in a safe place and accessible to all staff. • Make sure all bolts and screws are tight prior to each day’s use. Make sure machine is working properly every day. - Page 4 Setting up the Ab Coaster®: Make sure the Coaster® is placed on a flat, stable surface.
-
Page 5: Exercise Instructions
EXERCISE INSTRUCTIONS: 1. Approach the Coaster® from the rear of the unit. 2. Adjust Hand Grip and place forearms and elbows on arm pads. Grasp handles to maintain your balance. 3. While grasping handles, place knees on Seat so that your feet are hooked on the back edge of the seat. -
Page 6: Resistance Training
MOVING AND STORING THE AB COASTER There are 2 wheels attached to the front leg support of Coaster in order to aid in the moving and storage of the unit. Keep stored in a cool,dry place.If placed in long-term storage,you should cover the unit with a cloth or other material to protect the unit from excessive dust or dirt accumulation. -
Page 7: Exploded Diagram
EXPLODED DIAGRAM... -
Page 8: Parts List
PART LIST Part No Part Name Specification Quantity Part No Part Name Specification Quantity arm plate support frame flat washer side frame S8 hex screw left support frame S6 hex screw right support frame wrench S17 4mm left swing arm roller bushing right swing arm leveler orientetion... -
Page 9: Assembly Overview
ASSEMBLY OVERVIEW... -
Page 10: Step-By-Step Assembly
STEP BY STEP ASSEMBLY IMPORTANT: Remove all parts from packing and inspect for damage. Retain packing materials if possible. STEP 1: Attach Weight Storage Post to Bottom Frame. NOTE: Half-tighten all screws until assembly is complete. STEP 2: Attach Side Frame and Swing Arm to both sides of Bottom Frame. NOTE: Be sure to use correct size screws as indicated. - Page 11 STEP 3: Attach Top Frame to both Side Frames.
- Page 12 STEP 4: Attach Weight Post to Seat and then attach Seat to both Swing Arms.
- Page 13 STEP 5: Attach Arm Rest Console to Top Frame, and then attach Hand Grip to Arm Rest Console.
- Page 14 Adjustable Hand Grip Insert Adjustable Hand Grip into slot as shown and attach with screw in back and secure with pop pin in front. STEP 6: Attach Plastic Covers.
-
Page 15: Warnings
STEP 7: Use hex key tool to firmly tighten all screws. Be careful not to cross thread or overtighten screws. The assembly process is now complete. Adjust LEVELERS located under front and rear feet as needed. WARNING SERIOUS INJURY COULD OCCUR IF THESE PRECAUTIONS ARE NOT OBSERVED. •...
Need help?
Do you have a question about the COASTER and is the answer not in the manual?
Questions and answers