
Related Manuals for zioxi Rechargeable powerHub3

Summary of Contents for zioxi Rechargeable powerHub3
- Page 1 Rechargeable powerHub3 User Guide zioxi Rechargeable powerHub3 (April 2019 onwards) User Guide © zioxi Limited 30-March-19...
-
Page 2: Table Of Contents
Timed On ............................ 7 Auto On ............................ 8 Sleep Mode .......................... 1 0 Battery State of Charge ........................ 1 0 Re-charging ........................... 1 1 User Access Control ........................ 1 3 Moving a powerHub3 ........................ 1 3 WiFi Setup ............................ 1 4 Admin mode .......................... 1 8 onView Web Control ........................ 1 9 Appendix 1 – Troubleshooting guide .................... 2 2 © zioxi Limited 30-March-19... -
Page 3: Warning And Safety Instructions
Ø While the appliance is under guarantee, repairs should only be undertaken by a service technician authorized by the manufacturer, otherwise the guarantee will be invalidated. Ø During any maintenance and repair work the appliance must be disconnected from the mains supply, the on / off switch should be turned off and the power conversion module switched off. Correct Use Ø If the appliance is being left unused for a few weeks or more, then it is important to fully charge and then turn the appliance off using the on/off switch under the top rim Ø Re-charge the appliance regularly (eg. every 30 days) and always in a ventilated space Ø The appliance is designed for use with lower power mobile computing devices Ø Always use the appliance on a clear and level surface Ø Do not place heavy objects on the appliance Ø Do not sit on the appliance Ø Avoid the spillage of liquids on the appliance Ø Do not insert any object into any opening Ø Store the appliance in it’s upright position, with lockable castors locked Ø Avoid exposing the appliance to high temperatures and significant impact forces Disposal and Caring for the environment Ø The transport and protective packing has been selected from materials which are environmentally friendly for disposal and can normally be re-cycled. Ø The appliance contains materials eg. lead acid batteries, which if disposed of incorrectly, could be potentially hazardous to human health and to the environment. Please dispose of the appliance at your local waste collection / recycling centre or contact your dealer for advice. © zioxi Limited 30-March-19... -
Page 4: Overview
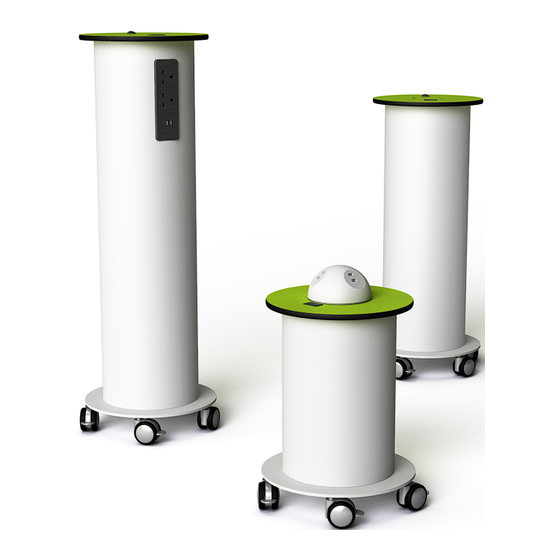
Rechargeable powerHub3 User Guide Overview The zioxi range of Rechargeable powerHub3s provide a mobile, rechargeable mains and/or USB power source for use in any setting where fixed mains power sockets are not available. The powerHub3s contain rechargeable batteries in 3 different capacity variants. As a guide, powerHub3s with 100Ah battery capacities (codes containing R100) have approximately 1000Wh of output capacity when the batteries are new. The powerHub3s are designed with a simple Timed On button which when pressed turns the power on for a set period of time – this time is factory set at 60 minutes but can be re- programmed to any time period (using the onView web app). However leaving the powerHub3 on & providing mains power to the power sockets even when the sockets are not in use will consume power from the battery, so is to be avoided. The Timed On feature is therefore designed to prevent inadvertent & unnecessary depletion of the batteries. Recharging the batteries is typically an overnight exercise. zioxi Rechargeable powerHub3s are fitted with a microprocessor control system which includes the capability of remote web based monitoring and control using zioxi onView. The onView web app provides the ability to remotely view current powerHub3 status (such as battery charge levels), change settings, send commands, receive alerts and review usage. Using zioxi onView requires the powerHub3’s WiFi connection to be configured to a WAP using the powerHub3’s local Admin function and a mobile device with web browser. The use of onView requires a licencing agreement to be signed via the zioxi team – this is typically free for the first year or 3 years depending on the product selected. The use of onView is described separately in the onView Guides (available from the www.onView.io web site Support pages once logged in). Please note that in order to ensure healthy and safe management of a powerHub3’s rechargeable lead acid batteries, the use of the onView web application is mandatory and is required in order for the product warranty to be valid. onView includes automatic alerting when powerHub3s require re-charging and provides notification of any issues during charging. © zioxi Limited 30-March-19... -
Page 5: Screen & Buttons
Rechargeable powerHub3 User Guide Screen & Buttons Sockets & Switches © zioxi Limited 30-March-19... -
Page 6: Turning On
Rechargeable powerHub3 User Guide Turning On The powerHub3 is delivered turned off. The switch for turning on the powerHub3 system is hidden discretely under the top. Once the on/off this switch is in the on position (the letter “I” is down), the powerHub3 screen will turn on for several minutes. This on / off switch can be used to turn off the powerHub3 at any point (for example, during long holiday periods) and may be useful if the powerHub3 needs to be “re-booted”. If the powerHub3 is to be left unused for several weeks or more, then it is strongly advised to firstly fully re-charge and then turn off the powerHub3 in order to maintain battery health. A couple of seconds after switching on, the screen will display the zioxi logo, followed by the Restart screen (which includes product code & version information). A progress bar shows the stage of restart and text description of the activity. Once completed, by default the standby screen will be displayed. Product Code Product 1.0.1 V300 20/03/19 V3Rev1 / Rev8 RHUBV302 ZHUB234567 01:23 The screen header displays the battery charge level and the WiFi connection status alongside the zioxi logo. In the bottom left of the screen, the powerHub3 serial number will be displayed (or a Device Name if this has been entered using onView). The WiFi symbol will show an empty fan outline icon until the WiFi connection has been set-up. © zioxi Limited 30-March-19... -
Page 7: Timed On
Rechargeable powerHub3 User Guide ZHUB234567 01:23 ZHUB234567 01:23 ZHUB234567 01:23 ZHUB234567 ZHUB234567 ZHUB234567 01:23 01:23 01:23 Whilst in a Standby mode, the central area of the screen will scroll around several panels. These include the advice to re-charge your powerHub once the battery symbol changes to orange (indicating a state of recharge advised) and a reminder to regularly re-charge a powerHub3 at least every 30 days regardless of the level of use. The laptop and smartphone help screen indicates that the powerHub3 is designed to provide top up power for mobile devices. It is not intended for use with high power devices such as hoovers, kettles and heaters - if devices of this nature are connected then the safety systems within the powerHub3 will engage and power to the sockets will be turned off. An alarm may sound warning the user that the powerHub3 is being overloaded. This condition can also arise if too many medium power devices (for example, high end laptops) are plugged into the powerHub3 at the same time. In this case, removing the last device to be plugged in may reduce the power load to an acceptable level. UK mains sockets are further protected with 3A fuses. The Standby screen will go off once the Display on Time has expired and no button has been pressed. Timed On The powerHub3 is designed to be turned on for a set period of time only. This is to prevent unnecessary battery use. Pressing and releasing the far left “Power” button marking below the screen on the powerHub3 top will turn on power to the powerHub3 sockets for the Countdown Timer period and then automatically turn off power. This button will also wake the powerHub3 if the screen is off. The powerHub3 can simply be re-started by pressing and releasing the same touch button again. The Timed On period is factory set to 60 minutes but this time can be changed using the onView web application. © zioxi Limited 30-March-19... -
Page 8: Auto On
Rechargeable powerHub3 User Guide The display will then show the following screen. 01:23 ZRPH234567 The Timed On screen displays the number of hours and minutes remaining. The timer can be increased up to the Maximum Time On period by pressing the + touch button below the screen whilst the powerHub3 is in Timed On mode. The – touch button below the screen will reduce the period down to a minimum of 1 minute. Pressing the far left “Power” button will turn off the timer and return the powerHub3 to the Standby screen. Auto On The Auto On function is managed using the onView web app. A schedule can be created, edited and then saved to any number of powerHub3s in one go. A single action can then be used to enable operation of the schedule across all selected powerHub3s. An Auto On schedule controls the output of power for fixed periods of time. The onView web app schedule edit tool allows a user to define variable power On durations, start times and days. © zioxi Limited 30-March-19... - Page 9 Rechargeable powerHub3 User Guide When an Auto On schedule is enabled and operating on a powerHub3, the following screen will be displayed. 01:23 ZHUB234567 The >|On information defines the day and time that power is next scheduled to be On. The >|Off information defines when the current power On cycle will complete. An Auto On schedule can be disabled by pressing the far left Off button. To avoid the inadvertent halting of a schedule, it maybe helpful to enable local User Access control in order that only logged in staff have the ability to locally disable the schedule. More information on using schedules to control power On is available in the onView Site Guide found in the support area of the web site once logged in (www.onView.io). © zioxi Limited 30-March-19...
-
Page 10: Sleep Mode
Sleep Mode The powerHub3 is designed to automatically go into a Sleep mode if left inactive for a few minutes in order to preserve battery power. The screen will switch off first and then approximately 2 minutes later the powerHub3 will enter Sleep mode. ZHUB234567 01:23 The device will show the moon symbol just before it goes to sleep. The powerHub3 can be woken from Sleep mode by pressing the far left “Power” button or by plugging into mains power. The powerHub3 can be remotely sent to Sleep or woken using the onView web or mobile app. Battery State of Charge The state of charge of the rechargeable batteries within the powerHub3 is displayed in the header bar on most screens. 01:23 01:23 01:23 01:23 01:23 01:23 ZHUB234567 ZHUB234567 ZHUB234567 Once the battery symbol changes from Green to Amber and starts to flash, it is advisable to recharge the powerHub3 at the next convenient opportunity. Depending upon the mode, a help panel will be displayed for a few seconds or within the cycle of panels. 01:23 01:23 01:23 01:23 01:23 01:23 ZHUB234567 ZHUB234567 ZHUB234567 © zioxi Limited 30-March-19... -
Page 11: Re-Charging
Rechargeable powerHub3 User Guide Once the battery symbol changes to a single Red bar or an empty Red battery outline then the powerHub3 should be re-charged immediately and before any further use. 01:23 01:23 ZHUB234567 01:23 ZHUB234567 ZHUB234567 01:23 If the powerHub3 is left for a further period of time without re-charging then to protect its batteries it will automatically turn off power to the powerHub3 sockets, display a red warning triangle and message briefly before going to sleep. The powerHub3 can be woken from this state by pressing the far left “Power” button. If the state of charge of the batteries is allowed to reduce still further, the powerHub3 will automatically go into a Hibernate mode. 01:23 01:23 ZHUB234567 ZHUB234567 The powerHub3 can be recovered from this mode by plugging into a mains power supply for re- charging (or by pressing the far left “Power” button, although given it’s state of charge it is likely to just return to the Hibernate state). A user can both remotely view and manage automatic alerts regarding battery levels using onView. If a powerHub3 is going to be left idle for a significant period of time (for example, through a holiday period) then it is advisable to ensure the powerHub3 is fully charged before it is left. Rechargeable batteries will naturally lose their charge when left inactive. It is also advisable to either turn the power off (using the on / off switch under the top) or remotely send the powerHub3 into Hibernate mode using the onView Hibernate command. Re-charging To recharge a powerHub3 simply plug it into a mains supply using the IEC (kettle) lead supplied. The IEC connector plugs in under the base of the powerHub3. The position is indicated by 2 holes in the base plate. When the mains lead is not in use it must not be plugged into one of the powerHub3’s main sockets and IEC connector in the base at the same time. © zioxi Limited 30-March-19... - Page 12 ZHUB234567 ZHUB234567 Plugged in – Plugged in – full charging Plugged in – float charging Plugged in – fully charged Not Charging AC power to sockets The charging mode will automatically change between the 3 modes as each phase of charging is completed. The length of time required for a full charge from a fully depleted battery will vary depending on the powerHub3 capacity but will typically be 12 to 16 hours from a fully discharged state. zioxi onView can also be used to remotely monitor the Charging status and email alert when charging is complete. Once the powerHub3 has entered Trickle charge mode it is almost fully re-charged so can be used if required. The powerHub3 sockets can be used whilst the powerHub3 is connected to the mains supply. The life of the powerHub3 rechargeable batteries is dependent on a number of factors. If a powerHub3 is recharged every time its battery gauge shows orange, then typically after 700 to 1000 recharge cycles the batteries will operate to 80% of their original capacity (this is the optimal re-charging approach). The batteries can be replaced as a chargeable return to factory (or approved zioxi agent) service. © zioxi Limited...
-
Page 13: User Access Control
Rechargeable powerHub3 User Guide User Access Control * * * * ZRPH234567 ZHUB234567 01:23 powerHub3s & hubTable3s are delivered with the user access control featured disabled. User access control using a 4 digit passcode can be enabled and configured using the zioxi onView web app. If enabled, a user will be prompted to enter a 4 digit code by using the up & down arrows to select a number and then pressing OK to confirm each digit. The default user code is 2244. Once logged in the Standby screen will be presented. The powerHub3 will automatically logout after a period of inactivity. User passcode control can be utilized to prevent local user operation, for example if the trolley is operating in Auto mode from a schedule and you don’t want local users to turn this schedule off. Moving a powerHub3 zioxi powerHub3s are designed with castors to enable them to be moved around & located anywhere inside a building. Before moving a powerHub3 ensure that both locking castors are unlocked first, and then re-engaged once the powerHub3 is re-located. powerHub3s are heavy items so care needs to be taken when moving them around, especially when encountering door stops and ridges. They are designed for storage in a vertical orientation. If there is a need for storage in a horizontal orientation eg. for transport purposes, © zioxi Limited 30-March-19... -
Page 14: Wifi Setup
Rechargeable powerHub3 User Guide then a powerHub3 should be stored with the mains connector (marked by the 2 holes) under the base ring in the lowest position (ie underneath). WiFi Setup To establish a WiFi connection between an onView enabled device and a WiFi Access Point (WAP), it is necessary to login to the device’s Admin menu and temporarily establish a WiFi connection between the device (trolley, powerHub, desk etc) and a personal mobile device (smartphone, tablet or laptop). If required for WiFi router provisioning, the device’s MAC address can be found on a label on the base of the device or can be retrieved from the Device Details Technical page within the onView web app. zioxi onView enabled devices support 2.4Ghz WiFi radio frequencies and the following WiFi security & encryption types: • None, WEP, WPA, WPA2 • AES, TKIP A future release is planned to support WPA2 Enterprise. “Captive” WiFi security where a user enters credentials into a custom login screen is currently not supported. For onView powerHub3 and hubTable3 products, the Admin screen can be accessed by simultaneously pressing both far left and far right buttons when in one of the Standby screens. ZRPH234567 01:23 ZRPH234567 01:23 The Admin Passcode entry screen is then presented. The default Admin passcode is 151617. See the Admin login instructions in the Admin section below for more information. The Admin menu is then presented. © zioxi Limited 30-March-19... - Page 15 Rechargeable powerHub3 User Guide ZHUB234567 01:23 If a WiFi empty fan symbol with a line through is displayed on the device screen (top right), then it is necessary first to change the device from Local to Connected mode using option 4 of the Admin menu. This is achieved by selecting the Local/Connected option using the arrow keys, then pressing OK to save and then ESC to return to the Admin menu. To configure WiFi credentials, select Admin menu WiFi Setup (option 6). The screen will then summarise the steps to configure a WAP connection to the powerHub3 or hubTable3 (the device). zhub-234567 * * * * ZCTS234567 ZRPH234567 01:23 If you wish to delete any existing stored WAP credentials on the device before adding a WAP, then press the DEL button. This will delete the WAP credentials currently saved on the device. The device will confirm when the action has been completed. This may take a short period. Pressing the ESC key at any stage will halt the WiFi Setup process and return you to the main Admin menu. To initiate the addition of a WAP connection for the device: 1. Press OK to initiate the process. After a short period, a blue WiFi fan will be displayed indicating the device is temporarily acting as a WiFi access point and broadcasting a WiFi signal. It operates in this mode for the duration of WiFi setup only. If advised to do so, re-start the trolley using option 3 Restart in the Admin menu and then log back into the Admin menu to initiate the WiFi setup process. © zioxi Limited 30-March-19...
- Page 16 Rechargeable powerHub3 User Guide 2. Go to WiFi Settings on your mobile device (a smartphone, tablet or laptop with a common browser, such as Chrome). 3. Find zhub-xxxxxx in your list of WiFi networks and connect (where xxxxxx is the 6 digit serial number of the powerHub3 / hubTable3 device). You may get a pop-up on your mobile device saying you have no internet connection, this is to be expected so select the option to continue with the connection anyway. 4. Enter 192.168.0.1 in your web browser to bring up the zioxi onView WiFi Setup web page on your phone, tablet or laptop. 5. Select and enter WAP details using the browser web page The web page below should appear, although this may take a little time. Click Scan (or Re- Scan) to list all available WAPs. Select the WAP name (SSID) you want to use to connect the trolley. Enter the password credentials and then click Connect. © zioxi Limited 30-March-19...
- Page 17 Rechargeable powerHub3 User Guide If the pop-up message below is presented on your mobile device, then the WAP credentials you have entered have been successfully sent to the device. The device will then attempt to establish a WiFi connection (regardless of whether the WAP credentials you have provided are correct or not). Attempting to connect… will be displayed at the bottom of the browser window. If this process is unsuccessful, ensure you have entered the password correctly, a MAC address is provisioned on your router (if this is required for your network) and you have a strong & reliable signal from the WAP (by moving the device nearer if necessary) and then repeat the process. The WiFi setup process is best conducted during quieter times when the number of WiFi connected devices in a space is reduced. The WiFi Setup process will timeout after 3 minutes if it has not successfully completed. Please note the search process for already configured and new WiFi networks can take some time for the device to complete. © zioxi Limited 30-March-19...
-
Page 18: Admin Mode
Rechargeable powerHub3 User Guide Once a WiFi connection has been successfully made, the WiFi icon on the header bar will show some or all bars in orange. After a short period (it may take seconds or a couple of minutes) the WiFi symbol bars should then change to blue, indicating that a connection has also been made to the zioxi cloud service. If this doesn’t occur, you may need to configure your web filtering and firewall settings to enable the external Internet connection. The firewall & filtering must also allow outbound TCP access to port 5683 (COAP) on device.spark.io and outbound https (port 443) to api.particle.io in order that devices can connect to the zioxi cloud service. The device looks up device.spark.io using DNS with demand load balanced by DNS across a number of server IP addresses. Ideally it’s best to allow unlimited outbound TCP 5683, or whitelist by device MAC address, but if this is not possible, you should whitelist all of the zioxi cloud service server IP addresses, as they change about once a minute. This list is subject to change as servers are added or removed, so whitelisting by destination IP address is not ideal. The latest list can be found by using a nslookup “device.spark.io” on your command line. The device software currently doesn’t allow the assignment of a Static IP addresses directly but this can be achieved by creating a DHCP reservation on your server. The MAC address of the device can be found on the rear or underside of the product or within the Technical tab of the Device Details section of the onView web application. For more information, see the article on “How do I assign a static IP address?” within the Support/FAQ section of the web application. If changes are made to your WiFi network set-up, it is advisable to re-start your onView device(s) using Restart (option 3) within the local Admin menu or the on/off button found under the top rim to re-initiate the cloud connection process. Once a WiFi connection has been made to the zioxi cloud service, all other Admin functions can be performed using the onView web app. Admin mode There are a small number of other functions that can be carried out via local Admin at the device. The Admin screen can be accessed by simultaneously pressing both far left and far right buttons when in the Standby screens. The Admin Passcode entry screen is then presented. The default Admin passcode is 151617. This should be changed after your first login by using the local Admin option 2 (or changed across a number of devices at once using the onView web app once a WiFi & zioxi cloud connection has been established). The code is entered using the up & down arrows to select a number and then OK to confirm and progress to the next number entry. © zioxi Limited 30-March-19... -
Page 19: Onview Web Control
Rechargeable powerHub3 User Guide * * * * ZHUB234567 ZCTS234567 ZRPH234567 01:23 A green tick will be displayed to signify the correct code. The Admin menu is then presented. ZHUB234567 01:23 The local Admin menu options are as follows: 1. Display Language to change the language displayed locally on the device 2. Admin Passcode to update the local Admin passcode 3. Restart to re-boot the trolley 4. Local/Connected to toggle between Local mode and WiFi Connected mode (note that only limited functionality is available without a web connection) 5. Restore Defaults to return the trolley to it’s factory settings 6. WiFi Setup to connect the trolley to up to 5 Wireless Access Points 7. Technical / Legal to review technical and legal information about the device, including it’s MAC address and Local IP address Use the ESC key to back-up and to exit Admin. The trolley will automatically exit Admin mode if inactive for 90 seconds. The onView web application provides all the above Admin functions along with a large number of additional functions. onView Web Control onView provides a web based application which enables functions to be performed remotely from any device, anywhere. onView includes the following features: © zioxi Limited 30-March-19... - Page 20 Rechargeable powerHub3 User Guide • view current status information such as battery state of charge, mains charging status and location • change powerHub3 settings such as Timed On period, Automated Schedules, Device Name, Daylight Saving Time and Admin passcode • send instructions such as turn on or off, operate to an automated on/off timed schedule, send to sleep, hibernate and restart • receive email & dashboard alerts based on your own rule definitions such as battery level low and charging complete • review usage history including how much the powerHub3 has been used, how long it was last on charge, how many times it’s been charged and when it was last turned on • update the powerHub3 software automatically over the web with on-going functionality enhancements and bug fixes, so your device is always getting smarter • remote diagnosis of issues and faults by zioxi approved engineers In order to use onView a licence agreement needs to be completed, signed and returned to zioxi. An administrator’s login for your organization will then be created from which user, location, schedule, rule and device configurations can be performed. There are separate guides for using onView under the Knowledge Base in the Support area of the onView web site. If you would like to start using onView then please visit www.onView.io or contact us via support@zioxi.co.uk providing your contact details and we will then send you a licence © zioxi Limited 30-March-19...
- Page 21 Rechargeable powerHub3 User Guide agreement to sign & return. If you have not purchased the product directly from us but via a reseller please include their details. © zioxi Limited 30-March-19...
-
Page 22: Appendix 1 - Troubleshooting Guide
To recover from this mode the powerHub3 will Black or blank need to be plugged into a mains supply to re- screen Battery charge level is charge the batteries (or press the Power button critical and powerHub3 is which will return the powerHub to Standby, but Hibernating only for a very short time if the battery level is critically low and re-charging is urgently required. The powerHub3 has been Press the Power button on the powerHub3 to wake put into Sleep mode it up remotely using onView If the WiFi signal is weak the connection maybe intermittent and not connect long enough for the zioxi cloud connection to be made. Explore Intermittent WiFi solutions for improving the signal strength. Signal WiFi symbol connection strength is indicated by the number of bars that stays black (or are highlighted on the web symbol and can be partially black) reviewed using the onView Device Details screen. - should go Sometimes the connection to the zioxi cloud takes blue a few minutes. If it takes longer than this, it may be Delay in achieving a worth pressing the Power button or turning the connection powerHub3 off & on (switch under the rim) to see if that re-establishes the connection. Within local Admin, try re-entering the password Password incorrect (& if necessary Deleting Stored WAP before doing... - Page 23 On some country sockets (eg. UK) there is a 3.15A fuse to protect the powerHub3 and comply with One socket has country specific electrical safety standards. The socket fuse has been stopped Plugging a high powered device such as a hoover, blown working heater or kettle into a socket is likely to blown this fuse. Replace the fuse and identify which device may have caused the issue. Once the level of charge capacity retained after a The Rechargeable batteries powerHub3 full powerHub3 re-charge becomes insufficient for have reduced capacity as a capacity has normal use contact zioxi or your local zioxi reseller result of degradation with reduced to arrange a chargeable replacement of the use batteries. Mains charging lead is Clicking noise plugged into both the after pressing Unplug the mains lead from the powerHub3 output charging IEC connector in the Timed On socket the base and a mains button output socket An error message is Try a power off & on (using the switch under the...
- Page 24 Rechargeable powerHub3 User Guide Symptom Potential causes Possible solutions The clock on Using onView, go to Device Details Edit screen and the device is Update the Daylight Saving update the Daylight Saving Time setting (Auto, On incorrect by 1 Time setting or Off) and click Save hour The clock on The Time Zone is Using onView, go to Device Details Edit screen and the device is incorrectly set update the Time Zone setting incorrect © zioxi Limited 30-March-19...
Need help?
Do you have a question about the Rechargeable powerHub3 and is the answer not in the manual?
Questions and answers