Advertisement
Table of Contents
*
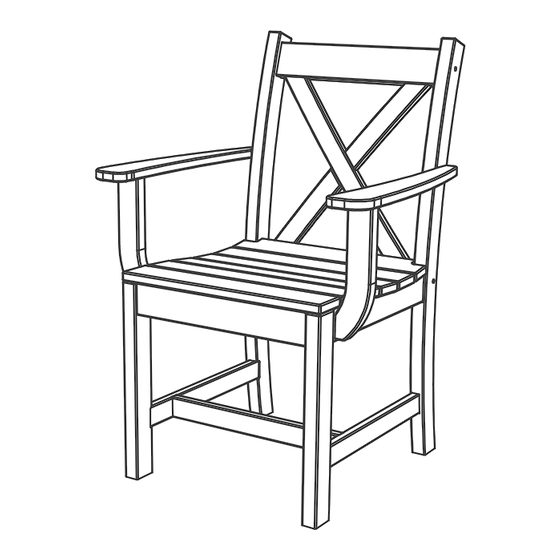
Chair Back Design
May Vary
CLASSIC DINING ARM CHAIR
Thank you for your purchase of Tangentwood furniture. If you
have any questions or need assistance with assembly, please
contact our customer care team through our website or email
REV: 03.25.24
Assembly Instructions
us at service@tangentwood.com.
Tangentwood Brands Include:
TW-APDAC-7020AC
PAGE 1
Advertisement
Table of Contents

Related Manuals for TANGENTWOOD DUROGreen CLASSIC DINING ARM CHAIR


Summary of Contents for TANGENTWOOD DUROGreen CLASSIC DINING ARM CHAIR
- Page 1 Chair Back Design May Vary CLASSIC DINING ARM CHAIR Thank you for your purchase of Tangentwood furniture. If you have any questions or need assistance with assembly, please contact our customer care team through our website or email us at service@tangentwood.com.
- Page 2 Tangentwood furniture is made with recycled plastic and marine-grade stainless steel hardware. Simply clean with soap and water. Tangentwood furniture is tested to a 350-pound weight capacity. Proudly made in the USA. Ships ready to assemble with easy step-by-step instructions.
-
Page 3: Component List
COMPONENT LIST ITEM PICTURE DESCRIPTION QTY. Chair Assembly Left Arm Right Arm Left Arm Support Right Arm Support PAGE 3... -
Page 4: Hardware List
HARDWARE LIST ITEM PICTURE DESCRIPTION QTY. Phillips Pan Head Screw #8 x 1-1/4" Phillips Pan Head Screw #10 x 5/8" TOOL LIST ITEM PICTURE DESCRIPTION QTY. #2 Phillips Screwdriver (Not Included) PAGE 4... -
Page 5: Assembly Preparation
Do not discard any packaging until the product has been fully assembled. In case of missing parts, please email our customer care team at info@tangentwood.com. WARNING: Small parts are a choking hazard. Adult supervision is required before, during and after assembly. - Page 6 Step 1 Installing the Right Arm Thread Right Arm (C) into the hole on the right side of the Chair Assembly (A). Ensure arm is fully threaded into the hole. PAGE 6...
- Page 7 Step 2 Installing the Right Arm (H-1) 1-1/4" Phillips Pan Head Screw x 2 (T-1) Phillips Screwdriver Insert Right Arm Support (E) into the pocket on the right side of the seat of the Chair Assembly (A). Secure with two 1-1/4" Phillips Pan Head Screws (H-1) using the Phillips Screwdriver (T-1).
- Page 8 Step 3 Installing the Right Arm (H-2) 5/8" Phillips Pan Head Screw x 2 (T-1) Phillips Screwdriver Fasten Right Arm (C) to Right Arm Support (E) with two 5/8" Phillips Pan Head Screws (H-2) using the Phillips Screwdriver (T-1). Do not yet fully tighten. PAGE 8...
- Page 9 Step 4 Installing the Left Arm Thread Left Arm (B) into the hole on the left side of the Chair Assembly (A). Ensure arm is fully threaded into the hole. PAGE 9...
- Page 10 Step 5 Installing the Left Arm (H-1) 1-1/4" Phillips Pan Head Screw x 2 (T-1) Phillips Screwdriver Insert Left Arm Support (D) into the pocket on the left side of the seat of the Chair Assembly (A). Secure with two 1-1/4" Phillips Pan Head Screws (H-1) using the Phillips Screwdriver (T-1).
- Page 11 Step 6 Installing the Left Arm (H-2) 5/8" Phillips Pan Head Screw x 2 (T-1) Phillips Screwdriver Fasten Left Arm (B) to Left Arm Support (D) with two 5/8" Phillips Pan Head Screws (H-2) using the Phillips Screwdriver (T-1). Fully tighten all hardware from this step and all previous steps.
- Page 12 Assembly is now complete and the product is ready for use. NOTE: Hardware may loosen over time. Periodically check that all connections remain tight and adjust as needed. TANGENTWOOD | 325 State Rte 31, Building B Montgomery, IL 60538 PAGE 12...
Need help?
Do you have a question about the DUROGreen CLASSIC DINING ARM CHAIR and is the answer not in the manual?
Questions and answers