
Related Manuals for Shield neo NX-FACP-1L


Summary of Contents for Shield neo NX-FACP-1L
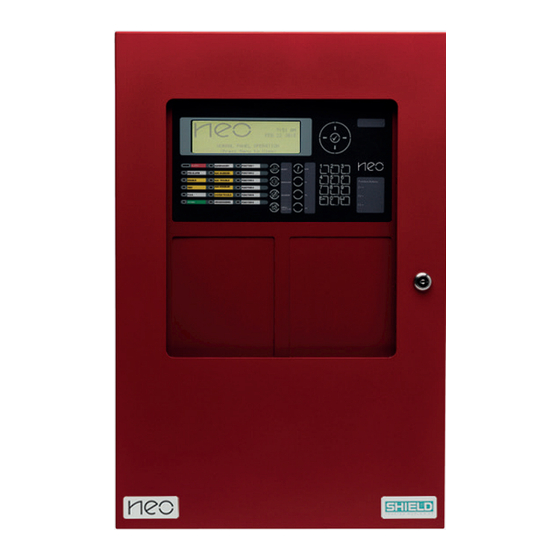
- Page 1 MANUAL NX-FACP-1L, 2 and 4 Intelligent Fire Alarm Control Panel Installation & Operation Manual...
-
Page 2: Table Of Contents
Table of Contents Page INTRODUCTION / OVERVIEW ....................6 1.1 Product Description ............................6 1.2 System Components ............................7 1.2.1 Internal Peripherals............................7 1.2.2 SLC Devices ..............................8 1.2.3 NAC Devices ............................... 9 1.2.4 Network Devices ............................9 1.3 Limitations of Fire Alarm Systems ........................10 1.4 General Installation Notes..........................10 AGENCY LISTINGS / APPROVALS / REQUIREMENTS ............ - Page 3 4.5 NX-ZS Audio Zone Splitter Module ....................... 45 4.5.1 Installing an NX-ZS Module ........................46 4.5.2 NX-ZS Wiring ............................. 47 4.5.3 Replacing an NX-ZS Module ........................47 4.6 NX-EM-PSU-6 Power Supply Charger ......................48 4.6.1 Installing the NX-EM-PSU-6 Power Supply Charger................. 48 4.6.2 NX-EM-PSU-6 Power Supply Charger Wiring ...................
- Page 4 7.1.1 Control Keys ..............................77 7.1.2 Navigation Keys ............................78 7.1.3 Number Keys .............................78 7.1.4 LED Indications ............................78 7.2 LCD Indications ...............................79 7.2.1 Fire Alarm Condition ..........................79 7.2.1.1 Unacknowledged and Acknowledged Alarms with and without MNS or Supervisory Events ..79 7.2.1.2 Alarm Condition - Silence, Resound and Reset ................81 7.2.2 Non-Alarm, Non-MNS Conditions ......................81 7.2.2.1 Unacknowledged and Acknowledged Non-Alarm, Non-MNS Events ..........81...
- Page 5 NEO WIRING GUIDE ......................106 10 MAINTENANCE & TROUBLESHOOTING ................ 108 10.1 Troubleshooting ............................ 108 10.1.1 NX-FACP Base Card I/O Addresses and Built-in Intelligent Multi-Meter ......... 109 10.2 Replacement of Components ....................... 110 10.2.1 Batteries ............................110 10.2.1.1 Standby Batteries ........................110 10.2.2 Liquid Crystal Display ........................
-
Page 6: Introduction / Overview
Note: The NX-FACP-1L cannot support optional NX-EM-PSU, NX-EM-LPD or NX-EM-NAC modules. The NX-FACP-1L, NX-FACP-2 and NX-FACP-4 models are compatibility tested for use with the SHIELD range of intelligent detectors and modules, refer to Section 1.2.2 SLC Devices for a full list of devices. Each SLC (Signaling Line Circuit) loop supports the connection of 126 devices in any combination of intelligent detectors and modules. -
Page 7: System Components
1.2 System Components 1.2.1 Internal Peripherals The following internal peripherals can be installed in a NEO Intelligent Fire Alarm Control Panel: Document NX-ACS-ACB AC Board NX682-033 NX-ACS-1L One Loop Base Card PCB NX682-034 NX-ACS-2L Two Loop Base Card PCB NX682-034 NX-EM-LPD SLC/NAC Expansion Module (cannot be used with NX-ACS-1L) NX682-011... -
Page 8: Slc Devices
1.2.2 SLC Devices Document S-A4061 Polycarbonate Dual Action Pull Station 39214-837 (APD0559 A130718) S-A4013 Intelligent Heat Detector 39214-819 S-A4012 Intelligent Ionization Smoke Detector 39214-819 S-A4011 Intelligent Photoelectric Smoke Detector 39214-819 S-A4014 Intelligent Multi Sensor Detector 39214-819 S-A4042 Dual Switch Monitor Module 39214-820 S-A4043 Switch Monitor Module... -
Page 9: Nac Devices
1.2.3 NAC Devices NAC outputs are 24V DC Regulated. Any Listed Notification Appliance with compatible ratings may be installed, including previously installed devices in existing facilities. 1.2.4 Network Devices The following additional network nodes can be added to the NEO Intelligent Fire Alarm Control Panel: Document NX-FAN-C Remote Control Annunciator, Style 4 (Class B) -
Page 10: Limitations Of Fire Alarm Systems
1.3 Limitations of Fire Alarm Systems Installation of a fire alarm system may An automatic fire alarm system can provide early lower insurance rates, BUT it is not a warning and notification of the development of a substitute for fire insurance! fire. -
Page 11: Agency Listings / Approvals / Requirements
2 Agency Listings / Approvals / Requirements 2.1 ANSI/UL864 This product is listed for the following services and applications. • Local • Local & Shunt Trip • Auxiliary • Central Station (Requires DACT) • Manual • Automatic • Waterflow • Supervisory This product must be installed, serviced and maintained in accordance with the following standards and any local / state codes. -
Page 12: Enclosure Installation And Inner Door Assembly
3 Enclosure Installation and Inner Door Assembly The NX-FACP-1L, NX-FACP-2 and NX-FACP-4 Intelligent Fire Alarm Control Panels are delivered fully assembled. Carefully unpack the system and check for shipping damage. Remove all circuit boards and mount the cabinet in a clean, dry, vibration-free area where extreme temperatures are not encountered. -
Page 13: Inner Door Assembly And Installation
3.2 Inner Door Assembly and Installation The NEO Intelligent Fire Alarm Control Panel is factory assembled with a 2x2 inner door (NX-FA01-ID1). Note: Inner and outer doors are mounted to the back box with NX-FA-HPINs. The NEO Intelligent Fire Alarm Control Panel inner door supports one (1) double aperture module and two (2) optional single aperture modules. -
Page 14: Mounting Inner Door Aperture Modules
3.2.1.1 Mounting Inner Door Aperture Modules To install an aperture module onto the inner door of an NEO Intelligent Fire Alarm Control Panel, simply remove the nuts and remove the single aperture plate. Place the aperture module into the aperture location between the aperture screws and remount the previously removed washers and nuts. -
Page 15: Nx-Acs-Acb Electrical Specifications
4.1.1 NX-ACS-ACB Electrical Specifications AC Branch Circuit Ratings: 120V (1.4A [1 or 2 loop] / 2.8A [4 loop]) – 240V (0.7A [1 or 2 loop] / 1.4A [4 loop]) 50/60Hz Brown-out – 98V nominal 15A Branch Circuit Fuse: 5A, 250VAC Ceramic, Time Delay (size 5x20mm) (Bussmann S505-5-R, Littelfuse 0215005.XP) AC Wiring: #14 or #12 AWG, refer to NEC Over-current protection for this circuit must comply with... -
Page 16: Nx-Acs-1L One Loop Or Nx-Acs-2L Two Loop Base Card
4.2 NX-ACS-1L One Loop or NX-ACS-2L Two Loop Base Card The NX-ACS-1L one loop or NX-ACS-2L two loop, base card (referred to as NX-FACP base card) is the main board of the NEO Intelligent Fire Alarm Control Panel and is pre-mounted to standoffs on the rear of the back box. The NX-FACP base card is hung on five top-hat (screw-less) standoffs [ ] and secured with three (3) screws [p] (see figure 5). -
Page 17: Nx-Facp Base Card Wiring
4.2.1 NX-FACP Base Card Wiring 4.2.1.1 NX-FACP Base Card Battery Circuit 24 VDC Nominal 27.4V nominal charging voltage, 2.0A temperature compensated charging current. 0.83 manufacturer Start from battery de-rating factor. Battery Button Minimum 7Ah, Maximum 48Ah batteries. SUPERVISED. NON-POWER LIMITED. Battery link wire fuse: Fuse: 10A, 250VAC Ceramic, Time Delay (size 5x20mm) -
Page 18: Slc Peripheral Devices
Class B L2 (+) For Class X (Style 7), it is CAUTION: Break wiring run recommended that isolator to maintain supervision of connections. modules or isolated bases are L1 ( installed on zone boundaries or at each device. Refer to NFPA 72. Class A L2 (+) L2 (+) - Page 19 Designed to adapt to changing environments and protect against unwanted false alarms, the response characteristics of each detector is set to comply with the stringent requirements of UL and NFPA 72. Each detector is continuously monitored and tested for proper sensitivity and operation. If a problem is detected with either the device’s sensitivity or its operation, a trouble or maintenance signal is reported back to the fire alarm control panel.
- Page 20 Ionization Detector Heat Detector Programmable Spacing Response Sensitivity Response UL521 Temperature Sensitivity Assessment Mode Characteristics Mode Rating ( Characteristics Time .60 %/ft 5 sec Ordinary Static/Rate-of-Rise 70 ft .60 %/ft 30 sec Ordinary Static/Rate-of-Rise 70 ft .65 %/ft 5 sec Ordinary Static 70 ft...
-
Page 21: Detector Bases
3 alarm signal has the highest priority. The built-in Sounder Base requires a separate regulated 24 VDC supply whether from an Shield notification appliance circuit (NAC) or from a listed, supervised, power supply. Synchronization of multiple sounder bases is possible with the use of an optional MB-SDRT-M synchronization module. - Page 22 4.2.1.3.1.1.2 E-Z Fit Detector Base Wiring (6”) 4.2.2.1.1.1.3 Relay Detector Base Wiring (4”) www.shieldglobal.com...
- Page 23 4.2.1.3.1.1.4 Isolator Detector Base Wiring (4”) 4.2.1.3.1.1.5 Loop Powered Sounder/Beacon Base Wiring (6”) www.shieldglobal.com...
-
Page 24: Isolator Base (4") For Use With S-A4051 Isolator
4.2.1.3.1.1.6 Enhanced Loop Powered Sounder/Beacon Base Wiring 4.2.1.3.1.2 Isolator Base (4”) for use with S-A4051 Isolator 4.2.1.3.1.3 6” Mounting Base Adapter Kit – Mounting Plate & Trim Ring www.shieldglobal.com... -
Page 25: Open Area Sounders
4.2.1.3.1.4 Open Area Sounders www.shieldglobal.com... -
Page 26: Intelligent Manual Pull Stations
4.2.1.3.1.5 Intelligent Manual Pull Stations 4.2.1.3.1.5.1 Single and Dual Action NX-APS2 The Intelligent Manual Pull Stations (NX-APS2-xx) consists of a family of versatile, low profile, high quality addressable manual pull stations. Easily recognizable during a fire situation, the NX-APS2-xx stations are constructed of rugged die-cast metal for long life and reliability, with a high gloss red finish and raised white “FIRE”... -
Page 27: Intelligent Modules
The S-A4061, Intelligent Dual Action Polycarbonate Pull Station, can be mounted semi-flush onto a standard single- gang electrical outlet box. If installations require surface mounting, an optional polycarbonate surface back box (S- A4062) is available. 4.2.1.3.1.6 Intelligent Modules Intelligent Modules offer a wide range of input and output capabilities. The communications is a digital protocol that provides a high degree of immunity to transient noise and interference. - Page 28 Mini Monitor Module - S-A4041 The S-A4041 Mini Monitor Module can either fit inside the device being monitored, or can be placed in an electrical box in the vicinity of the device being monitored. The Mini Monitor Module’s initiating device circuit (IDC) is capable of being wired Class B to the monitored contact device(s).
- Page 29 Switch Monitor Module - S-A4043 The S-A4043 Switch Monitor Module is designed to mount to the front of a 4” square or 2- gang electrical box. Based on installation requirements, the Switch Monitor Module’s initiating device circuit (IDC) is capable of being wired Class A or B to the monitored contact device(s).
- Page 30 Dual Switch Monitor Module - S-A4042 The S-A4042 Dual Switch Monitor Module is an addressable module for use with the NX-FACP-1L, NX-FACP-2 or NX-FACP-4 intelligent fire alarm control panel. The Dual Switch Monitor Module incorporates two (2) independent, individually programmable, initiating device circuits (IDC), providing cost-effective solutions in areas requiring multiple addresses within the same location.
- Page 31 Programming DIP Switches Opto Input (30 VDC max. > 4V = High Form- C Relay Contact < 1V = Low 24 VDC @ 1 Amp or 30 VAC @ .5 Amp (resistive) From Class B Wiring SLC Loop A/B+ 1/2 Watt A/B- Class A Wiring A/B+...
- Page 32 4.2.1.3.1.6.3 Intelligent Output Modules Notification Appliance Circuit (NAC) Module - S-A4046 The S-A4046 Notification Appliance Circuit (NAC) Module is an addressable module for use with the NX-FACP-1L, NX-FACP-2 or NX-FACP-4 NX-FACP base card. Each module incorporates an independent, individually programmable, notification appliance circuit (NAC), providing cost-effective solutions in areas requiring multiple notification appliance circuits.
- Page 33 Class B Wiring Audio Amplifier In Audio Amplifier Out 1/2 Watt 25/70 VRMS @ 500mA (12.5 Watts) Class A Wiring Vext- Vext+ SOUNDER * Set Jumper Programming to PA DIP Switches From To Next SLC Loop Peripheral Figure 15 – S-A4046 Speaker Circuit Wiring Relay Module - S-A4050 The S-A4050 Relay Module is an application specific addressable module for use with the NX-FACP-1L, NX-FACP- 2 or NX-FACP-4 NX-FACP base card.
-
Page 34: Nx-Facp Notification Appliance Circuits
4.2.1.4 NX-FACP Notification Appliance Circuits The NX-FACP base card provides two notification appliance circuits (NAC). In addition, two additional notification appliance circuits can be added to the NX- ACS-2L by adding the optional NX-EM-LPD or NX-EM- NAC plug-in card. Note: The NX-ACS-1L one loop base card cannot support the NX-EM-LPD or NX-EM-NAC option modules. -
Page 35: Nx-Facp Relay Contacts
Class B End-of-Line 10KΩ Class A RETURN CAUTION: Break wiring run Devices must be polarized. to maintain supervision of Polarity is shown in the alarm (active) condition. connections. 4.2.1.5 NX-FACP Relay Contacts The NX-FACP provides three programmable Form C relay contacts. Common Normal Closed The contact ratings for each relay are as follows:... -
Page 36: Nx-Facp Peripheral Bus (P-Bus) Network
4.2.1.6 NX-FACP Peripheral Bus (P-BUS) Network RS-232 P-BUS The NX-FACP provides a PBUS (peripheral bus GND RX [RS485]) network for the connection of devices such as NX-EM-RL4, NX-EM-ASW-16, NX-FA-LED16RY, NX-FA-LED32R NX-FA-LED32Y, NX-EM-IO48, NX- AMP-80 and NX-EM-CZM modules. The PBUS ratings are as follows: CCITT RS-485 (network) –... -
Page 37: Nx-Facp Ancillary Contact Monitoring Input
4.2.1.9 NX-FACP Ancillary Contact Monitoring Input NX-FACP provides an ancillary contact monitoring input which allows the NX-FACP to monitor any normally closed contact for supervision. If the contact opens a trouble/fault is generated by the NX-FACP. This input is normally utilized for NX-EM-PSU and in a hardwired audio amplifier installation for the NX-EM-PSU-6 and NX-AMP-80 trouble/fault monitoring. -
Page 38: Replacing The Nx-Facp Base Card
4.2.2 Replacing the NX-FACP Base Card If replacing the NX-FACP base card, remove power (AC and battery) from the system. Remove all field wiring terminal blocks from the NX-FACP and disconnect the Molex connector cable originating from the NX-ACS-ACB board. Disconnect the flat ribbon cable attached to the NX-ACS-DSP, Alphanumeric Graphical Display, and remove the three (3) screws [p] securing the NX-FACP to the back box. -
Page 39: Nx-Acs-Dsp Alphanumeric Graphical Display
4.3 NX-ACS-DSP Alphanumeric Graphical Display The NX-ACS-DSP Alphanumeric Graphical Display is the colorized human interface for status and control of an NX- CTL-1V, NX-FACP-2V or NX-FACP-4V (see figure 18). In addition, the NX-ACS-DSP has three (3) buttons and six (6) LEDs that can be customized to meet specific installation requirements. Customized buttons and LEDs have easy slide-in labels to accommodate the defining of these programmable control and status points (see figure 19). -
Page 40: Installing The Nx-Acs-Dsp Alphanumeric Graphical Display
4.3.1 Installing the NX-ACS-DSP Alphanumeric Graphical Display The NX-ACS-DSP alphanumeric graphical display is mounted in the double aperture of the NX-FACP-1AU, NX- FACP-2AU and NX-FACP-4AU inner door. Figure 20 - NX-ACS-DSP Installation and Inputs 4.3.2 NX-ACS-DSP Alphanumeric Graphical Display Inputs On the back of the NX-ACS-DSP alphanumeric graphical display is a 10-pin and 2-pin (duplicated common and input 8) header, providing eight (8) programmable switch inputs, which can be utilized for special application monitoring and control functions. -
Page 41: Nx-Amp-80 Audio Amplifier Module
4.4 NX-AMP-80 Audio Amplifier Module An NX-AMP-80 audio amplifier module with associated NX-EM-PSU-6 power supply charger module can be added to any NEO Intelligent Fire Alarm Control Panel to create an audio signaling or remote audio booster panel [hardwired or PBUS (RS485)]. The NX-AMP-80 gets mounted below the NX-FACP base card on the left side of the back box (see figure 21). -
Page 42: Hardwired Amplifier
4.4.1 Hardwired Amplifier If configured as a hardwired (non PBUS) amplifier each of the NX-AMP-80 amplifiers (two per NX-AMP-80) is activated whenever one of the NX-AMP-80 trigger inputs (trigger input 1, 2 or 3) is activated (see figure 22): Trigger input 1 when activated not only turns on both amplifiers (audio notification appliance circuits) it also activates programmed message/tone #1, and plays this message over the audio notification appliance circuits. -
Page 43: Pbus (Rs485) Amplifier
Figure 22 – Hardwired NX-AMP-80 Amplifier 4.4.2 PBUS (RS485) Amplifier When configured as a PBUS (RS485) amplifier the NX-FACP-1L, NX-FACP-2 and NX-FACP-4 intelligent fire alarm control panel’s optional amplifier would be programmed as a PBUS (RS485) floor [area] (see figure 23). Floor (area) amplifiers can support up to sixteen (16) field programmable messages (refer to NEO NX-AMP Audio Message Programming Manual regarding message programming) which can be tailored to meet specific installation messaging demands;... -
Page 44: Installing The Nx-Amp-80 Audio Amplifier Module
Figure 23 – Floor (Area) NX-AMP-80 Amplifier 4.4.3 Installing the NX-AMP-80 Audio Amplifier Module The NX-AMP-80 audio amplifier module provides digital audio capabilities for the NEO Intelligent Fire Alarm Control Panel. It requires separate 24 VDC originating from an NX-EM-PSU-6 power supply charger. As previously indicated the NX-AMP-80 audio amplifier module is mounted below the NX-CTL base card on the left side of the back box (see figure 21). -
Page 45: Replacing The Nx-Amp-80 Audio Amplifier Module
* Mounting Tabs Figure 24 - NX-AMP-80 Audio Amplifier Module Mounting 4.4.4 Replacing the NX-AMP-80 Audio Amplifier Module If replacing an NX-AMP-80 audio amplifier module, remove power (AC and battery) from the system. When replacing the amplifier remove the amplifier and its attached mounting plate from the enclosure and replace with a new amplifier mounted to its own mounting plate. -
Page 46: Installing An Nx-Zs Module
4.5.1 Installing an NX-ZS Module The NX-ZS audio zone splitter module is supplied with three (3) metal hexagon spacers and one (1) nylon spacer. Remove the three (3) lower screws securing the NX-AMP-80 module to its mounting plate and install the three (3) provided metal hexagon spacers. -
Page 47: Nx-Zs Wiring
4.5.2 NX-ZS Wiring Wire 24 VDC (from NX-AMP-80 power output terminals) to the power input terminals of the NX-ZS audio zone splitter module. Wire one or both NX-AMP-80 amplifiers (audio notification appliance circuits) to the Audio Input 1 and Audio Input 2 terminals of the NX-ZS module and set jumpers J6 and J7 to their appropriate position [1 audio input or 2] (see figure 26). -
Page 48: Nx-Em-Psu-6 Power Supply Charger
4.6 NX-EM-PSU-6 Power Supply Charger The NX-EM-PSU-6 power supply charger is the power supply charger for the NX-AMP-80 amplifier. In addition, the NX-EM-PSU-6 can be utilized as an additional power supply charger for other NEO installation power supply charger requirements (i.e. power for NX-EM-CZM conventional zone module, etc.). Note: If an NX-EM-PSU-6 power supply charger is utilized, the NEO Intelligent Fire Alarm Control Panel cannot support an NX-EM-PSU auxiliary power supply. -
Page 49: Nx-Em-Psu-6 Power Supply Charger Wiring
4.6.2 NX-EM-PSU-6 Power Supply Charger Wiring The NX-EM-PSU-6 provides a maximum of 6.5 Amps for powering and battery charging capabilities to meet installation backup requirements. NX-EM-PSU-6 ratings are as follows: • 120-240 VAC (3A) 50/60Hz • 98 VAC Brown-out • 24 VDC @ 6.5 Amp (POWER LIMITED) Peak for 15 minutes 5 Amp continuous •... -
Page 50: Nx-Em-Psu-6 Battery Connections
4.6.2.2 NX-EM-PSU-6 Battery Connections NX-EM-PSU-6 Battery Charger: • Supervised charger 2.0A (Maximum 45Ah). • NON-POWER LIMITED • Charging voltage 27.4 VDC typical, temperature compensated. Start the NX-EM-PSU-6 power supply charger on AC power first then connect the batteries. If AC power is not available, the NX-EM-PSU-6 can be started directly from the batteries. -
Page 51: Replacing The Nx-Em-Psu-6 Power Supply Charger
4.6.3 Replacing the NX-EM-PSU-6 Power Supply Charger If replacing the NX-EM-PSU-6 power supply charger remove power (AC and battery) from the system. Remove the AC, battery, 24 VDC output and relay trouble contact wiring from the NX-EM-PSU-6. Remove the four (4) screws [p] securing the NX-EM-PSU-6 to the back box and remove the NX-EM-PSU-6 (see figure 28). -
Page 52: Nx-Em-Lpd Slc Circuit Wiring
A.C. MAINS! NC NO COM NC NO COM NC NO COM RELAY 1 RELAY 2 RELAY 3 LOOP - 1 LOOP - 2 NAC - 1 NAC - 2 NETWORK LOCK MEM PROG MASTER PROGRAM RS-232 P-BUS AUX-1 AUX-2 ANC PSU FAULT GND RX SERIAL... -
Page 53: Nx-Em-Lpd And Nx-Em-Nac Notification Appliance Circuit Wiring
4.7.3 NX-EM-LPD and NX-EM-NAC Notification Appliance Circuit Wiring The NX-EM-LPD and NX-EM-NAC modules provide two additional notification appliance circuits to the NX-ACS-2L base card. REGULATED 24V DC, 2.0A SUPERVISED, POWER LIMITED. Class A or B Class B EOL (End-of-Line) Resistor 10KΩ Minimum return voltage permitted is 16V. -
Page 54: Installing The Nx-Fanet4 Or Nx-Fanet7 Module
Maximum Overall Cable Length 66000ft Cable wiring must be minimum twisted shielded pair 18AWG to 20AWG. Connect the shield to the designated terminal block positions only. Refer to NEO Wiring Guide Section 9. Note: Optional NX-FOC-MM Fiber Optic Converter Modules are available for converting NX-FANET4 or NX-FANET7 copper wiring to fiber optic. -
Page 55: Nx-Fanet4 Or Nx-Fanet7 Module Wiring
Each NX-FANET4/NX-FANET7 module has independent connectors for the outgoing and incoming network wiring. Utilizing twisted shielded cable, connect from the “OUT” terminal on the first panel, to the “IN” terminal on the next panel, as follows: Shield Shield SHIELD 4.8.2.1 AD-NeT-PluS Class B Wiring The “IN”... -
Page 56: Digital Alarm Communicator - Interfacing To A D9068P And D9068E (Dact)
When the D9068P serial communications DACT is used with the NX-FACP-1L, NX-FACP-2 or NX-FACP-4 intelligent fire alarm control panel’s NX-CTL base card an SHIELD NX-SEB serial expansion board is required. The NX-SEB serial expansion board plugs into the NX-CTL base card serial expansion port and provides RS-232 communications and power to the D9068P. -
Page 57: Installing The Nx-Seb Serial Expansion Board And D9068P Bosch Dact
NEO Intelligent Fire Alarm Control Panel D9068P DACT – RS-232 Serial Connection D9068P A.C. MAINS! NC NO COM NC NO COM NC NO COM RELAY 1 RELAY 2 RELAY 3 LOOP - 1 LOOP - 2 NAC - 1 NAC - 2 NETWORK LOCK MEM PROG... - Page 58 RS-232 SERIAL EXPANSION Round Spacer To DACT-PRG Programming Keypad Screw Figure 32 - NX-SEB to D9068P Wiring Plug the NX-SEB, Serial Expansion Board, into the expansion socket and install/tighten the supplied screw to the round spacer (see figure 32). Plug the 6 pin ribbon cable coming from the NX- SEB (PL4) into the RS-232/power input connection on the D9068P.
-
Page 59: Relay Contact Interfacing To A Bosch D9068E Dact
4.9.2 Relay Contact Interfacing to a Bosch D9068E DACT When monitoring the NX-FACP-1L, NX-FACP-2 or NX-FACP-4 intelligent fire alarm control panel via simple dry contacts, a D9068E DACT is required. The D9068E comes in its own enclosure that can be mounted adjacent to the fire alarm control panel. -
Page 60: Interfacing To A Standalone Digital Alarm Communicator
4.10 Interfacing to a Standalone Digital Alarm Communicator The following is an example of the NX-FACP-1L, NX-FACP-2 or NX-FACP-4 intelligent fire alarm control panel interfaced to a Fire Lite Model 411UDAC for Central Station connection (see figure 35). Note: Though the interface to a Model 411UDAC is shown, the NX-FACP-1L, NX-FACP-2 or NX-FACP-4 intelligent fire alarm control panel can be interfaced to any LISTED standalone DACT. -
Page 61: Auxiliary - Reverse Polarity Signaling
4.11 Auxiliary - Reverse Polarity Signaling The following is a wiring diagram utilizing a NAC circuit or S-A4046 addressable NAC module for reverse polarity signaling to a remote location (see figure 36). Note: A “Not” statement will need to be created for the trouble contact activation, so that an alarm condition has a higher priority than a trouble condition (consult factory). -
Page 62: Switch Led Modules
4.12 Switch LED Modules Switch LED modules are PBUS (RS485) field configurable switch input and LED status indicator modules for use with the NX-FACP-1L, NX-FACP-2 or NX-FACP-4 intelligent fire alarm control panel NX-FACP base card. There are five (5) types of switch LED modules (NX-EM-ASW-16, NX-EM-IO48, NX-FA-LED16RY, NX-FA-LED32R and NX-FA-LED32Y) available based on installation requirements. -
Page 63: Addressing Switch Led Modules
4.12.2 Addressing Switch LED Modules Each switch LED module must be connected to the NX-FACP-1L, NX-FACP-2 or NX-FACP-4 intelligent fire alarm control panel’s NX-FACP base card P-BUS (RS485). As the switch LED modules reside on the NX-FACP PBUS (RS485), each module must be configured with a unique address (see figure 38). The address setting corresponds to PBUS programming criteria utilized within the PC-NeT field configuration program. -
Page 64: Replacing The Switch Led Module
Figure 39 – Switch LED Module Wiring To Next 10-Way Module Ribbon Cable 24 VDC P-BUS (485) Figure 40 – Switch LED Module Daisy Chain Wiring 4.12.4 Replacing the Switch LED Module Remove AC and DC power. Unplug the terminal block and/or 10-way IDC ribbon cables attached to the switch LED module. -
Page 65: Nx-Cty Module
4.13 NX-CTY Module The NX-CTY is a module that provides the connection of an NEO fire alarm control panel to a Local Energy Masterbox. 4.13.1 Adding and Replacing the NX-CTY Module The NX-CTY module connects to any dedicated Class B notification appliance circuit (NX-FACP, NX-EM-LPD, NX-EM-NAC circuit or SLC addressable NAC module). -
Page 66: Nx-Em-Psu Dc Wiring
PSU ONLY PSU + CHARGER Install the jumper in the Remote LED PSU ONLY location. The Connections unit ships with the jumper pre-installed in this location. 4.14.1.1 NX-EM-PSU DC Wiring The NX-EM-PSU is a 27.4 VDC temperature compensated power supply designed to track the NX-FACP DC supply. The power from the NX-EM-PSU is used to supply additional power to the NAC-3 and NAC-4 notification appliance circuits in lieu of power being drawn from the NX-FACP base card. -
Page 67: Nx-Em-Rl8 Output Wiring
4.15.2 NX-EM-RL8 Output Wiring Relays 1 and 2 are Form C relays. Relays 3 thru 8 are Form A, but can be programmed inverted. AUX-1 AUX-2 All outputs are field programmable (default setting is set O/C OUTPUTS to activate on common alarm). 30 VDC/AC @ 1.0A, PF=1 (resistive) POWER LIMITED –... -
Page 68: Nx-Em-Czm Conventional Zone Module
4.17 NX-EM-CZM Conventional Zone Module The NX-EM-CZM is an SHIELD conventional zone module that can be monitored and controlled by an NEO fire alarm control panel (see figure 43). The NX-EM-CZM conventional zone module provides monitoring for up to eight (8) Class B conventional zones, with programmable end-of-line, or four (4) Class A conventional zones. -
Page 69: Nx-Em-012 Panel Strip Printer
ZONE 1 ZONE 2 ZONE 1 ZONE 2 ZONE 1 ZONE 2 ZONE 1 ZONE 2 ZONE 1 ZONE 2 ZONE 1 ZONE 2 ZONE 1 ZONE 2 ZONE 1 ZONE 2 CLA S S B ZONE MONITOR CLA S S B ZONE MONITOR ADDRESS ADDRESS A LL CIRCUITS A RE P OWE R LIMITE D... -
Page 70: Nx-Em-012 Panel Printer Programming
2 or NX-FACP-4 intelligent fire alarm control panel’s NX-FACP base card. This access allows qualified/trained SHIELD’ technicians’ remote access, through the SHIELD NEO terminal dial-up program, to monitor, maintain and perform service of a single NEO fire alarm control panel. -
Page 71: Recommended Cable Routing
5 Recommended Cable Routing Power limited and non-power limited circuit wiring must remain separate in the fire alarm system enclosure. All power limited circuit wiring must remain at least 0.25” (6.35 mm) away from any non-power limited circuit wiring. Furthermore, all power limited and non-power limited circuit wiring must enter and exit the enclosure through different knockouts and/or conduits (see figure 46). -
Page 72: Loading Calculations
6 Loading Calculations 6.1 Panel Loading The total NX-FACP base card load must not exceed the rating of the NX-FACP power supply. The NX-FACP power supply can deliver 5A total load maximum (battery charging is disabled during alarm). When the optional NX-EM-PSU expansion power supply is used to supplement the NX-CTL base card power supply (NX-ACS-2L two loop and four only) an additional 4A of load current for NAC #3 and NAC #4 is available. -
Page 73: Nx-Ctl One Loop Battery Calculation
6.1.1 NX-CTL One Loop Battery Calculation Quiescent Load Alarm Load Equipment I (A) Total I (A) Total NX-FACP (One Loop) 0.110 = 0.110 0.195 = 0.195 Sensor / SLC Current SLC #1 NX-FANET4 or NX-FANET7 Network 0.062 0.062 Card NX-FAN-C (D) – Style 4 or 7 0.078 1 to (x) 0.140... -
Page 74: Nx-Ctl Two Loop Battery Calculation
6.1.2 NX-CTL Two Loop Battery Calculation Quiescent Load Alarm Load Equipment I (A) Total I (A) Total NX-CTL (Two Loop) 0.110 = 0.110 0.195 = 0.195 Sensor / SLC Current SLC #1 SLC #2 NX-FANET4 or NX-FANET7 Network 0.062 0.062 Card NX-FAN-C (D) –... -
Page 75: Nx-Ctl Four Loop Battery Calculation
6.1.3 NX-CTL Four Loop Battery Calculation Quiescent Load Alarm Load Equipment I (A) Total I (A) Total NX-CTL (Four Loop) 0.175 = 0.175 0.260 = 0.260 Sensor / SLC Current SLC #1 SLC #2 SLC #3 SLC #4 NX-FANET4 or NX-FANET7 Network 0.062 0.062 Card... -
Page 76: Nx-Amp-80 Battery Calculations
6.1.4 NX-AMP-80 Battery Calculations Quiescent Load Alarm Load Equipment I (A) Total I (A) Total NX-AMP-80 0.035 = 0.035 0.220 = 0.220 Amplifier 1 Amplifier 2 Quiescent Load Alarm Load Total x 24 hr or 60 hr x 0.0833 Total Quiescent Current Total Alarm Current Total Load (Quiescent + Alarm) Total Load x 1.20 (battery de-rating factor) -
Page 77: Operation
7 Operation 7.1 User Controls and Indications 7.1.1 Control Keys RESET Press to reset the panel from a latched alarm (or other programmed latched input i.e. latching trouble or supervisory condition) or press to deactivate a Drill condition. ACKNOWLEDGE Press to acknowledge an alarm, supervisory and/or trouble condition. LED indications on the panel change from flashing to steady and zone/device display removes the word “New”. -
Page 78: Navigation Keys
7.1.2 Navigation Keys UP, DOWN, LEFT and RIGHT arrow keys are used to scroll through multiple status events, device details, and to navigate through the various displays and menus. ✔) “Enter” key confirms entry of numeric or letter information. In Check Mark ( addition, confirms selection of menu options and changes some of the configuration options. -
Page 79: Lcd Indications
7.2 LCD Indications The LCD provides detailed information on the operational status of the panel. The normal standby state is shown above. Information is shown on the display in the following priority order: Fire Alarms MNS (Mass Notification) ... - Page 80 Example of an unacknowledged alarm event: < New unacknowledged alarm message NEW ALARM IN ZONE 0001 First Floor < Zone alarm text (32 Characters) < Device text (26 Characters) & type of device Front Lobby Exit [PULL STATION] < Further device details (Press →...
-
Page 81: Alarm Condition - Silence, Resound And Reset
If a new alarm, mass notification or supervisory event occurs after previously acknowledged alarm, mass notification and/or supervisory events, the alarm, if programmed MNS, or supervisory LED will flash, the internal buzzer will sound (continuously for alarm, or pulsed for mass notification and supervisory), and the alarm, mass notification and/or supervisory tally will increase. - Page 82 Example of an unacknowledged supervisory event, when no alarms or mass notification events are present (refer to Fire Alarm Condition, for displaying supervisory events with alarms or mass notification events present on the system): < New supervisory message (unacknowledged) NEW SUPERVISORY ZONE 0020 Electrical Room <...
-
Page 83: Disabled Condition
7.2.2.2 Disabled Condition If any zones, input devices or output devices have been disabled, the DISABLE LED and if programmed via the PC- NeT the TROUBLE LED will illuminate. In addition, the NAC DISABLE LED will illuminate if one or more notification appliance circuits or NAC SLC devices have been disabled. -
Page 84: Obtaining Detailed Device Information During Events
7.3 Obtaining Detailed Device Information During Events When any event message display indicates (Press → for device details), pressing the right arrow () button on the keypad navigation keys will allow the user to view further detailed information about the event/device. Example of an event message display prior to device details lookup: <... -
Page 85: Performing A Fire Drill
Example of a device detailed display pertaining to a specific off-normal event: < Supervisory message SUPERVISORY ZONE 0001 Electrical Room < Zone supervisory text (32 Characters) < Device text (26 Characters) / type of device Sprinkler System Riser [SWITCH(MON.)] NODE 1 <... -
Page 86: Positive Alarm Sequence
Pressing the check mark (✔) button, on the keypad navigation keys will allow the user to view further detailed information about the Warnings event. Example of device detailed information pertaining to the Warning event: < Warning message WARNING ZONE 0701 <... -
Page 87: Alarm Verification
Example of an acknowledged P.A.S. alarm: < Acknowledged P.A.S. alarm message ALARM IN ZONE 0001 First Floor < Zone P.A.S. alarm text(32 Characters) < Device text (26 Characters) / type of device Conference Room 100 [PHOTO SMOKE ] < Output delay Stage 2 - time period OUTPUT DELAY 140s <... -
Page 88: Multiple Detector Operation
7.7 Multiple Detector Operation 6.8.5.4.3 Multiple Detector Operation shall be permitted provided the following are met: [1] The system is not prohibited by the Authority Having Jursidiction. [2] At least two automatic detectors are in each protected space. [3] The Alarm Verification feature is not used. Notification and other output signal circuits may be configured to only activate when two or more automatic devices within a detection zone enter an alarm condition. -
Page 89: User Menu Functions
7.8 USER Menu Functions The following table gives a list of the USER Menu Functions, the sub-functions available within each main function and a brief description for each function. Main Menu Option Sub Menus Comments VIEW Alarms View Zones and Inputs that are reporting an alarm condition. Off-Normal View Zones, Inputs and Outputs that are reporting an off-normal condition. -
Page 90: View Menu
Problems are specifically associated with device dirty (detectors) when utilizing the SHIELD’ enhanced calibration capabilities, these pre-dirty detector conditions can be view via the off-normal area, in addition to being transmitted via email from an optional NX-FA-LAN (ipGateway). -
Page 91: View Inputs
7.8.1.2 View Inputs This function shows the current operational state and condition for all zones and individual inputs (including zones/points of other network nodes). The display presents a list of all of the zones containing input devices, with the first zone highlighted. For example: [Inputs] More>... -
Page 92: View Log
7.8.1.4 View Log After selecting to view the log option, the display presents a pop-up window to allow selection between; view all of the event history, view only the alarms events that have occurred, or view the alarm counter. ALL EVENTS ALARM EVENTS ONLY ALARM COUNTER Press the ... -
Page 93: View Panel
7.8.1.5 View Panel The View Panel Option provides viewing of panel information regarding Local-Hardware, Software and Network- Hardware. [Panel Information] User 2 Node 1 LOCAL-HARDWARE_ SOFTWARE NETWORK-HARDWARE 7.8.1.5.1 Local-Hardware Viewing The View Hardware provides diagnostic meter readout of the operational condition and readings for the internal panel electronic circuits. -
Page 94: Disable Menu
By pressing the more button operational information and diagnostic meter readouts for each available network panel electronic circuits can be viewed: (Refer to Section 10.1.1) [Hardware in Zone 0701] More> Device Text Value NAC-1 A Volts 5.6V NAC-2 A Volts 5.6V NAC-3 A Volts 5.6V... -
Page 95: Disable - Outputs
If SELECTED INPUTS is chosen, the pop-up window disappears and a list of the input devices within the selected zone is presented. For example: Inputs in Zone 0001] More> Mode Device Text Enabled BASEMENT WEST Disabled BASEMENT EAST Enabled GROUND FLOOR Enabled MAIN RECEPTION AREA Press the ... -
Page 96: Nac Outputs
7.8.2.2.2 NAC Outputs ✔ Press the buttons to scroll through and highlight the “NACS” option and then press the button to disable them. The display automatically reverts to the Main Disable Menu and the ‘NAC Disabled’ LED will illuminate, indicating NACs disabled. -
Page 97: Disable - Controls
7.8.2.3 Disable - Controls Disabling Controls will cancel any Level 2 or above access User Level and return the panel to a Level 1 access level. Access Level 1 requires an access password for any control button (i.e.: ACK, RESET, etc.) or keypad entry usage. -
Page 98: Enable Menu
7.8.3 Enable Menu When selecting the Enable Menu Option, the display shows the available Enable Functions. [Enable] User 1 Node ZONE/INPUTS OUTPUTS GROUPS REMOTE ✔ Press the buttons to highlight the required menu option and then press the button to select it. 7.8.3.1 Enable - Zones and Inputs Selecting this option will show a list of zones containing disabled input devices. - Page 99 When the Test Zones option is selected, a pop-up window is shown on the display to select whether the testing will or will not activate the NAC circuits for approximately 10-seconds when an input device is activated. For example: WITHOUT NACS WITH NACS ✔...
-
Page 100: Test Display
Selecting the “FINISHED TEST” option will cancel all zones that are in test mode. The Test LED will then extinguish. Alternatively, it is possible to leave the Zone Test menu with one or more zones still in test mode by selecting the “KEEP ZONES IN TEST”... -
Page 101: Test Outputs
7.8.4.5 Test Outputs ✔ To Test outputs, highlight the Test Output option and press the button to confirm. [ Outputs ] More> Zone Location 0001 BASEMENT WEST 0002 BASEMENT EAST 0008 GROUND FLOOR 0009 MAIN RECEPTION AREA Press the buttons to scroll through and highlight the required zone and then press the button to scroll to the specific Output to be tested. -
Page 102: Tools Menu
7.8.6 Tools Menu When selecting the Tools Menu, the display shows three possible options. For example: [Tools] User 1 Node PROGRAM PRINT CHANGE TIME 7.8.6.1 Program Menu Note: To access the programming area a proper service level password is required. Front Panel Programming Manual for information and details on front panel programming capabilities. -
Page 103: Print Inputs
The upper line of options determines whether the panel will automatically print specific events as they occur. The lower line of options determines whether a printer is connected and the type of printer it is. ✔ Use the,,, and ✔ buttons to highlight the required option and change its setting. Pressing the button turns the option on (✔... -
Page 104: Print Troubles
7.8.6.2.4 Print Troubles ✔ To print information on any troubles, highlight the Troubles option and press the button to confirm. The display will show the following: 2 Zones in Trouble] First Zone Last Zone (Press → to Start Print) The panel will analyze the network and the display will prompt the zones in trouble condition to be printed. Use the arrow () buttons to highlight the first and last zone number and use the number keys to change the zone number as required. -
Page 105: Print Feed Paper
When the History Log is completely printed the display will automatically revert to the Print Options Menu. Press the “Esc” button at any time to cancel the log print. Note: The pop-up window also allows selection of the Alarm Counter. The alarm count is displayed on the NX-ACS-DSP display only, it is not printed. -
Page 106: Neo Wiring Guide
(RFI/EMI) compared to twisted pair or untwisted wire. If shielded cable is used, connect the shield to the panel enclosure (out and return) and to the dedicated shield terminations in the bases only. - Page 107 Typic Circuit Circuit Maximum Wire Types Wire Comments Type Function Distance Size (AWG) IDCs SLC based Untwisted Unshielded, 300 feet 18-20 EOL resistor value varies depending upon module. (power initiating Twisted Pair or limited) device input Twisted Shielded Pair. circuits & conventiona l smoke zones...
-
Page 108: Maintenance & Troubleshooting
In addition to all of the NX-FACP-1L, NX-FACP-2 and NX-FACP-4 intelligent fire alarm control panel capabilities, the SHIELD Remote Diagnostic Virtual Panel Simulator offers technicians the ability to access the NX-FACP-1L, NX-FACP-2 or NX-FACP-4 intelligent fire alarm control panel (w/integral modems) remotely. The Remote Diagnostic Virtual Panel emulates the onsite NX-ACS-DSP alphanumeric graphic display in real time from an offsite location. -
Page 109: Nx-Facp Base Card I/O Addresses And Built-In Intelligent Multi-Meter
10.1.1 NX-FACP Base Card I/O Addresses and Built-in Intelligent Multi-Meter The following is a list of NX-FACP base card addresses for troubleshooting various input and output circuits: Item (Address) Description Value (Real-Time) State 01.0 NAC-1 A Volts (Voltage)* (State of Output Voltage) 01.1 NAC-2 A Volts (Voltage) -
Page 110: Replacement Of Components
NOT seal the enclosure or install in a sealed enclosure. 10.2.2 Liquid Crystal Display Expected Life: > 10 years Replacement Schedule: When the display becomes difficult to read due to gradual fading over time. Manufacturer / Part Number: Consult SHIELD www.shieldglobal.com... -
Page 111: Led Status
10.3 LED Status On-board status LEDs are available for troubleshooting purposes on many of the SHIELD modules. 10.3.1 NX-FACP Base Card A.C. MAINS! NC NO COM NC NO COM NC NO COM RELAY 1 RELAY 2 RELAY 3 LOOP - 1... -
Page 112: Nx-Em-Lpd And Nx-Em-Nac Module
10.3.2 NX-EM-LPD and NX-EM-NAC Module LED Function Description Heartbeat LED – SLC #3 Flashes when communicating on the SLC LOOP-1 LOOP-1 NAC-1 NAC-2 Heartbeat LED – SLC #4 Flashes when communicating on the SLC 10.3.3 NX-FANET4/NX-FANET7 Network Module LED Function Description Heartbeat LED Normal: Flashes at 1Hz... -
Page 113: Nx-Em-Psu-6 Power Supply Charger
10.3.5 NX-EM-PSU-6 Power Supply Charger There are seven (7) onboard LEDs associated with the NX-EM-PSU-6. Refer to the opposite diagram for LED descriptions and purpose. Earth Fault Battery Connect Heart Beat Battery Low Battery O-C Charger Fault PSU Fault www.shieldglobal.com... -
Page 114: Appendices
11 Appendices 11.1 Additional Intelligent Detector Information Not Applicable 11.1.1 View Drift Not Applicable 11.1.1.1 Intelligent Detector Drift Compensation Not Applicable 11.1.2 Rapid Compensation Not Applicable 11.1.3 View EEPROM Not Applicable 11.2 Loop Isolators It is recommended that there are a maximum of 20 intelligent detectors and/or addressable devices between loop isolators. - Page 115 SHIELD FIRE, SAFETY AND SECURITY LTD Redburn House, 2A Tonbridge Road, Romford, Essex – RM3 8QE, United Kingdom Tel: +44 1708 377731, Fax: +44 1708 347637, E-mail: shielduk@shieldglobal.com www.shieldglobal.com...
Need help?
Do you have a question about the neo NX-FACP-1L and is the answer not in the manual?
Questions and answers
Connection for a repeater panel to omega - x 4loop addressable control panel