Table of Contents
Advertisement
Available languages
Available languages
Quick Links
USA office: Fontana
AUS office: Truganina
DEU office: FDS GmbH, Neuer Höltigbaum 36, 22143 Hamburg, Deutschland
If you're having difficulty, our friendly
customer team is always here to help.
GBR office: Ipswich
ITA office: Milano
POL office: Gdańsk
FRA office: Saint Vigor d'Ymonville
USA:cs.us@costway.com
POL:sklep@costway.com
AUS:cs.au@costway.com
DEU:cs.de@costway.com
GBR:cs.uk@costway.com
FRA:cs.fr@costway.com
I T A :cs.i t @costway.com
ESP:cs.es@costway.com
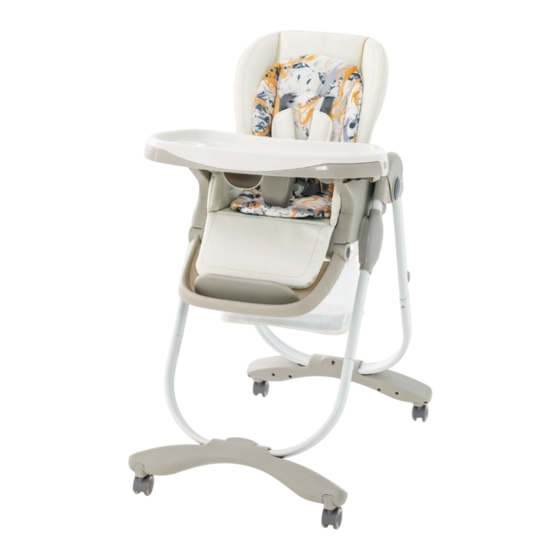
Baby High Chair
Babyhochstuhl
Chaise Haute pour Bébé
Trona para Bebé
Seggiolone per Bambini
Krzesełko do karmienia
AD10056
THIS INSTRUCTION BOOKLET CONTAINS IMPORTANT SAFETY INFORMATION. PLEASE READ AND KEEP FOR FUTURE REFERENCE.
Advertisement
Table of Contents

Related Manuals for Costway AD10056


Summary of Contents for Costway AD10056
- Page 1 USA:cs.us@costway.com POL:sklep@costway.com If you're having difficulty, our friendly AUS:cs.au@costway.com DEU:cs.de@costway.com customer team is always here to help. GBR:cs.uk@costway.com FRA:cs.fr@costway.com I T A :cs.i t @costway.com ESP:cs.es@costway.com THIS INSTRUCTION BOOKLET CONTAINS IMPORTANT SAFETY INFORMATION. PLEASE READ AND KEEP FOR FUTURE REFERENCE.
-
Page 2: Before You Start
Safety notes WARNING! Do not use the high chair until your child can sit up unaided (6-36 months approximately). WARNING! Never leave the child unattended. WARNING! Always use the restraint system. WARNING! Do not use the product unless all components are correctly fitted Before You Start and adjusted. -
Page 3: Care And Maintenance
Care & maintenance 2 - Assembling the high chair Ensure all locking devices work correctly & regularly check the locks, screws & Noting the orientation (L/R), fit the height adjusters(1) to match the tubes fittings for security. under the seat by pushing in the 2 spring loaded pins (1a) on each side, until the 2 spring loaded pins locate in the holes in the 2 tubes. -
Page 4: Adjusting The Footrest
4 - Assembling the armrest Caution: The left and right armrest marked with"L" "R" to prevent them being assembled the wrong way. Following the Fig3a, press the right armrest to fix it on the seat, repeat the same process with the left armrest. Once the assembly is completed, push the armrest to check if it is locked on the seat firmly (Fig 3b). -
Page 5: Adjusting The Height Of The Seat
10 - Removing the inner tray 8 - Adjusting the height of the seat To remove the inner tray (9), pull the clips out on inner sides then lift the inner Press the button on each seat tray off the tray. height adjuster to lower the seat(7).Pull the seat height To refit the inner tray, place over the tray and push down on the clips until the... -
Page 6: Using The Harness
14 - Removing the seat cushion for cleaning 12 - Using the harness Feed the harness straps through the slots in seat and seat cushion on the A five point harness is provided to restrain your child. To unfasten, push the back and under the seat (a) and remove the harness. -
Page 7: Bevor Sie Beginnen
Sicherheitshinweise ACHTUNG! Benutzen Sie den Hochstuhl erst, wenn Ihr Kind sich selbständig aufsetzen kann ( ungefähr 6-9 Monate bis 36 Monate). ACHTUNG! Lassen Sie das Kind niemals unbeaufsichtigt. ACHTUNG! Verwenden Sie immer das Rückhaltesystem. ACHTUNG! Benutzen Sie das Produkt nicht, wenn nicht alle Komponenten korrekt montiert und eingestellt sind. -
Page 8: Pflege Und Wartung
Pflege und Wartung 2 - Montage des Hochstuhls - 1 • Vergewissern Sie sich, dass alle Verriegelungsvorrichtungen richtig Achten Sie auf die Ausrichtung (L/R) und bringen Sie die Höhenversteller (1) funktionieren und überprüfen Sie regelmäßig die Schlösser, Schrauben so an, dass sie zu den Rohren unter dem Sitz passen, indem Sie die 2 und Beschläge auf ihre Sicherheit. - Page 9 4 - Montage der Armlehne - 3 Vorsicht! Die linke und rechte Armlehne sind mit "L""R" gekennzeichnet, um zu verhindern, dass sie falsch herum montiert werden. Drücken Sie die rechte Armlehne wie in Abb. 3a dargestellt auf den Sitz und wiederholen Sie den Vorgang mit der linken Armlehne.
-
Page 10: Einstellen Der Sitzhöhe
10 - Entfernen des Innentabletts - 9 8 - Einstellen der Sitzhöhe - 7 Ziehen Sie zum Entfernen des Innentabletts (9) die Clips an den Innenseiten Drücken Sie den Knopf an jedem heraus und heben Sie das Innentablett vom Tablett ab. Sitzhöhenversteller, um den Sitz (7) abzusenken. -
Page 11: Verwendung Des Gurtes
13 - Aufbewahrung des Hochstuhls - 12 12 - Verwendung des Gurtes - 11 Zum Anschnallen Ihres Kindes ist ein Fünfpunktgurt vorhanden. Um den Gurt Senken Sie den Sitz ab (siehe Schritt 7). Es wird empfohlen, den Sitz für die Aufbewahrung in die niedrigste Position zu bringen. -
Page 12: Avant De Commencer
Consignes de Sécurité AVERTISSEMENT ! N'utilisez pas la chaise haute tant que votre enfant ne peut pas s'asseoir sans aide (environ 6-36 mois). AVERTISSEMENT ! Ne laissez jamais votre enfant sans surveillance. AVERTISSEMENT ! Utilisez toujours le système de retenue. AVERTISSEMENT ! N'utilisez pas le produit si tous les composants ne sont pas correctement installés et réglés. -
Page 13: Entretien Et Maintenance
Entretien et maintenance 2 - Montage de la chaise haute – 1 ● Assurez-vous que tous les dispositifs de verrouillage fonctionnent En tenant compte de l'orientation (G/D), réglez les dispositifs de réglage de la correctement et vérifiez régulièrement la sécurité des serrures, des vis et des hauteur (1) pour qu'ils correspondent aux tubes sous le siège en poussant les raccords. -
Page 14: Réglage Du Repose-Pieds
4 - Assemblage de l'accoudoir – 3 Attention : Les accoudoirs gauche et droit sont marqués "L" "R" pour éviter tout montage incorrect. En suivant la Fig. 3a, enfoncez l'accoudoir droit dans le siège, puis répétez le même processus avec l'accoudoir gauche. Une fois le montage terminé, poussez l'accoudoir pour vérifier qu'il est bien CLIC fixé... - Page 15 9 - Retrait du plateau intérieur – 9 7 - Réglage de la hauteur d'assise – 7 Pour retirer le plateau intérieur (9), tirez sur les attaches situées sur les côtés Appuyez sur le bouton de chaque intérieurs, puis soulevez le plateau intérieur pour l'extraire du plateau. dispositif de réglage de la hauteur d'assise pour abaisser l'assise (7).
-
Page 16: Utilisation Du Harnais
12 - Rangement de la chaise haute – 12 11 - Utilisation du harnais – 11 Un harnais à cinq points est fourni pour retenir l'enfant. Pour détacher le Abaissez le siège (voir étape 7). Il est recommandé d'abaisser le siège à la hauteur la plus basse pour le ranger. -
Page 17: Antes De Empezar
Indicaciones de Seguridad ¡ADVERTENCIA! No utilice la trona hasta que su hijo pueda sentarse sin ayuda (6-36 meses aproximadamente). ¡ADVERTENCIA! No deje nunca al niño sin vigilancia. ¡ADVERTENCIA! Utilice siempre el sistema de retención. ¡ADVERTENCIA! No utilice el producto a menos que todos los componentes estén correctamente instalados y ajustados. -
Page 18: Cuidado & Mantenimiento
Cuidado & mantenimiento 2 - Montaje de la trona - 1 ● Asegúrese de que todos los dispositivos de bloqueo funcionan Teniendo en cuenta la orientación (I/D), ajuste los reguladores de altura (1) correctamente y compruebe regularmente los bloqueos, tornillos y accesorios para que coincidan con los tubos situados debajo del asiento empujando los 2 para la seguridad. -
Page 19: Ajuste Del Reposapiés
4 - Montaje del Reposabrazos - 3 Precaución: Los reposabrazos izquierdo y derecho están marcados con "L" "R" para evitar que se monten incorrectamente. Siguiendo la Fig 3a, presione el reposabrazos derecho para fijarlo en el asiento, repita el mismo proceso con el reposabrazos izquierdo. Una vez finalizado el montaje, empuje el reposabrazos para comprobar si está... -
Page 20: Ajuste De La Altura Del Asiento
9 - Desmontaje de la bandeja interior - 9 7 - Ajuste de la altura del asiento - 7 Para extraer la bandeja interior (9), tire de las abrazaderas de los lados Pulse el botón de cada ajustador de interiores y, a continuación, levante la bandeja interior para extraerla de la altura del asiento para bajar el bandeja. -
Page 21: Uso Del Arnés
12 - Almacenamiento de la trona - 12 11 - Uso del arnés - 11 Para sujetar al niño se ha suministrado un arnés de cinco puntos. Para Baje el asiento (Vea paso 7). Se recomienda bajar el asiento a la posición de altura más baja para guardarlo. -
Page 22: Prima Di Iniziare
Istruzioni di Sicurezza AVVERTENZA! Non utilizzare il seggiolone finché il bambino non è in grado di stare seduto da solo (circa 6-36 mesi). AVVERTENZA! Non lasciare mai il bambino incustodito. AVVERTENZA! Utilizzare sempre il sistema di ritenuta. AVVERTENZA! Non utilizzare il prodotto se tutti i componenti non sono stati installati e regolati correttamente. -
Page 23: Cura & Manutenzione
Cura & Manutenzione 2 - Montaggio del seggiolone - 1 ● Assicurarsi che tutti i dispositivi di chiusura funzionino correttamente e Tenendo conto dell'orientamento (S/D), regolare i regolatori di altezza (1) in controllare regolarmente la sicurezza di serrature, viti e accessori. modo che corrispondano ai tubi sotto il sedile, spingendo i 2 perni a molla (1a) su ciascun lato, finché... -
Page 24: Regolazione Del Poggiapiedi
4 - Montaggio del bracciolo - 3 Attenzione: I braccioli destro e sinistro sono contrassegnati con "L" "R" per evitare un montaggio errato. Seguendo la Fig. 3a, spingere il bracciolo destro per fissarlo al sedile, ripetere lo stesso procedimento con il bracciolo sinistro. Una volta completato il montaggio, spingere il bracciolo per verificare che sia CLIC saldamente fissato al sedile (Fig. - Page 25 9 - Smontaggio del vassoio interno - 9 7 - Regolazione dell'altezza del sedile - 7 Per rimuovere il vassoio interno (9), tirare i morsetti sui lati interni e quindi Premere il pulsante su ciascun sollevare il vassoio interno dal vassoio. regolatore di altezza del sedile per abbassare il sedile(7).
- Page 26 12 - Conservazione del seggiolone - 12 11 - Utilizzo dell'imbracatura - 11 Per trattenere il bambino è prevista una cintura a cinque punti. Per sganciare Abbassare il sedile (vedere passo 7). Si consiglia di abbassare il sedile alla posizione più bassa per riporlo. la cintura, premere il pulsante della fibbia (a) ed estrarre i fermi della cintura.
-
Page 27: Zanim Zaczniesz
Bezpieczeństwo użytkowania OSTRZEŻENIE! Krzesełko przeznaczone jest dla dzieci, które siedzą samodzielnie (od około 6 miesiąca do 3 roku życia). Nie umieszczaj w krzesełku młodszego dziecka. OSTRZEŻENIE! Nigdy nie pozostawiaj dziecka bez nadzoru. OSTRZEŻENIE! Zawsze zapinaj dziecku uprząż bezpieczeństwa. OSTRZEŻENIE! Przed użyciem krzesełka upewnij się, że wszystkie jego Zanim Zaczniesz części zostały prawidłowo zmontowane i zablokowane. -
Page 28: Lista Części
Konserwacja 2 - Montaż krzsełka - 1 • Regularnie sprawdzaj, czy wszystkie blokady działają prawidłowo, a Zwracając uwagę na orientację (lewa/prawa) zamontuj blokady regulacji części są właściwie zmontowane. Regularnie sprawdzaj, czy części nie są wysokości (1) wsuwając rurki w gniazda pod siedzonkiem, aż 2 zatrzaski zużyte lub uszkodzone. -
Page 29: Regulacja Podnóżka
4 - Montaż poręczy - 3 Uwaga: Poręcze oznaczone są literami „L” (lewa) i „R” (prawa), aby nie zamontować ich odwrotnie. Jak pokazano na Rys. 3a, wsuń prawą poręcz w gniazdo siedzonka, aż się zablokuje. Powtórzy czynność dla lewej poręczy. Po zamontowaniu poręczy pociągnij ją, aby sprawdzić, czy zablokowała się... - Page 30 9 - Zdejmowanie tacki - 9 7 - Regulacja wysokości siedzonka - 7 Aby zdjąć tackę (9) pociągnij na zewnątrz zatrzaski na jej brzegach, a Naciśnij blokady po bokach siedzonka, następnie wyjmij ją. aby je obniżyć (7). Pociągnij je do góry, aby je podwyższyć.
- Page 31 11 - Przechowywanie krzesełka - 12 11 - Używanie uprzęży bezpieczeństwa - 11 Pięciopunktowa uprząż ma zapewnić bezpieczeństwo twojemu dziecku. Aby ją Przed złożeniem krzesełka zalecamy zsunięcie siedzonka do najniższej pozycji. rozpiąć, naciśnij przycisk na klamrze (a) i wyciągnij zaczepy. Aby zapiąć...
- Page 32 Instructions De Retour / Réclamation De Dommages Return / Damage Claim Instructions NE PAS jeter la boîte/l'emballage d'origine. DO NOT discard the box / original packaging. Dans le cas où un retour est requis, l'article doit être retourné dans sa boîte In case a return is required, the item must be returned in original box.
- Page 33 Istruzioni Per La Restituzione / Reclamo Per Danni NON scartare la scatola / confezione originale. Nel caso in cui sia richiesto un reso, l'articolo deve essere restituito nella scatola originale. Senza la scatola originale il tuo reso non sarà accettato. Fare una foto dei contrassegni sulla scatola.
Need help?
Do you have a question about the AD10056 and is the answer not in the manual?
Questions and answers