Table of Contents
Advertisement
Quick Links
Service Manual
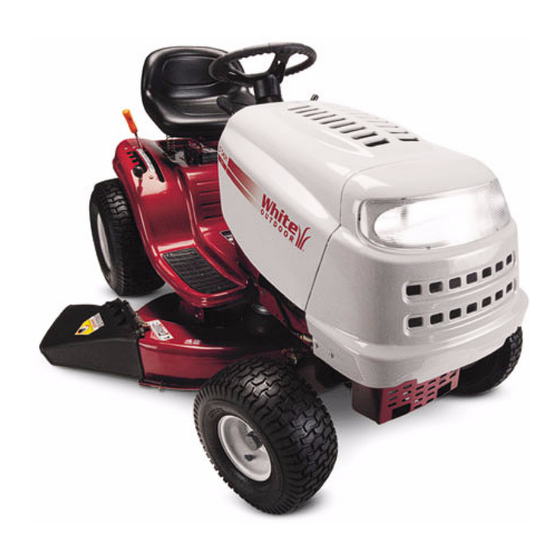
LT-5 - 700 Series Rider
NOTE: These materials are for use by trained technicians who are experienced in the service and repair of
outdoor power equipment of the kind described in this publication, and are not intended for use by untrained or
inexperienced individuals. These materials are intended to provide supplemental information to assist the trained
technician. Untrained or inexperienced individuals should seek the assistance of an experienced and trained
professional. Read, understand, and follow all instructions and use common sense when working on power
equipment. This includes the contents of the product's Operators Manual, supplied with the equipment. No liability
can be accepted for any inaccuracies or omission in this publication, although care has been taken to make it as
complete and accurate as possible at the time of publication. However, due to the variety of outdoor power
equipment and continuing product changes that occur over time, updates will be made to these instructions from
time to time. Therefore, it may be necessary to obtain the latest materials before servicing or repairing a product.
The company reserves the right to make changes at any time to this publication without prior notice and without
incurring an obligation to make such changes to previously published versions. Instructions, photographs and
illustrations used in this publication are for reference use only and may not depict actual model and component
parts.
MTD Products Inc - Product Training and Education Department
© Copyright 2005 MTD Products Inc. All Rights Reserved
Advertisement
Table of Contents

Related Manuals for MTD Rider 700 Series


Summary of Contents for MTD Rider 700 Series
- Page 1 Instructions, photographs and illustrations used in this publication are for reference use only and may not depict actual model and component parts. MTD Products Inc - Product Training and Education Department © Copyright 2005 MTD Products Inc. All Rights Reserved...
-
Page 2: Table Of Contents
TABLE OF CONTENTS Introduction ..........................1 Deck Removal ........................2 Deck Details and Updates for 2005 ..................3 PTO Cable ..........................5 Deck Lift..........................Hydrostatic Transaxle ......................9 Transaxle Control Linkage ....................Drive Belt: Hydrostatic Drive.................... -
Page 3: Introduction
Forward-Neutral-Reverse transmission 600 series has “J” pins to connect the rear of the manufactured by MTD. The Hydrostatic versions deck, while the 700 series decks are secured will have model numbers in the 790 range. Non-... -
Page 4: Deck Removal
700 SERIES LAWN TRACTORS DECK REMOVAL 2.5. With the deck on the ground, the lift rods can be reconnected to the lift links. This will enable the 2.1. The engine should be turned off long enough for rods and links to be moved out of the way by lift- the exhaust system to cool before starting work. -
Page 5: Deck Details And Updates For 2005
700 SERIES LAWN TRACTORS 2.8. Slide the deck forward slightly, and slip the PTO DECK DETAILS AND UPDATES FOR 2005 belt off of the crankshaft pulley. 3.1. The front deck support rod is easily removed by 2.9. Because of angular interference between the slipping it forward until the coined spot slips inside angle of the front deck support rod and through the opening in the bracket that supports... - Page 6 700 SERIES LAWN TRACTORS 3.2. The hooked side of the front deck support rod 3.5. The 42” deck has a fixed idler pulley to provide belongs on the left. This is important because better wrap on the left spindle pulley, and a ten- there is a slight bend in the rod.
-
Page 7: Pto Cable
700 SERIES LAWN TRACTORS 4.4. The bushing is easily replaced by simply unbolt- PTO CABLE ing the two halves using a 3/8” wrench. 4.1. The deck engagement lever is supported by a See Figure 4.4. two-piece bushing under the right fender. See Figure 4.1. -
Page 8: Deck Lift
700 SERIES LAWN TRACTORS DECK LIFT 5.4. The bushings that support the lift shaft assembly are easily replaced. See Figure 5.4. 5.1. In an advancement over the box-frame design, the deck height and engagement functions are isolated from one-another. Hex bushing 5.2. - Page 9 700 SERIES LAWN TRACTORS 5.6. Preliminary steps: See Figure 5.6. NOTE: The stepped “bow” in the middle goes outboard, riding against the transaxle control brackets. 5.9. Remove the bushings that support the lift shaft assembly. See Figure 5.9. The old blow-gun trick Figure 5.6 Bushings •...
- Page 10 700 SERIES LAWN TRACTORS 5.11. Slide the lift shaft to the right, so that the left end 5.14. Once the lift rods are removed, the lift shaft can clears the opening in the frame that the hexago- be withdrawn, complete with the lift lever, out the nal bushing fits in.
-
Page 11: Hydrostatic Transaxle
Install the lift rods onto the arms on the lift shaft, as a unit by an authorized White dealer, return- from the inside-out. ing the transaxle to MTD for vendor recovery. It • Confirm that the right side lift rod passes above... - Page 12 700 SERIES LAWN TRACTORS 6.5. Access to the fill plug can be gained by removing 6.7. After a thorough cleaning, to prevent contamina- the battery and the tray that supports the battery. tion of the fluid, the fill plug can be removed See Figure 6.5.
- Page 13 700 SERIES LAWN TRACTORS 6.12. The by-pass valve and brake are visible beneath 6.13. The brake rod pulls on a spring that is hooked to the right side frame channel. See Figure 6.12. the cam-arm on the brake caliper. The cam-arm forces two pins inward against a backing plate and brake pad.
-
Page 14: Transaxle Control Linkage
700 SERIES LAWN TRACTORS • Too little resistance may allow the linkage to drift TRANSAXLE CONTROL LINKAGE back to neutral, particularly when ascending a 7.1. The lever that controls the ground speed and grade conforming to the 15 degree description in direction of travel is located on the right rear the Operators Manual. - Page 15 700 SERIES LAWN TRACTORS 7.4. The pitch on the threads of the rod is 16 threads 7.6. If it is necessary to remove the cross-shaft and per inch. If an adjustment of less than 1/16” is control lever: See Figure 7.6. needed, the bolts that secure the mounting bracket to the frame can be loosened slightly for adjustment.
-
Page 16: Drive Belt: Hydrostatic Drive
700 SERIES LAWN TRACTORS 7.8. The cross shaft, control lever, and torsion spring DRIVE BELT: HYDROSTATIC DRIVE can be disassembled on the bench. 8.1. To remove the transaxle drive belt, begin by See Figure 7.8. removing the cutting deck and the front deck sta- bilizer link. - Page 17 700 SERIES LAWN TRACTORS 8.5. Release the parking brake. 8.11. Loosen the pulley using a 3/4” wrench, and lift the pulley far enough to slip the belt by the belt 8.6. Loosen, but do not remove the nut that secures keeper tabs and screws.
Need help?
Do you have a question about the Rider 700 Series and is the answer not in the manual?
Questions and answers