
Subscribe to Our Youtube Channel
Related Manuals for Roberts iStream3L


Summary of Contents for Roberts iStream3L
- Page 1 Smart Radio with Internet radio / DAB+ / FM / Bluetooth / USB and Streaming Services and remote control from iPhone and Android using UNDOK Please read this manual before use...
-
Page 2: Table Of Contents
Contents Clear Bluetooth Pairing iStream3L Smart Radio features View Bluetooth connection details Before you can use this product Bluetooth information About this instruction manual Clock and Alarms Controls and connections Automatically updating the clock Battery operation using alkaline batteries Manually setting the clock... -
Page 3: Istream3L Smart Radio Features
The Roberts iStream3L Smart Radio is a radio which provides the following features in an attractive compact unit:- ● Bluetooth streaming to play your music or video soundtracks from ● Listen to local, regional, national and international broadcasts using your smartphone, tablet or similar device. FM, DAB and Internet radio. ● Large clock display with time and date when in standby. ● Listen to thousands of radio stations from around the world and listen to podcasts from a wide range of broadcasters. -
Page 4: Before You Can Use This Product
Before you can use this product We recommend before using your smart radio for the first time, to check for software updates. Details on updating your smart radio can be found on page 53. You will first need to connect your radio to your WiFi network see Configuration, page 11 onwards. Before you can use your radio, you must have the following: ● A broadband Internet connection (not required for DAB, FM or Music Player functions). ● A router (or equivalent wireless access point) providing a WiFi signal, connected to your broadband Internet Service Provider. The broadband modem, router and wireless access point will often be a single combined unit supplied by your Internet Service Provider or bought from a computer store. ● A Smart phone or tablet which uses either the Android operating system (version 4.0.3 or later) or Apple iOS (version 9 or later). -
Page 5: About This Instruction Manual
Introduction About this instruction manual This instruction manual is split into sections for each of the operating modes of your Roberts iStream3L internet radio. Each section is clearly identified by the shaded heading in the top right hand corner of each pair of pages. (page 11) Before using the Internet Radio, you will need to connect your radio to your computer network Configuration using the WiFi connection. -
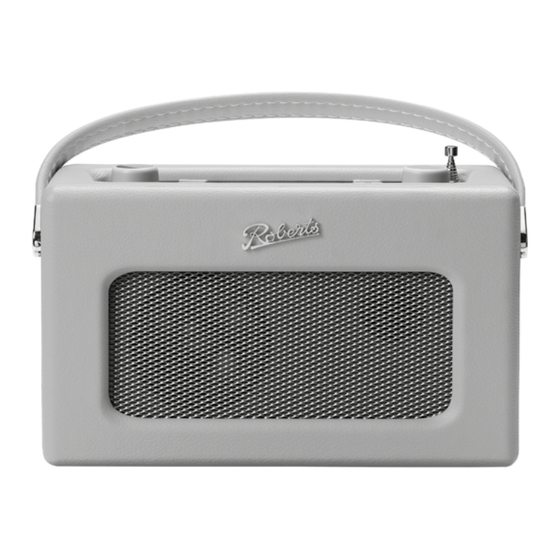
Page 6: Controls And Connections
Controls and connections Top view Aux In Preset Snooze Mode Charge/ Low Battery Low Battery Sleep 1. On/Off / Volume control 7. Tuning / Select / Snooze control 13. LCD display 2. Headphone socket 8. Bluetooth indicator 14. Mode / Bluetooth Pair button 3. - Page 7 DAB/DAB+ (BAND III): 5A-13F DC In: 12V 1.5A USB Output: 5V Battery: 6x 1.5V AA READ SAFETY GUIDE Roberts Radio Ltd, Glen Dimplex Europe Ltd, Stoney Lane, Whiston, Airport Road, Cloghran, Line Prescot, L35 2XW, UK Co. Dublin, K67 VE08, Ireland Designed &...
-
Page 8: Battery Operation Using Alkaline Batteries
• We would recommend for economy that the iStream3L is used via the AC adaptor whenever possible with battery operation for occasional or stand-by use only. If extended listening using batteries is anticipated, then the use of rechargeable batteries is recommended, see page 8. -
Page 9: Battery Operation Using Rechargeable Batteries
Introduction Battery operation using rechargeable batteries (also see page 59) 1. Slide the battery cover located underneath the unit in the direction of the arrow and lift upwards. 2. Slide the switch inside the battery compartment to the NiMH position (as shown). 3. Insert six identical Rechargeable LR6 (AA size) batteries into the spaces in the compartment. Take care to ensure all batteries are inserted with the correct polarity as shown on the battery compartment cover. -
Page 10: Navigation Controls
Navigation controls This page describes the basic means of controlling your iStream3L radio. Instructions for each operating mode are given in the later sections of this book. 1. Pressing and releasing the On/Off control brings your radio out of Standby mode if running from the mains or switches it on if using batteries. -
Page 11: Text Entry
Introduction Navigation controls cont. Text entry There are several occasions when you may need to enter text characters into your radio. For example, when setting up the WiFi connection, or when searching for artists or albums. When entering text you can use the Tuning/Select control alone or in conjunction with some of the buttons. The rotary control allows you to choose from all of the available characters, while the buttons allow you to move up and down or left and right through the list of characters. -
Page 12: Configuration
DC In: 12V 1.5A USB Output: 5V Battery: 6x 1.5V AA READ SAFETY GUIDE Roberts Radio Ltd, Glen Dimplex Europe Ltd, your radio (marked 'DC') ensuring that the plug is pushed fully into the socket and Stoney Lane, Whiston, Airport Road, Cloghran,... -
Page 13: Clock And Time Settings
Configuration Clock and time settings The following instructions assume that you have just plugged in your radio Snooze Date/Time and you have just specified the language option for the menus (see page 11). 1. Rotate Tuning to highlight the desired clock format (either 12 or 24 hour) 12/24 hour format then press the control to enter your selection. 2. Next, the way in which the radio updates its clock is set. A menu allowing you to specify the auto-update option for the clock will be shown. -
Page 14: Connecting To Your Computer Network
Connecting to your computer network Before you can use your iStream3L radio to listen to Internet radio or to music streamed from your computer, Network Settings it must first be connected to your computer network. This section describes how to connect the radio to your network using the wireless (WiFi) connection. Keep network connected? The following instructions assume that you have set up the clock and time options using the Setup Wizard as described on the preceding page. - Page 15 Configuration Connecting to your computer network - cont. 3. You will first need to identify your network in the list of network names presented Snooze Network Settings by the Network Wizard. If no networks are found then you may have to get your wireless router working (please see the instructions supplied with it) or you may be Network Wizard too far from the router. Scanning...
- Page 16 Connecting to your computer network - cont. SSID 5. If your network is not found, it may be because the router is configured not to broadcast the SSID. You Jones family should then use the Tuning control to highlight and select the '[Manual config]' option in order to enter [WPS] Paul’s network the network details manually. This is described in 'Manual Network Configuration', see page 18. Smith Brown If your network name is being broadcast, and it was not found, then try re-scanning (press the Menu [Rescan] button), and if necessary try moving your radio to a location closer to your access point / router.
- Page 17 Configuration Connecting to your computer network - cont. WEP keys are 10 or 26 characters long (using 0 - 9, and A - F). Some wireless routers can Snooze Key: also use pass-phrases for WEP but these are not supported by the radio. WPA keys are 123-jones usually set up using a pass-phrase of between 8 and 63 characters.
-
Page 18: Changing The Network Connection
Connecting to your computer network - cont. Internet Radio 10:30 If you have followed the steps on the preceding pages successfully, your radio will have connected to your Last Listened router, and then made a connection to the Internet and set its clock. You can then listen to radio stations Station List via the internet and use the other features of your radio (see page 23 onwards). -
Page 19: Manual Network Configuration
Configuration Manual network configuration Network Settings 10:30 If you do not wish to use DHCP for automatic network configuration, or if your network is configured with a Network Wizard hidden SSID, then you will need to enter some network settings manually. The typical user will not need to PBC Wlan Setup use manual network configuration. The facility is provided to allow the product to be used with networks where View Settings Manual Settings the configuration of devices is not managed by the router, or where customised settings may be required. In NetRemote PIN Setup such cases it is assumed that the user already has sufficient knowledge to understand the terms and settings Network Profile used for this purpose. -
Page 20: Configuration - Using The Undok App
It is possible that this app may have been changed slightly since these instructions were written. • Please refer to the Roberts Radio website for guidance on how to use the latest version. Note: At the time of writing Android version 4.0.3 and later or iOS version 9 or later are required to use UNDOK. -
Page 21: Setup New Audio System - Apple Ios Device
4. Select your Revival 5. Use the app to complete 6. For a WiFi connection app. to use your device’s iStream3L radio. the setup,including giving the app will ask you to WiFi settings to connect Once your device the radio a name. Choose choose a WiFi network 2. -
Page 22: Setup New Audio System - Android Device
4. Your radio will normally system. password. appear in this list as Revival iStream3L. It 8. Your radio will connect to may appear in the list your network. below called Other. Select the radio to be setup. -
Page 23: Network Remote Control Options
Configuration Network remote control options Network PIN setup (PIN number) Network Settings 10:30 Your radio has the option of being controlled by an application installed on an Network Wizard Apple iPhone, iPod touch, iPad or equivalent Android device. The PIN number PBC Wlan Setup View Settings facility allows you to ensure that your radio can only be controlled by your own Manual Settings device rather than someone else's. -
Page 24: Internet Radio
This can be helpful if you are unsure of the location or genre of a particular station. The iStream3L radio connects to a radio station database which serves many users in many countries. This means that there is a very wide range of programme content available. You can also search for stations which have been recently added to those available (new stations) or you can search for the most popular. -
Page 25: Selecting A Radio Station By Location
Internet Radio Selecting a radio station by location Internet Radio 10:30 1. Press On/Off to switch on the radio. Press Mode until Internet Radio is selected. Last Listened 2. Press Menu. Mode Station List Recall Preset 3. Choose 'Station List', then 'Location', and then scroll the list of continents then Save Preset countries in either direction. -
Page 26: Selecting A Popular Station
Selecting a popular station Internet Radio 10:30 Your radio connects via the Internet to a database of radio stations. This option is provided to highlight stations which are particularly popular with listeners around the world. Search Location Popular Snooze Discover 1. When in Internet Radio mode press Menu. 2. -
Page 27: Presetting Stations Internet Radio, Dab And Fm
Internet Radio Presetting stations Internet radio, DAB and FM Your radio has 40 memory presets for Internet radio / Podcast, 10 DAB and 10 FM which Save Preset 10:30 can easily be set to store the details of any radio station. The radio station presets are 1. [Not set] retained even when the radio is switched off. -
Page 28: Display Options - Radio / Bluetooth / Usb
Display options - Radio / Bluetooth / USB Your radio has a range of display options when in Internet Radio, Podcast, DAB, FM, Bluetooth and USB modes. Press the Info button to cycle through the various options. When images are displayed (station logos, album art) they may be displayed full screen by pressing the Tuning control. -
Page 29: Using Usb Memory Devices
Important: Your radio is only designed to work with USB flash memory devices. It is not intended to be connected to hard disk drives or any other type of USB device. The iStream3L radio has been tested with a range of USB memory devices of Aux In Preset Snooze up to 256GB capacity. USB memory must use the FAT or FAT 32 filing system... -
Page 30: Playing Files From Usb Memory Devices
Playing files from USB memory devices 1. Carefully insert the USB memory device into the USB socket on the top of the 10:30 radio. Press On/Off to switch the unit on. Mode USB Playback My Playlist The radio may detect that the memory has been connected, in which case it will ask Repeat Play: Off whether you wish to open the folder view of the memory contents. -
Page 31: Playlists
USB Playback Playlists You may wish to set up a list of music tracks or albums which can then be played as background music for a party, for example. Your radio can be configured to hold a queue of up to 500 tracks in a playlist menu. The tracks or albums for the playlist can be selected a USB memory device. The playlist is held in the memory in your radio until the external power is removed, or until the playlist is cleared from the menu. -
Page 32: Clearing The Playlist
Clearing the playlist 10:30 USB Playback 1. Press Menu. To clear the whole playlist choose 'Clear My Playlist' and My Playlist then choose 'YES'. If you do not wish to clear the playlist choose 'NO'. Repeat Play: Off Shuffle Play: Off Clear My Playlist Snooze Sleep Clear My Playlist... -
Page 33: Repeat Tracks
USB Playback Controlling playback cont. When playing tracks from your USB memory device you may choose to repeat the current 10:30 album (or playlist), or to play the files in random order, or both options together. USB Playback My Playlist Snooze Repeat Play: On Shuffle Play: Off Repeat tracks Clear My Playlist Sleep 1. Ensure you are in the main USB menu. Press Menu if needed. 2. -
Page 34: Dab Radio
DAB Radio 1. Carefully extend the telescopic aerial. Press On/Off to switch on the radio. If the radio Scan 10:30 has been used before the last used mode will be selected. Scanning... 2. Press Mode as needed to select the DAB Radio mode. Stations: 57 3. If this is the first time that the DAB mode is used a scan of the Band III DAB channels will be carried out. -
Page 35: Finding New Dab Radio Stations
DAB Radio Finding new DAB radio stations 10:30 Should you wish to use your radio for DAB reception in a new location, or if no stations Recall Preset were detected during the initial scan, you can follow this procedure to allow your radio to Save Preset Mode find out which DAB radio stations are available. -
Page 36: Dynamic Range Control Settings
Dynamic Range Control settings 10:30 The DRC facillity can make quieter sounds easier to hear when your radio is used in a noisy Recall Preset environment. Save Preset Scan 1. When in DAB mode, press Menu. Manual Tune 2. Choose 'DRC' and then choose the required DRC setting (default is Off). Snooze Prune DRC Off - DRC is switched off, Broadcast DRC will be ignored. -
Page 37: Fm Radio
FM Radio FM Radio Operating your radio in FM mode 1. Carefully extend the telescopic aerial and press On/Off to switch on the 10:30 radio. 103.40MHz 2. Press Mode as needed to select the FM Radio mode. 3. Rotate Tuning in a clockwise direction. The displayed frequency will increase. -
Page 38: Scan Sensitivity Setting - Fm
Scan sensitivity setting - FM Your radio will normally scan for FM broadcasts which are strong enough to give 10:30 good reception. However, you may wish the Auto-scan function to also be able to find Recall Preset weaker signals, possibly from more distant radio transmitters. Your radio includes a Save Preset local / distant option for the Auto-scan function. Scan Setting Snooze Audio Setting... -
Page 39: Bluetooth Mode
'iStream3L. Just occasionally it may take longer for the radio to be found by your Julia’s iPod touch device. Artist 5. Select 'iStream3L' to cause your phone, tablet or PC to pair with your radio and Edgar Froese to establish a connection. 6. Once the connection is established the Bluetooth indicator will remain steady. -
Page 40: Playing Audio Files In Bluetooth Mode
3. If you no longer want your Bluetooth device to be paired with your radio you will need to delete the 'iStream3L' pairing on the device. Please refer to the device's Bluetooth documentation. -
Page 41: Disconnecting A Bluetooth Device
Bluetooth Disconnecting a Bluetooth device You may disconnect your Bluetooth device using the Bluetooth menu. Bluetooth 10:30 Disconnect 1. To disconnect your Bluetooth device, press Menu, then choose 'Disconnect' Clear Pairing View Details and then choose 'YES'. Your radio will become 'discoverable' by other devices. Sleep Alarms System Settings... -
Page 42: Bluetooth Information
Bluetooth information Bluetooth connectivity performance may vary depending on the connected The Bluetooth capabilities of your radio enable it to receive audio from many Bluetooth devices. Please refer to the Bluetooth capabilities of your device Bluetooth capable devices including mobile phones, personal computers before connecting to your radio. -
Page 43: Clock And Alarms
Clock and Alarms Clock and Alarms System Settings 10:30 Automatically updating the clock Equaliser Audio Quality Your radio will normally update the clock automatically when connected to the internet. Network Time/Date Brightness Alternatively you may specify that the time is not automatically updated. In this case Inactive Standby Snooze the clock must always be set manually after a power interruption. -
Page 44: Manually Setting The Clock
Manually setting the clock System Settings 10:30 After a connection to the Internet has been established, your radio will normally Equaliser set its clock automatically to the local time zone that was specified during Audio Quality setup (see page 12). Network Time/Date Snooze Brightness Inactive Standby Should you need to set the time manually, change the time zone, or manually... -
Page 45: Setting The Alarm Clock
Clock and Alarms Setting the alarm clock Your radio has two separate alarms which can be set to wake you to either the radio or a buzzer alarm. In the event of a power interruption your radio has built in memory that will retain your alarm settings. Ensure that the time is set correctly before setting the alarms. The alarms can only be used when the radio is powered from the mains. -
Page 46: When The Alarm Sounds
Setting the alarm clock - cont. 9. Choose the alarm frequency option. Choosing Off will disable the alarm. Alarm 1 date/time If you choose to set the alarm to Once you will also need to set the date. 17 - 01 - 2022 10. The alarm can be set to buzzer, Internet radio, DAB radio or FM radio. For whichever 13 : 53 radio mode is selected, the radio alarm may be set to any of the stations which have Snooze... -
Page 47: Snooze Timer
Clock and Alarms When the alarm sounds cont. 1. During an alarm, the alarm icon will flash on the display. The radio will automatically revert to standby mode after 60 minutes. 0 9 : 3 0 2. To cancel an alarm, press On/Off to return to Standby mode. 13 - 01 - 2022 Note: If the radio is switched on because of an alarm you can control basic functions 09:30 such as volume. -
Page 48: Sleep Timer
Sleep timer Your radio can be set to turn off after a preset time has elapsed. The sleep timer can be Set Sleep Time adjusted between 15 and 120 minutes. Sleep 15 minutes 1. Press On/Off to switch on the radio. Snooze 2. Apply a long press on the Alarm/Sleep button to enter the sleep options. 10:30 3. -
Page 49: Display And Audio
Equaliser function Equaliser Audio Quality The sound on your radio can be adjusted to suit your personal taste for the material Network that you are listening to. The iStream3L has a range of equaliser options. Alternatively Time/Date you may set the treble and bass levels to your own preferences which can be accessed Brightness Inactive Standby from the My EQ menu item. -
Page 50: Brightness Control
Brightness control The brightness of the display can be adjusted for when the radio is in standby and for when System Settings 10:30 Equaliser it is in use. If you use the unit in the bedroom, you may prefer a lower standby brightness Audio Quality level than the standard setting. Network Time/Date Brightness There are 4 Standby brightness levels and 3 levels for when the radio is in use. To change Inactive Standby the current brightness setting please follow these steps. -
Page 51: Headphone Socket
Display and Audio Headphone socket A 3.5mm Headphone Socket located on the top of your radio is provided for use with headphones. Inserting a plug automatically mutes the internal loudspeaker. Please be aware that the sensitivity of headphones can vary widely. We therefore recommend setting volume to a low level before connecting headphones to the radio. -
Page 52: Line Out Socket (3.5Mm Jack)
DAB/DAB+ (BAND III): 5A-13F DC In: 12V 1.5A USB Output: 5V READ SAFETY GUIDE Battery: 6x 1.5V AA Roberts Radio Ltd, Glen Dimplex Europe Ltd, Stoney Lane, Whiston, Airport Road, Cloghran, Line Prescot, L35 2XW, UK Co. Dublin, K67 VE08, Ireland Designed &... -
Page 53: Information
Information Information Factory reset System Settings 10:30 Network If you wish to completely reset your radio to its initial state this may be performed Time/Date by following this procedure. By performing a factory reset, all user entered settings Brightness will be erased. Inactive Standby Language Snooze... -
Page 54: Software Update
Internet connection. You should not attempt to update your Time/Date radio unless it is recommended to you by Roberts Customer Services. Updating the software may remove all Brightness network settings, radio station presets and alarm settings from your radio. It is important that you do not attempt... -
Page 55: Software Version Display
Friendly name Your radio uses a Friendly Name so that it is identifiable within remote control software such as the UNDOK app and control software, and the Spotify app. By default, your radio's Friendly Name will be shown as the "iStream3L". If you would like to change this name to something more personalised you may either use the UNDOK app or follow the instructions below. -
Page 56: Troubleshooting
Troubleshooting If you experience any trouble with your radio, then you may find it useful You can view the radio’s MAC address using the menu items 'System to visit the help section on our web site. Settings' -> 'Network' -> 'View Settings' -> 'MAC address'. The MAC address will typically be of the form If you have difficulty connecting the radio to your computer network, some of these steps may help to resolve the problem: 00:22:61:xx:xx:xx... - Page 57 Information Troubleshooting - cont. Try using a computer or phone to listen via the broadcaster’s web site. If If your radio can connect to the network, but is unable to play a particular you can play the station with another device, it may be that the internet Internet radio station, it may be due to one these causes: feed or local network connection is poor.
-
Page 58: Cautions
The ventilation of the product should not be restricted by covering it with items such as newspapers, tablecloths, curtains etc. • Use only the mains adaptor provided with the product, or a genuine replacement provided by Roberts Radio. The use of alternative adaptors • No naked flame sources such as lighted candles should be placed will invalidate the guarantee. -
Page 59: Specifications
Information Specifications Power Requirements Headphone socket 3.5mm diameter, stereo Mains Adaptor 100 - 240 volts 50/60hz (use only supplied adaptor) Aux In socket 3.5mm diameter, stereo Line output socket 3.5mm diameter, stereo Batteries 6 x LR6 (AA size) Alkaline or NiMH rechargeable (not included) Aerial System WiFi... -
Page 60: A Few Words About Batteries
Rechargeable batteries Your Roberts iStream3L radio has been designed to use a choice Your iStream3L radio uses a range of methods to ensure correct and of power sources. You may plug it into the mains using the supplied safe charging of Rechargeable Nickel-Metal-Hydride batteries. These adaptor, or for listening away from the mains you may use either alkaline work to protect your batteries from excessive charge and discharge. - Page 61 Information If you intend not to use your radio for some months, then we recommend that the batteries are removed and put away, keeping them in a cool place out of reach of children, away from moisture and such that no metal object can contact the battery terminals.
-
Page 62: Software License Information
Software license information Use of the software in this radio is subject to software licence terms contained in this user manual - by using the radio, you are agreeing to comply with these licence terms: Thompson Licensing: MP3 audio decoder MPEG Layer-3 audio coding technology licensed from Fraunhofer IIS and Thomson Fraunhofer: MPEG-4 HE AAC Audio decoder MPEG-4 HE-AAC audio coding technology licensed by Fraunhofer IIS: http://www.iis.fraunhofer.de/amm/ Microsoft: Windows Media Audio decoder (WMA) This product is protected by certain intellectual property rights of Microsoft. Use or distribution of such technology outside of this product is prohibited without a license from Microsoft. -
Page 63: Notes
Notes... -
Page 64: Guarantee
Any claim under this guarantee should be made through the dealer from whom the product was purchased. It is likely that your Roberts' dealer will be able to attend to any defect quickly and efficiently, but should it be necessary the dealer will return the product to the company’s service department for attention. In the event that it is not possible to return the product to the Roberts dealer from whom it was purchased, please contact Roberts Radio using the contact details on the www.robertsradio.com website.
Need help?
Do you have a question about the iStream3L and is the answer not in the manual?
Questions and answers