Table of Contents
Advertisement
Quick Links
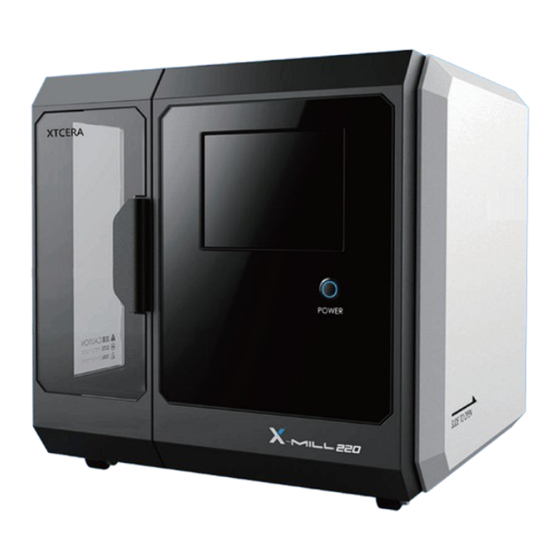
X-MILL 220
Shenzhen Xiangtong Co.,Ltd
Address: 2nd Floor, 1st building, No.88, North Zhuguang Rd, West Area,
Honghualing Industrial Park, Nanshan District, Shenzhen, China
Tel: 0086 755 8600 1804
Fax: 0086 755 8600 1486
E-mail: xtcera@xianton.com
http:// en.xtcera.com
X-MILL 220 Four-axis Engraving & Milling Machine
https://stomshop.pro
220
User Manual
Advertisement
Table of Contents

Related Manuals for XTCERA X-MILL 220

Summary of Contents for XTCERA X-MILL 220
- Page 1 X-MILL 220 User Manual X-MILL 220 Four-axis Engraving & Milling Machine Shenzhen Xiangtong Co.,Ltd Address: 2nd Floor, 1st building, No.88, North Zhuguang Rd, West Area, Honghualing Industrial Park, Nanshan District, Shenzhen, China Tel: 0086 755 8600 1804 Fax: 0086 755 8600 1486 E-mail: xtcera@xianton.com...
-
Page 2: Table Of Contents
FOREWORD Foreword Dear customers, Chapter 1 Introduction to X-mill 220 Four-axis Engraving & Milling Machine 1 Thank you for choosing the products of Xiangtong. Xiangtong X-mill 220 series 1-1 Product Introduction four-axis engraving & milling machine is a precise device created by the company 1-2 Outline Structure for model processing. -
Page 3: Chapter 1 Introduction To X-Mill 220 Four-Axis Engraving & Milling Machine
ENGRAVING & MILLING MACHINE 1-1 PRODUCT INTRODUCTION 1-2 OUTLINE STRUCTURE X-mill 220 Four-axis Engraving & Milling Machine is an integrated engraving and milling machine featuring high precision, high efficiency and high integration, and suitable for processing porcelain/wax/PMMA/Zirconia. The machine adopts horizontal structure. -
Page 4: Technical Parameters
1-3 TECHNICAL PARAMETERS 1-4 Operating Environment and Requirements Name:X-MILL220 milling machine 1.The power supply shall be grounded in accordance with method C in the electrician Weight:150kg regulation, in order to avoid any personal injury from electric leakage. Max power:2.0KW 2.The engraving & milling machine shall be placed horizontally on the flat and firm Number of axis:4axis workbench. -
Page 5: Equipment Commissioning
2. Count the accessories according to the packing list. 3. Install the equipment body on the horizontal and firm workbench, and remove the trans- portation fasteners. 4. Connect the power cable, air supply system, cooling water system and vacuum system according to the instructions. -
Page 6: Chapter 3 Pilot Run And Processing
If the NO is 1, then click “T2” on the manual interface and machine will put T1 bur into the tool station. After, you can put T2 bur into spindle. Then check tool NO. on the screen and click “T3”. Machine will put T2 bur into tool station and you can put T3 bur into the collet manually. - Page 7 2. Click “load” button and select the test processing file for pilot run. Load the file 5. Click “START” button again to start the auto processing. If you click “pause” button after confirmation. The relevant information of the processing file will be displayed after during the processing, the milling process will stop at the current point, the system will stop successful loading, such as the file name, material type, processing grade.
- Page 8 5. If power outage occurs during the processing, start the software after the system is powered on again. The system will automatically load the processing file loaded before the power outage and recover the saved information of the interrupted line. You can click “START”...
-
Page 9: Troubleshooting
4. When tightening the clamp, be sure to evenly tightening each screw. Do not fully tight- en a screw and then tighten other screws. It will cause uneven force to break the material or cause internal stress which results in breakage during the processing. 3-5 Trouble shooting 6. -
Page 10: Chapter 4 Maintenance And Precautions
CHAPTER 4 MAINTENANCE AND PRECAUTIONS 4-2 SPECIAL NOTES: 1. If you use our equipment to process products other than the above-mentioned materi- 4-1 INSTRUCTIONS FOR MAINTENANCE: als, please make evaluation according to the equipment parameters. You shall be fully 1. Clean the dust in the equipment processing chamber every day, and ensure that liable for any accident caused by processing products of other materials. -
Page 11: Chapter 5 Common Errors And Solutions
No force shall be applied to any part of the enclosure. Otherwise, enclosure deformation or even equipment dropping will be caused, resulting in severe accident. 8. If there is any abnormal noise or abnormal action during the use, please record the relevant exception message and contact us. -
Page 12: Appendix I: Overall Operation Flow
APPENDIX I: OVERALL OPERATION FLOW APPENDIX II REFERENCE TABLE FOR PROCESSING CHART OF THE EQUIPMENT FILE INFORMATION Information Module name Module meaning Connect power cable Customized processing mode, where the Custom rate can be adjusted and vacuum can be manually started and shut down Wax, high-efficiency processing mode, Turn on power switch and power on the system where the rate cannot be adjusted, and...
Need help?
Do you have a question about the X-MILL 220 and is the answer not in the manual?
Questions and answers